1 Chapter 1.1 – Setting Up Images
Overview
This chapter shows the steps necessary to access the files and images to Agisoft Metashape Professional (Metashape).
Metashape Project Setup
Access the Geomatics Desktop – GPU here and download the required files from the repository here (link n/a). These files are comprised of Lab_3_Images.zip and Check_points.CSV.
From the Start menu, locate the Agisoft folder and launch Agisoft Metashape Professional.
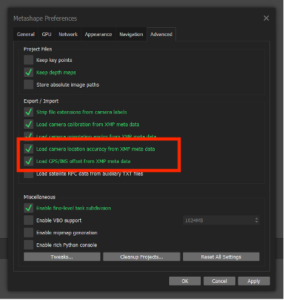
From the Tools menu, select Preferences…, click the Advanced tab, adjust the settings as shown below then click Apply and OK.
Import Photos
From the Workflow menu, select Add Photos. Navigate to the Images, click on one of the photos, select all (Ctrl-A) and click Open.
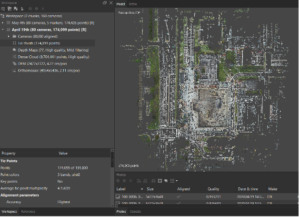
From the File menu, select Save As…, name the project and save it. Note the two tabs near the bottom left of the screen, Workspace and Reference. Click on the Reference tab.
Assess Image Quality
Click on the Convert icon (see below) and select More…, change the Coordinate System to NAD83(CSRS) / UTM zone 10N (EPSG::3157) and click OK.

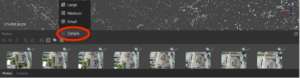
In the Photos pane (bottom of the screen, see below), click on Change View and select Details.
Right-click under the Quality column, select Estimate Image Quality…, select All cameras and click OK. This will generate an index of the image quality for each photo.
Align Photos
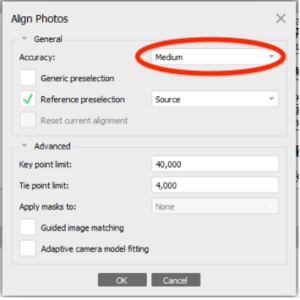
From the Workflow menu, select Align Photos… and set the parameters according to the screenshot below;
Click on the Workspace tab, the sparse point cloud should show approximately 38,000 Tie Points (double-click on it) between all 80 photos.