5 Chapter 2.3 – Accuracy
Overview
This chapter demonstrates the steps necessary to check the accuracy of the final model using the checkpoints.
Checkpoints
The checkpoints used in the final model can be found in the Check_points.csv file.
Below is the aerial perspective of the location where a general layout of four checkpoints is marked.

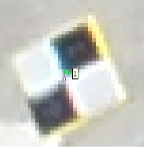
The images below are the closeup locations of each of the four checkpoints from the aerial view. It is crucial to place the marker flag as close to the center of each ground control target in at least five photos for each checkpoint to determine the residual errors and ensure accuracy.
-
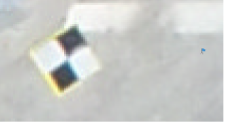
- Checkpoint 1
-

- Checkpoint 2
-

- Checkpoint 3
-

- Checkpoint 4
Ensure that the Show Markers icon is enabled (top of the screen) 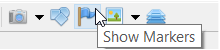
Select the Reference tab (bottom left), click the Import References tool, open the Check_points.CSV file, set the parameters as shown below and click OK.
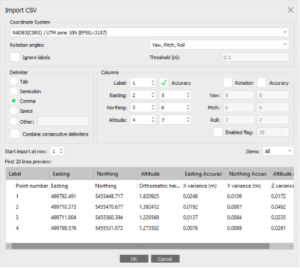
When asked to create a new marker, Click Yes to all.
Right-click on marker 1 and select Filter Photos by Markers. This will show only the photos where marker 1 shows up in the Photos pane (bottom right). Double-click the first photo and drag the marker flag to the center of the nearby control target. Double-click on the next photo and repeat this for at least five photos. The images below show a visual of how to perform the steps.
-
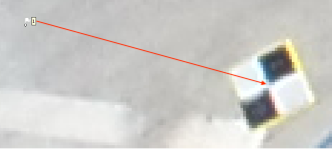
- Drag marker flag to the center of the marker
-
- Double-click to select
Repeat the previous steps on all four markers.
Lastly, click Update Transform to perform a bundle adjustment on the photos based on the control points.