4 End-to-End IoT Solution
Implementing an end-to-end IoT solution involves deploying sensors and processors and selecting the appropriate communication technology to transmit the telemetry data to the platform. This data is then visualized and analyzed to gain insights and trigger actions based on those insights. Additionally, in the final phase of the solution, it may be necessary to develop dashboards or applications for mobile phones, tablets, and personal computers. As mentioned earlier, the TB platform offers useful widgets for easy visualization of telemetry data. This chapter aims to provide a step-by-step guide for setting up a simple IoT project, which includes hardware configuration and data publishing to the TB platform over MQTT. Once the data is received by TB, we can utilize built-in widgets such as analog gauges and time series graphs to create a dashboard and visualize the telemetry data.
4.1 Hardware Selection
In general, IoT projects can be accomplished using different hardware options such as Arduino, ESP8266 (NodeMCU), and Raspberry Pi. Let's explore each of these options:
- Arduino:
Arduino is an electronic board on the ATmega328P microcontroller. It offers several general-purpose input/output (GPIO) pins that enable the development of various IoT projects. Arduino is an open-source platform, providing access to libraries and codes freely available on the internet. To work on an Arduino board, you need to use the C/C++ programming language.
- ESP8266:
One limitation of the Arduino board is its lack of built-in Wi-Fi and Bluetooth connectivity. To address this, the ESP8266 and its extension, the ESP32, were introduced for developing low-cost IoT projects. Both ESP8266 and ESP32 boards utilize the Xtensa processing core and the FreeRTOS real-time operating system. They fall between the Arduino and Raspberry Pi boards in terms of energy consumption and real-time processing capabilities. Similar to the Arduino board, the ESP8266 supports programming in C/C++.
- Raspberry Pi:
Raspberry Pi (RPI) is a low-cost mini-computer that offers full functionality and can be directly connected to a monitor, keyboard, or mouse. It runs on a custom Linux-based operating system called Raspberry Pi OS, previously known as Raspbian, which is based on Debian. Raspberry Pi is available in 32-bit and 64-bit versions, and it also supports other operating systems such as Windows, Ubuntu, and Mac. Due to limited internal memory, it is necessary to connect a micro SD card to store the OS and source codes. Raspberry Pi supports Bluetooth, Wi-Fi, and an Ethernet port for network file transfer. Several generations of Raspberry Pi have been released, including Raspberry Pi Pico, Zero, 3, and 4. Each generation has different specifications in terms of core technology, CPU frequency, RAM size, Wi-Fi data rate, power consumption, dimensions, and cost. Among these, Raspberry Pi 4 (RPI4) is highly recommended for developing professional IoT projects. For detailed information about each Raspberry Pi model, you can refer to the documentation provided by the Raspberry Pi Foundation. Python programming is well-suited for developing IoT projects on the RPI, and Raspberry Pi 4 is particularly suitable.
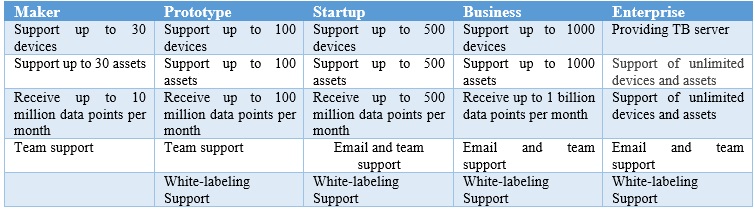
Table 3 provides an overview of the features of different boards that are suitable for IoT projects. Ultimately, Raspberry Pi 4 is a powerful choice for developing IoT projects, especially when using Python for programming.
Table 3. Comparison between Arduino, ESP32 and RPI
4.2 Booting the Raspberry Pi
This section briefly describes setting up and running the RPI.
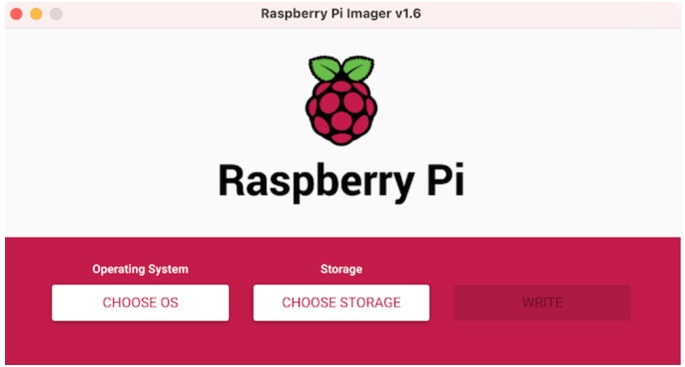
1- In order to get the suitable OS version for your Raspberry PI go to: https://www.raspberrypi.com/software/ and download Raspberry PI Imager on a computer with microSD card reader. Follow the instructions on the website to install the Debian OS on a previously formatted microSD card using the Imager.
2- Insert the microSD card into the RPI board’s memory slot. Connect the power cable as well as the peripheral devices such as the monitor, mouse and keyboard to the RPI. You may need to use an HDMI to micro-HDMI converter to connect the screen to the RPI board.
3- Turn on the RPI board and follow the instructions to install the OS. Once the installation is complete, you can log in and see the OS desktop.
4- Connect your RPI to an available Wi-Fi network. If you are connected to the same Wi-Fi network as your PC, you will be able to control your RPI remotely through your PC using “Remote Desktop Connection”. To connect the RPI to the Wi-Fi, on the top left corner of the OS desktop, open the terminal and type either of the following commands to get the IP address of your RPI: “hostname-I” or “ifconfig”.

5- On your PC, open “Remote Desktop Connection” and enter the IP address of your RPI to remotely connect to your RPI.
4.3 Connecting the RPI to TB
Once the RPI is booted, you will need to follow these instructions to get connected to the TB:
6- Before coding, you need to install the necessary Python packages on your RPI OS. For this purpose, click on the Command-line Terminal icon in the top menu bar (or choose Menu > Accessories > Terminal).
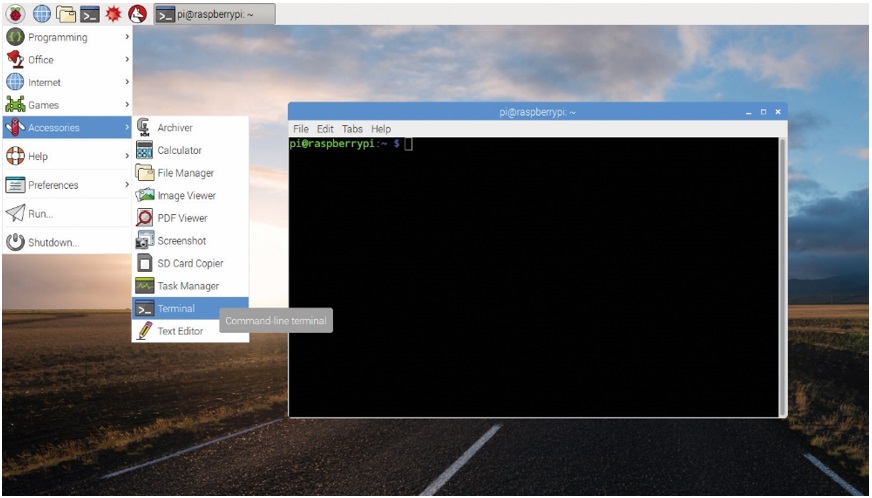
This will open a window where you can enter the following commands:
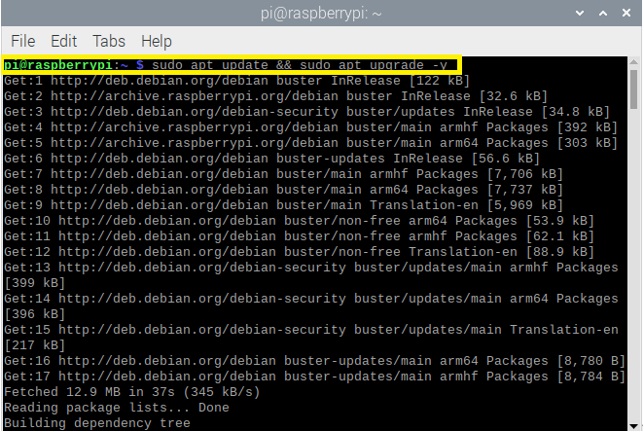
- Update and upgrade the OS: $ sudo apt update && sudo apt upgrade -y
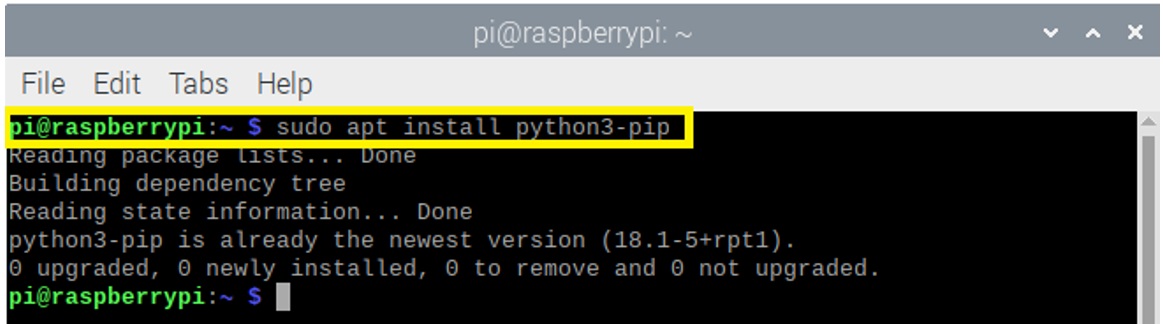
- Install the “pip” package installer for Python: $ sudo apt install python3-pip
- Check the pip version to make sure it is installed correctly: $ pip --version

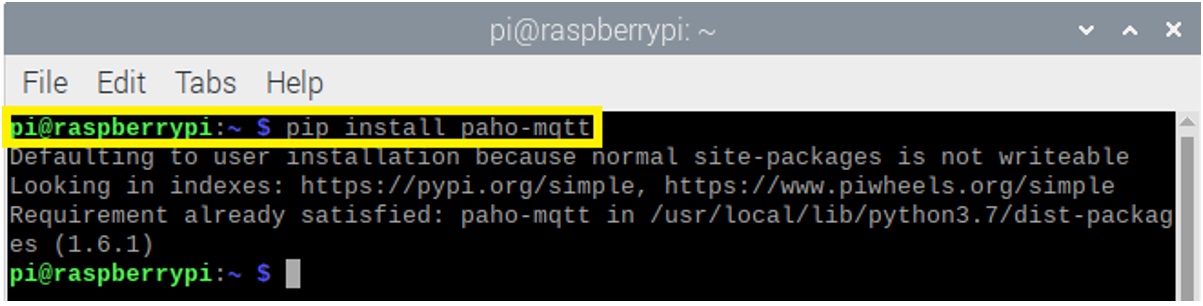
- Now, you can install the MQTT library to link the RPI board to the platform over MQTT protocol: $ pip install paho-mqtt
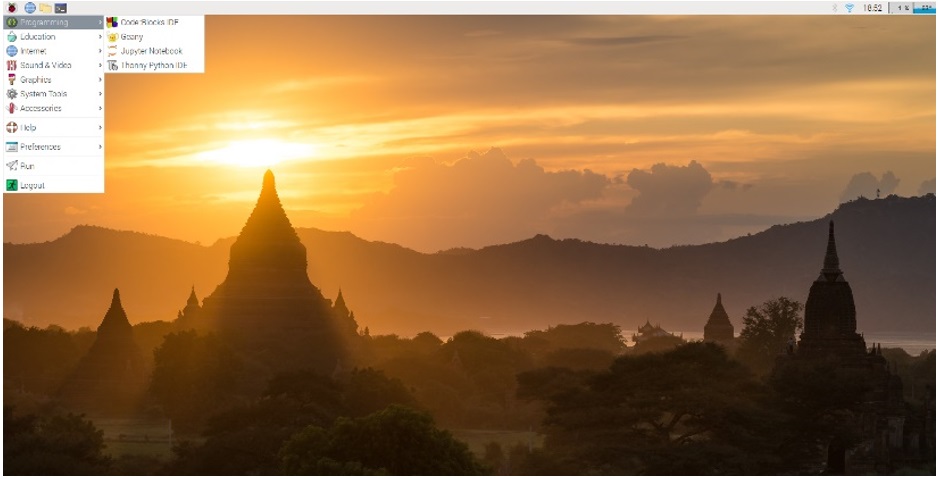
7- Open Thonny Python IDE to start coding.
![]() → Programmimg →Thonny Python IDE
→ Programmimg →Thonny Python IDE
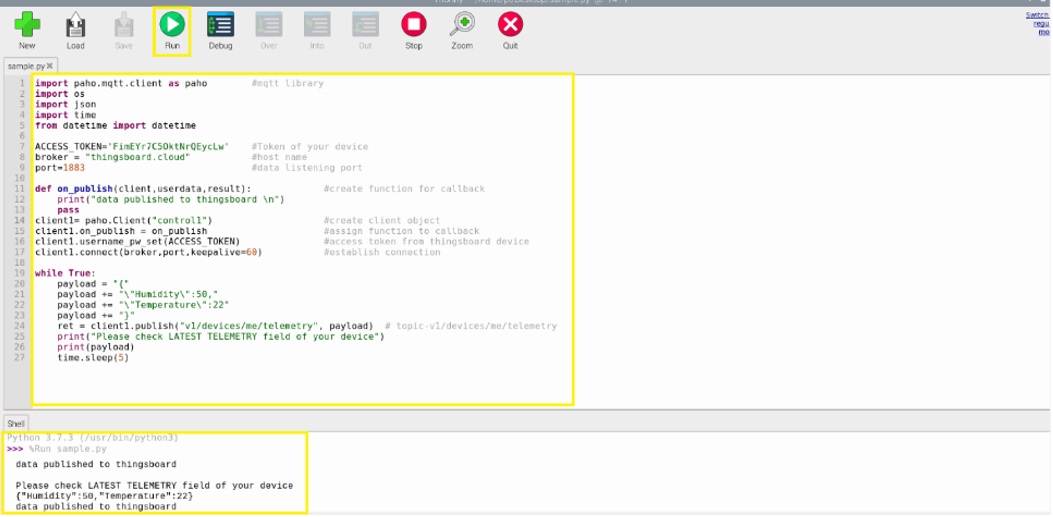
8- Copy and run the code which was described in the previous chapters to publish the sample temperature and humidity telemetry data to TB. Note that in this example, since our focus is on connecting the RPI board to the TB platform, we are just sending constant telemetry data. You may connect an environmental sensor such as DHT22 to your RPI board and transmit the real parameters captured by the senosr to the TB platform.
9- Go to TB and click on the device you created earlier to see the published telemetry data sent by RPI.
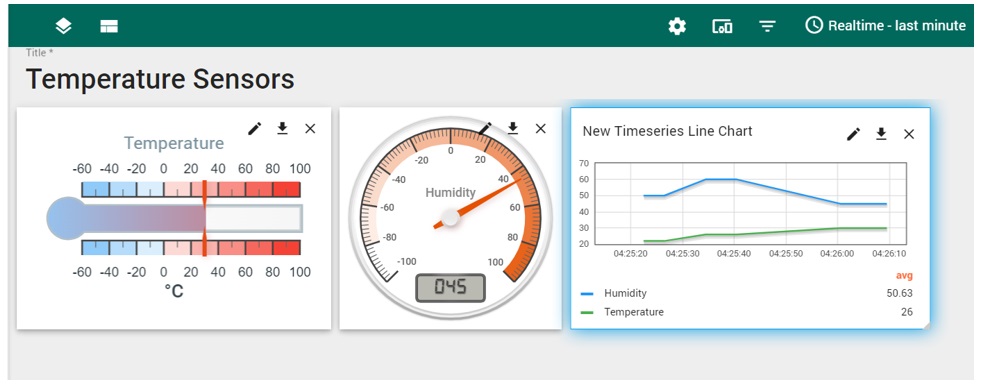
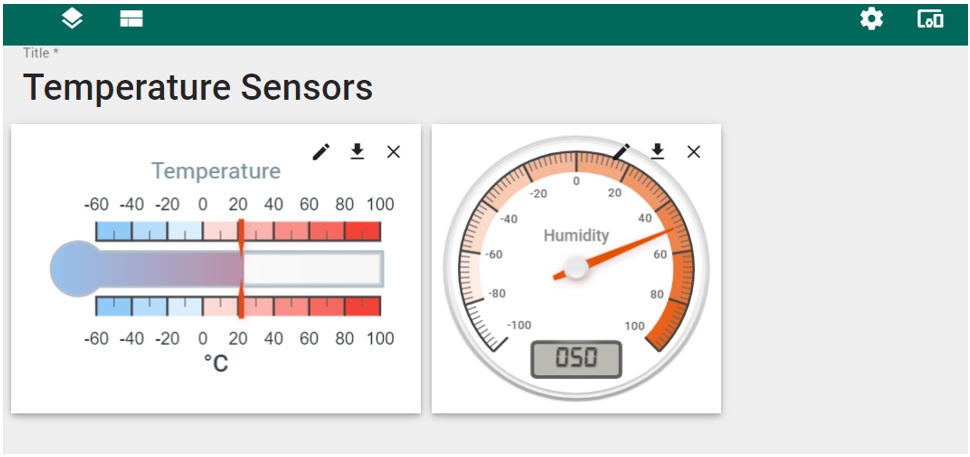
10- Now, you can create a dashboard using the pre-built widgets on TB. As it was explained earlier, you can add the thermometer gauge widget to exhibit the temperature value and the radial gauge widget to display the humidity.
11- Once you add the widgets, you will see the dashboard as illustrated below.
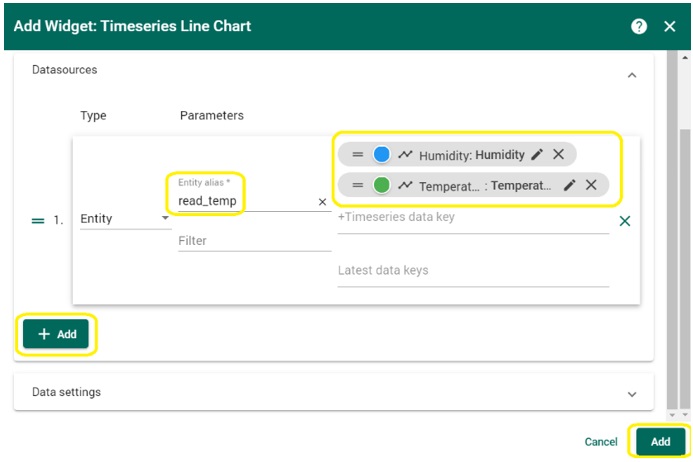
12- The above gauges show the instantaneous telemetry data. In order to show the historical values, you can use the “Timeseries Line Chart” widget which give you the opportunity to represent several variables from different devices over the time.