15 Chapter 15 More on an Example Website with a Database Connection
Fred Strickland
Original Material to the textbook: Fred Strickland
Learning Outcomes
|
Computing Sub Discipline |
Document Code, Reference Code, and Page Number |
Text |
|
Computer Science |
CS2013 IM/Query Languages (Page 1136) |
5. Embed object-oriented queries into a stand-alone language such as C++ or Java (e.g., SELECT Col.Method() FROM Object). [Usage] 6. Write a stored procedure that deals with parameters and has some control flow, to provide a given functionality. [Usage] |
|
CS2023 DM-Core: Core Database Systems Concepts (Pages 115-116) |
CS Core 8. How to support CRUD-only applications |
|
|
CS2023 DM-NoSQL: NoSQL Systems (Pages 120-121) |
KA Core 1. Why NoSQL? (e.g., Impedance mismatch between Application [CRUD] and RDBMS) |
|
| CS2023
FPL[1]-Event-Driven: Event-Driven and Reactive Programming (Pages 134-135) [1] Foundations of Programming Languages (FPL) The ACM has added the Model View Controller as a learning outcome in the Software Engineering Design Software Design area. See page 243 in CS2023. |
KA Core 6. Separation of model, view, and controller.
ILO KA Core 4. Describe an interactive system in terms of a model, a view, and a controller |
|
|
CS2023 SPD Web: Web Platforms (Page 302) |
KA Core 1. Web programming languages (e.g., HTML5, JavaScript …, CSS) KA Core 4. Web standards such as document object model, accessibility. Non-core 6. Analyzing requirements for web applications ILO KA Core 3. Compare and contrast web programming with general-purpose programming. ILO KA Core 5. Discuss how web standards impact software development.
|
|
Introduction to Chapter 15
In Chapter 14, we looked at creating a front end that could interact with a database. The examples were based on Bootstrap 5. Since we did not add any JavaScript code, there was no functionality to the created web page. For this chapter, we have the same learning outcomes as for Chapter 14 plus the addition of CS2023 ILO KA Core 3.
We will not repeat the paragraphs on website design. Nor will we repeat the paragraphs on how to design a good database. We will assume that we understand these concepts.
We will be working with ASPNET Core, Entity Framework Core, Model-View-Controller framework, Bootstrap 5 with JavaScript, code-behind, and a SQL Server Management database.
The Third Edition Style Guide
This is the style guide that this book will follow for this chapter and for the other chapters.
|
Naming Convention:
Using the IE’s Notation with Crow’s Foot Notation. |
Figure 15.1 The database style guide. Adapted from https://vertabelo.com/blog/database-schema-naming-conventions/
The examples will conform to the style guide.
|
The material in this chapter covers cutting edge technology. This area is changing rapidly. If you should decide to explore tutorials on the Internet, there are some cautions:
This chapter may appear disjointed. I wanted to wrap up this project before the start of 2025. |
The Project: A Small Religious Educational Institution
Storyboarding
We will storyboard the website and we will use the University of Notre Dame approach. Here is the first navigation row:

Figure 15.2 First navigation row.
Here is the second navigation row:

Figure 15.3 Second navigation row.
Under the “About” tab is information about the leadership, about the offices, about the history, about the mission, about notable alumni, about commitments, about financial information, and about a contact link. The middle has some text about the history of the university. On the far right is a quote. Scrolling down is information about the number of majors, colleges and schools, and the ranking based on several respectable authorities. There is more information.
Under the “Visit” tab is information about the campus and the nearby area.
In the second row is where one would find more detailed information. The “Academics” tab has the academic units, the various academic programs, and other items. I did notice that a visitor would keep going deeper and deeper into the website. What I found troubling is the absence of a traditional catalog with academic plans and course descriptions.
The “Admissions” tab has a link to an application and another link to financial aid. It takes several mouse clicks to reach the actual form. And the actual application is hosted on three different third-party websites. A person must create an account before going forward. This has the benefit of saving the entries, but it has the disadvantage of preventing a person from previewing the questions.
You may continue to explore the remaining tabs.
As a personal note, I could not find on the University of Norte Dame website the traditional catalog. This is a large book that contains detailed information about the policies, about the programs, about the courses, about the faculty, and about other important items. I had the same issue with the Douglas College website. Has this document become obsolete? The answer is “No.” Recall from Chapter 14 that Abhijeet Kaldate had a list of noteworthy higher education institutions. Let’s look at Syracuse University in central New York.
The Syracuse University navigation bar is simpler.

Figure 15.4 The main Syracuse University navigation bar.
Under the “Academics” tab is the link to the catalog. The label is “Course Catalog.” This label is a bit misleading since this contains more than just course information.

Figure 15.5 The Syracuse University academic drop down list.
After some pondering, here is the new storyboard:

Figure 15.6 Proposed Website (Unfortunately, the image is fuzzy.)
The storyboard is very small. Here is an outline of the proposed website below the home page:
- About
- Leadership
- Director
- Registrar and Financial Secretary
- Treasurer
- Assistant Treasurer
- Dean – Central Area
- Dean – Portland Area
- Dean – Aroostook County
- Dean – Bangor Area
- Offices
- An A through Z list
- History
- When was the ABCOM Institute for Ministry founded?
- The first involved individuals.
- Sponsoring Organization: The American Baptist Churches of Maine
- Mission and Vision
- Serving Leaders in Maine and Beyond
- The Mission is to provide ongoing theological, ministry, and discipleship education to pastoral leadership and laity in Maine.
- Contact
- Admissions Questions
- General Information Questions
- Leadership
- Academics
- Programs
- Basic Diploma Program
- Field Guidance Program
- Advanced Studies Program
- Libraries
- Housed and Shared Locations
- Academic Calendar
- The Catalog
- In PDF
- Programs
- Admissions
- Why ABCOM Institute for Ministry (AIM)?
- Application Process
- Financial Information
- Annual Tuition and Fees
- Financial Aid
- Students Profile
- Request for Information
- Faith & Service
- Opportunities
- Employment
- Churches
- News
- Give
- Why Give
- Ways to Give
- Alumni
- Brian Casey
- John Cheney
- Others
The Home Page
This small religious educational institution does not perform cutting edge research nor has interesting news stories to share. We could have the following arrangement:
|
Logo navigation |
|
Faith & Service item |
|
Mission statement |
|
Calendar |
|
Footer |
|
Logo with social media links |
|
More navigation buttons. |
Figure 15.7 Proposed Website home page
First Effort: Working with ASP.NET Core
ASP.NET Core is an open source and cloud-optimized web framework. This is used for developing modern web applications that can run on Windows, on Linux, and on Mac. It includes the Model-View-Controller (MVC) framework, which is designed to separate the three parts of a program. The Entity Framework Core contains an Object-Relational Mapping (ORM) tool that works with data by using .NET objects.
Check the edition of the .NET Core framework. On my older laptop, I had 7.0 and the support had ended in May 2024. If you have an older version, you could update or just do a removal-and-fresh-install. As of this writing, .NET 8.0 (Long Term Support)1 and .NET 9.0 (Standard Term Support)2.

Figure 15.8 Screenshot of the .NET selection dropdown menu.
Open Visual Studio3 and select “Create a new project.”

Figure 15.9 The opening screen for Visual Studio 2022.
In the Jan Potgieter article, the next step was to “Choose ASP.Net Web Application (.Net Framework) template.” In Visual Studio 2022, this entry does not exist. The closest entry is “ASP.Net Core Web App (Razor Pages)” and “ASP.NET Core Web App (Model-View-Controller).”

Figure 15.10 Visual Studio 2022 new project list (Filtered by the phrase of “web app.”)
Razor Pages technology makes coding page-focused scenarios easier and more productive than using controllers and views. Recall that the Model-View-Controller (MVC) is a framework that separates an application into three main logical components (the model, the view, and the controller). This is an approach that supports many developers working at the same time. This is known as “separation of concerns.
With the “separation of concerns” pattern, the user requests are routed to a controller that is responsible for working with the model. The model performs the user’s requested action. This could be to retrieve the results from a query. The controller chooses the view for displaying the information back to the user. This approach means that the common actions can be used for routing to the user on a web page, to the user on a desktop application, or to the user on a kiosk in a shopping mall. The Figure 15.11 image is from the article entitled “Overview of ASP.NET Core MVC” and this illustrates these actions nicely.

Figure 15.11 Image of the MVC approach. Source of image: From the Internet
Since MVC “is one of the most frequently used industry-standard web development frameworks” for creating scalable projects, we will use that approach. Choose the C# version.

Figure 15.12 Close up of the new “ASP.NET Core Web App (Model-View-Controller” project menu item.
Hit “Next.” On the “Configure your new project” screen use the following entries:
Project name: ExampleWebApplication4
Accepting the default entries.

Figure 15.13 Configure the project screen.
Although the Jan Potgieter article was published in 2022, she is using Visual Studio 2019 and Microsoft NET Framework Version 4.8.04084. Philip Gyllhamn wrote his article in 2019 and he is using Visual Studio 2019 and ASP.NET Core 2.1. He is creating an actual web page and so we will follow some of his steps.
In the next screen, Select “.NET 8. (Long Term Support)5,” no authentication type, configure for HTTPS. Then hit the create button.
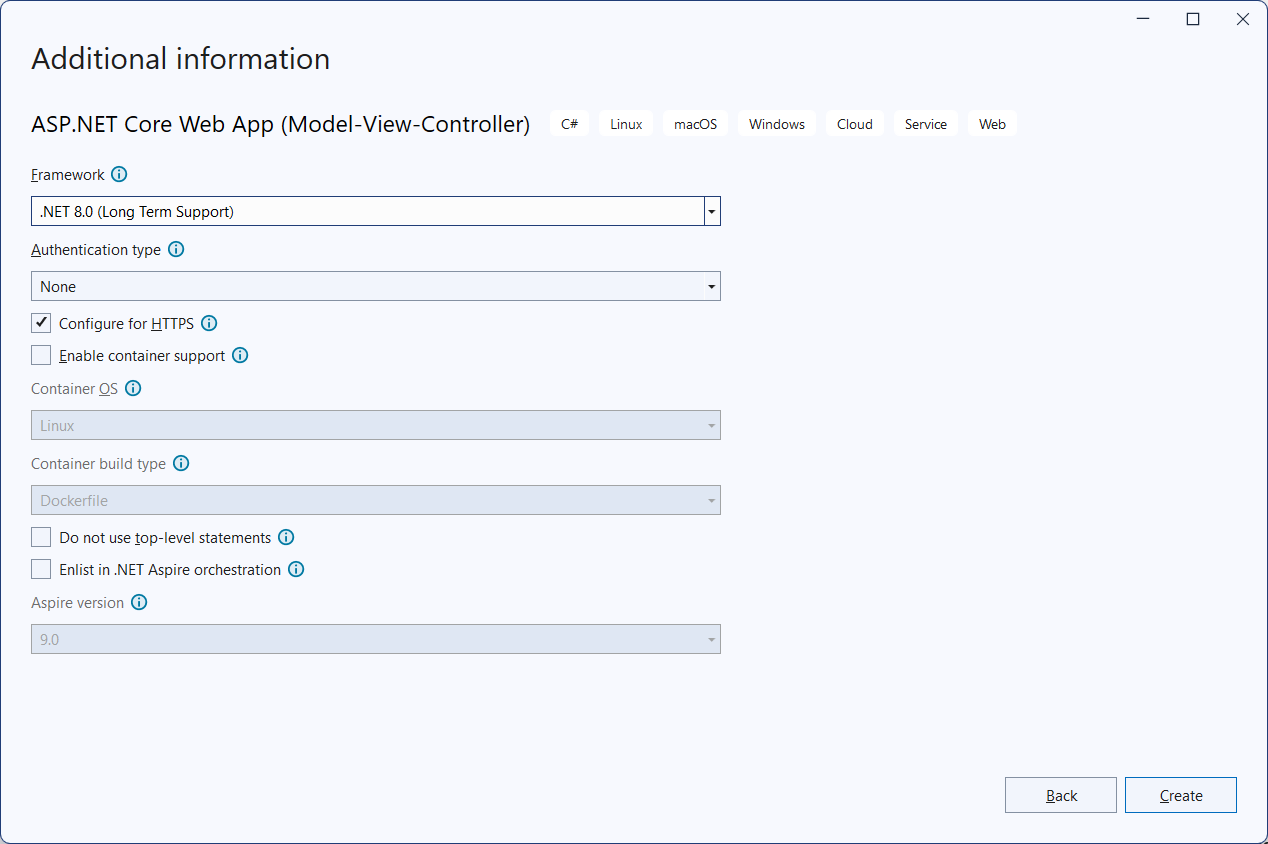
Figure 15.14 Additional information screen.
Here is the working home screen for the project:
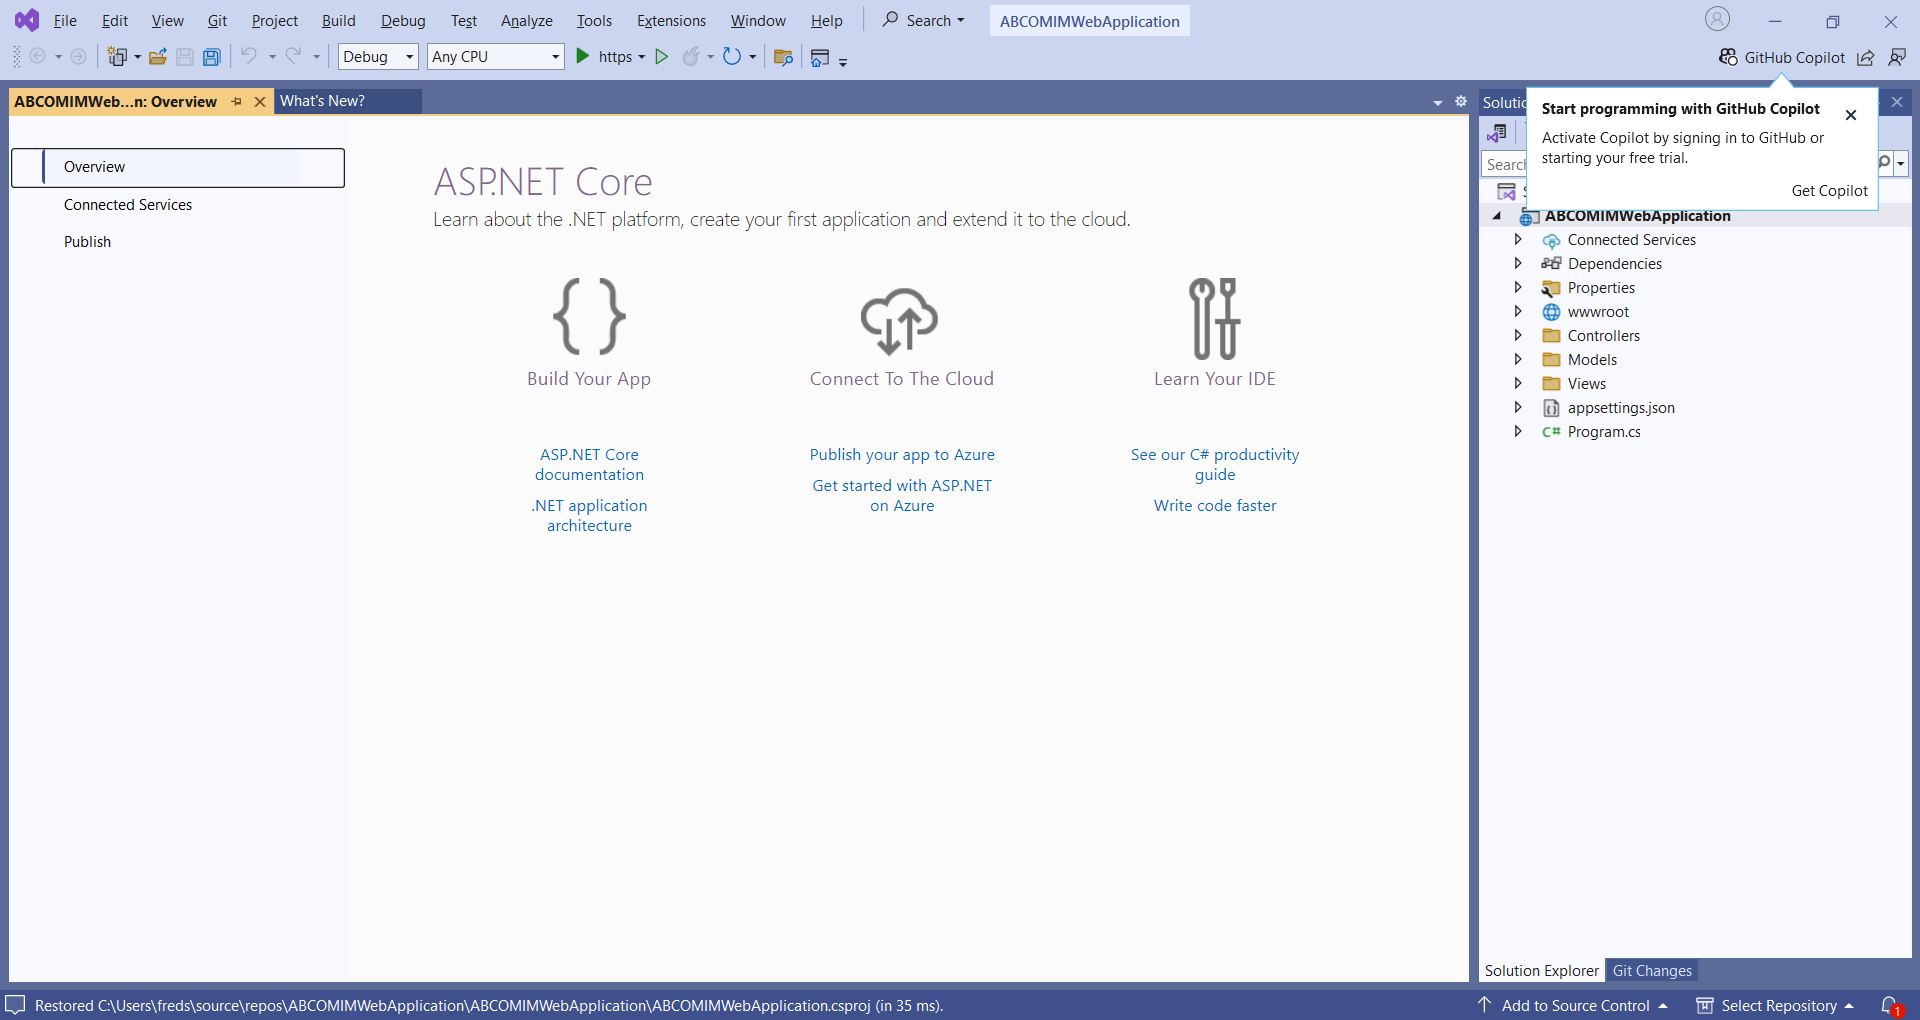
Figure 15.15 The opening screen for the project.
Adding Bootstrap 5 to the Project
From Chapter 14, we learned that we can reference the Bootstrap library on another website by adding a line to the header block. There are other ways of adding Bootstrap support within Visual Studio:
- Enter the line manually into the text. (The approach was used by Jan Potgieter.)
- Add the Content Delivery Network (CDN) line to the project layout file (usually named as _Layout.cshtml).

Figure 15.16 Screenshot of the Solution Explorer screen.
- Bootstrap support may be already present. See Figure 15.17.

Figure 15.17 Screenshot of the top of the _Layout.cshtml file.
- Use the Node Package Manager (NPM) to import the actual Bootstrap files into the project.
- Use the NuGet package manager to import the actual Bootstrap files into the project.
- Use the LibMan6.
When we selected the “create HTTP option,” Bootstrap support was added to the project. So we do not need to take any action about adding Bootstrap support.
Figure 15.18 shows more of the _Layout.cshtml file.

Figure 15.18 Screenshot of more lines of the _Layout.cshtml file.
Executing the MVC Program the First Time
To see what has been done for us, hit the run button. 
If a floating dialog box appears, hit “Yes.”

Figure 15.19 Screenshot of the floating dialog box on the SSL Certificate.
Hit “Yes” on the second floating dialog box.

Figure 15.20 Screenshot of the floating dialog box on a security warning.
Hit “Yes” on the third floating dialog box.

Figure 15.21 Screenshot of the floating dialog box about the IIS Express SSL certificate.

Figure 15.22 Screenshot of the floating dialog box about the second security warning.
Hit “Yes.”

Figure 15.23 Screenshot of the floating dialog box about the connection not being private.
Hit “Advanced.” Figure 15.24 shows the text from the “Advanced” button.
Figure 15.24 Screenshot of the floating dialog box about the connection not being private.
According to the article entitled “Get started with ASP.NET Core MVC,” this should have worked. For me, it did not7. A quick fix8 is to use http instead of https:

Figure 15.25 Screenshot of the HTTP/HTTPS options.
Now hitting the run button will present the web page:
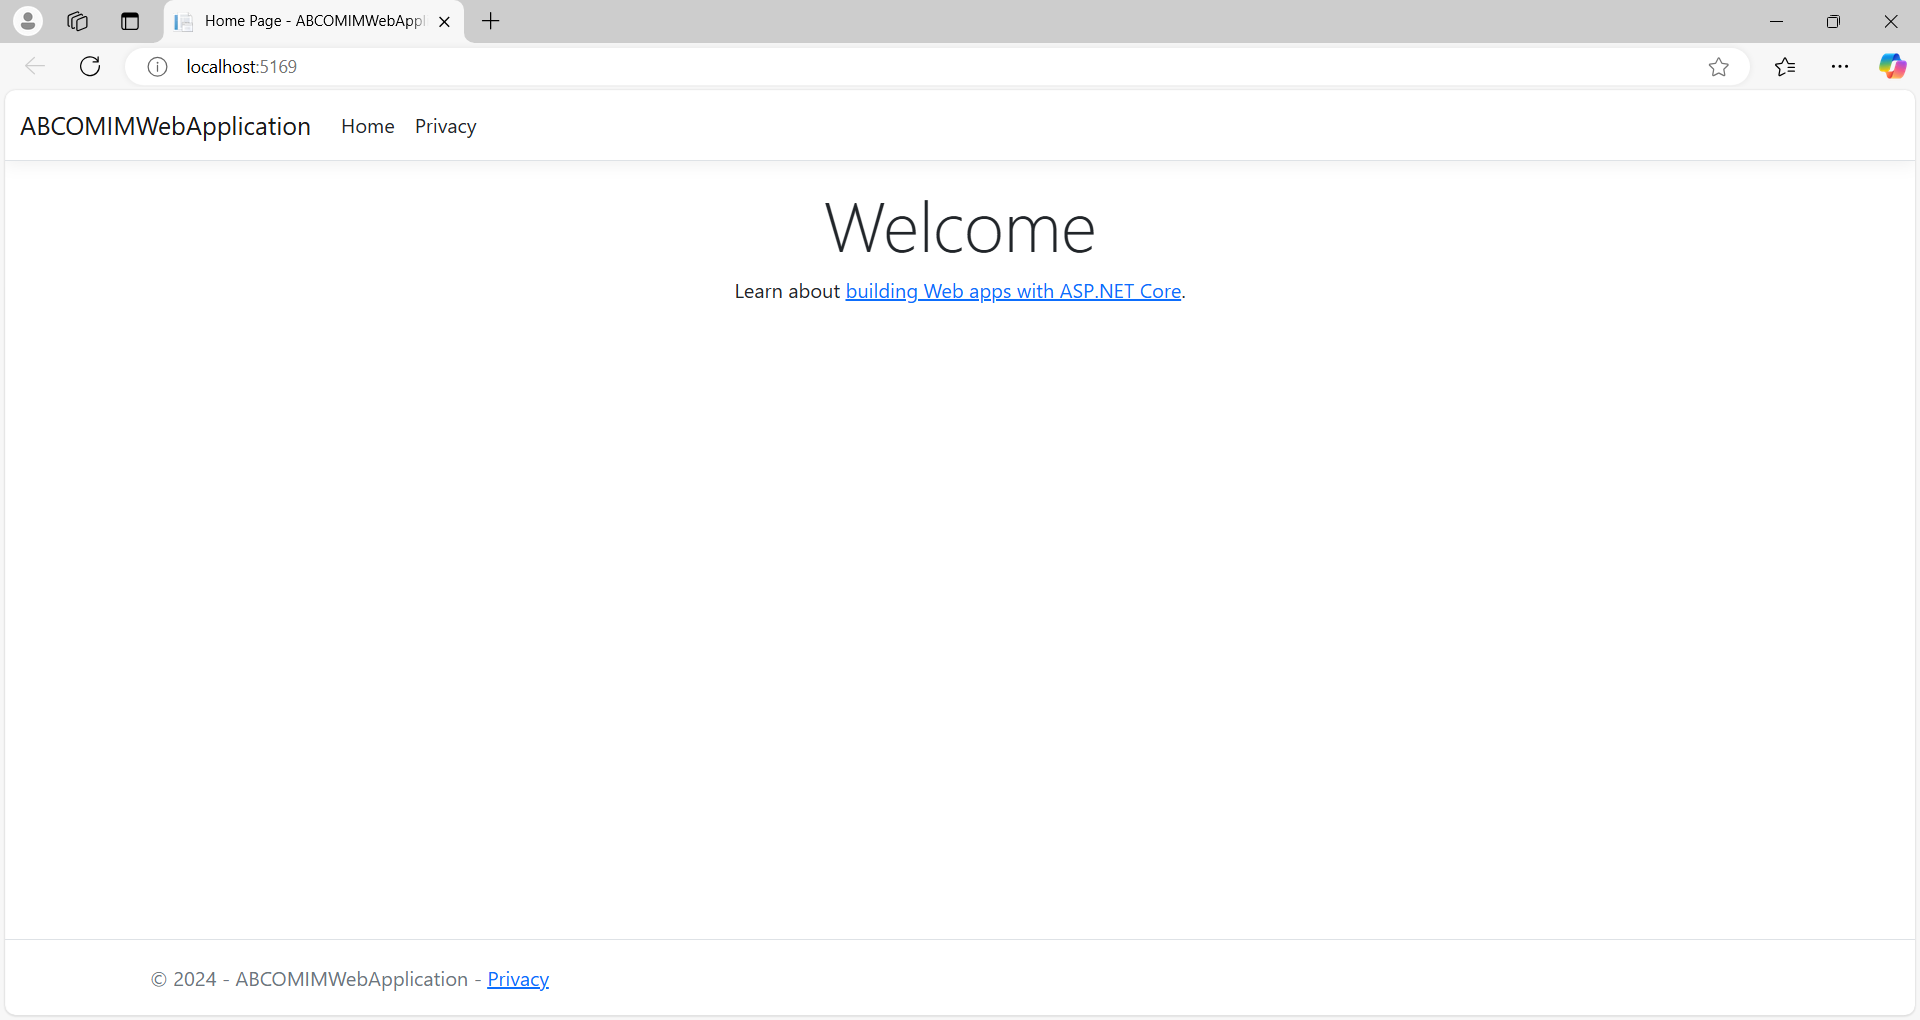
Figure 15.26 Screenshot of the executing program.
You must close the entire web browser session, not just the web page before you can do any further editing.
We can begin to make some changes to this part of the program.
Which Bootstrap Version is Visual Studio Using?
When the web page is displayed, hit “Control U” on your keyboard. You will see the” rel” lines as hyper links.

Figure 15.27 Screenshot of the HTML header lines.
Click on the line containing “bootstrap.min.css.” You will see the actual version number in the second line.

Figure 15.28 Screenshot of the bootstrap.min.css lines.
Now, close the example web page. To obtain the latest version, do a right mouse click on the project name in the “Solution Explorer” box. Look for the “Add” line. Follow this to the “Client-Side Library.”

Figure 15.29 Screenshot of the adding “Client-Side Library.”
In the search box (the second box), type “Bootstrap.”
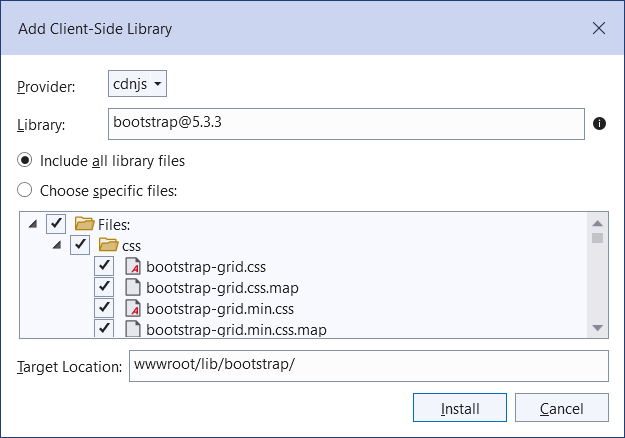
Figure 15.30 Screenshot of the available bootstrap versions.
It will display the current version available. In December 2024, it is 5.3.3. On the Bootstrap website, the last update was 5.3.39. Since the default version is older, we will install the latest version. The Output box will show the steps. Notice that the Bootstrap files were installed on the hard drive.
Adding Bootstrap Lines to the _Layout.cshtml File
An integrated development environment (IDE) may use “code complete.” For example, on the second line, starting typing “<!–.” When you hit the space bar, the closing piece will appear. Be careful when you move your cursor around. If the ending piece does not have two hyphens, then the web page will not display.
I began to edit the web page. As I did for Douglas College, I found the URL for the American Baptist Churches USA. For some strange reason, the image would not display. The alternate text would display. So I changed the URL for the American Baptist Churches of Maine logo that would display.
Using the generated HTML code solved many issues. For example, the generated code has the top menu on every web page. Here is what I have so far:

Figure 15.31 Screenshot of the executing website.
More About the MVC Approach
Recall that the MVC pattern separates an application into three components. The model represents the data. It is here that we would validate the user’s input and enforce any business rules10. We would use the model to work with a database.

Figure 15.32 Screenshot of the model tree.
More About the MVC View
Recall that the MVC pattern separates an application into three components. The view displays something to the user. So for this effort, it is a web page. Again, the user interface logic is stored in the view. The view does not handle business logic. Nor does the view interact with a database directly.

Figure 15.33 Screenshot of the view tree.
More About the MVC Controller
Recall that the MVC pattern separates an application into three components. The controller handles the web browser requests, retrieves the model’s data, and calls upon the proper view template for displaying the information.
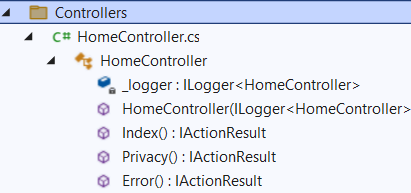
Figure 15.34 Screenshot of the controller tree.
Adding a Controller
There are two ways of adding a controller. One way is outside of the HomeController. The other way is to add to the HomeController. We see both approaches.
Adding a Controller Outside of the HomeController
In the Solution Explorer, do a right mouse click on “Controller” and select “Add Controller.”

Figure 15.35 Screenshot of adding a controller outside of the HomeController.
In the “Add New Scaffolded Item” dialog box, select “MVC Controller Empty Add.
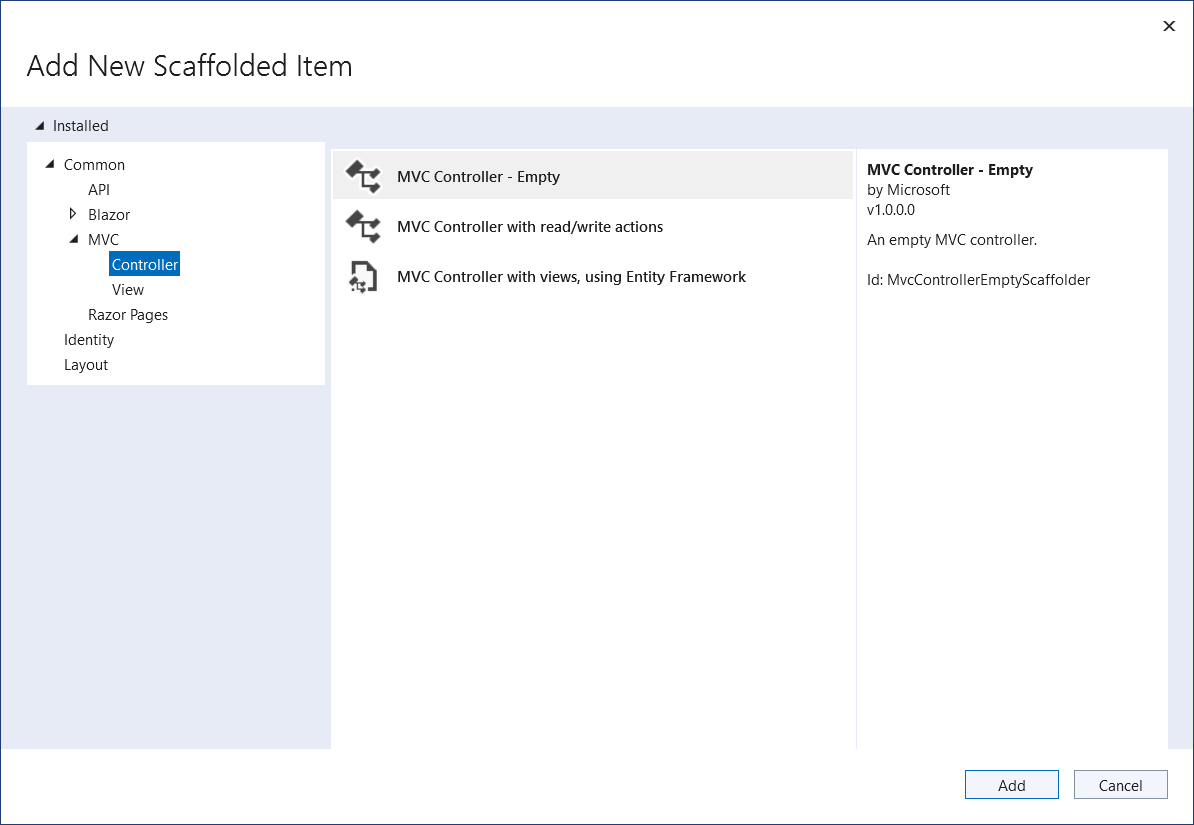
Figure 15.36 Screenshot of adding a controller outside of the HomeController: Adding the scaffolding lines.
Replace the default entry of “HomeController1.cs” with “About.cs” and hit the “Add” button.

Figure 15.37 Screenshot of adding a controller outside of the HomeController: Selecting the desired web item.
See Figure 15.38 for the result of this action:

Figure 15.38 Screenshot of the results of adding a controller outside of the HomeController.
We can test out the C# code. Change the default text to look like Figure 15.39:
|
public class About : Controller { //public IActionResult Index() // GET: /About/ public string Index() { // return View(); return “This is a test string from the About C# file.”; } // // GET: /About/Welcome/ public string Welcome() { return “This is the Welcome action method…”; } } |
Figure 15.39 C# code for the About Controller
Execute the file. Do the following actions in order:
- After the port number, add “/About” (Figure 15.40) to the end of the URL and hit the enter key.

Figure 15.40 Screenshot of executing the About web page.
- After “/About,” add “/Welcome” and hit the enter key.

Figure 15.41 Screenshot of executing the About/Welcome web page.
Adding to the HomeController
This is the second approach. In the Solution Explorer, click on the “HomeController.”

Figure 15.42 Screenshot of the HomeController tree.
Copy the IActionResult block from Figure15.43 and paste it in the order that you wish the item to appear in the menu. The Figure 15.43 shows the addition of “Academics” and “Faith & Service:”
|
public IActionResult Index() { return View(); } public IActionResult Academics() { return View(); } public IActionResult FaithAndService() { return View(); } public IActionResult Privacy() { return View(); } |
Figure 15.43 The IActionResult blocks.
Adding a View
We want the view component to handle the display of our information. From Figure 15.6, we know that we need to add a view element for “About,” for “Academics,” for “Admissions,” for “Faith & Service,” for “Give,” and for “Alumni.” There are two ways of adding a view. One way is outside of the Home folder. The other way is to add to the Home folder.
Adding a View Outside of the Home Folder
Right-click on the Views folder, and then Add –> New Folder and name the folder “About.” See Figure 15.44.

Figure 15.44 The first step of adding a View.
Right-click on the Views/About folder, and then Add > New Item. See Figure 15.45.

Figure 15.45 The second step of adding a View.

Figure 15.46 The result of the second step of adding a View.
Select the “Razor View – Empty.” Notice that the “Name” field changes to read “Index.cshtml.” See Figure 15.47.
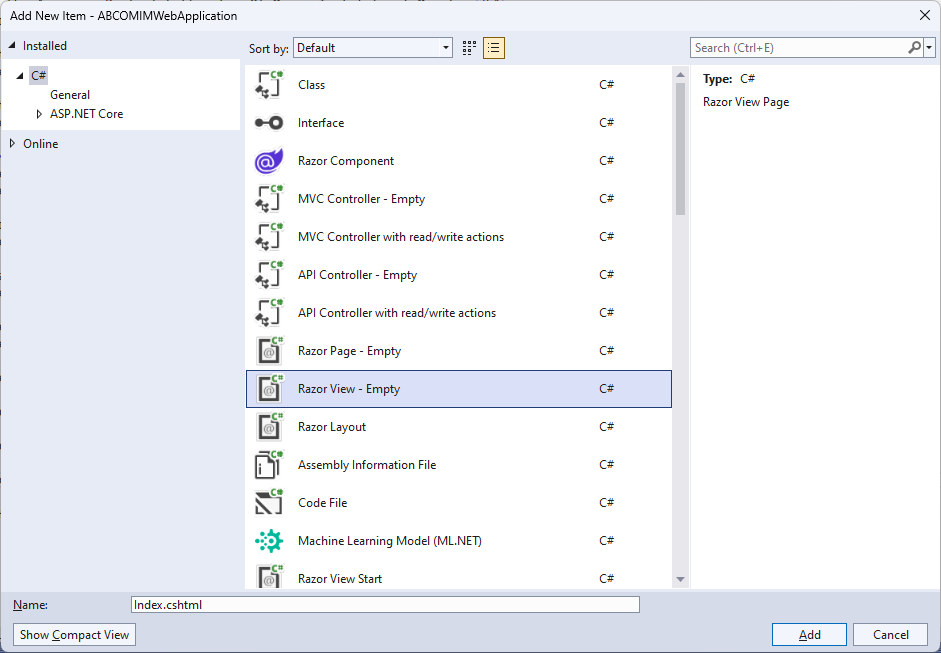
Figure 15.47 The result of selecting “Razor View – Empty” in the second step of adding a View.
Hit the “Add” button. The dialog box goes away and a empty file appears. See Figure 15.48.

Figure 15.48 The empty “Index.cshtml” file.
Replace canned lines with the following:
|
@{ ViewData[“Title”] = “Index”; } <h2>Index About</h2> <p>Hello from our About View Template!</p> |
Figure 15.49 The replacement lines in the “Index.cshtml” file.
Edit the Controller file to read:
|
namespace ABCOMIMWebApplication.Controllers { public class About : Controller { public IActionResult Index() { return View(); } } } |
Figure 15.50 The revised lines in the About Controller file.
Now execute the web page with About in the address bar:

Figure 15.51 The result of executing the revised About web page.
Adding a View Inside the Home Folder
Right-click on the Home folder inside the Views folder, and then Add > New Item. Name it “Academics.”
In the search box in the upper-right, enter view.
Select Razor View – Empty.
Replace the canned lines with the following:
|
@{ ViewData[“Title”] = “Academics”; } <h1>@ViewData[“Title”]</h1> <p>Use this page to detail the academics.</p> |
Figure 15.52 The revised lines for adding the “Academics” view to the Home Folder
These steps could be repeated for other views. See Figure 15.53 for “Academics” and for “FaithAndService.”

Figure 15.53 Showing views outside of the “Home” folder and inside the “Home” folder.
Adding a Model
Recall that the model does the actual interfacing with a database. We will create classes for working with a database. The Rick Anderson and Jon P. Smith article is about creating a movies database from the website side. That may not be the case when a database exists already. Rick Anderson and Jon P. Smith do not mention in their article that there is a weakness with their approach. The weakness is that any database created through this avenue may not be well defined. All the needed tables and fields may not be created and normalization issues may be present.
For the small religious educational institution, I am working with the following tables:
- Persons (These are the common elements for anyone associated with American Baptist Churches of Maine Institute of Ministry (ABCOMIM). I do not have a position or role in this table, because a person could be filling more than one role. I am not storing the date of birth, the gender, and the government ID number. I do not perceive these items as being necessary. Website visitors will not have access to the entire table. We will pull from this table and from another table for populating the “Leadership” web page.
- ID Number (Generated by the database table.)
- Title (Mr., Mrs., Ms., Dr., and so on)
- First Name
- Middle Name
- Last Name
- Maiden Name
- Preferred Name
- Suffix
- Home Church (Use an ID here and reference another table.)
- Education (This is not stored in this table. We reference another table, because a person could have more than one degree.)
- Next of Kin (Use an ID here and reference this table.)
- Active (Yes or No. This avoids the need for an archive table.)
- Telephone Numbers (We do not have the telephone number item with the Persons table, because a person could have more than one telephone number. We are assuming that a person has only one cell phone number, only one home telephone number, and only one office telephone number.)
|
Values for the Columns |
Examples |
|
1 1 0000000000 1 2 0000000001 1 3 0000000002 |
Figure 15.54 More details on the example phone table with example entries.
- E-Mail Addresses (We do not have the e-mail address item in the Persons table, because a person could have more than one e-mail address. The coding and the columns are similar to the Telephone table.)
- PersonID
- 1. Personal
- 2. Office
- 3. Other
- 1. Actual personal e-mail address
- 2. Actual office e-mail address
- 3. Actual other e-mail address
- Addresses (We do not have the address item with the Persons table, because a person could have more than one address. The coding and the columns are similar to the Telephone table.)
- PersonID
- 1. Current or home
- 2. Permanent
- 3. Office
- 4. Temporary or Vacation or Other
- 1. Actual Current or Home address.
- 2. Actual Permanent address
- 3. Actual Office address
- 4. Actual Temporary or Vacation or Other
- Students (Using the Person ID number, we can pull up the common elements from the Persons table. Using this ID and the program ID in the academic progress table, we can view what courses the student has taken.)
- Person ID
- Program ID
- First enrollment date
- Holds (Yes or No; If “Yes,” then the hold table would be used, because a student could have more than one hold active.)
- Advisor ID
- Holds (The student ID could be repeated if the student has more than one type of hold.)
- Person ID
- (financial, academic, etc.)
- 1 for academic
- 2 for financial
- 3 for moral
- 4 for whatever
- Instructors (We will track what courses this person has taught in the Schedules table.)
- Person ID
- Subject area
- Availability
- Salary
- Leaders (This table with the Persons table would be used to populate the leadership web page. A person could be doing two or more leadership roles. More roles could be added in the future. The deans could be more administrative and advisors could be more academic. Since this is a small institute, the deans could be doing both.)
- Person ID
- Position
- 1. Director
- 2. Assistant Director
- 3. Dean Central
- 4. Dean Eastern
- 5. Dean Northern
- 6. Dean Southern
- 7. Advisor
- Invoices (From the viewpoint of a student.)
- Person ID
- Invoice ID
- Purpose
- 1. Course fees
- 2. Lab fees
- 3. Registration
- Amount
- Due date
- Payment Status
- 1. Paid in full
- 2. Partial payment
- 3. Overdue
- Balance
- Last Status date
- Payment method
- 1. Cash
- 2. Check
- 3. Donation
- 4. Scholarship
- Offered Programs
- ID for each unique offering
- 1 Basic Diploma
- 2 Advanced Diploma
- ID for each unique offering
- Program Requirements (This would be a combination of IDs. The first ID is for the program and the second ID is for the course. A third column could be used to reflect when the program requirements were approved. This would handle the situation if a program offering is changed. There would be students on the old program requirements. The student enrollment date would be used to determine which version the student could be using.)
- Program ID
- Course ID or course code.
- Program approval date
- Courses
- Course code (for example: NT1, NT2, BHP, etc.)
- Course description
- Schedule (This gives us the ability to schedule a course for a future term and to look at the history of a course. We would also be able to determine which courses were canceled.)
- Schedule ID
- Semester (I am assuming this is on a semester scheme instead of a quarter scheme.)
- 1. Fall
- 2. Spring
- 3. Summer
- Year (In four digits. Avoids issues in 2100.)
- Course Code
- Section Number (If two sessions are never offered in a term for a course, then this field could be dropped.)
- Meeting Format
- 1. In person
- 2. Hybrid
- 3. Virtual
- Meeting Location (N/A or an actual location.)
- Meeting Days
- 1. Sunday only
- 2. Monday only
- 3. Tuesday only
- 4. Wednesday only
- 5. Thursday only
- 6. Friday only
- 7. Saturday only
- 8. Monday and Wednesday
- 9. Tuesday and Thursday
- 10. To be determined
- Meeting Times (This is the start time expressed in a 24-hour clock.
- Duration
- Instructor ID
- Status (Active or Cancelled. With this field, we know whether or not the course ran.)
- Do we need to have the actual calendar dates?
- Enrollment
- Student ID
- Schedule ID (We know when the student was enrolled in a term. This can track when a student has repeated a course.)
- Course Code (We know which courses the student took.)
- Academic progress (Using the three IDs, we can create an unofficial transcript. For the official transcript, we can add a business rule to keep only the highest grade and ignore a duplicate course with a low grade.)
- Student ID
- Program ID
- Schedule ID
- Course Code
- Status (We can pull up the student’s program and see what has been completed
- Completed or Needed or must repeat)
- Grade
- Scholarship
- ID Number
- Name of Scholarship
- Amount
- Deadline Date
- Requirements
- Point of Contact ID
- AwardedScholarship
- “Student” ID
- Scholarship ID
- Amount
- Other details
- Churches (This table will persist even if there is no one in the person table with a relationship to a table.)
- ID
- Name
- Shorten Name
- Address
- URL
- Pastor ID (this points back to the persons table.)
- Note: The telephone number would be based on the person’s office telephone number.
- Education (We can document more than one type.)
- Person ID
- 1 No award
- 2 High school or GED
- 3 Associate’s degree
- 4 Bachelor’s degree
- 5 Master’s degree
- 6 Doctoral or Ph.D. or terminal degree
- 7 Trade school
- 8 Basic AIM
- Advanced AIM
To add a model, we do a right mouse click on the Models folder. Then we click on Add Class.

Figure 15.55 Screenshot of adding a model.
Models use files that have a file extension of “.cs.”

Figure 15.56 Screenshot of the generic class.cs floating dialog box.
We change the generic file name to “About.cs” and hit the “Add” button.
Figure 15.57 shows the result:

Figure 15.57 Screenshot of the empty About.cs file.
Adding the Other Web Pages to the Menu
You need to use the Views/Shared/_Layout.cshtml in order to have the items to appear on the home page.
Notice in Figure 15.58 how the About asp-action has an entry of “Index.” This is due to the placement outside of the Home folder. The other folders are inside the Home folder and thus can have unique names.

Figure 15.58 Text of the menu items.
Figure 15.59 shows how these appear on the web page. Notice the placement of “About” outside of the Home folder does not impact how it appears on the web page.

Figure 15.59 View of the menu items (Mobile phone or reduced screen size view).
|
The Rick Anderson and Jon P. Smith plus 28 contributors article went into the creation of a database from inside Visual Studio. I had trouble figuring out how to link this program to an existing database. My attempts broken my program. I did not have the time to dig into the solution. So I restarted the effort without using Bootstrap. |
Second Effort: ASP.NET Core with MVC and EF Core Working with an Existing Database
In another chapter, I had worked through the steps of installing Microsoft SQL Server Developer Edition. I used the same steps to install Microsoft SQL Server Express Edition.
You would select which server you wish to use. See Figure 15.60.

Figure 15.60 Selecting the desired server from inside Microsoft SQL Server Management Studio
Inside Visual Studio, you would use “Server Explorer” to link to the desired database server. See Figure 15.61.

Figure 15.61 Visual Studio’s Server Explorer
You will need an item known as a connection string. To see the text, do a right mouse click on the line containing “sqlexpress” and the database name. Select “Properties.” The properties will appear in the lower right hand corner in the “Solution Explorer.” Look for the connection string inside the “Connection” section. See Figure 15.62.

Figure 15.62 Visual Studio’s Properties panel in the Solution Explorer.
You can copy the connection string. It will have the following appearance:
Data Source=.\SQLEXPRESS;Initial Catalog=ABCOMIM;Integrated Security=True;Trust Server Certificate=True
I am using insights from the Pranaya Rout article. He does not include Bootstrap. That can be added after things are created.
Open Visual Studio and select a new project. See Figure 15.9. Select “ASP.NET Core Web App (Model-View-Controller).” See Figure 15.12. For the configure project screen, use a different name from the first efforts. For the “Additional information” screen, we will have the same selections as in Figure 15.14, except we will check the “Do not use top-level statements12.”
Adding Microsoft Entity Framework Core Packages
As noted in the first effort, Bootstrap is included in the template. We will not repeat that discussion. We do need to add the Entity Framework Core, because it is not part of the .NET Core Framework. This task is accomplished by using the NuGet Package Manager. See Figure 15.63

Figure 15.63 Accessing the “Manage NuGet Packages” option via the right mouse click on the project name.
Search for “Microsoft.EntityFrameworkCore.SQLServer.” Select the desired version13.
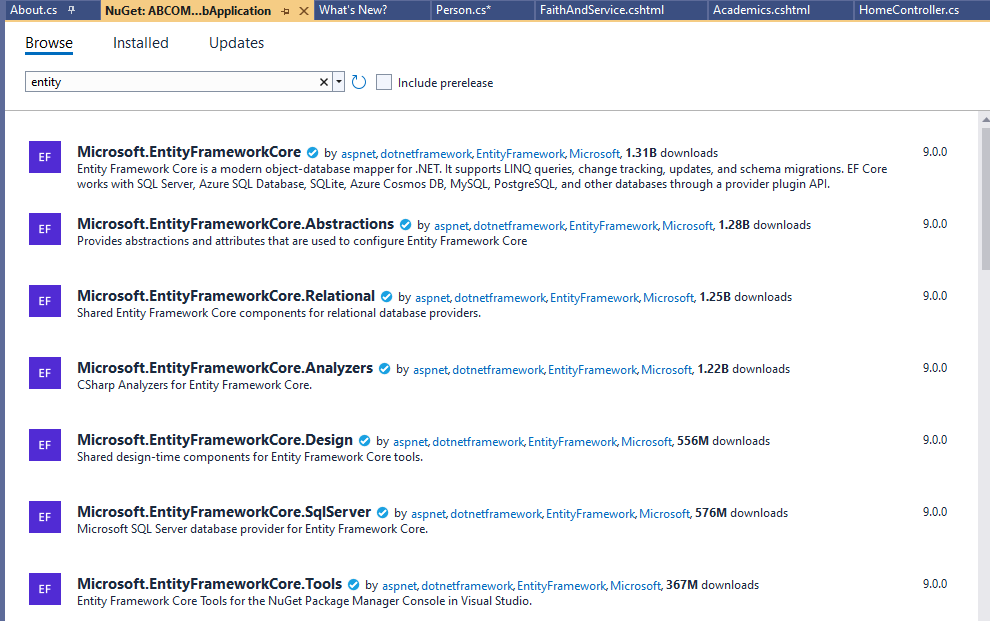
Figure 15.64 The available items that contain “Microsoft.EntityFrameworkCore” in the title.
Select and install. See Figure 15.65.

Figure 15.65 The details on the Microsoft.EntityFrameworkCore.SqlServer (Note: The title is truncated in this view.)
After hitting the “Install” button, a floating dialog box appear. It has a list of other items that will be installed. Hit the “OK” button. The next floating dialog box is about agreeing to the terms of the license for several items. See Figure 15.66.

Figure 15.66 The “License Acceptance” floating dialog box.
Hit the “I Accept” button.
Repeat these steps and select the Microsoft.EntityFrameworkCore.Tools package.
The two Microsoft.EntityFrameworkCore packages will appear in the “Dependencies” folder. See Figure 15.67.

Figure 15.67 View of the two Microsoft.EntityFrameworkCore packages in the Dependencies folder.
Creating and Implementing the Database Context
The Microsoft.EntityFrameworkCore packages do not have a Visual Designer nor a Wizard. These tools were present in Microsoft.EntityFrameworkCore 6, but not in version 7 or later versions. Instead, we will be doing some reverse engineering, which is the act of recovering design information from a source. We will be using the Scaffold-DbContext command, which will examine the connected database and then generate the required context and entities.
The Scaffold-DbContext command is a resource inside the Package Manager Console. Figure 15.68 shows how to access the Package Manager Console.

Figure 15.68 View of steps for accessing the Package Manager Console.
The Package Manager Console will appear at the bottom of the workspace. It replaced the “Output” workspace.
The Scaffold-DbContext command format is:
Scaffold-Dbcontext <Connection string using “Server” instead of “Data Source” and two other changes.> Microsoft.EntityFrameworkCore.SqlServer -OutputDir Models
For my personal computer, the connection string is:
Data Source=.\SQLEXPRESS;Initial Catalog=ABCOMIM;Integrated Security=True;Encrypt=True;Trust Server Certificate=True
Scaffold-DbContext command needs the connection string to be modified and to become:
Server=.\SQLEXPRESS;Database=ABCOMIM; Trusted_Conection=True;Trust Server Certificate=True
Here is the full text of the Scaffold-DbContext command:
Scaffold-Dbcontext “Server=.\SQLEXPRESS;Initial Catalog=ABCOMIM;Integrated Security=True;Trust Server Certificate=True;” Microsoft.EntityFrameworkCore.SqlServer -OutputDir Models
The “Microsoft.EntityFrameworkCore.SqlServer” is based on the database environment. If you were running MySQL or Oracle or another database, then this command would be different.
The “-OutputDir Models” tells the command where to create the model C# files. Since we have accepted that the Model files make the actual connection to the database, then it follows that the created files should be stored in the Models folder.
Figure 15.69 shows the command and the output.

Figure 15.69 View the Scaffold-DbContext command wording and its output messages.
The Odd Naming Behavior in the Context.cs File
Figure 15.70 shows the created C# files in the Models folder. Notice that the singular spelling is used for each database table. I do not know why Microsoft does not use the actual spelling for the database table names.

Figure 15.70 View of the created C# files in the Models folder.
The first file (AbcomimContext.cs) did not come from the database. This file was generated by the Scaffold-DbContext command. Notice that Microsoft used “People” in the name for the controller (PeopleController). Again, I do not know how the word “People” was used instead of “Persons.” In the body of some IActionResult blocks, “Persons” is used. See Figure 15.71 for an extract from this long file.

Figure 15.71 Extract from the ABCOMIM2.Controllers.PeopleController.
Viewing an Example Model.cs File
Look at Figure 15.72. These match the columns in the Persons database table. Notice the usage of the question marks for some of the headers data types and the use of the phrase “= string.Empty.”
|
The Person Model File Contents |
|
namespace ABCOMIM2.Models; public partial class Person { public int Id { get; set; } public string FirstName { get; set; } = string.Empty; public string MiddleName { get; set; } = string.Empty; public string LastName { get; set; } = null!; public string Suffix { get; set; } = string.Empty; public string MaidenName { get; set; } = string.Empty; public string PreferredName { get; set; } = string.Empty; public string Title { get; set; } = string.Empty; public int? HomeChurchId { get; set; } public int? NextOfKinId { get; set; } public string ActiveRecord { get; set; } = string.Empty; } |
Figure 15.72 Extract from the ABCOMIM2.Models.Person file.
The “string.Empty” according to Microsoft should accept an absence value. I found that I had to enter something (“N/A”) for MaidenName and for PreferredName. When a field is not used in the view, then a value is not needed. (You will see this in for the section entitled “Configuring the View” for the ActiveRecord field.) For the question mark on the header data type, it generated a “NULL” entry. See Figure 15.73.

Figure 15.73 The stored values from the program to the database.
The Warning Message in the Context Model CS File
In Figure 15.69, there was a warning message. This message was placed toward the end of the ABCOMIM2.Models.AbcomimContext.cs file. See Figure 15.74.

Figure 15.74 The warning message in the OnConfiguring block (Source of image: https://dotnettutorials.net/lesson/asp-net-core-mvc-with-ef-core-db-first/)
In plain English, the warning message is telling us that the connection string is in the Context class. This is a bad programming practice. Good programmers do not hard code certain values. The solution is to put the connection string in a file that should not be available to the visitor. So we will use the appsettings.json file. It is located near the bottom of the Solution Explorer. See Figure 15.75.
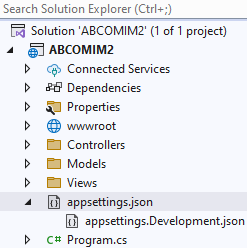
Figure 15.75 The location of the appsettings.json file.
We will edit this file to include the connection string. Notice that we are using the original format instead of the Scaffold-DbContext format. Also notice that we had to add another backward slant bar to the server name field. Figure 15.76 shows the final version of this file.

Figure 15.76 The revised appsettings.json file.
The last action is to edit the OnConfiguring block. See Figure 15.77.

Figure 15.77 The revised OnConfiguring block.
Adding the DBContext Service
We need to add a new block. See Figure 15.78 for the final version of the Program.cs file.
|
using Microsoft.EntityFrameworkCore; using ABCOMIM2.Models; // This is needed so the program can find AbcomimContext.cs file. namespace ABCOMIM2 { public class Program { public static void Main(string[] args) { var builder = WebApplication.CreateBuilder(args); // Add services to the container. builder.Services.AddControllersWithViews(); //Adding DBContext Service builder.Services.AddDbContext<AbcomimContext>(options => options.UseSqlServer(builder.Configuration.GetConnectionString(“DBConnection”))); var app = builder.Build(); // Configure the HTTP request pipeline. if (!app.Environment.IsDevelopment()) { app.UseExceptionHandler(“/Home/Error”); // The default HSTS value is 30 days. You may want to change this for production scenarios, see https://aka.ms/aspnetcore-hsts. app.UseHsts(); } app.UseHttpsRedirection(); app.UseStaticFiles(); app.UseRouting(); app.UseAuthorization(); app.MapControllerRoute( name: “default”, pattern: “{controller=Home}/{action=Index}/{id?}”); app.Run(); } } }
|
Figure 15.78 The final version of the Program.cs file.
Configuring the View
So far, we have the models and the views. We need to add a MVC Controller in order to make our program work. To do so, we need to do a right mouse click on the Controllers folder and then select Add => Controller from the context menu, as shown in Figure 15.79.


Figure 15.79 Adding a controller.
The Add button will cause the “Add MVC Controller with views, using Entity Framework” window to appear. From the Model class dropdown, we select the “Person” model. From the Data context class, we select AbcomimContext. We keep all other selections as they are, i.e., Generate views, Reference script libraries, and Use a layout page options checked. We add “PeopleController” to the Controller Name box. Figure 15.80 shows these actions and Figure 15.81 shows the final appearance.

Figure 15.80 Working with the “Add MVC Controller with views, using Entity Framework” options.

Figure 15.81 Final appearance of the “Add MVC Controller with views, using Entity Framework” options.
Click the Add button. A status bar will appear. See Figure 15.82.

Figure 15.82 Scaffolding status bar.
When the scaffolding is completed, the controller folder will have a new entry. See Figure 15.83.

Figure 15.83 The new PeopleController.
Also, the View folder has a new addition. See Figure 15.84.

Figure 15.84 The new People view with support five actions.
When we build the program and navigate to the URL containing “/People,” the following web page will appear:

Figure 15.85 The People web page with the headings from the database table.
When we hit the create new link, we see the URL has updated. See Figure 15.86.

Figure 15.86 The People/Create web page (Notice now Active Record field.)
I added my information. See Figure 15.87.

Figure 15.87 The People/Create web page with entries.
Figure 15.88 shows the result of hitting the “Create” button.

Figure 15.88 The People/Create web page with error messages.
I added “N/A” in order to clear the error messages. Figure 15.89 shows that the view table was updated with my information.

Figure 15.89 The People web page with an entry.
Notice that three hyperlinks have been added to the end of the row.
Figure 15.90 shows that the actual database has been revised.

Figure 15.90 The revised database table.
Some sources will state that we have created CRUD. This states for Create, Read, Update, and Delete.
Final Words
The first effort had Bootstrap in it. The second effort did not. Why? As you noticed in the red font box at the beginning of this chapter, there are many outdated tutorials and forums on the Internet. It is very hard to find clear and current sources of information. Even Microsoft made it hard by providing a tutorial that has Visual Studio creating a database from the lines for creating a website! The Dot Net Tutorials were much better, but some of the articles have misleading titles.
A complete website project would have stored procedures, images, and more user-friendly information.
It is my hope that you have gained enough insights from this chapter that you could make good progress with your project.
Maybe for the fourth edition, this chapter could be revised to include a complete example that uses Bootstrap from start to finish.
Key Terms
ASP.NET Core: This is an open source and cloud-optimized web framework. This is used for developing modern web applications that can run on Windows, on Linux, and on Mac.
controller: This is responsible for working with the model.
CRUD: This is an acronym that stands for Create, Read, Update, and Delete.
Entity Framework Core: This contains an Object-Relational Mapping (ORM) tool that works with dates by using .NET objects.
model: This performs the user’s requested action.
Model-View-Controller (MVC) framework: This is designed to separate the three parts of a program. This is known as the “separation of concerns.” The user requests are routed to a controller that is responsible for working with the model. The model performs the user’s requested action. This could be to retrieve the results from a query. The controller chooses the view for displaying the information back to the user. This approach means that the common actions can be used for routing to the user on a web page, to the user on a desktop application, or to the user on a kiosk in a shopping mall. One benefit is that developers can divide the project into different parts.
reverse engineering: This is the act of recovering design information from a source. I did not mention in the chapter that software reverse engineering is the process of recovering the design, the requirements specifications, and the functions of a product from analyzing a program’s codes. There are courses and degree programs devoted to this area. A company may reverse engineer a product in order to determine how to build a better version.
view: This is the presentation to the user.
Exercises
1. Explain the following terms:
1. ASP.NET Core
2. Model-View-Controller (MVC) framework [CS2023 FPL-Event-Driven and Reactive Programming KA Core 6 and ILO KA Core 4]
3. Model
4. View
5. Controller
6. Entity Framework Core
7. Reverse engineering
2. Explain the role or purpose of the following:
1. HTML 5
2. Bootstrap
3. JavaScript
4. CSS
[CS2023 SPD Web: Web Platforms KA Core 1]
3. In the Entity Framework Core is the Object-Relational Mapping (ORM). This was not explained in the chapter. Do some research and explain in your own words what this is about. [CS2023 SPD Web: Web Platforms KA Core 4]
4. Why do accessibility standards exist? [CS2023 SPD Web: Web Platforms KA Core 4]
5. Pick a non-profit organization. Examine its website. What is the purpose of the presentation? [CS2023 SPD Web: Web Platforms Non-core 6]
6. If you are a computing major, chances are you that you may have taken at least one computer programming course. In the final chapters of this textbook, you have worked with HTML 5, with JavaScript, with CSS, with Bootstrap, and with C#. Compare and contrast web programming with general-purpose programming. [CS2023 SPD Web: Web Platforms ILO KA Core 3]
7. In different places in this textbook, we have talked about style guides, about accessibility, and about security programming. List at least three points how web standards have impacted software development. [CS2023 SPD Web: Web Platforms ILO KA Core 3]
Advanced questions
A1. Show the text from a website project that would execute a query for obtaining data from a connected database. [CS2013 IM Query Languages 5]
A2. Add to a website project a stored procedure that receives values from the user. [CS2013 IM Query Languages 6]
A Running Project
For your running program, code a website CRUD operation that works with your database.
Attribution
This chapter of Database Design is a brand-new addition.
This chapter drew from many sources.
Image Attribution
No second edition images were used.
References
Rick Anderson and 23 contributors. “Get started with ASP.NET Core MVC,” Microsoft Learn, July 29, 2024. https://learn.microsoft.com/en-us/aspnet/core/tutorials/first-mvc-app/start-mvc?view=aspnetcore-9.0&tabs=visual-studio
Rick Anderson and 20 contributors. “Part 2, add a controller to an ASP.NET Core MVC app,” Microsoft Learn, July 29, 2024. https://learn.microsoft.com/en-us/aspnet/core/tutorials/first-mvc-app/adding-controller?view=aspnetcore-9.0&tabs=visual-studio
Rick Anderson and 23 contributors. “Part 3, add a view to an ASP.NET Core MVC app,” Microsoft Learn, July 29, 2024. https://learn.microsoft.com/en-us/aspnet/core/tutorials/first-mvc-app/adding-view?view=aspnetcore-9.0&tabs=visual-studio
Rick Anderson, Jon P. Smith, and 28 contributors. “Part 4, add a model to an ASP.NET Core MVC app,” July 29, 2024. https://learn.microsoft.com/en-us/aspnet/core/tutorials/first-mvc-app/adding-model?view=aspnetcore-9.0&tabs=visual-studio
Philip Gyllhamn. “HOW TO: Create an WEB API in ASP.NET Core with SQL Database First in Visual Studio 2019,” Medium, May 11. 2019.
“Integrating Bootstrap with ASP.NET Core: Step-by-Step Guide,” Web Dev Tutor, September 5, 2023.
“MVC Framework Introduction,” Geeks for Geeks, July 8, 2024. https://www.geeksforgeeks.org/mvc-framework-introduction/
“Overview of ASP.NET Core MVC,” Microsoft Learn, June 17, 2024. https://learn.microsoft.com/en-us/aspnet/core/mvc/overview?view=aspnetcore-9.0
Jan Potgieter. “Develop a Simple Web Application in ASP.NET with SQL Server,” MSSQL Tips, November 15, 2022. https://www.mssqltips.com/sqlservertip/7461/developing-a-web-application-with-aspnet-and-sqlserver/
Pranaya Rout. “ASP.NET Core MVC with EF Core DB First Approach,” Don Net Tutorials, n.d. https://dotnettutorials.net/lesson/asp-net-core-mvc-with-ef-core-db-first/