23 Activities

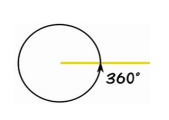
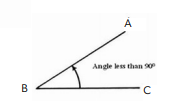
Name that Angle


Pipe Trades Magic Number 1.414
1.414 is the square root of 2. Typically, in many piping installations, you will be working to find the hypotenuse of a right angle. The three interior angles of a triangle add up to 180-degrees, in a right triangle, since one angle is always 90-degrees. So, when working with a right triangle with a 90-degree and two 45-degree angles, you would use the quick method to find the Hypotenuse (long side) by multiplying the short side by 1.414.
To find the short side, when the Hypotenuse is known, multiply it by .707.
You can use the Pythagorean theorem to find the answers you are looking for, but this is a much simpler and faster way to find your answers by using 1.414. Here is an example where a copper line needs a 45-degree offset from point A to point B.

You know that the measured difference from point A to point B is 8 inches. Multiply that by 1.414 to find the Hypotenuse. Now you know that the Hypotenuse is 11.30 inches.
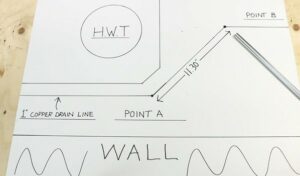
Don’t forget to take off your Fitting Allowance before you cut your piece of pipe!
Pipe fittings are a necessary part of any piping system. When you need to connect two pipes or a pipe with fittings, you need a perfect length. Fitting lengths can be a little confusing, but with a little bit of calculation, it’s easy to get the right length for your needs.
Calculating pipe length with fittings is a simple process that can be done quickly and easily. By knowing the dimensions of the fitting and the length of pipe needed, calculating pipe length can be done quickly and with accuracy.
Measure and Assemble Piping Using Fitting Allowances
Written by Andrea Durdle, RSE
Plumbers are required to measure, cut and assemble piping for drainage, venting, heating, process piping and water systems. In order to properly plan work, plumbers must use the concept of fitting loss calculations and basic mathematics involving addition, subtraction and fractions to create a cut list for materials.
Fitting loss calculations take into consideration how far piping will go into a fitting and where the fitting’s center line will line up where piping may extend through walls and ceilings. Calculating fitting losses not only helps a plumber plan their installation, it also helps them in determining the amount of material required for a job before the work begins. Below is an example of some terminology that applies to fitting loss calculations.

The most common fitting loss calculations a plumber uses are to calculate center to center measurements as illustrated by letter A above. To practice using basic mathematics and fitting loss calculations you will measure and assemble components commonly used in a residential venting system. All plumbing systems require venting; have you ever wondered what the black plastic pipes sticking out from the roofs of houses are? They’re vents for the plumbing system, they serve a few purposes. First, they allow sewer gases to have a path to escape outside of the home. Secondly, their primary their primary function is to allow for proper drainage allowing air into the system. Have you ever held a full pop bottle upside down and watched it pour in big glugging slugs? But when you turn it slightly to the side and air is allowed in, the pop pours smoothly and quickly. The same principle applies to your plumbing system, without air in behind the water in the drains, things would flow very slowly and create problems in the drainage system.
To complete this activity, look at the drawing of a venting system below. Notice that some, but not all measurements are given. In the field plumbers would be required to measure based on the layout of the plumbing system and the features of the construction in the home to create a cut list. You will be assembling this venting system in a wooden box that looks like the one in the image below. You will only be dry-fitting the fittings and pipe together, so that they can be reused. In a real installation, a plumber would glue the piping and fittings together.
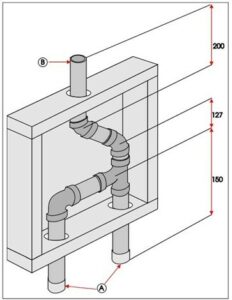
In the box, you will have many different fittings to assemble, along with piping cut to predetermined lengths. The fittings in the box will include; 90-degree bends, 45-degree bends, and a sanitary tee (this tee is directional to provide better drainage flow). Your task will be to use a measuring tape and fitting allowance logic to match the measurements on the drawing above to the piping available and install the piping and fittings, so they do not bind in the holes in the wood box. Note that the further the piping engages into the fitting the closer in accuracy your measurements will be.