Chapter 6: Microsoft Azure IoT Hub
6.1 Introduction
Microsoft Azure IoT Hub is a cloud-based managed service acting as a central message hub for two-way secure communication between the IoT application and the IoT devices that it manages. IoT Hub supports several messaging patterns such as file upload from devices, device-to-cloud telemetry, and request-reply methods to control the IoT devices from the cloud. IoT Hub monitoring helps to maintain the health of the IoT solution by tracking events such as device failures, creation, and connections [8].
6.2 Microsoft Azure IoT Hub
In this chapter, you will become familiar with Microsoft Azure IoT Hub and create an account. Then, you will register the IoT device with Microsoft Azure IoT Hub to exchange messages.
A. Microsoft Azure account
- Go to azure.microsoft.com and create a free Microsoft Azure account.
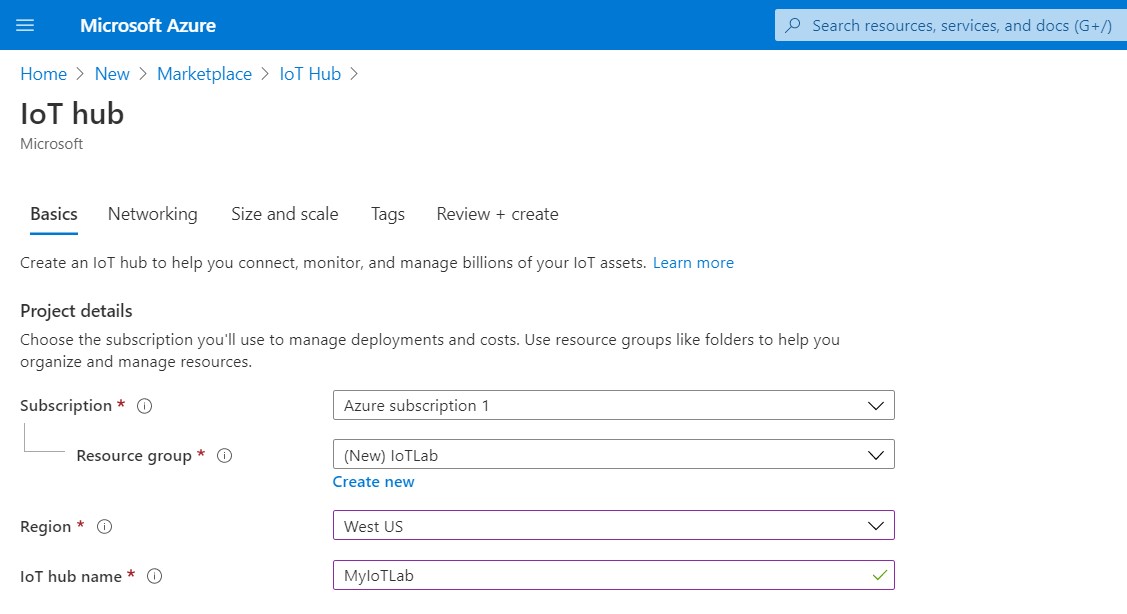
- Go to the Azure portal[1] and follow the instructions[2] on Microsoft website to create an IoT hub using the Azure portal.
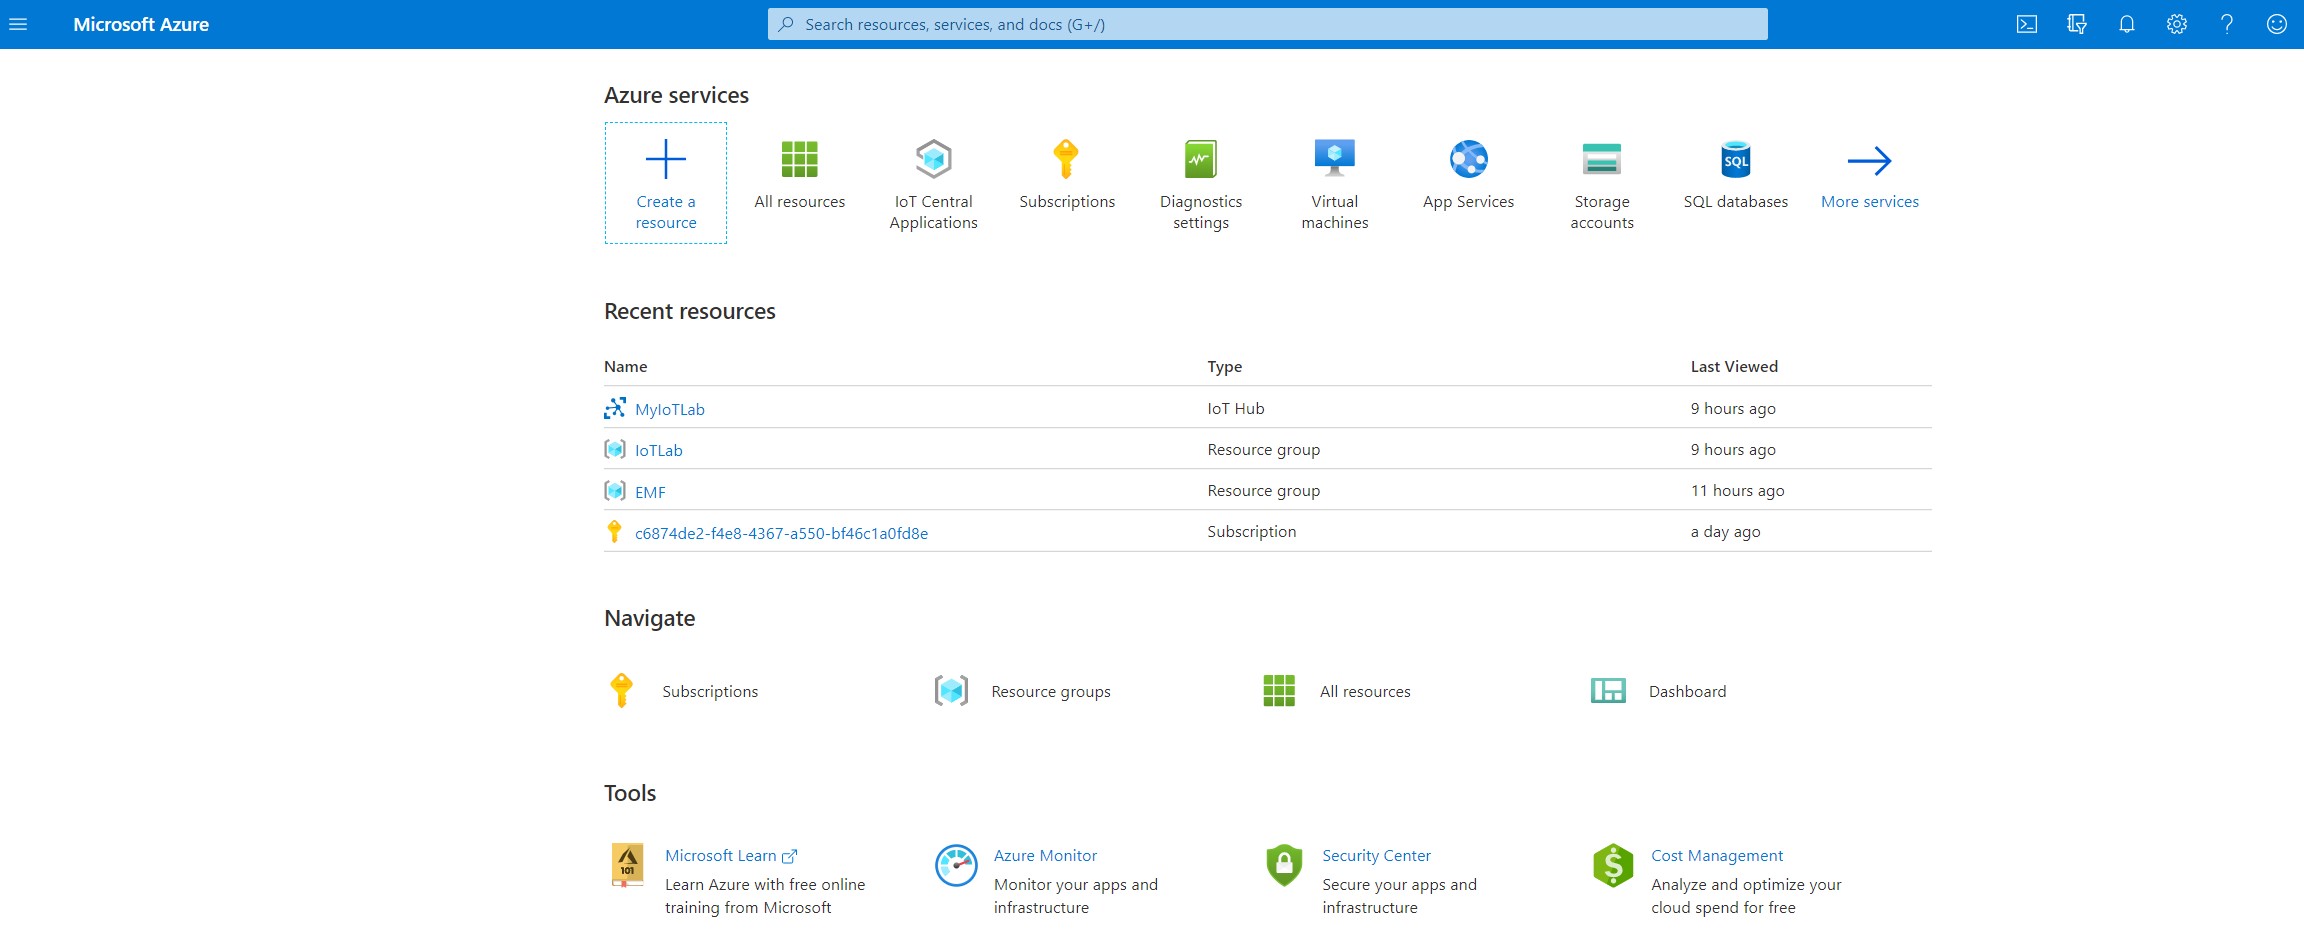
In this example and through the procedure to create an IoT hub, we created a new resource group called “IoTLab” and entered “MyIoTLab” as the IoT hub name. In the “size and scale” tab, make sure you select the free pricing tier to avoid extra charges to your bill.
- Use the instructions[3] to register a new device in the IoT hub. Once the device is created, open the device from the list in the IoT devicespane and take note of the Primary Connection String (it will be used later). This string gives you three important pieces of information for your newly registered device including HostName, DeviceID, and SharedAccessKey that will be used later when configuring the nodes in Node-RED. For example, as you see in the picture below, the primary connection string for the new device that we created is:
HostName=MyIoTLab.azure-devices.net;
DeviceId=MyDeviceID;
SharedAccessKey=W/uBNVjPNq1ntkPpv8t5xCyMyVOdy7YjrO IAVCtFi8=
Therefore, in this case:
- HostName = MyIoTLab.azure-devices.net
- DeviceID = MyDeviceID
- Device SharedAccessKey = W/uBNVjPNq1ntkPpv8t5xCyMyVOdy7YjrO IAVCtFi8=

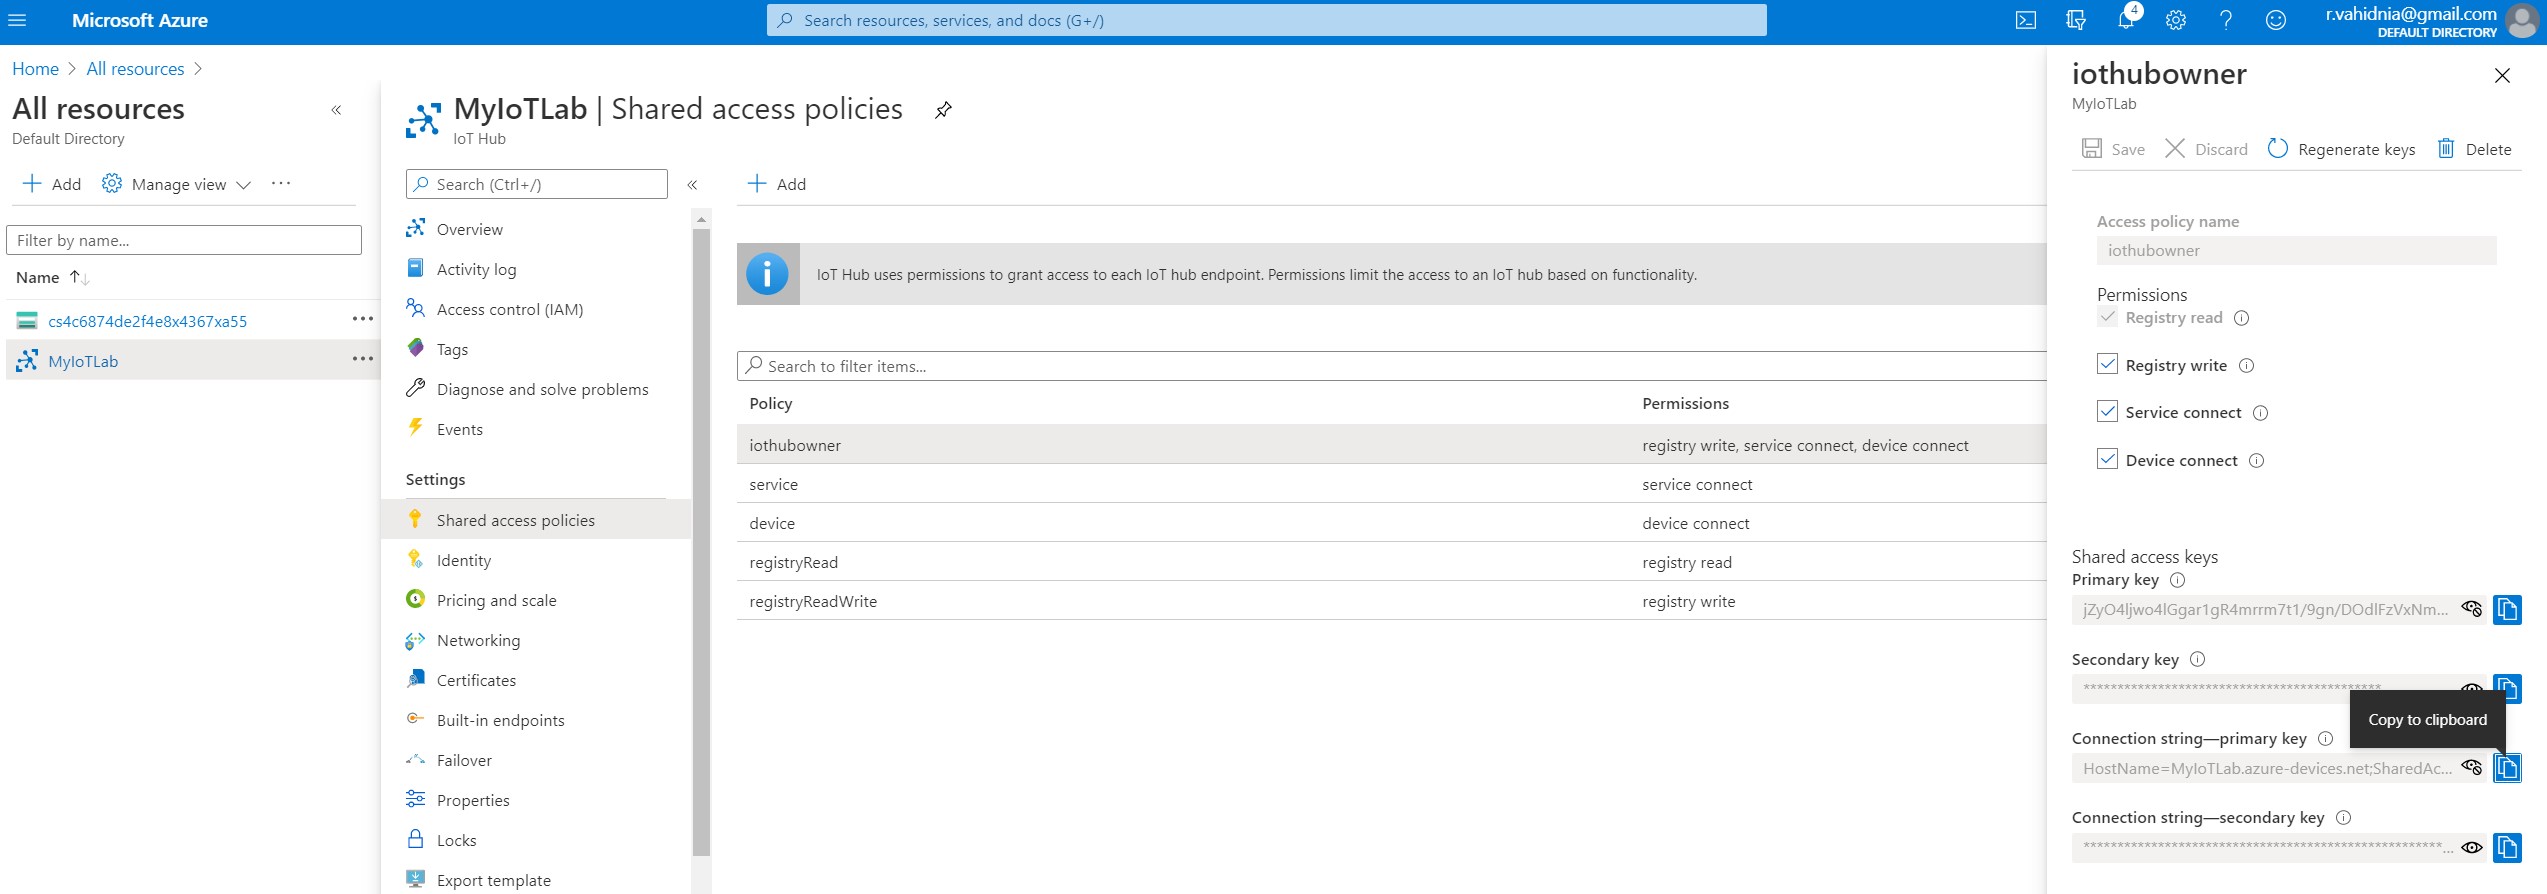
- In the previous step, you registered and obtained the information for your registered device. In order to get the access information about your IoT hub, in the IoT portal go to “All resources” and click on your IoT hub that you created. Then, go to Shared access policies -> iothubowner and copy the Connection string – primary key. For example, our IoT hub connection string is:
HostName=MyIoTLab.azure-devices.net;
SharedAccessKeyName=iothubowner;
SharedAccessKey=8JUL6zD9joqYCQyeBIP9uyhQh6u 8BhjP/mg3u ucRg=
As you could see, the HostName is the same as for the device in the previous step; but, we have:
- SharedAccessKeyName = iothubowner
- IoT Hub SharedAccessKey = 8JUL6zD9joqYCQyeBIP9uyhQh6u 8BhjP/mg3u ucRg=
B. Device Explorer
The Device Explorer tool is a Windows graphical tool to manage the devices in IoT Hub.
- Click on Azure IoT SDKs releases[4] and scroll down to the Downloads section to locate the download link for the SetupDeviceExplorer.msiinstaller. Now download and run the installer.
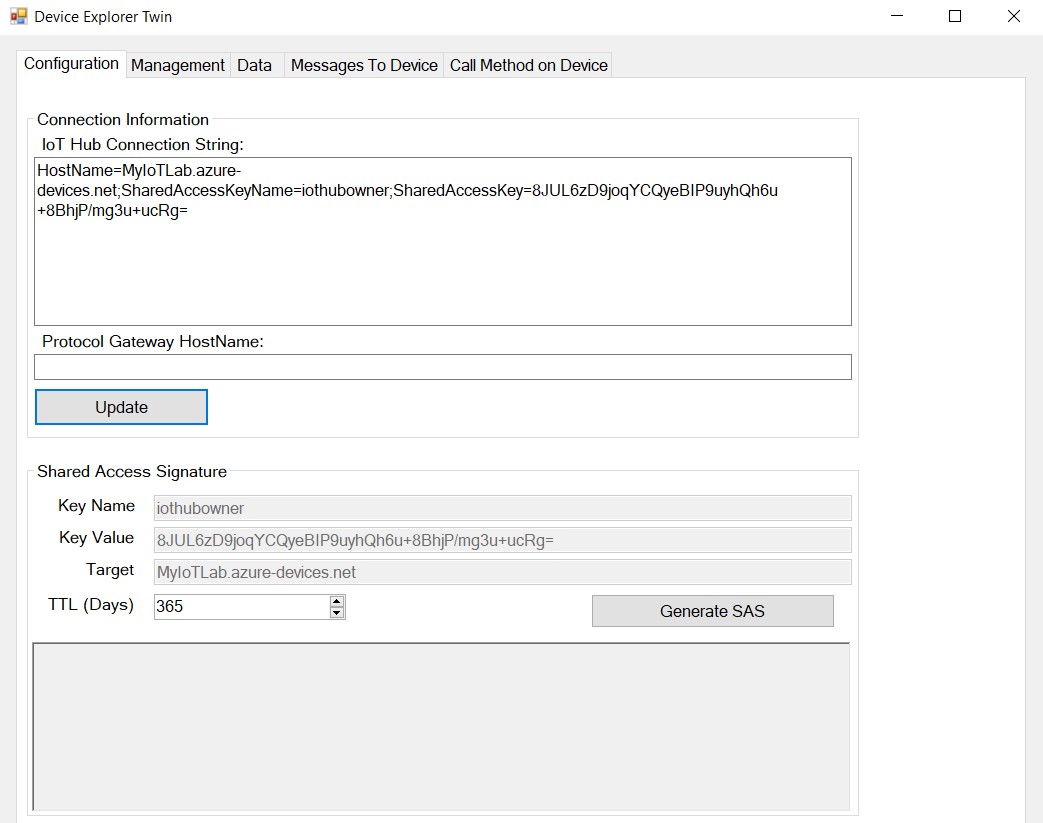
- Open the Device Explorer tool. On the connection tab, paste the Shared Access Policies connection string (with HostName, SharedAccessKeyName, and SharedAccessKey) and click Update to connect the Device Explorer to your IoT hub.
- Click on the Management tab. You can see the device you already created on Azure portal. You can also right click on the device to retrieve the connection string.
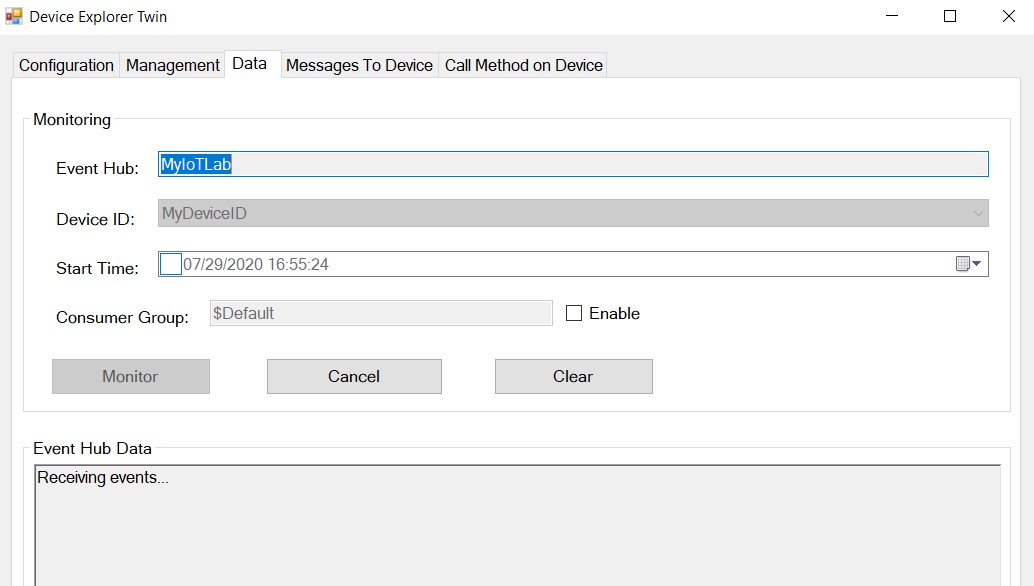
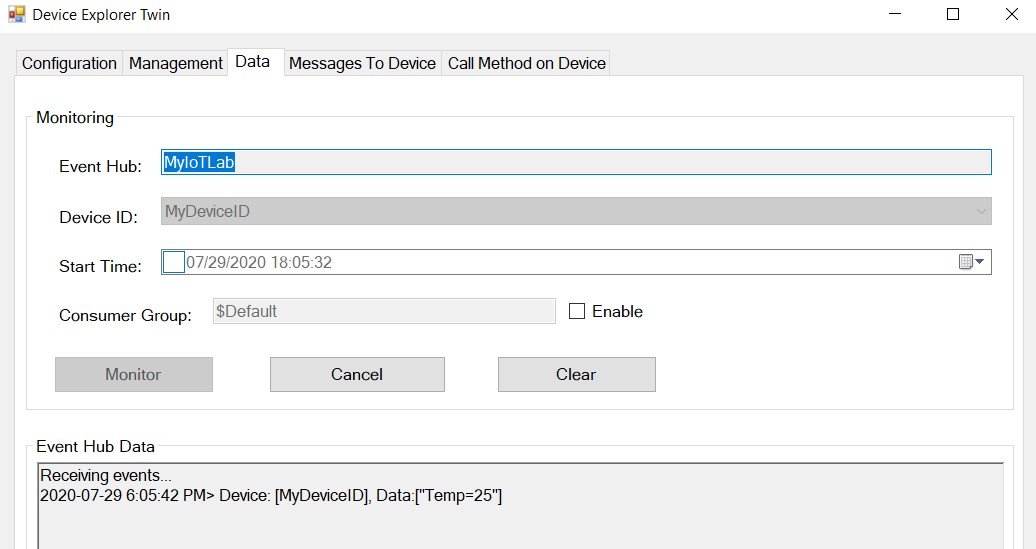
- Go to Data tab and select your event hub and device ID and click on Monitor to start receiving data on Azure IoT hub. Here is where you will see the data received from your IoT device.
C. Node-RED flow
- Download and install the recommended version of the JavaScript runtime Node.js[5]. Skip this step if you have Node.js installed on your computer.
- Open Command Prompt and type in the following code to install Node-RED as a global module with all its dependencies. Skip this step if you have Node-RED installed on your computer.
npm install -g –unsafe-perm node-red
- In the Command Prompt type in the following command to start Node-RED. If you want to stop Node-RED, you can do so by pressing Ctrl-C or closing the terminal window. Node-red
- You can then access the Node-RED editor by pointing your browser at http://localhost:1880. Make sure Port 1880 is open.
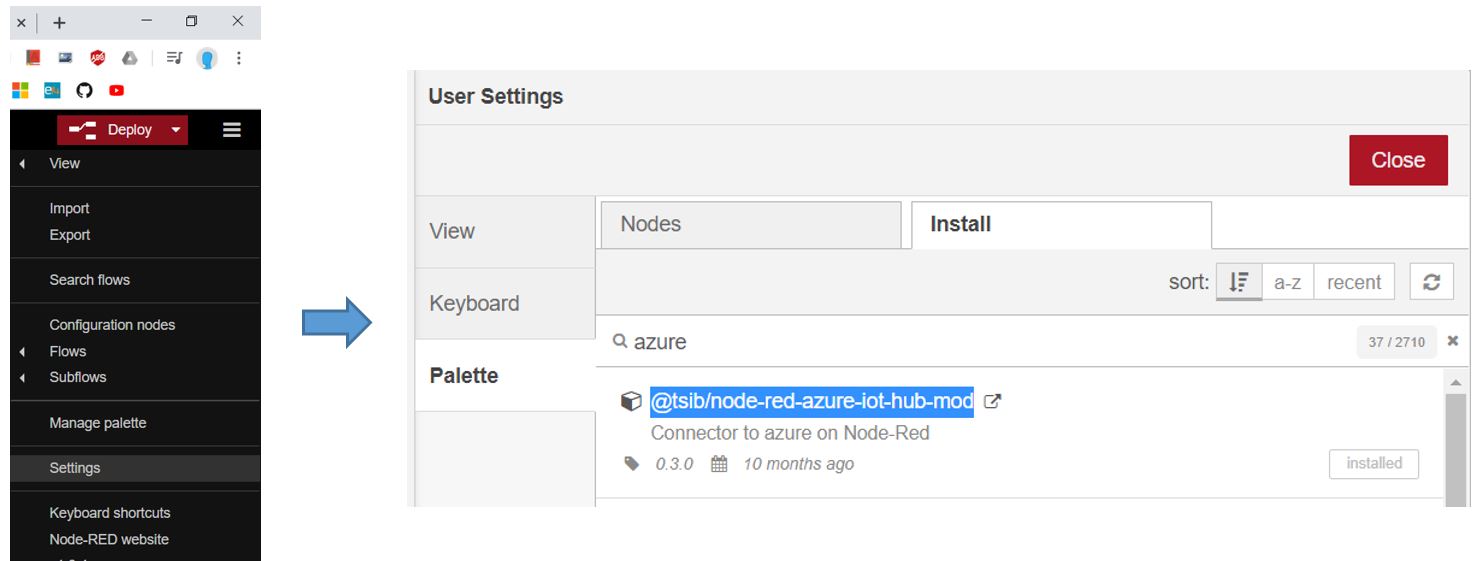
- Go to Settings -> Palette -> Install and search for “node-red-azure-iot-hub-mod” to install Microsoft Azure IoT hub nodes.
- Same as previous lab, your IoT device will publish to an MQTT server. You will need a “function” node to prepare the message (i.e., add the device ID and primary key to the message payload) for the Azure IoT Hub.
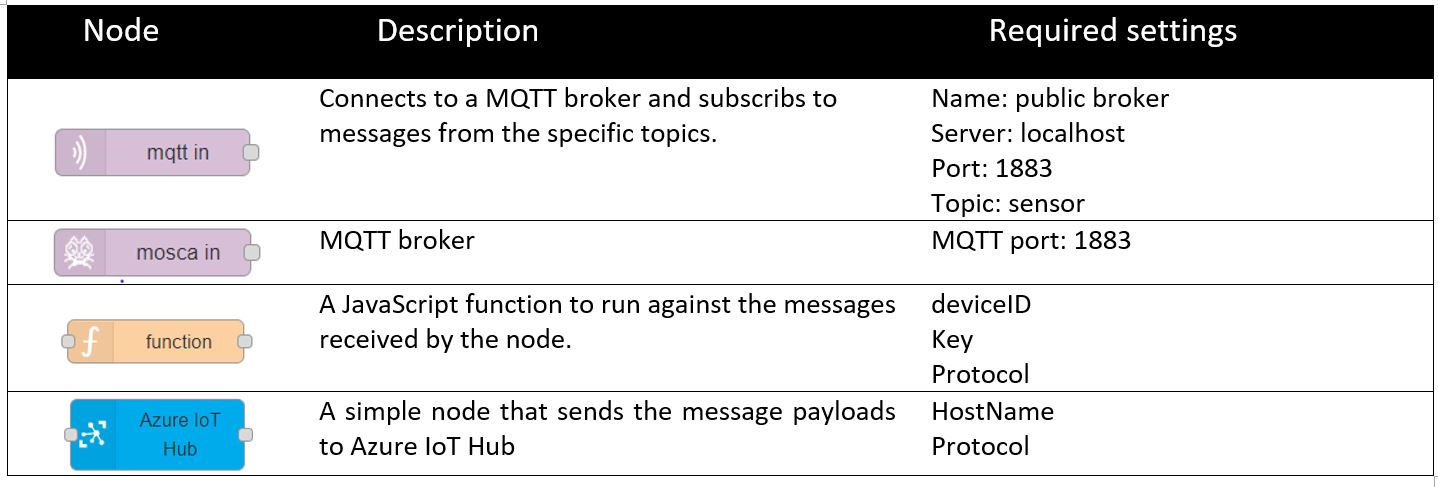
- Drag and drop “mqqt in”, “mosca in”, “debug”, “function” and “Azure IoT Hub” nodes into the canvas and connect them as shown below. You will need the information in the Primary Connection String to configure these nodes in the next step.

- Similar to the previous lab, configure the mqqt nodes so that your IoT device can publish to the broker. Use the following JSON object and the “DeviceID” and the “SharedAccessKey” to set up the “function” node to prepare the message for the “Azure IoT Hub”. Use the “HostName” in the Primary Connection Stringto set up the “Azure IoT Hub” node and pick “mqtt” as the protocol. Before deploying the flow, make sure that you have access to Port 1880, 1883 and 8883 (Azure MQTT port)
msg.payload={
‘deviceId’:”xxxxxxxxxx”,
‘key’:”xxxxxxxxxxxx”,
‘protocol’:”mqtt”,
‘data’:msg.payload
}
return msg;
For more information on JavaScript Object Notation (JSON), visit: https://www.w3schools.com/js/js_json_intro.asp
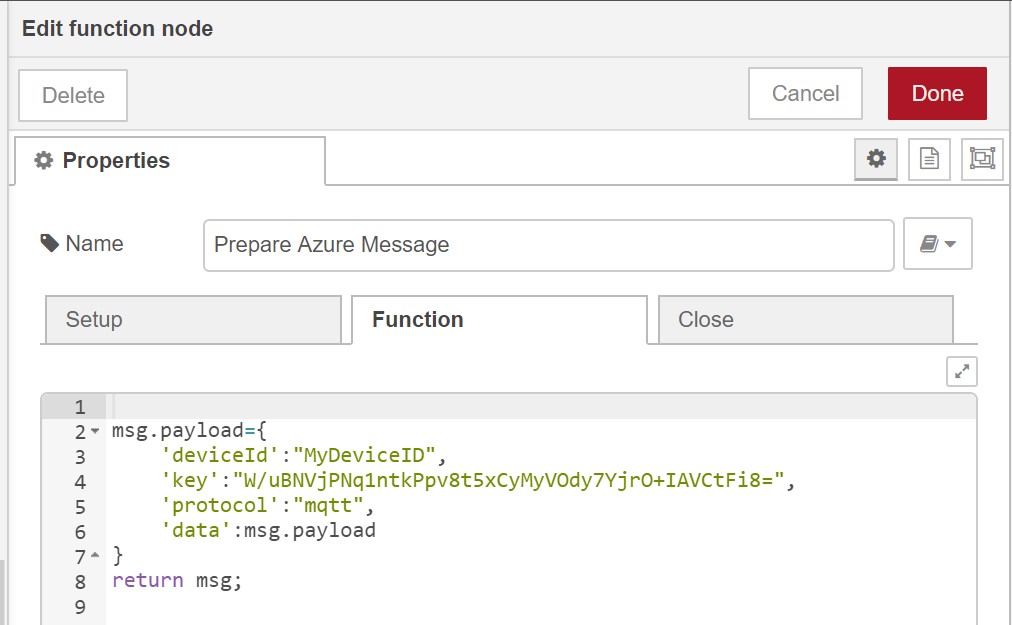
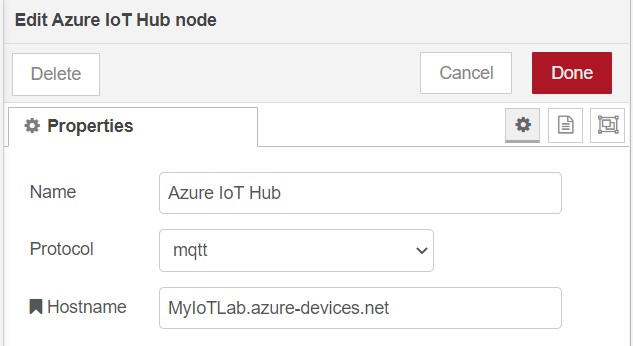
Table6.1. Nodes settings
D. Device to Cloud MQTT function
This part of the lab is similar to Lab 3.
- Replace your own public IP address and enter the following AT Commands. You should be able to see the message “Temp=25” in the data tab of Device Explorer.
| AT QMTOPEN=0,” 172.218.32.19 “,1883 // Open a network for MQTT client. Use your own IP
OK
QMTOPEN: 0,0 //Opened the MQTT client network successfully AT QMTCONN=0,“MyClientID” // Connect a client to MQTT server. Use any client ID OK
QMTCONN: 0,0,0 AT QMTPUB=0,0,0,0,“sensor” // Publish a message to topic “sensor” >Temp=25 // Press CTR Z to send OK
QMTPUB: 0,0,0
|
Figure6.11 shows how the received data will be represented in Device Explorer tool.
E. Cloud to Device MQTT function
- Make appropriate changes to your Node-RED flow and enter the AT command (same as Lab 3) so that the IoT device can subscribe to the MQTT broker with topic “sensor”.
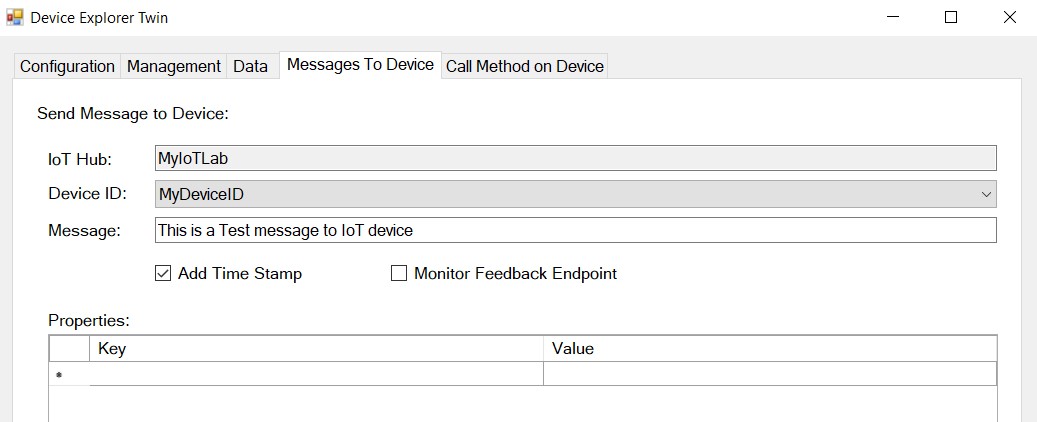
- In the Device Explorer tool go to “Message to Device” tab. Type and send a message to your device. You should see this message in your IoT device as well as the debug pannel in the Node-RED environment. You may need to use the “function” node to format the received message.
By conducting this lab you were able to communicate with Microsoft Azure IoT Hub. Now, if you are interested, you can make yourself familiar with other features of Microsoft Azure to create a dashboard and visualize the data, store the data on the cloud or send email alerts.
