Chapter 5: MQTT Function
5.1 Introduction
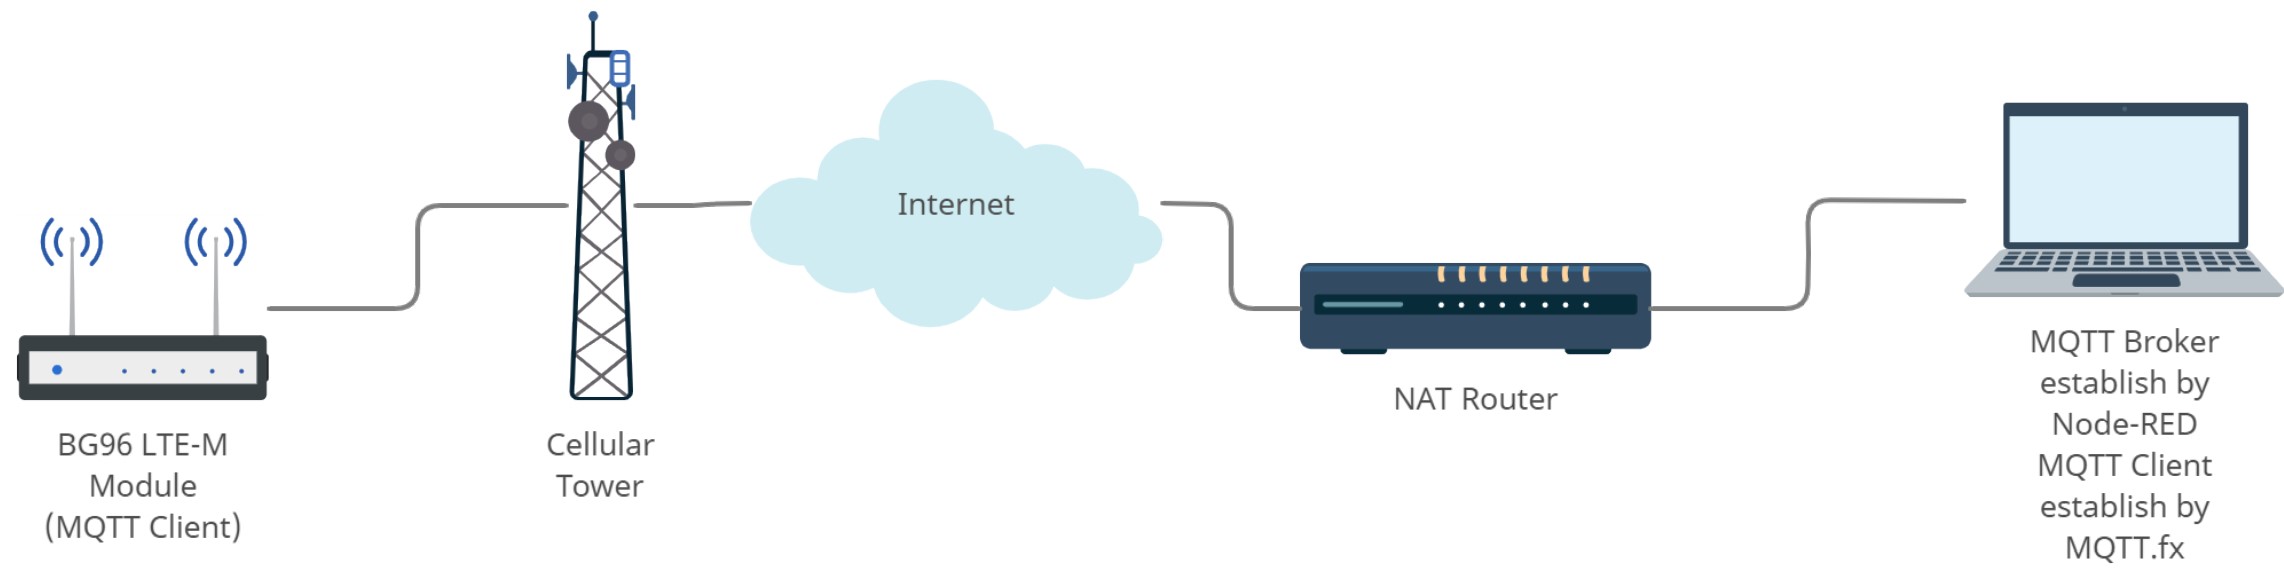
In this chapter, we would like a BG96 board to act as a MQTT client and publish its data with a specific topic to a broker. To build a broker, we use an architecture similar to the one used in Chapter 3. The broker is built on a computer by using Node-RED[1] programming tool to wire together hardware devices, and online services to establish a communication with the BG96 module through MQTT protocol.
The data published on the broker will be sent to all the MQTT clients that have subscribed to the topic. To have another MQTT client, we use a MQTT client software on the same computer. The configuration used in this lab is shown in Figure 5.1. The MQTT client on the computer also can publish a message to MQTT broker that can be forwarded to BG96 board.
5.2 MQTT Broker
In Project A of this lab, we try to build the MQTT-broker and a MQTT client on a computer. In project B, we set up the BG96 board to become a MQTT client and publish the data. Since the computer is behind a NAT router and uses internal IP address, the router needs to have been setup properly and we should do port forwarding for Port 1880 and 1883.
A. Install and run Node-RED
- Download and install the recommended version of the JavaScript runtime Node.js[2]
- Open Command Prompt and type in the following code to install Node-RED as a global module including its all dependencies:
npm install -g –unsafe-perm node-red
- Once installed, in the Command Prompt type in Node-red to start Node-RED. If you want to stop Node-RED you can press Ctrl-C or close the terminal window.
- Access the Node-RED editor by entering http://localhost:1880 at your browser’s address bar. To get familiar with Node-Red, you can watch Intro to Node-RED: Part 1 fundamentals[3].
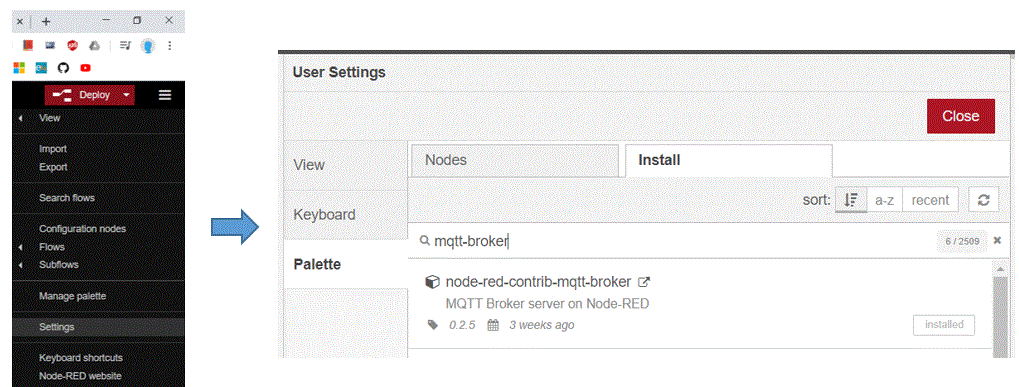
- Go to Settings -> Palette->Install and search for “node-red-contrib-mqtt-broker” to install Mosca MQTT broker (server).
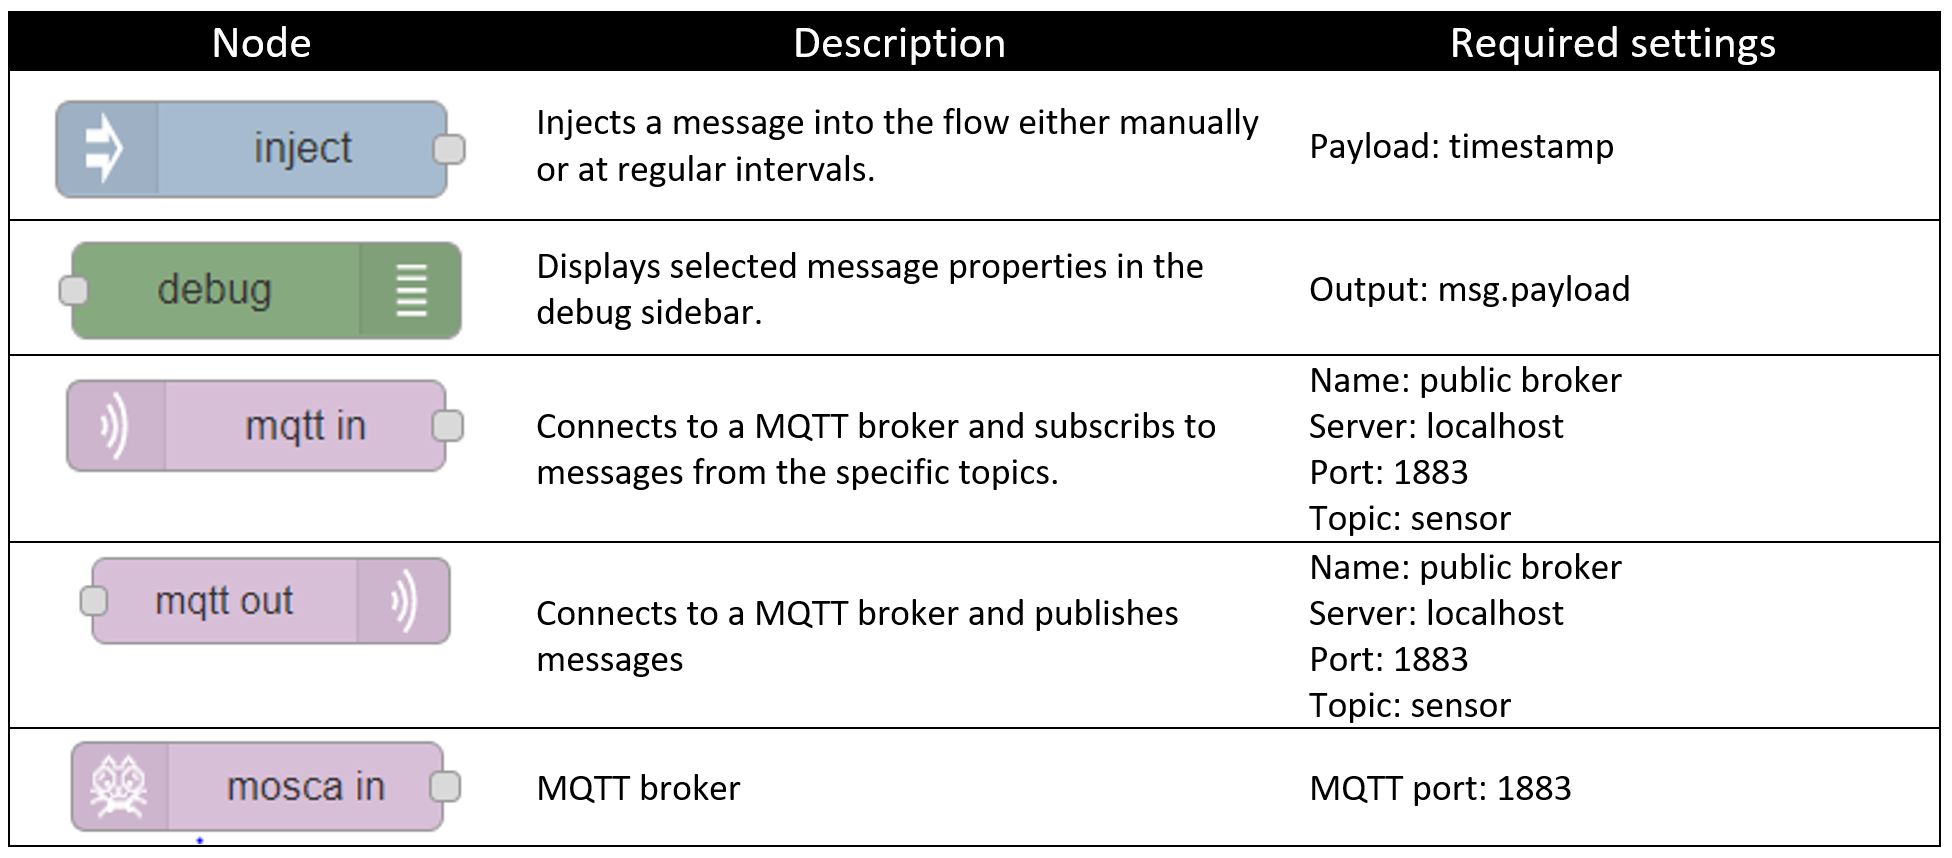
- From the left side pallet drag and drop the following nodes to form the MQTT communication and set the settings according to Table5.1.
Table5.1. Node description and settings:1
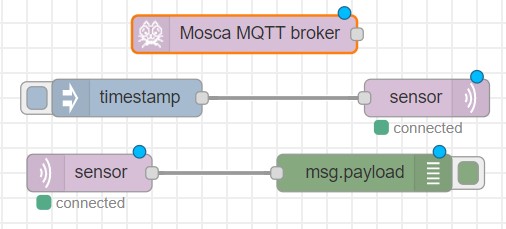
- Connect the nodes as shown below. Before deploying the flow, using the same port forwarding process as you did in the previous lab, make sure that you have access to Port 1880 and 1883. To make sure that everything is set up correctly, you should download and install MQTT.fx[4] to use as a MQTT client.
B. MQTT function of Quectel BG96 module through AT commands
In Lab 2, you learned how to obtain the public IP address of your computer (e.g., 172.218.32.19). Also, as it was shown in Table5.1, the MQTT port was set as 1883 (TCP/IP port 1883 is reserved with Internet Assigned Numbers Authority (IANA) for MQTT) and the topic was chosen as “sensor”, i.e., any device that subscribes to this topic will receive the messages published with this topic. If you refer to BG96 MQTT Application Note[5], you can find the AT Commands to publish/subscribe to a specific topic.
- Replace your own public IP address and enter the following AT Commands. You should be able to see the message in the debug slide bar of Node-RED (press the button to access).
| AT+QMTOPEN=0,” 172.218.32.19 “,1883 // Open a network for MQTT client. Use your own IP
OK
QMTOPEN: 0,0 //Opened the MQTT client network successfully AT+QMTCONN=0,“MyClientID” // Connect a client to MQTT server. Use any client ID OK
QMTCONN: 0,0,0 AT+QMTPUB=0,0,0,0,“sensor” // Publish a message to topic “sensor” >Hello MQTT. This is my message to publish. // Press CTR Z to send OK
QMTPUB: 0,0,0 |
- Enter the following AT Command to subscribe the BG96 module to the “sensor” topic. Then, in Node-RED, inject timestamp or any string. You should see the received message on the BG96 module. You may use AT QMTDISC=0 AT Command to disconnect the client from the MQTT server.
| AT+QMTSUB=0,1,“sensor”,2
OK
QMTSUB: 0,1,0,1 QMTRECV: 0,2,”sensor”,”1583885887680″ // This shows the received timestamp
AT+QMTDISC=0
QMTDISC: 0,0
|
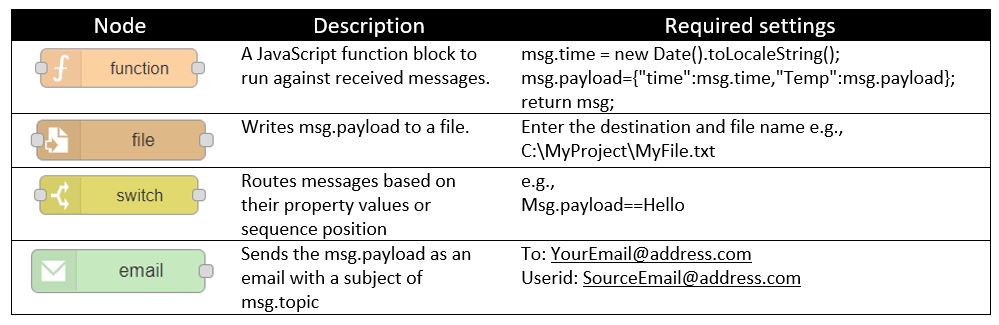
- From the left side palette and under the “storage” nodes, drag and drop the “file” node. This is where you can store the data received from module. You can add a “function” node to format the message and add a timestamp before storing the message in your file. Also, install the “Email” node, then drag and drop it. You will use this node to send a notification if a specific message is received (e.g., if the temperature is above a certain number or if the string is “Hello”). Table5.2 summarizes the description and required settings for these three nodes. If you are using Gmail, go to your “account preferences” make sure that “Allow less secure apps” is enabled.
Table5.2. Node description and settings:1
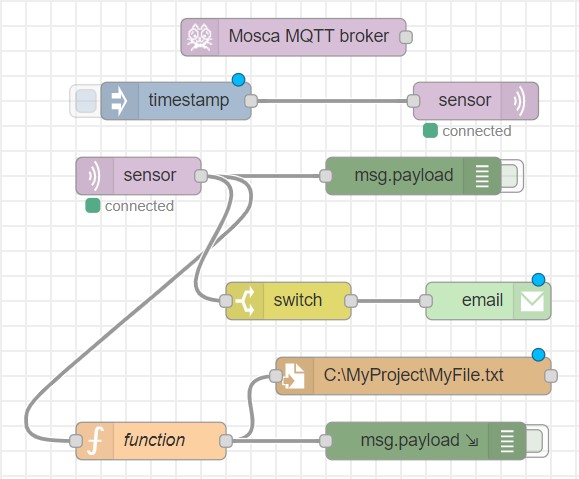
The flow looks like the one depicted in Figure5.4.
- Go to Hamburger Menu -> Export to generate the “*.json” file for future use.
