Chapter 10. Cloud Technologies
10.3 Site to Site VPN between FortiGate on Premise and FortiGate in the Azure
Learning Objectives
- Configure a VPN Wizard in Azure
- Configure site-to-site VPN between FortiGate on premise and Azure
- Identify FortiGate subnets in Azure
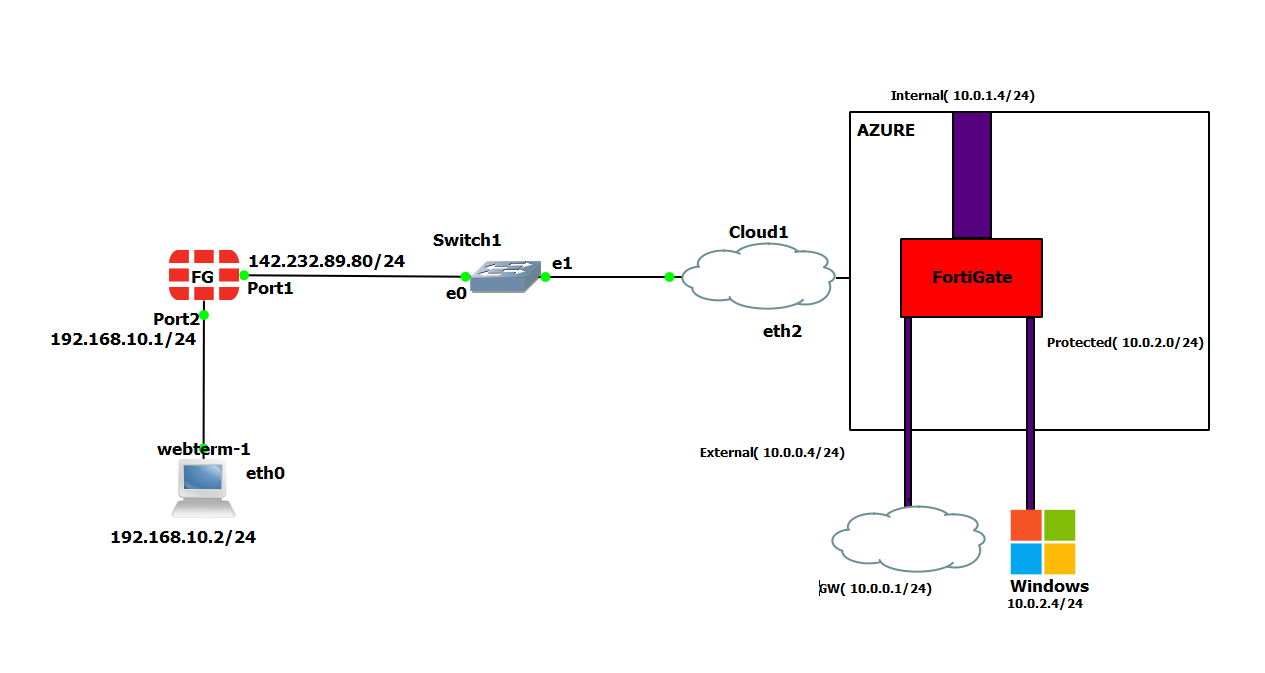
Scenario: In this lab, we are going to create a site-to-site VPN from FortiGate on premise to FortiGate in the Azure. Knowing the configuration from section 10.2 is necessary for this lab. Port1 is set as a DHCP, so they will receive an IP address from Cloud.
| Device | Interface | IP address |
|---|---|---|
| FortiGate | Port 1 | DHCP Client |
| Port 2 | 192.168.10.1/24 | |
| WebTerm | Eth0 | 192.168.10.2/24 |
- On Premise FortiGate Configuration. Follow these steps:
- Configure the interfaces of the firewall. Port2 by default is an internal interface and name as a “LAN” and Port1 is an external interface and name as a “WAN”.
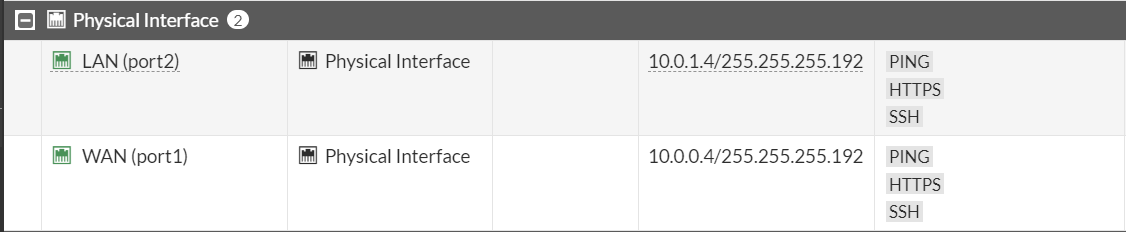
Figure 10.50: Firewall interfaces - Create a site-to-site VPN from IPsec Wizard as Figures 10.51 to 10.53.
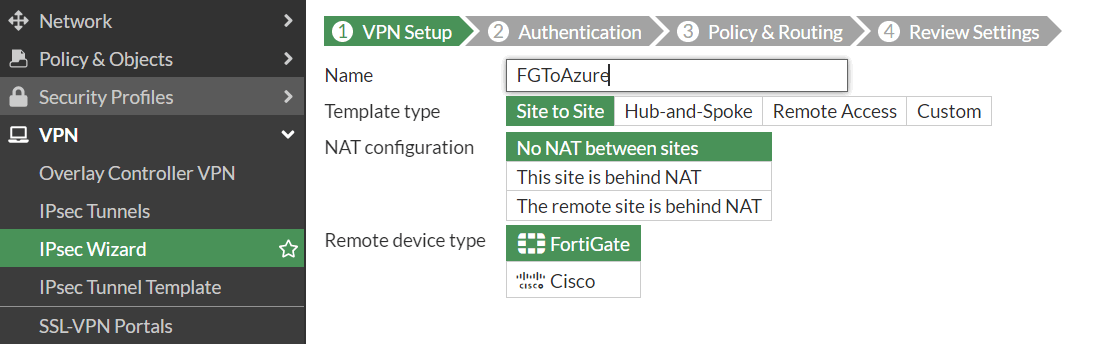
Figure 10.51: Select VPN name 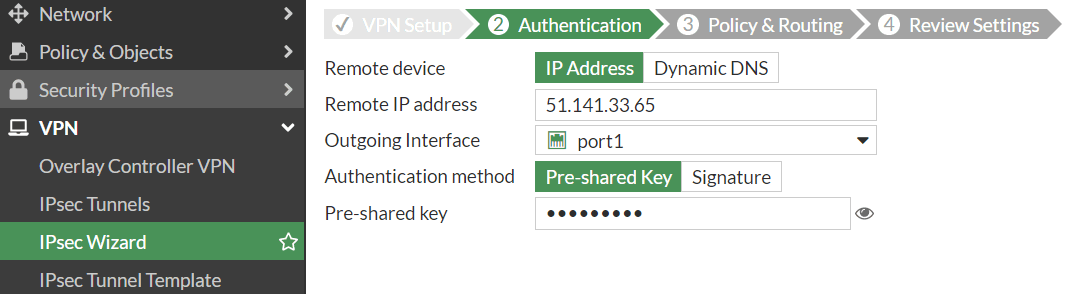
Figure 10.52: Set remote IP address 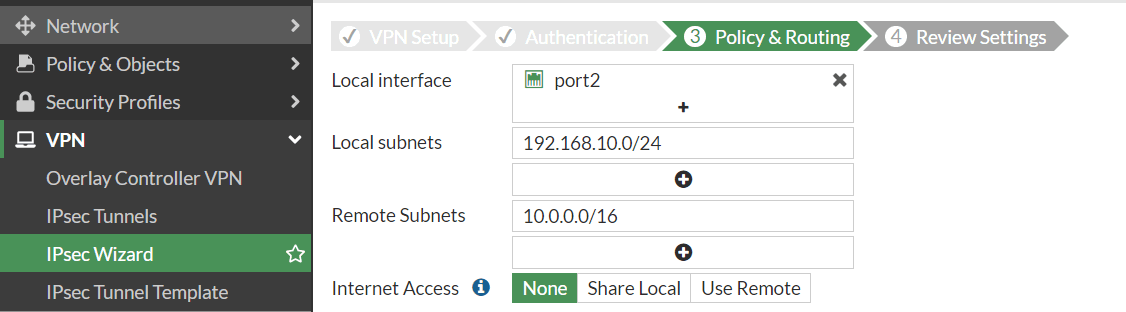
Figure 10.53: Set Policy & Routing - Create a static route to the default gateway.
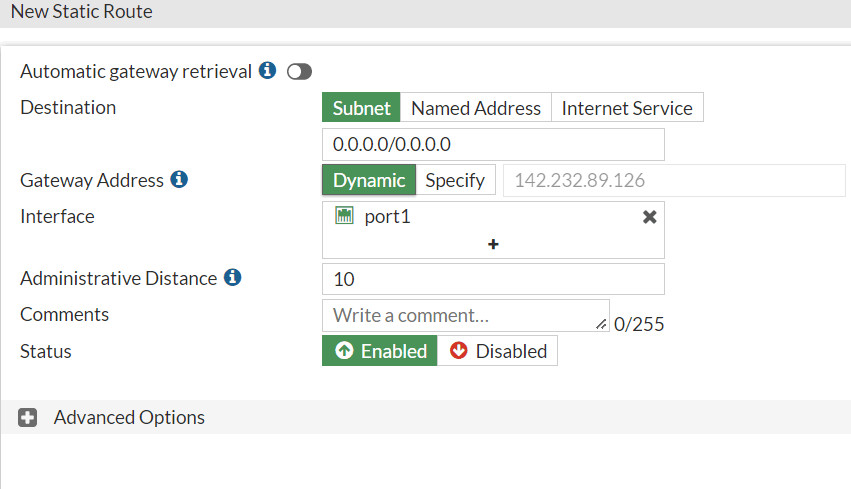
Figure 10.54: Set a default gateway
- Configure the interfaces of the firewall. Port2 by default is an internal interface and name as a “LAN” and Port1 is an external interface and name as a “WAN”.
- Azure Configuration. Follow these steps:
- Create a FortiGate firewall in Azure and configure the interfaces. You need to do all steps found in section 10.1.
- Create a VPN from IPsec Wizard as Figures 10.55 to 10.57.
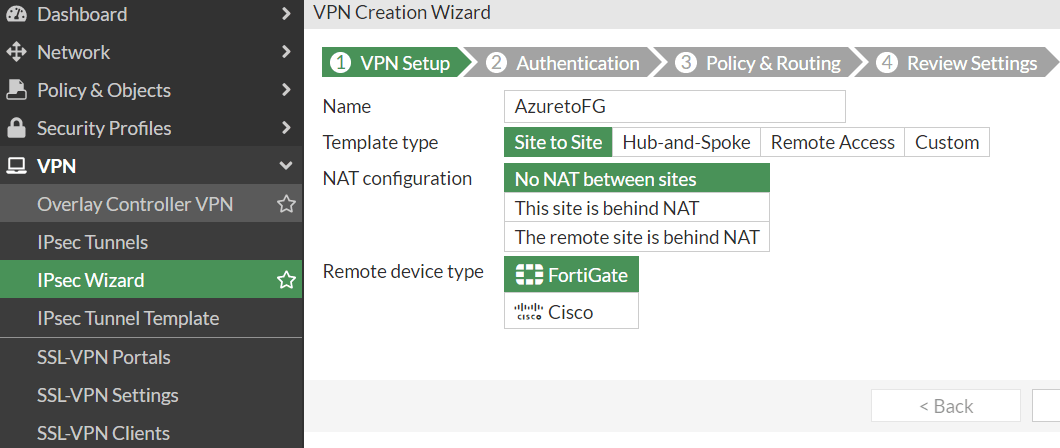
Figure 10.55: Select VPN name 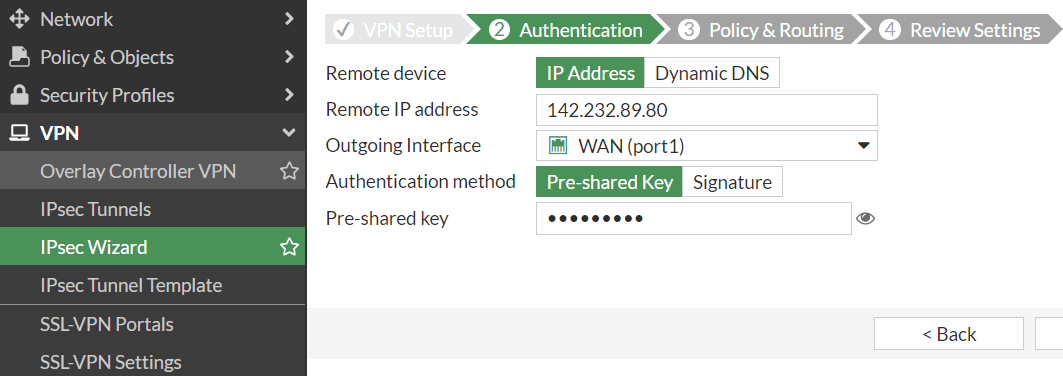
Figure 10.56: Set a remote IP address 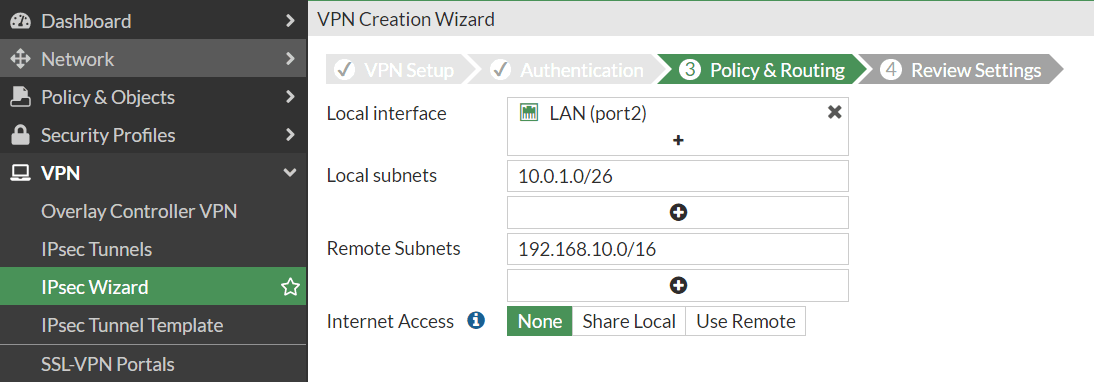
Figure 10.57: Set Policy & Routing - Add a Linux or Windows Virtual Machine to Protected subnet. You don’t need to enable public IP address. Your private IP address should be in the range of 10.0.2.0/24.
- Go to VPN > IPsec Tunnels and check status of the tunnel.

Figure 10.58: Check status of tunnel - You should be able to ping from WebTerm to the Virtual Machine.
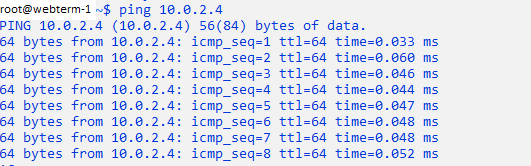
Figure 10.59: Ping from WebTerm to Windows VM
