Chapter 7. Security
7.1 DDoS Prevention
Learning Objectives
- Configure a DDoS prevention profile
| Device | IP address | Access |
|---|---|---|
| Kali(2019/2021) | DHCP Client | – |
| FortiGate | Port 1: DHCP Client
Port 2: 192.168.0.1/24, DHCP Server (192.168.0.10-192.168.0.20) |
ICMP-HTTP-HTTPS |
| Web Term1(FMC) | 192.168.0.2/24 | – |
| Web Term2 | DHCP Client | – |
- FortiGate CLI Configuration for port2.
FGVM01TM19008000 # config system interface
FGVM01TM19008000 (interface) # edit port2
FGVM01TM19008000 (port2) # set ip 192.168.0.1/24
FGVM01TM19008000 (port2) # set allowaccess http https ping
FGVM01TM19008000 (port2) # end - Go to Kali and Download the pentmenu repository and run DOS > UDP FLOOD > Enter port1 IP address > Port 443.
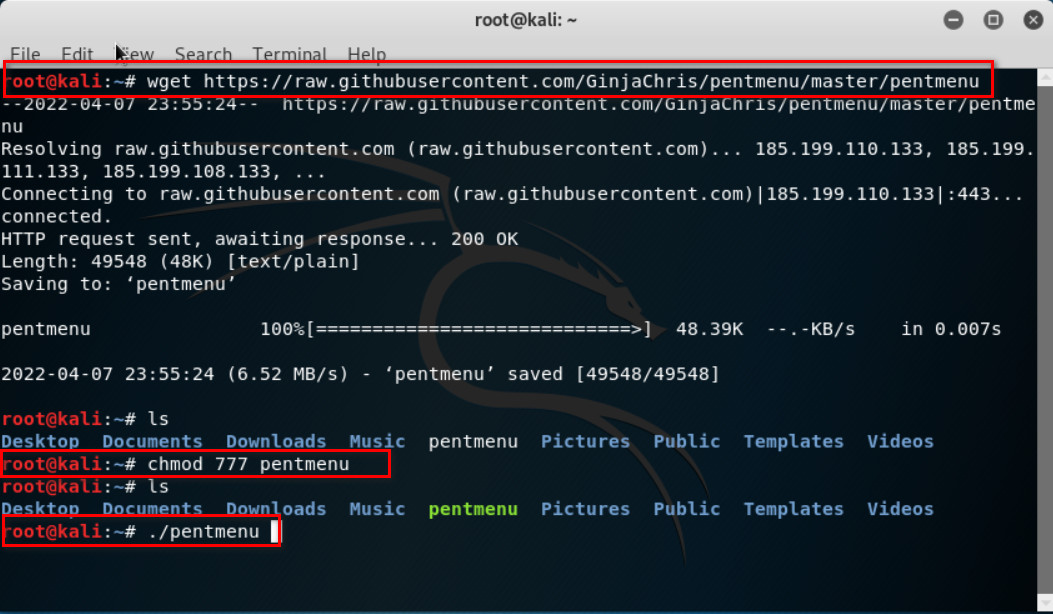
Figure 7.2: Download and execute pentmenu script 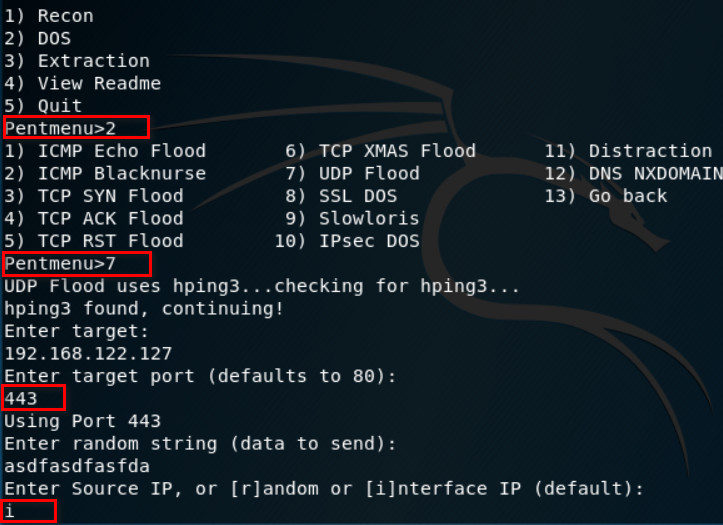
Figure 7.3: Running UDP Flood - Go to Policy & Object > IPV4 DOS Policy:
- Name: DOS
- Incoming Interface: Port1
- Source, Destination, Service: all
- Enable logging
- L3 Anomalies: Status and Logging: Enable, Action Block
- L4 Anomalies: Status and Logging: Enable, Action Block
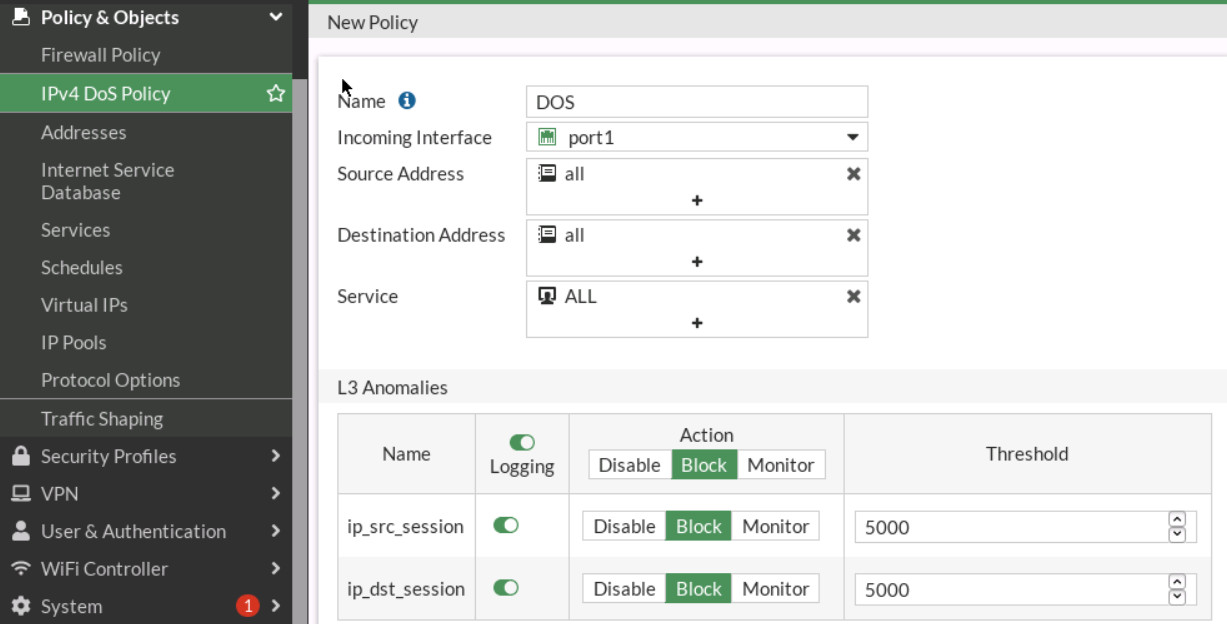
Figure 7.4: IPv4 DoS Policy 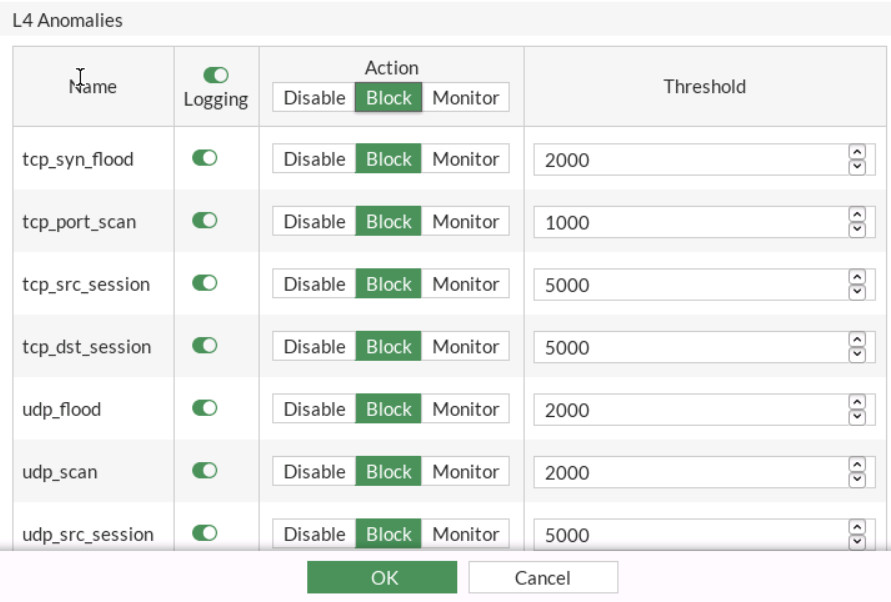
Figure 7.5: IPv4 DOS Policy Settings - Now, start the attack again and go to Log & Report > Anomaly.
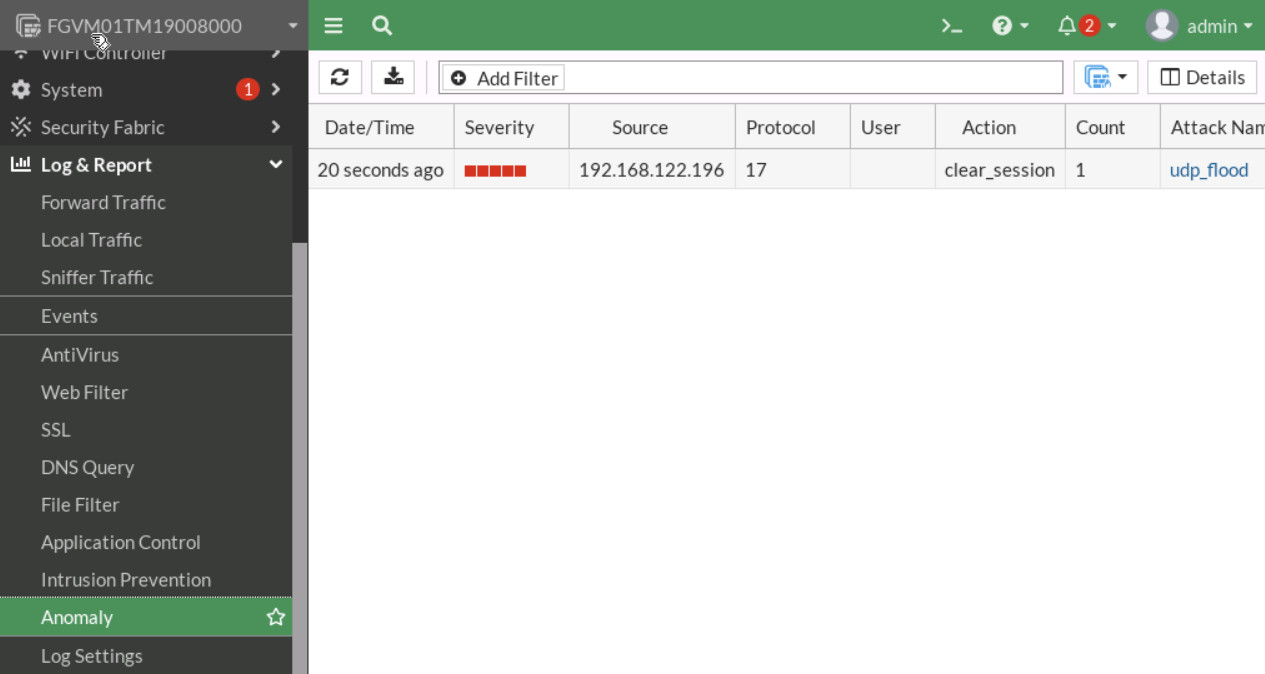
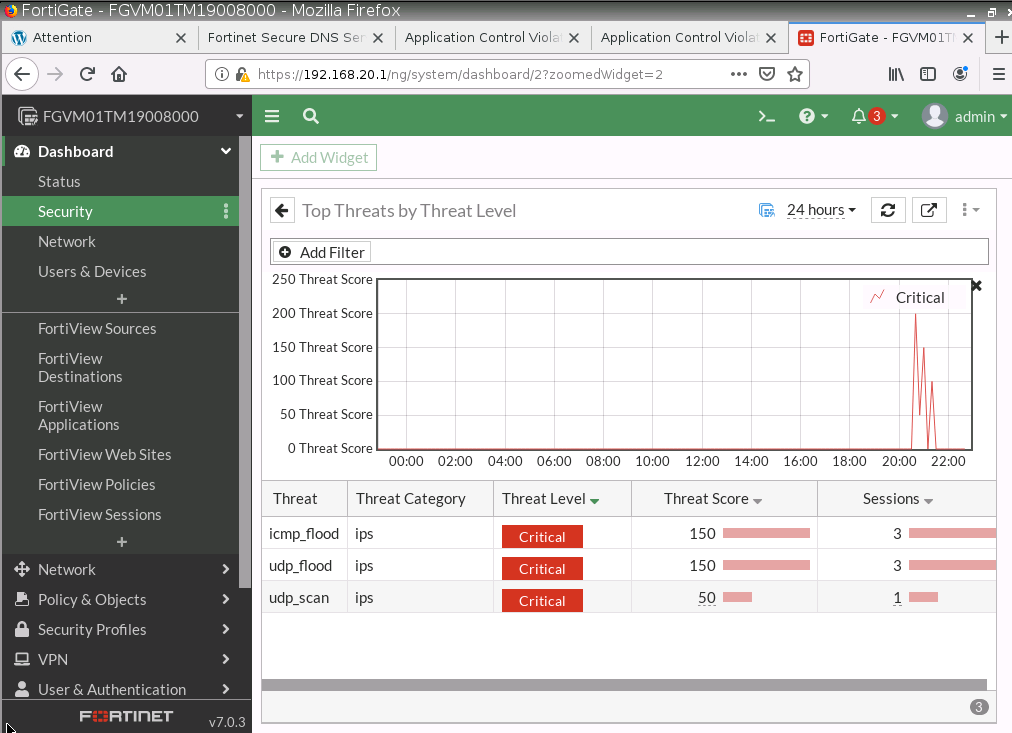
Figure 7.6: View anomaly report Go to Dashboard > Security > Top Threats and verify your result.
- Go to FortiGate CLI and configure DOS Policy for ICMP_flood as follows:
FGVM01TM19008000 # config firewall DoS-policy
FGVM01TM19008000 (DoS-policy) # edit 2
FGVM01TM19008000 (2) # set interface “port1”
FGVM01TM19008000 (2) # set srcaddr “all”
FGVM01TM19008000 (2) # set dstaddr “all”
FGVM01TM19008000 (2) # set service “ALL”
FGVM01TM19008000 (2) # config anomaly
FGVM01TM19008000 (anomaly) # edit “icmp_flood”
FGVM01TM19008000 (icmp_flood) # set status enable
FGVM01TM19008000 (icmp_flood) # set log enable
FGVM01TM19008000 (icmp_flood) # set quarantine attacker
FGVM01TM19008000 (icmp_flood) # set quarantine-expiry 2m
FGVM01TM19008000 (icmp_flood) # set quarantine-log disable
FGVM01TM19008000 (icmp_flood) # set threshold 10
FGVM01TM19008000 (icmp_flood) # next
FGVM01TM19008000 (anomaly) # end
FGVM01TM19008000 (2) # end - Go to Kali and run this command. root@ubuntu:~# ping -c 2000 -i 0.01 Port1-IP-Address.
- The first 10 packets were permitted, but the 11th packet exceeded the limit and triggered a block event. In this configuration, the FortiGate firewall applies a DoS protection policy on the internal interface to detect and mitigate ICMP flood attacks. The policy monitors all source and destination IP addresses across all services while using anomaly-based detection tailored specifically for ICMP traffic. Once the threshold of 10 packets is surpassed, the firewall automatically blocks further traffic, logs the incident, and quarantines the offending IP address for two minutes. This configuration strengthens the internal network’s security posture by proactively identifying and preventing potential denial-of-service attempts caused by unusual spikes in ICMP activity.
-
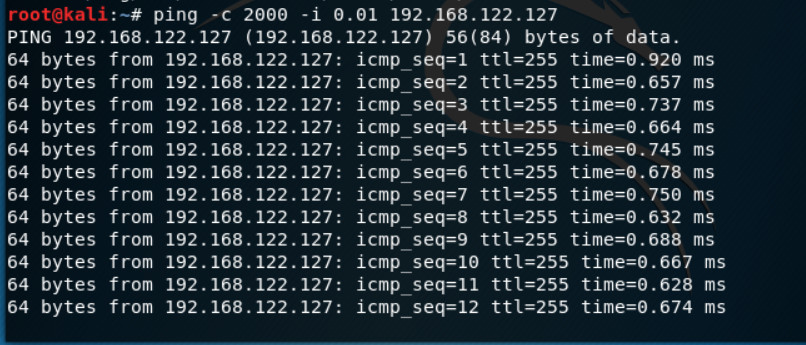
Figure 7.8: Verify DOS prevention
