Chapter 10. Cloud Technologies
10.4 IPsec VPN from FortiGate (on Premise) to AWS
Learning Objectives
- Configure a Customer Gateway in AWS
- Configure a Virtual Private Gateway
- Create an IPsec VPN between FortiGate on-Premise and AWS
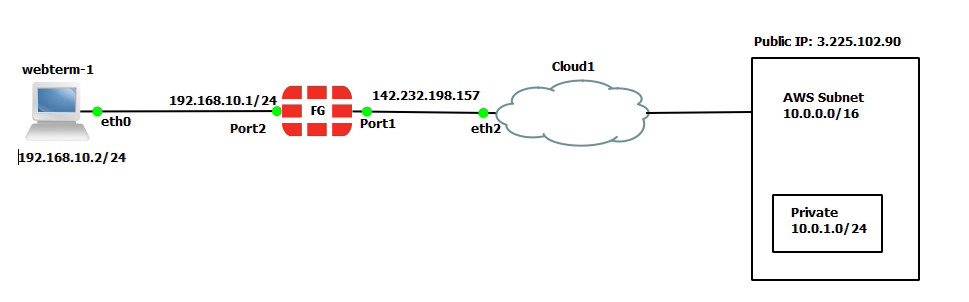
Scenario: We are going to connect on premise FortiGate to AWS Virtual Gateway. This is going to be IPsec VPN between FortiGate and AWS. First, we will configure AWS and then connect FortiGate through Port1 to AWS Virtual Gateway
| Device | Configuration | Access |
|---|---|---|
| FortiGate | Port 1: DHCP Client
Port 2: 192.168.10.1/24 |
Port1: HTTP, HTTPS, PING
|
| WebTerm1 | 192.168.10.2/24 | – |
AWS Configuration
- Create a VPC for AWS as follows:
- Name tag: AWS Subnet
- IPv4 CIDR: 10.0.0.0/16

Figure 10.61: Create a VPC 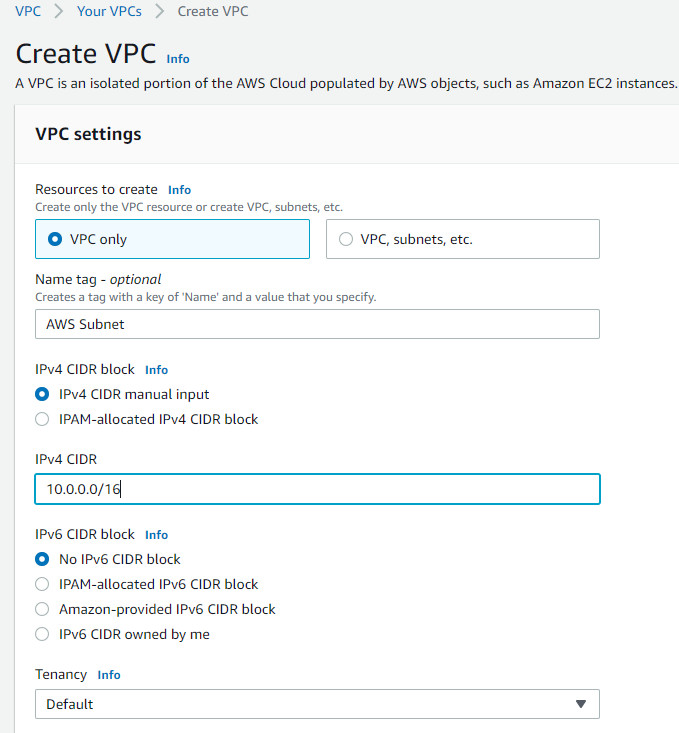
Figure 10.62: Create a VPC named “AWS Subnet” - Create a private subnet under AWS VPC as follows:
- VPC: AWS Subnet
- Subnet Name: Private
- IPv4 CIDR block: 10.0.1.0/24
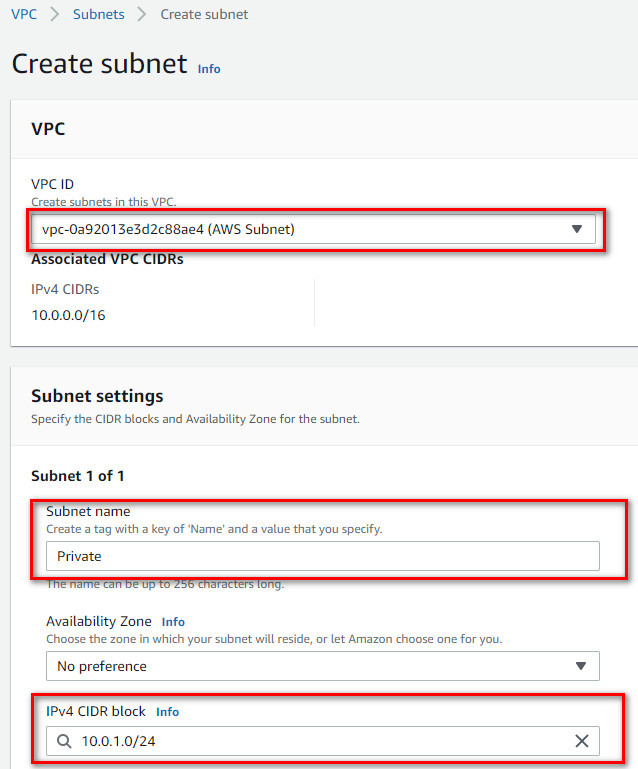
Figure 10.63: Create a subnet under AWS VPC - Create an internet gateway as follows:
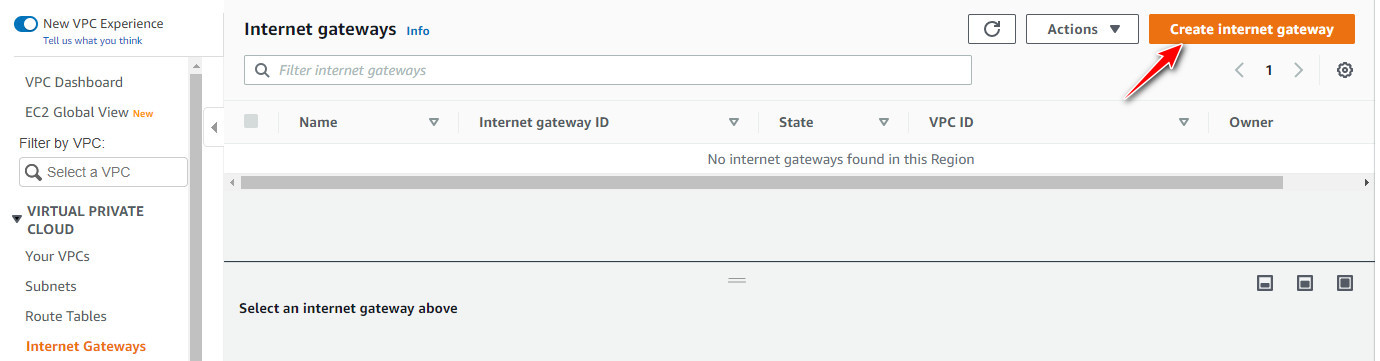
Figure 10.64: Create an internet gateway 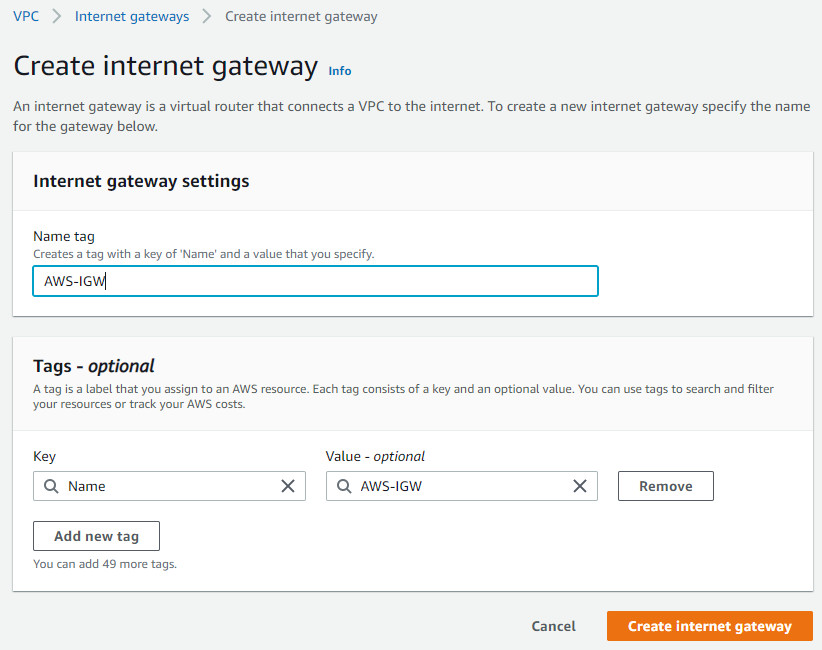
Figure 10.65: Select Name as AWS-IGW 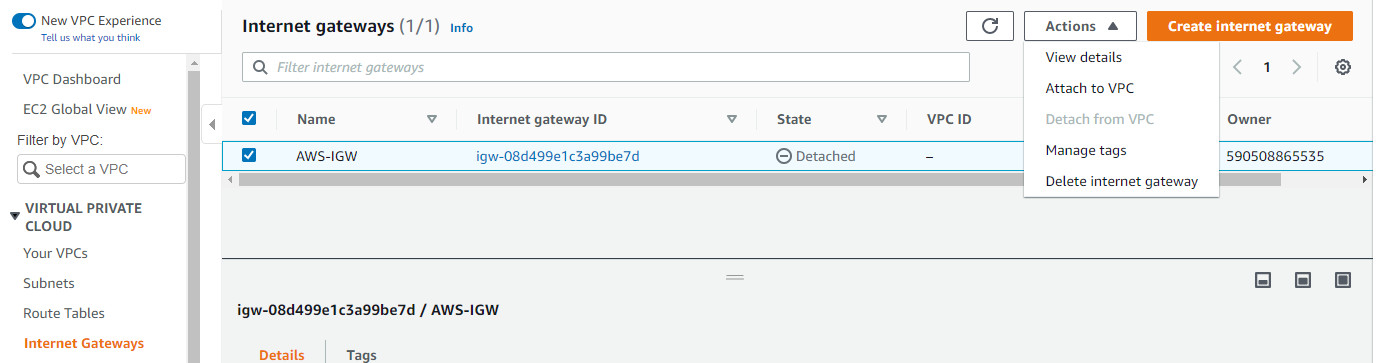
Figure 10.66: Attach the internet gateway to VPC 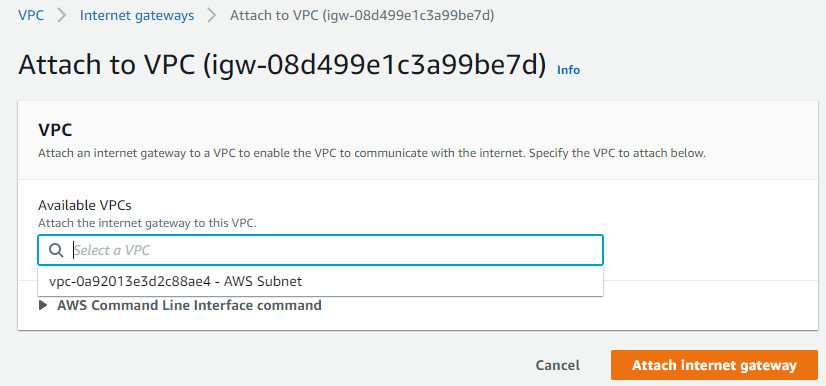
Figure 10.67: Attach the internet gateway to VPC - Create a static route to the internet gateway (AWS-IGW). Edit Routes as follows:
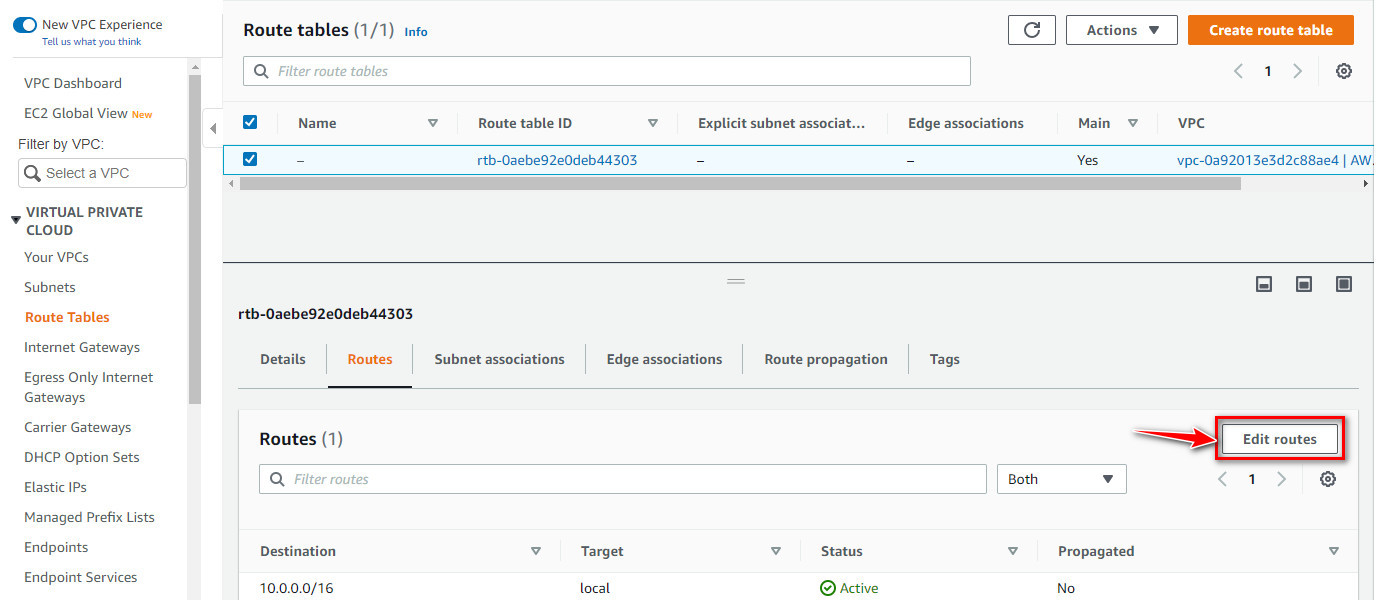
Figure 10.68: Edit routes 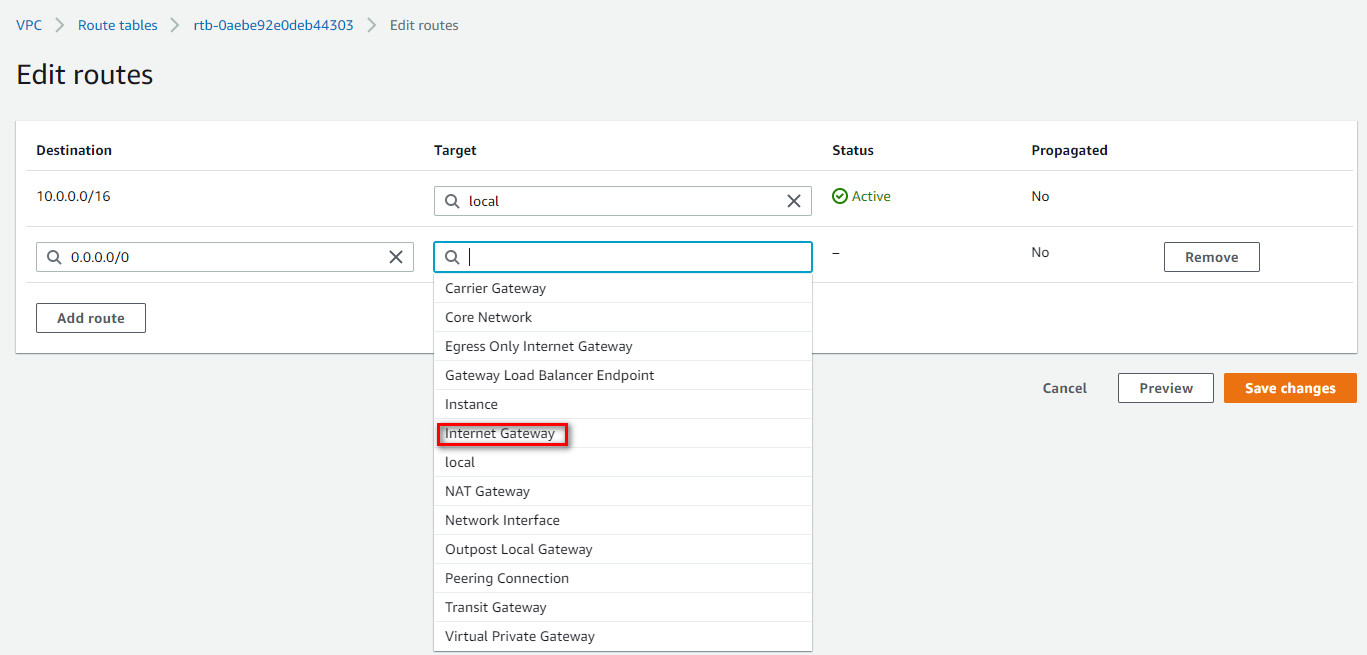
Figure 10.69: Add a new route 0.0.0.0/0 to your internet gateway 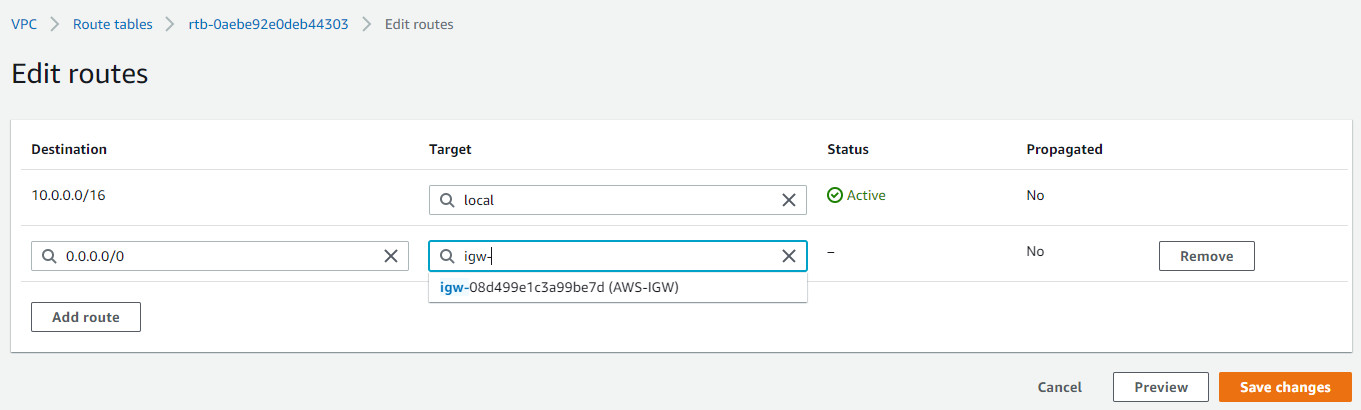
Figure 10.70: Add a new route 0.0.0.0/0 to your internet gateway 
Figure 10.71: Route tables overview - Create a customer gateway as follows:

Figure 10.72: Create a customer gateway 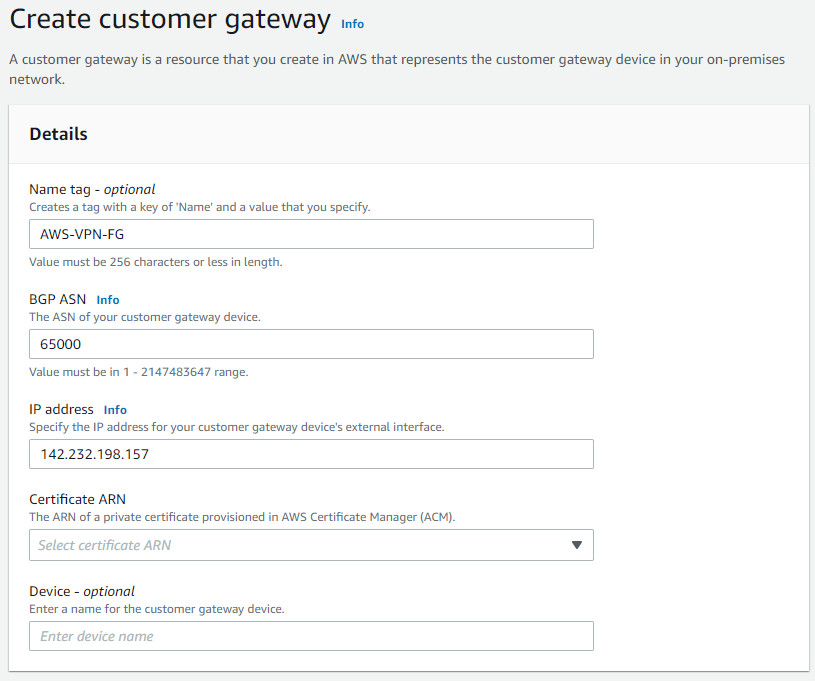
Figure 10.73: Create a customer gateway - Create a virtual private gateway as follows:

Figure 10.74: Create a virtual private gateway 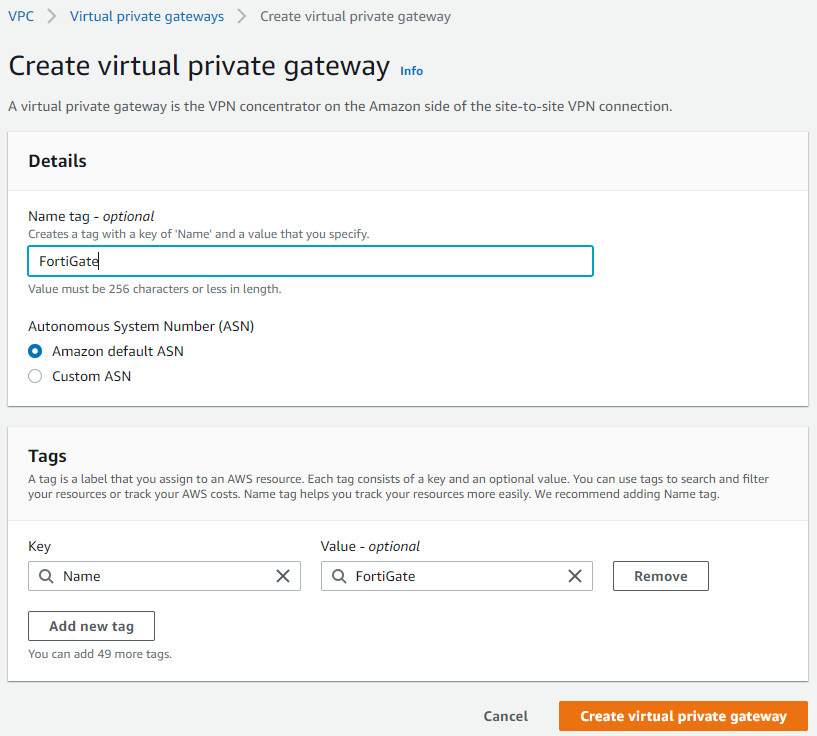
Figure 10.75: Create a virtual private gateway on FortiGate 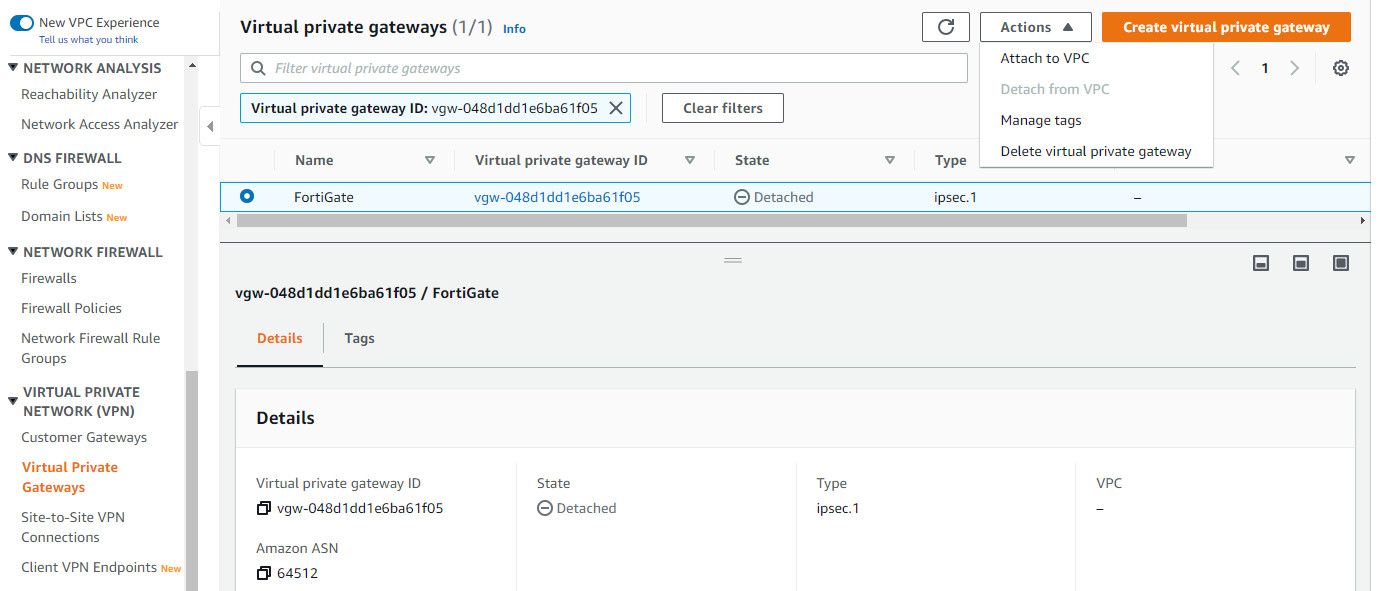
Figure 10.76: Attach virtual private gateway to VPC 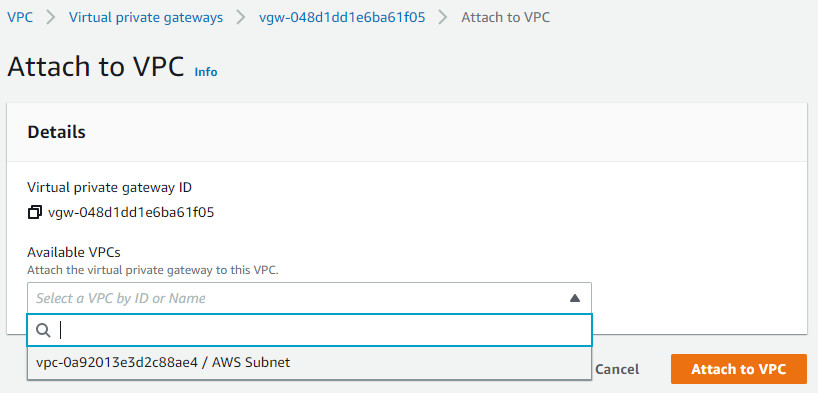
Figure 10.77: Attach virtual private gateway to VPC - Create a Site-to-Site VPN connection as follows:
- Name Tag: VPNAWS
- Target gateway type: Virtual private gateway
- Virtual Private Gateway: FortiGate
- Customer Gateway ID: AWS-VPN-FG
- Routing options: Static
- Static IP prefixes: 192.168.10.0/24
- Local IPv4 network CIDR: 192.168.10.0/24
- Remote IPV4 network CIDR: 10.0.1.0/24
- Tunnel 1 and Tunnel 2 options: leave it as default
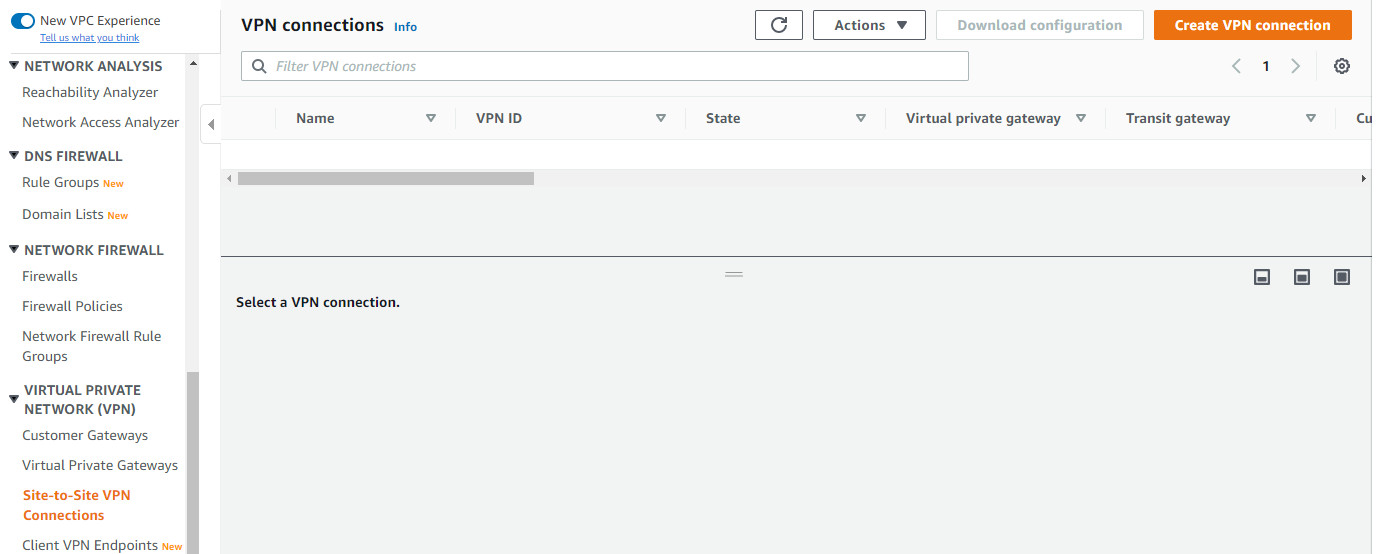
Figure 10.78: Create a site-to-site VPN connection 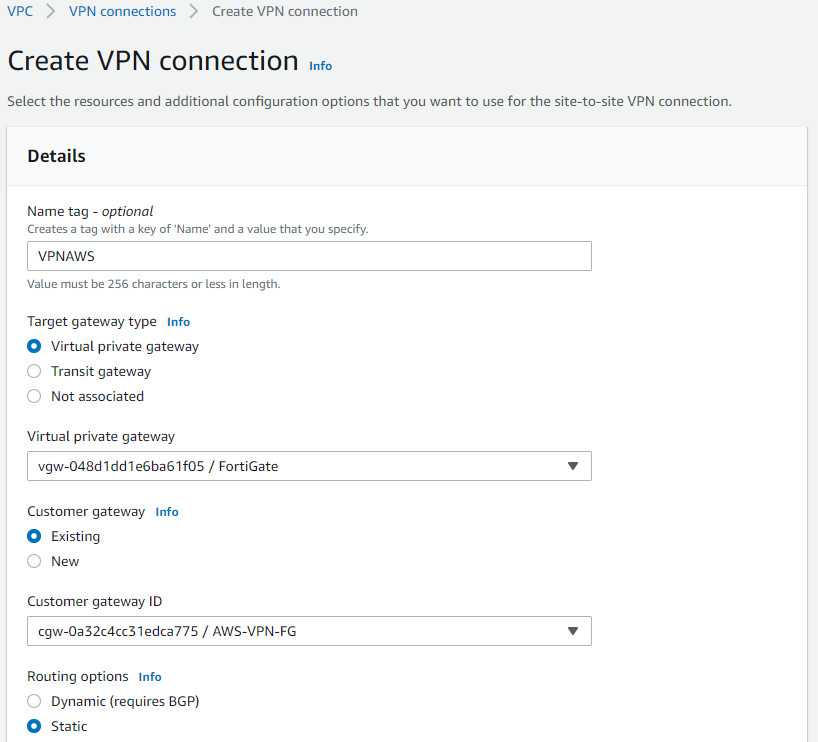
Figure 10.79: Create a site-to-site VPN connection with FortiGate 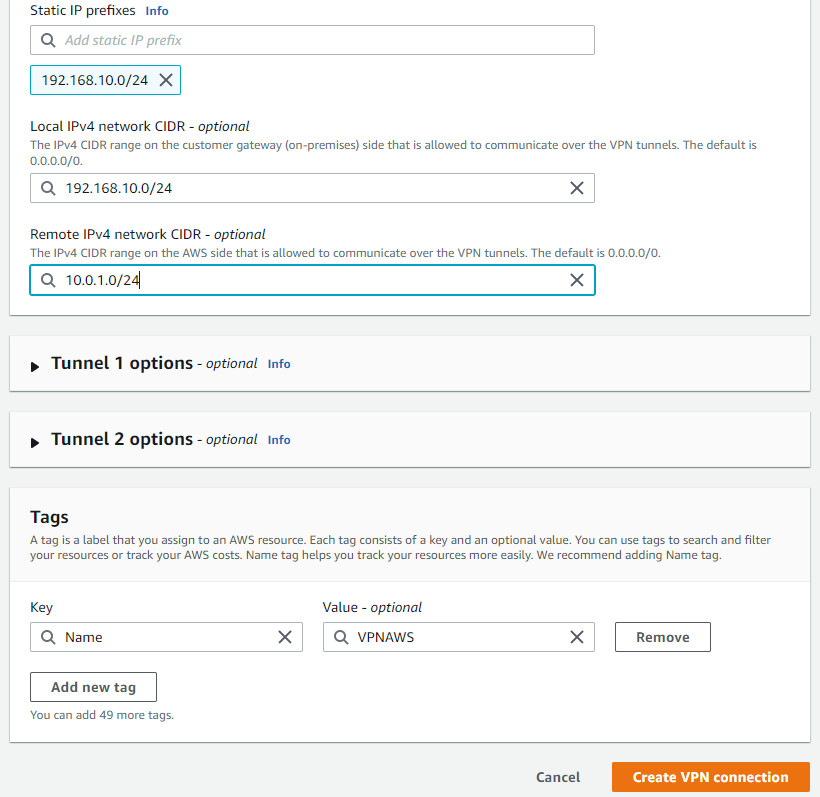
Figure 10.80: Create a site-to-site VPN connection with FortiGate 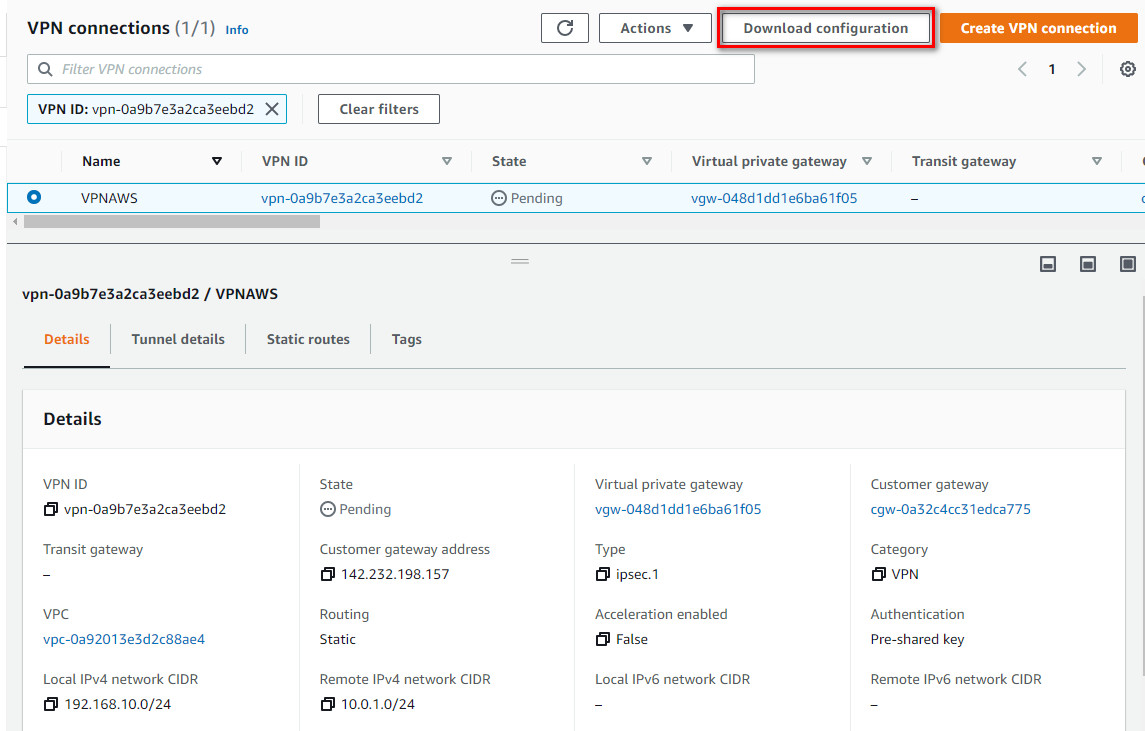
Figure 10.81: Create a site-to-site VPN connection with FortiGate 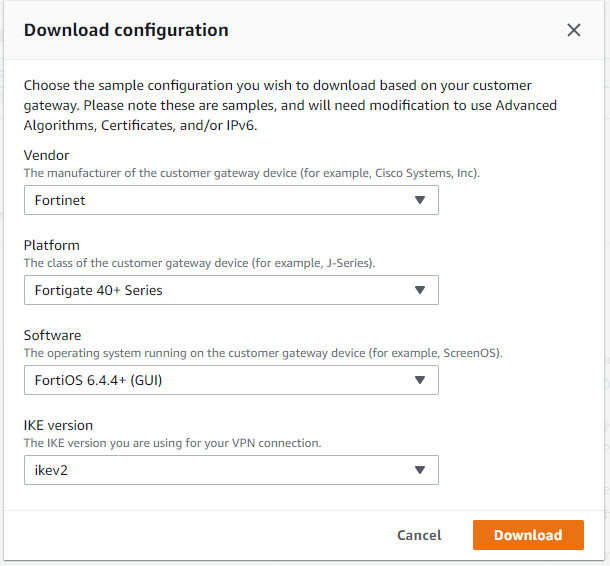
Figure 10.82: Download configuration 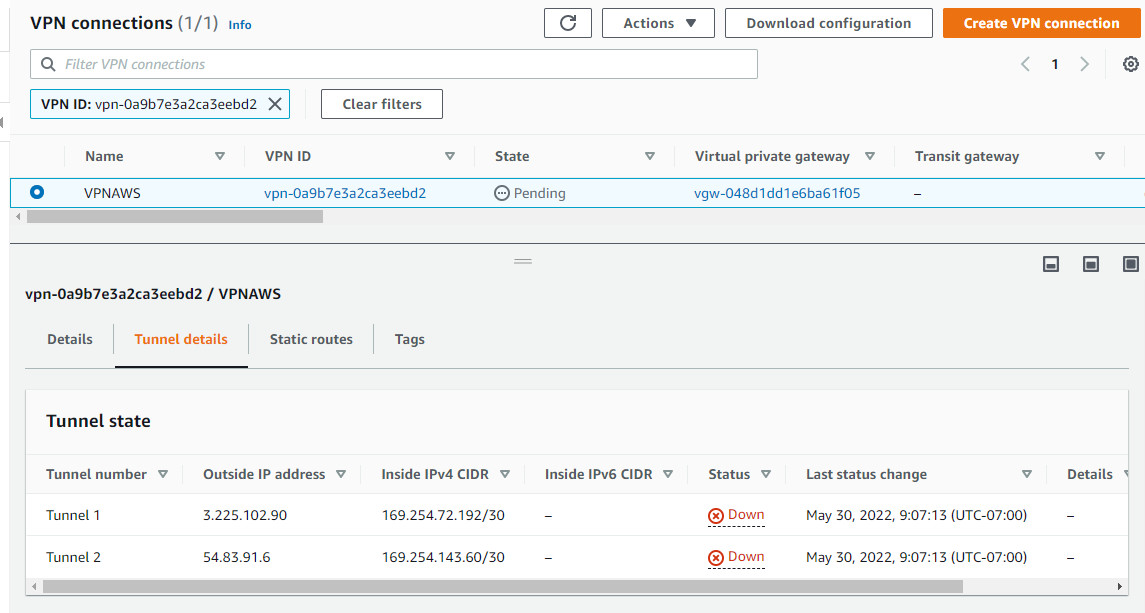
Figure 10.83: Verify public IP address - Open the file that you have downloaded on AWS. It will show phase 1 and phase 2 configuration.
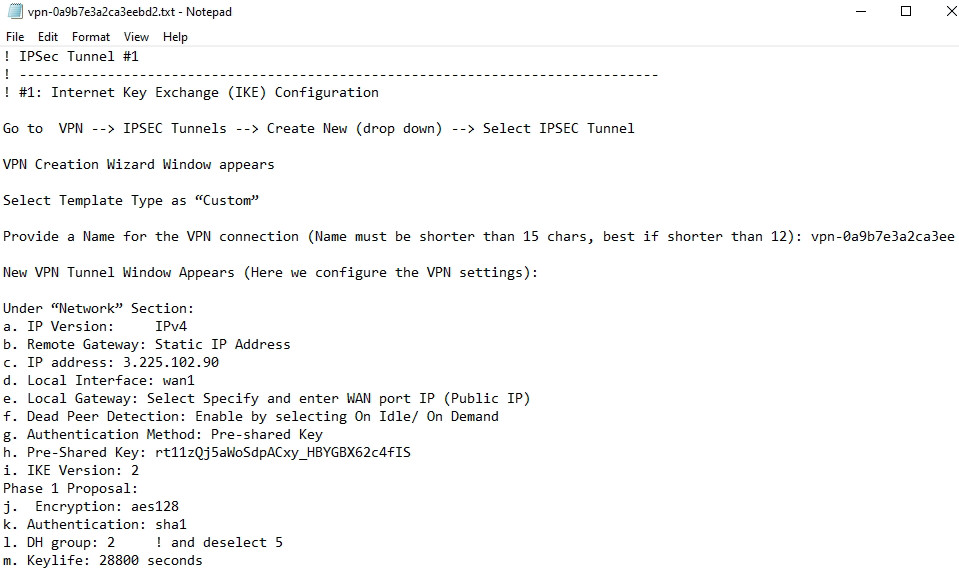
Figure 10.84: IPsec Phase 1 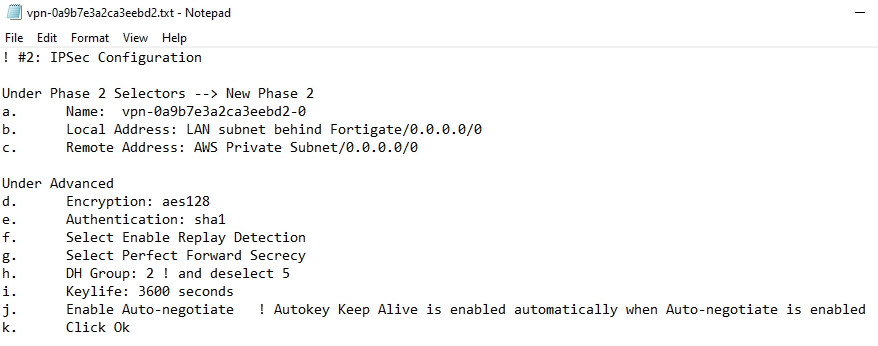
Figure 10.85: IPsec Phase 2
FortiGate Configuration
- First, we will configure port1 and port2 IP addresses. port1 should be set as DHCP client and port2 should be set as 192.168.10.1/24.
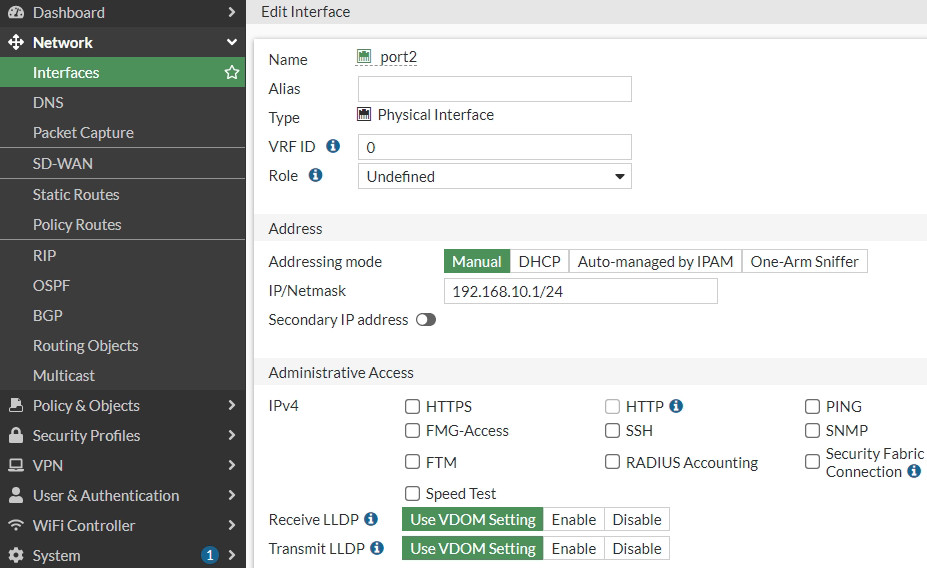
Figure 10.86: Set an IP address for port2 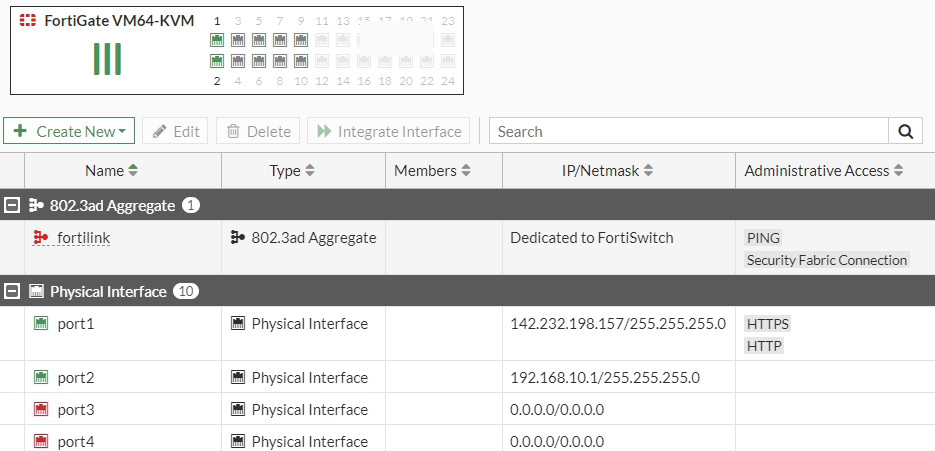
Figure 10.87: Port1 and Port2 IP addresses - Create a static route to port1 (WAN Port) as Figure 10.88.
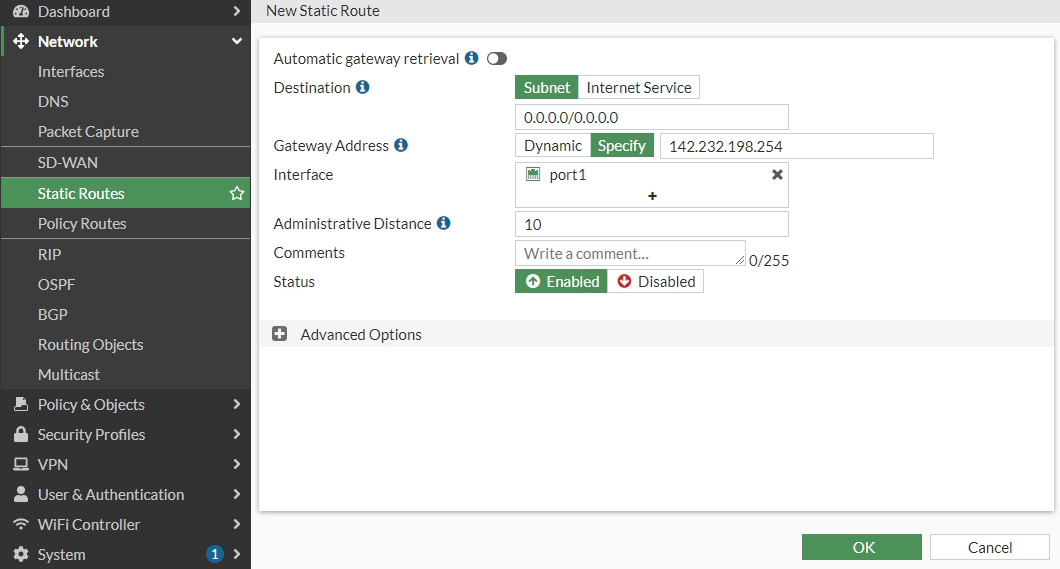
Figure 10.88: Create a static route - Create an IPsec Wizard as a custom as follows:
- Remote Gateway IP Address: Public_IP_Address_AWS_Virtual_Gateway
- Nat Traversal: Disable
- Pre-shared Key: The same as AWS key(psWvIznNXaD3e1bWB9mVrODkrYALmrBO)
- Local Address: 192.168.10.0/24
- Remote Address: 10.0.0.0/16
- Phase 1: Encryption: AES128, Authentication: SHA-1, DH: 2, lifetime: 28800
- Phase 2: Encryption: AES128, Authentication: SHA-1, DH: 2, lifetime: 3600
- IKE: version 2
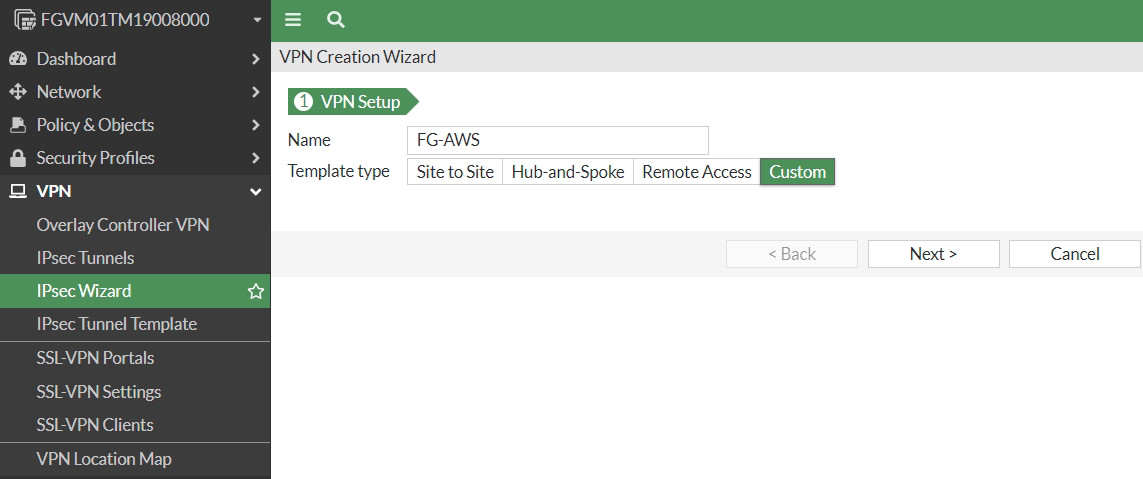
Figure 10.89: Create a custom VPN 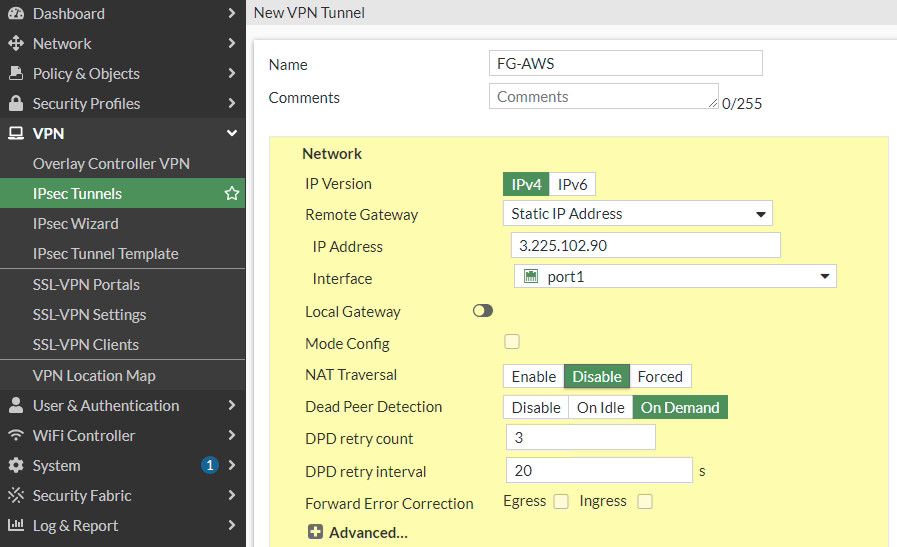
Figure 10.90: Create a custom VPN 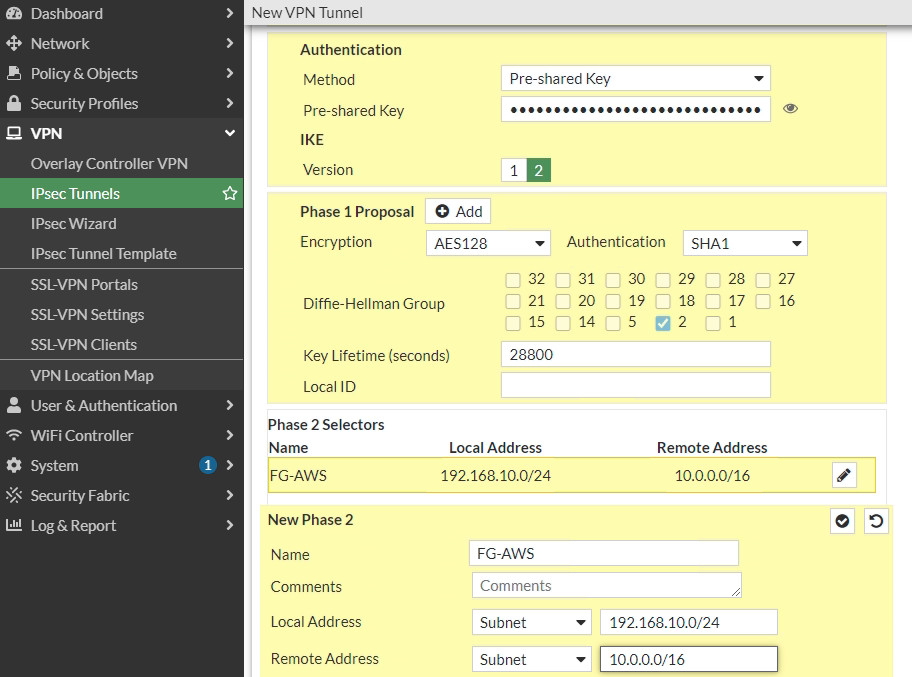
Figure 10.91: Create a custom VPN 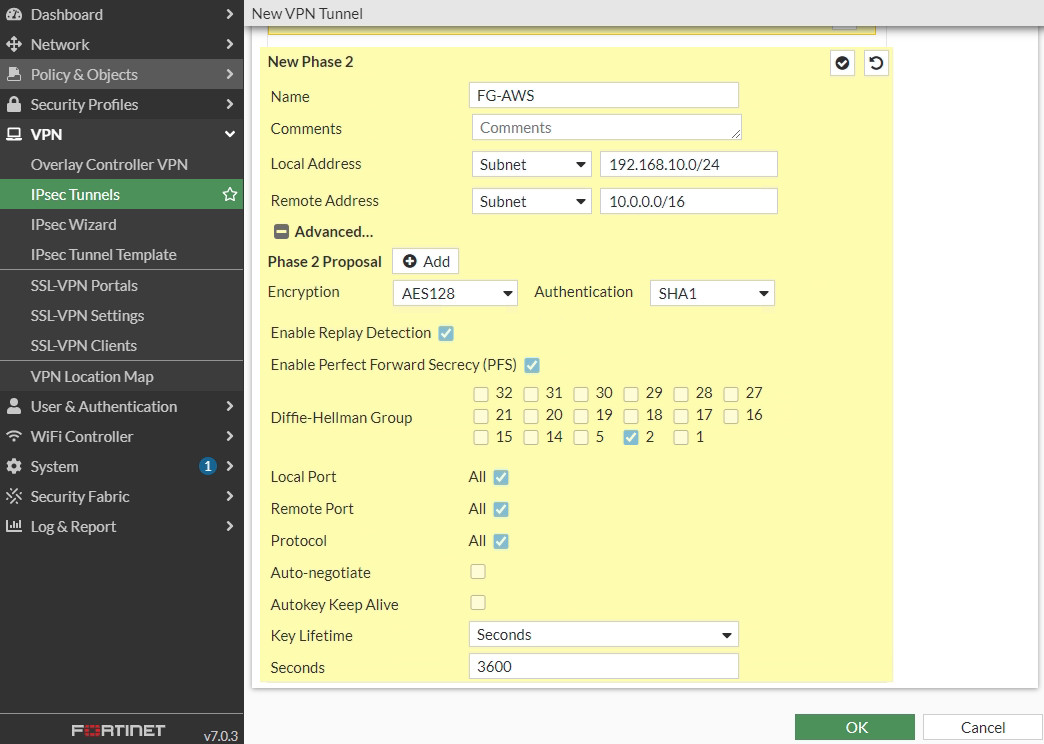
Figure 10.92: Create a custom VPN - Set an IP address for FG-AWS tunnel. We will set the IP address based on the configuration file.
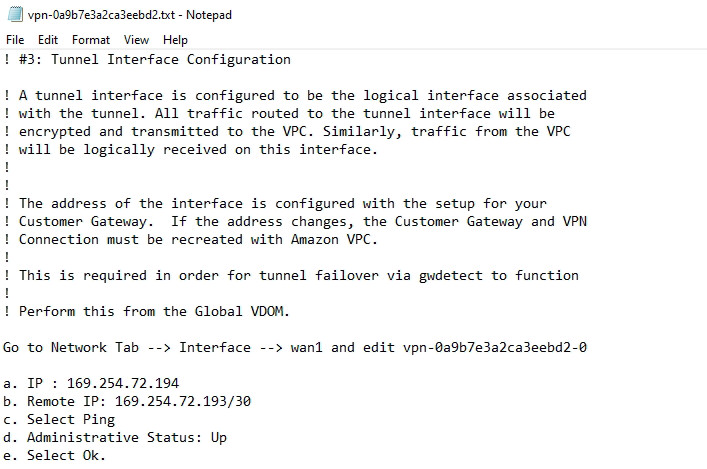
Figure 10.93: Configuration file for setting an IP address for FG-AWS tunnel 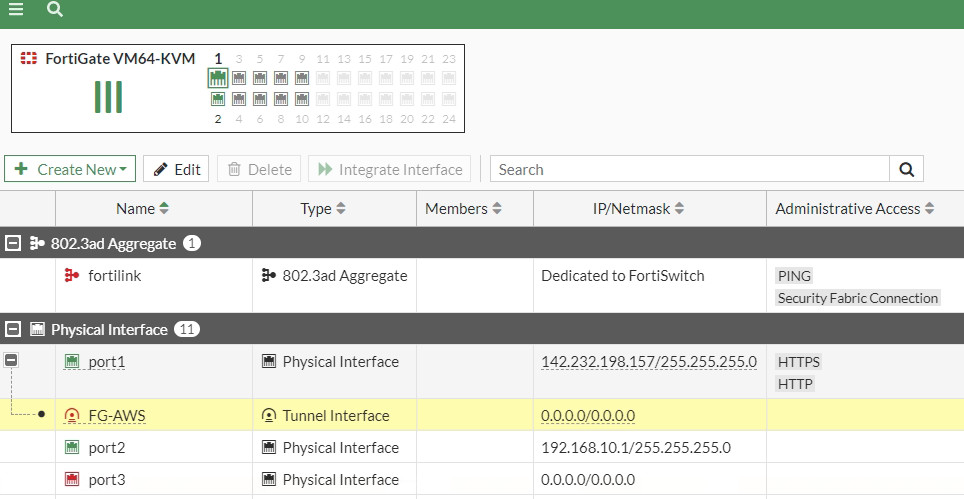
Figure 10.94: Set an IP address for FG-AWS tunnel 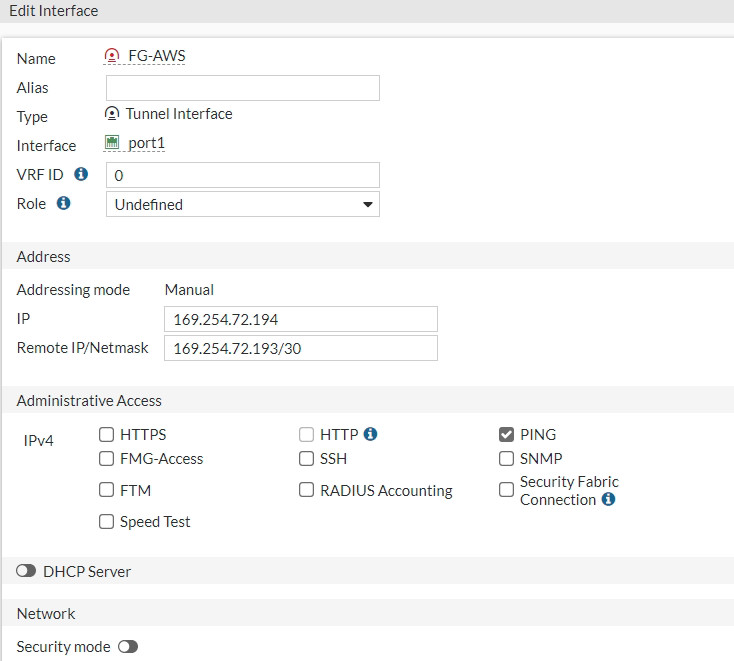
Figure 10.95: Set an IP address for FG-AWS tunnel - Create a static route from FG-LAN to AWS-LAN. We will set a static route based on the configuration file.

Figure 10.96: Configuration file for creating a static route from FG-LAN to AWS-LAN 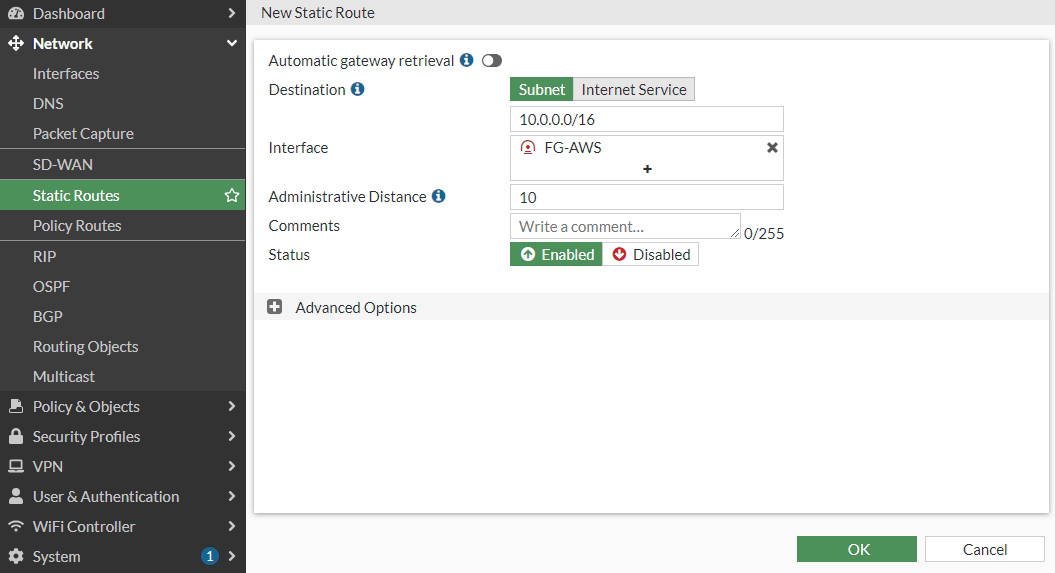
Figure 10.97: Create a static route from FG-LAN to AWS-LAN 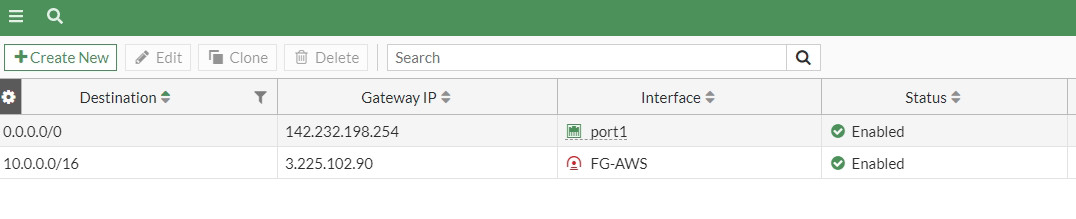
Figure 10.98: Create a static route from FG-LAN to AWS-LAN - Create a firewall policy from Port2 to Tunnel and from Tunnel to Port2. We will create a subnet for LAN on premise and a subnet for AWS. Also, in site-to-site VPN, NAT should be disabled here.
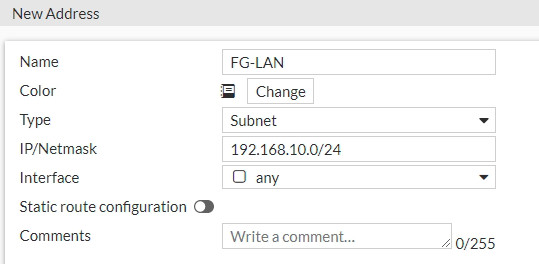
Figure 10.99: Create a subnet for local network 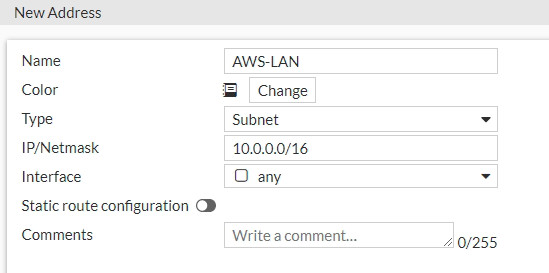
Figure 10.100: Create a subnet for AWS local network 
Figure 10.101: Create a policy from port2 to FG-AWS Tunnel 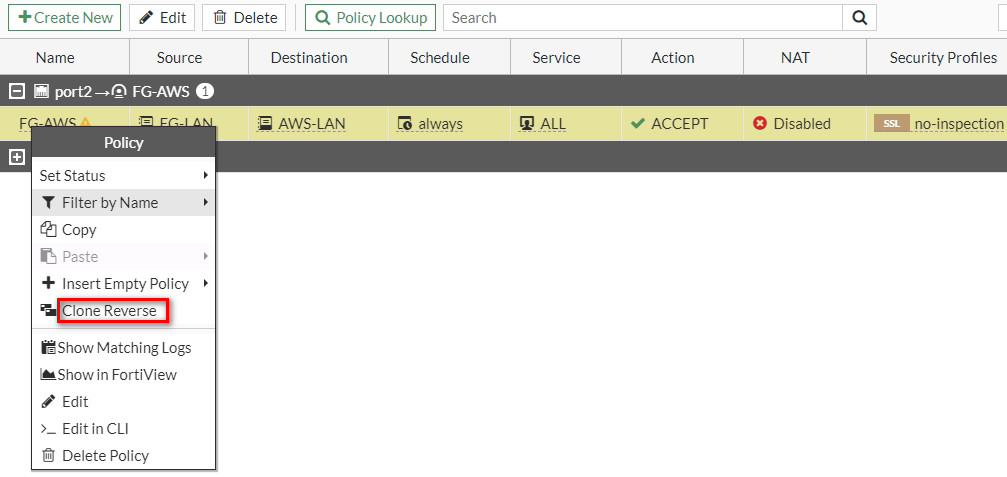
Figure 10.102: Create a policy from FG-AWS Tunnel to port2 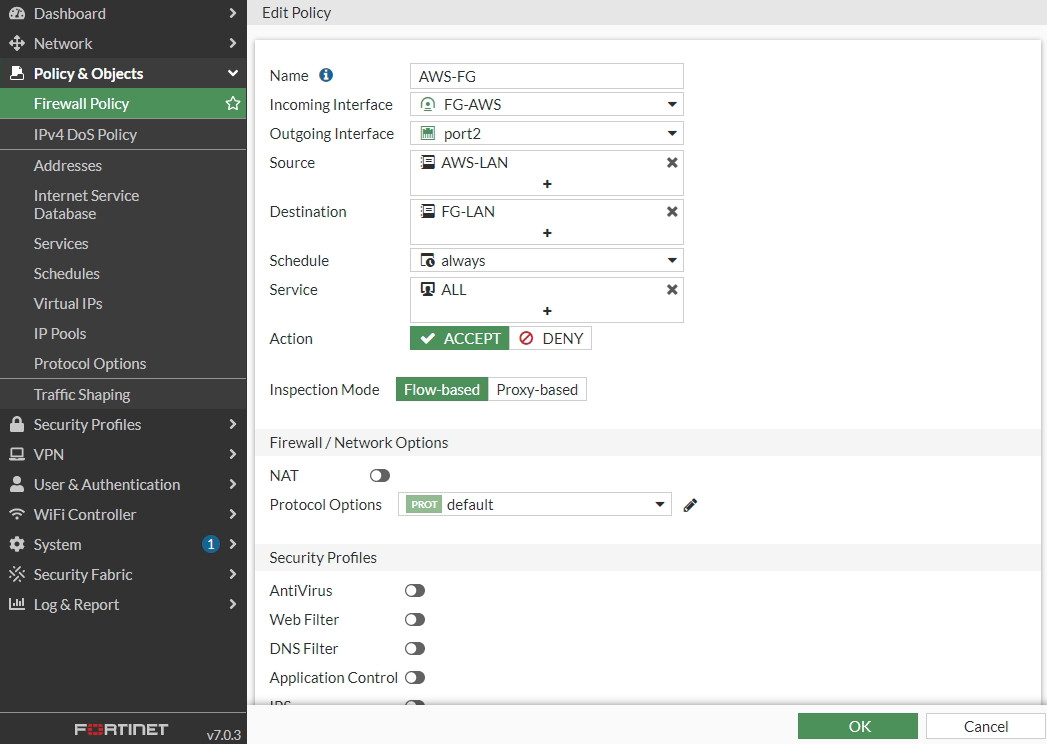
Figure 10.103: Create a policy from AWS-FG Tunnel to port2 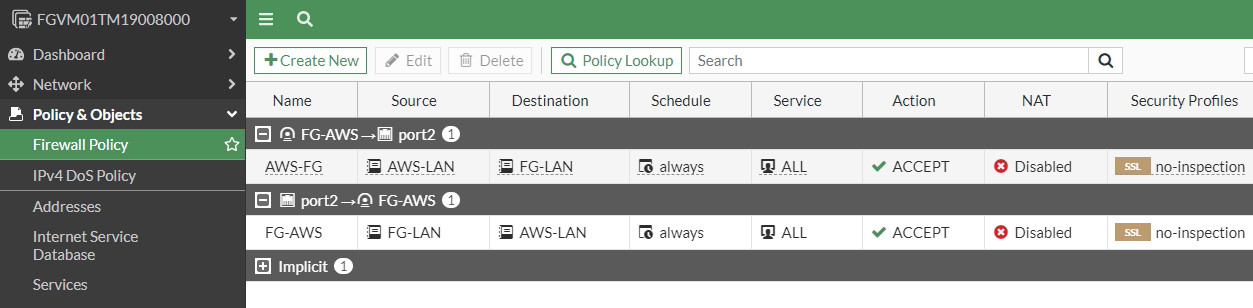
Figure 10.104: Firewall Policies Overview
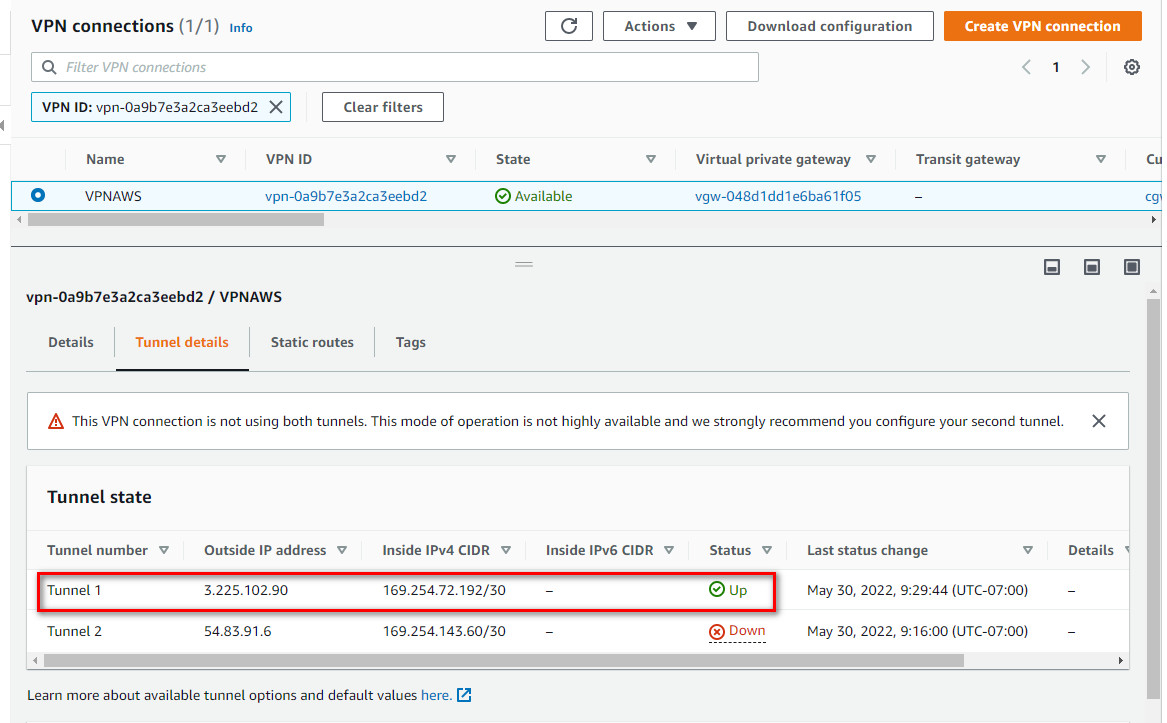
Verify Connections
If you navigate to IPsec Tunnel, the status should be up.