Chapter 3. NAT
3.2 Destination NAT
Learning Objectives
- Create a virtual IP address
- Create a Destination NAT
- Create a Port Forwarding
Scenario: We are going to enable Destination NAT (DNAT) and able to reach WordPress from WebTerm1. That means if someone from WebTerm1 opens the browser and types http://10.10.10.1 should be able to reach WordPress.

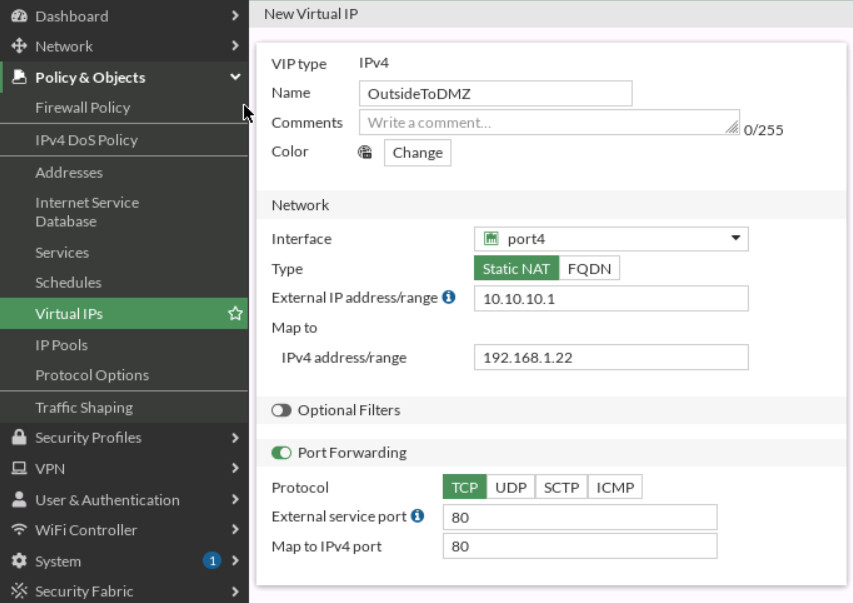
VIP (Virtual IP address)
Go to Policy Objects > Virtual IPs and Create a new Virtual IP:
- Name: outsideToDMZ
- Interface: Port 4
- External IP address: 10.10.10.1
- Mapped IP address: 192.168.1.X (Find the local IP address of your WordPress)
- Enable Port Forwarding:
- External Service Port: TCP 80
- Map to Port: TCP 80
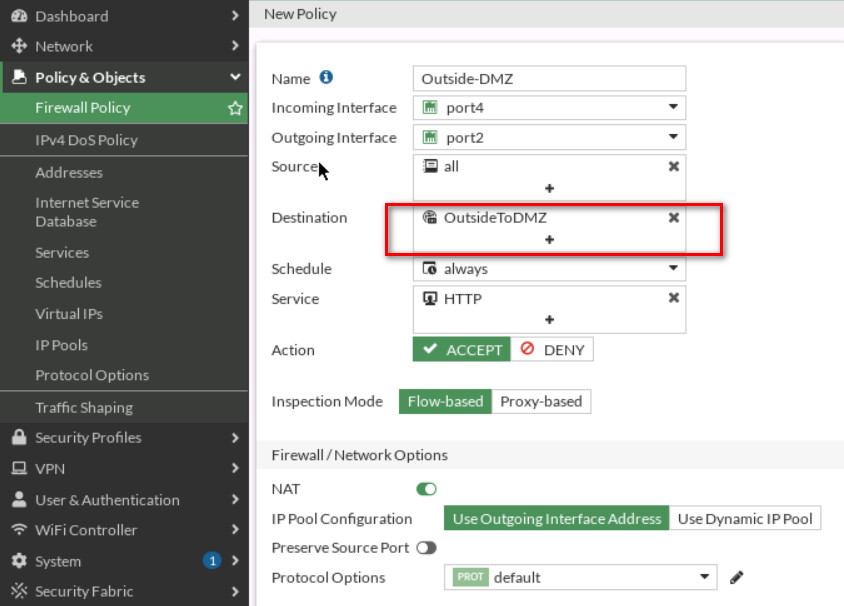
Create a Firewall Policy
You will create a new firewall policy to match a specific source, destination, service, and action set to Accept.
| Field | Value |
|---|---|
| Name | Outside-DMZ |
| Incoming Interface | Port 4 |
| Outgoing Interface | Port 2 |
| Source | All |
| Destination | Select your VIP Name( outsideToDMZ) |
| Schedule | Always |
| Service | HTTP |
| Action | ACCEPT |
| Log Violation Traffic | <enable> |
| Enable this policy | <enable> |
Click OK to save the changes.
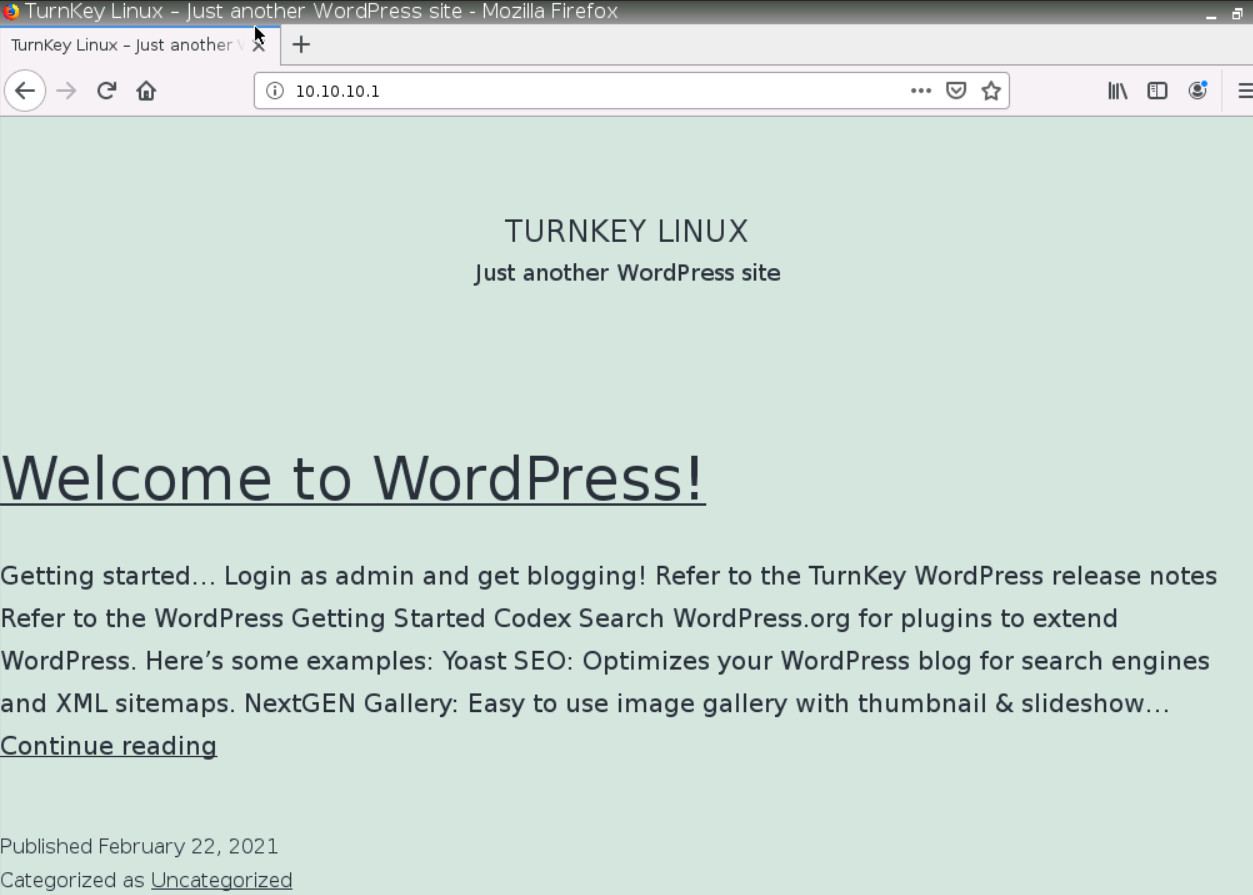
To confirm traffic matches, go to WebTerm1, open the browser and type http://10.10.10.1 in the browser. You should be able to reach WordPress.
Port Forwarding
- Set the interface of Kali as a DHCP client and enable SSH in Kali. To enable SSH in Kali type Figure 3.13 command:
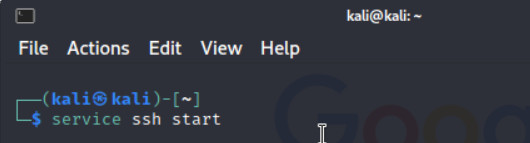
Figure 3.13: Enable SSH service in Kali 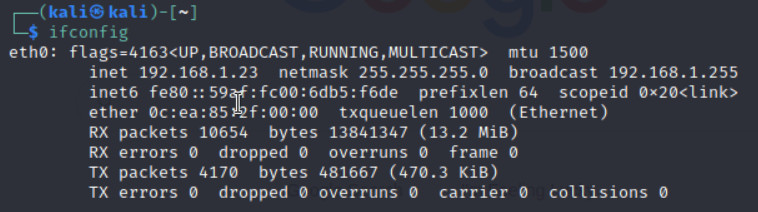
Figure 3.14: Verify you’ve received an IP address from DHCP - Repeat the previous steps we have done for DNAT and try to reach Kali from port 8080 (Port Forwarding: 8080 → 22)
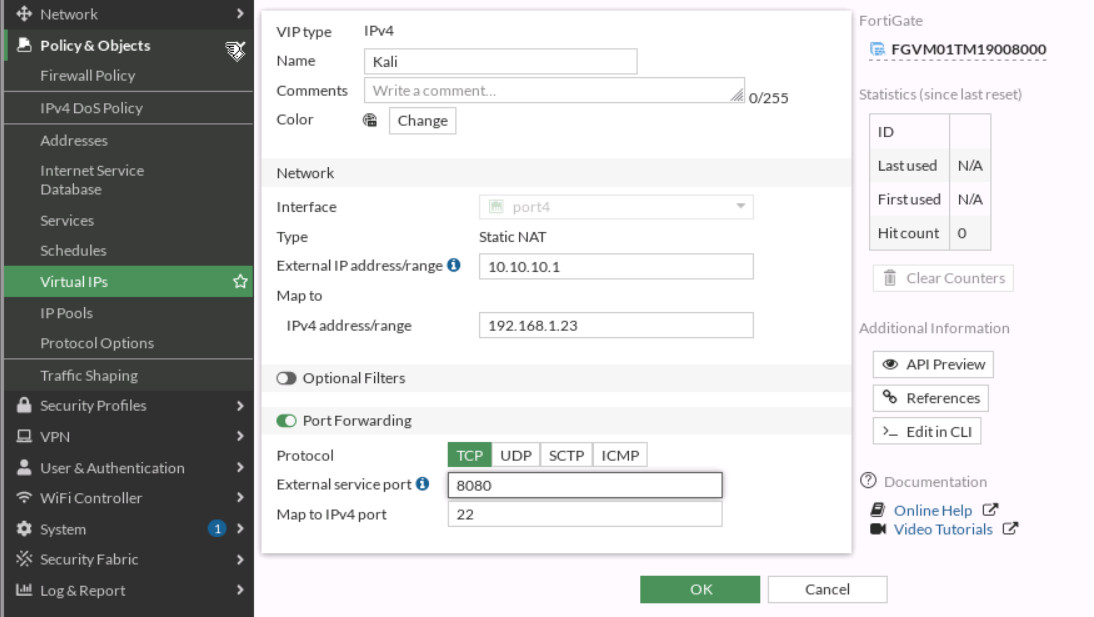
Figure 3.15: Map External port 8080 to local port 22 
Figure 3.16: Set Firewall Policy - Verify your connection from WebTerm (Hint: ssh user@10.10.10.1 -p 8080).

Figure 3.17: Verify SSH connection
