Chapter 5. Authentication
5.1 Captive Portal
Learning Objectives
- Configure a Captive Portal
| Device | IP address | Access |
|---|---|---|
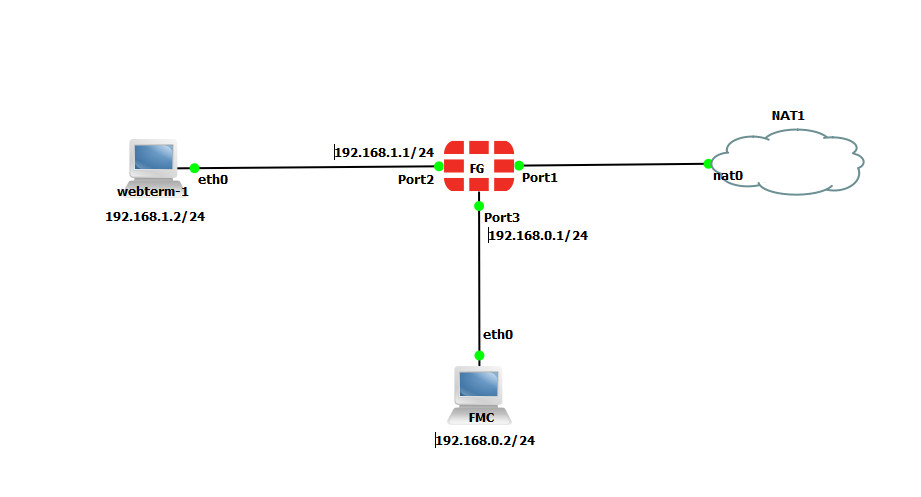
| WebTerm1 | 192.168.1.2/24 | – |
| FortiGate | Port 1: DHCP Client
Port 2: 192.168.1.1/24 Port 3: 192.168.0.1/24 |
ICMP
HTTP HTTPS |
| WebTerm (FMC) | 192.168.0.2/24 | – |
- Prerequisites:
- Set the IP addresses in the firewall as above table. The CLI is available as following:
FGVM01TM19008000 # config system interface
FGVM01TM19008000 (interface) # edit port1
FGVM01TM19008000 (port1) # set mode dhcp
FGVM01TM19008000 (port1) # endFGVM01TM19008000 # config system interface
FGVM01TM19008000 (interface) # edit port2
FGVM01TM19008000 (port2) # set ip 192.168.1.1/24
FGVM01TM19008000 (port2) # endFGVM01TM19008000 # config system interface
FGVM01TM19008000 (interface) # edit port3
FGVM01TM19008000 (port3) # set ip 192.168.0.1/24
FGVM01TM19008000 (port3) # set allowaccess http https
FGVM01TM19008000 (port3) # end - Set a static route in the firewall. You should always set the default route in the firewall (0.0.0.0 0.0.0.0 Internet IP).
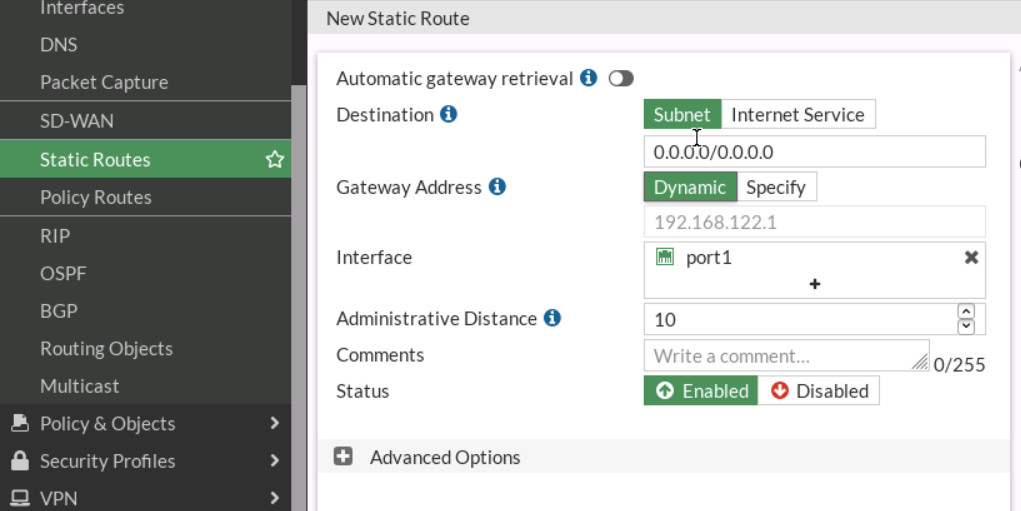
Figure 5.2: Configure a static route - Set a Firewall Policy from port2 to port1.
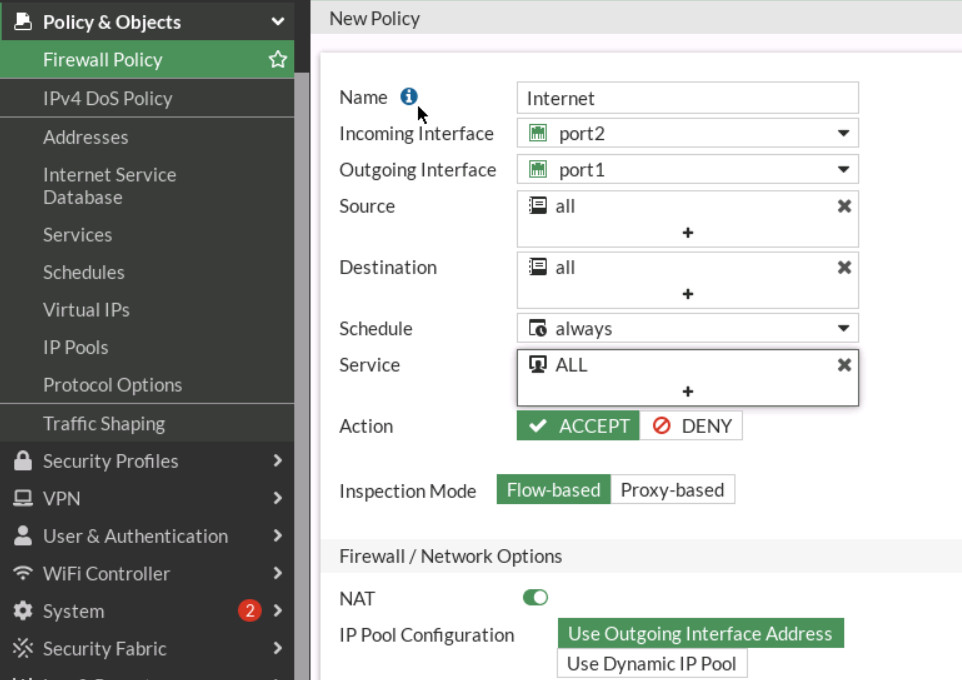
Figure 5.3: Set a Firewall Policy - Set the static IP address in WebTerm1 (192.168.1.2/24).
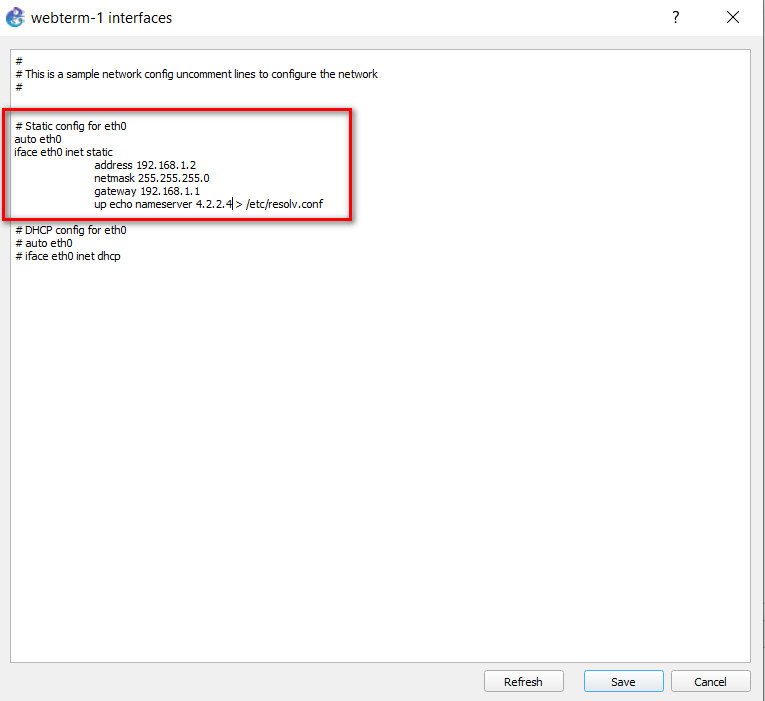
Figure 5.4: Configure a static IP address in WebTerm1
- Set the IP addresses in the firewall as above table. The CLI is available as following:
- Create a user and group. Go to User & Authentication > User Groups. Create a group name: CaptivePortal.
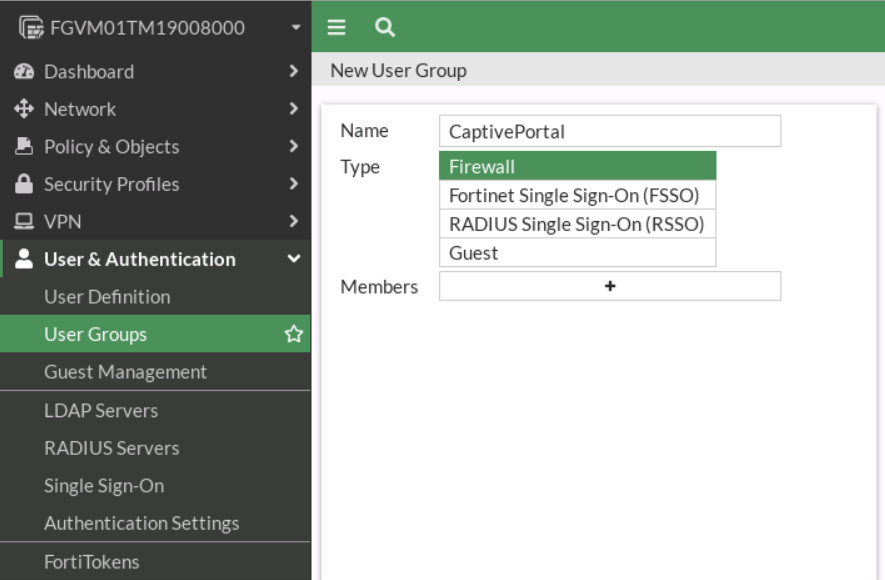
Figure 5.5: Create a group Go to User & Authentication > User Definition > Create a New User and assign your user in step 4 to A0ID-CaptivePortal Group.
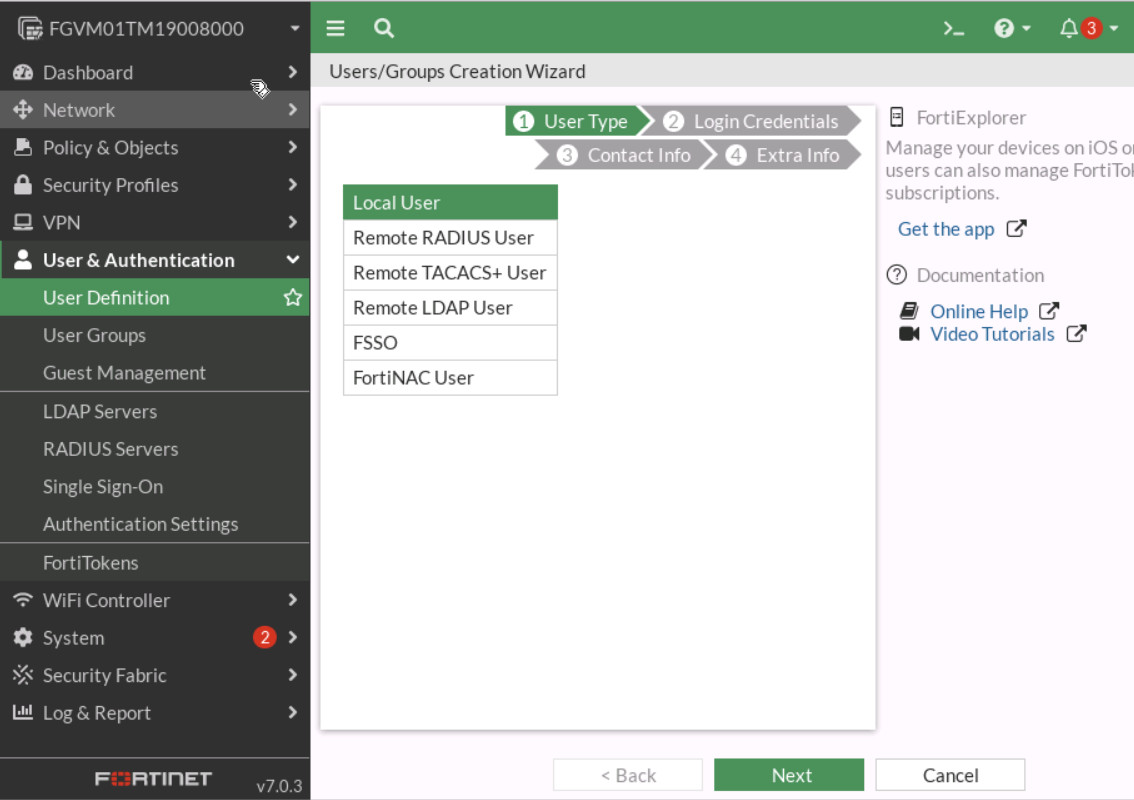
Figure 5.6: Create a user 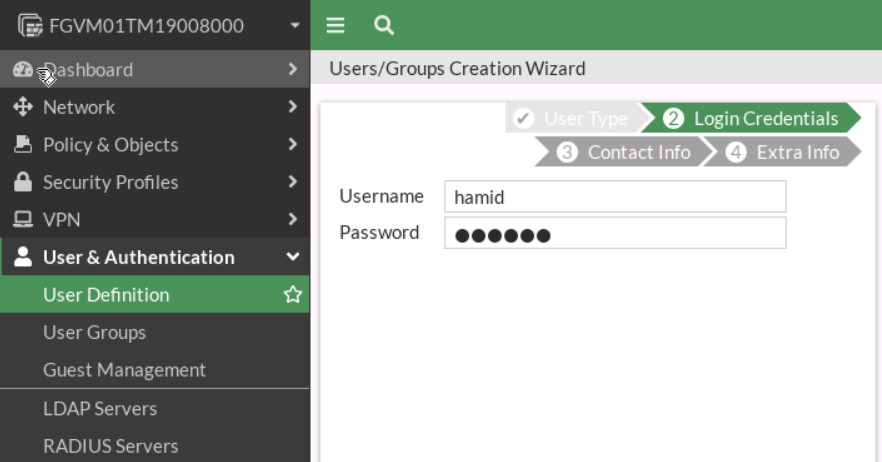
Figure 5.7: Create login credentials 
Figure 5.8: Add user to the group - Go to Network > Interfaces and edit port 2. In the Admission Control section, set:
- Security mode: captive portal
- Authentication Portal: Local
- User Access: Restricted to Group and assign the group you have created in the previous step.

Figure 5.9: Configure Captive Portal on port2 - Now, open the browser in WebTerm1 and type http://talebi.ca.
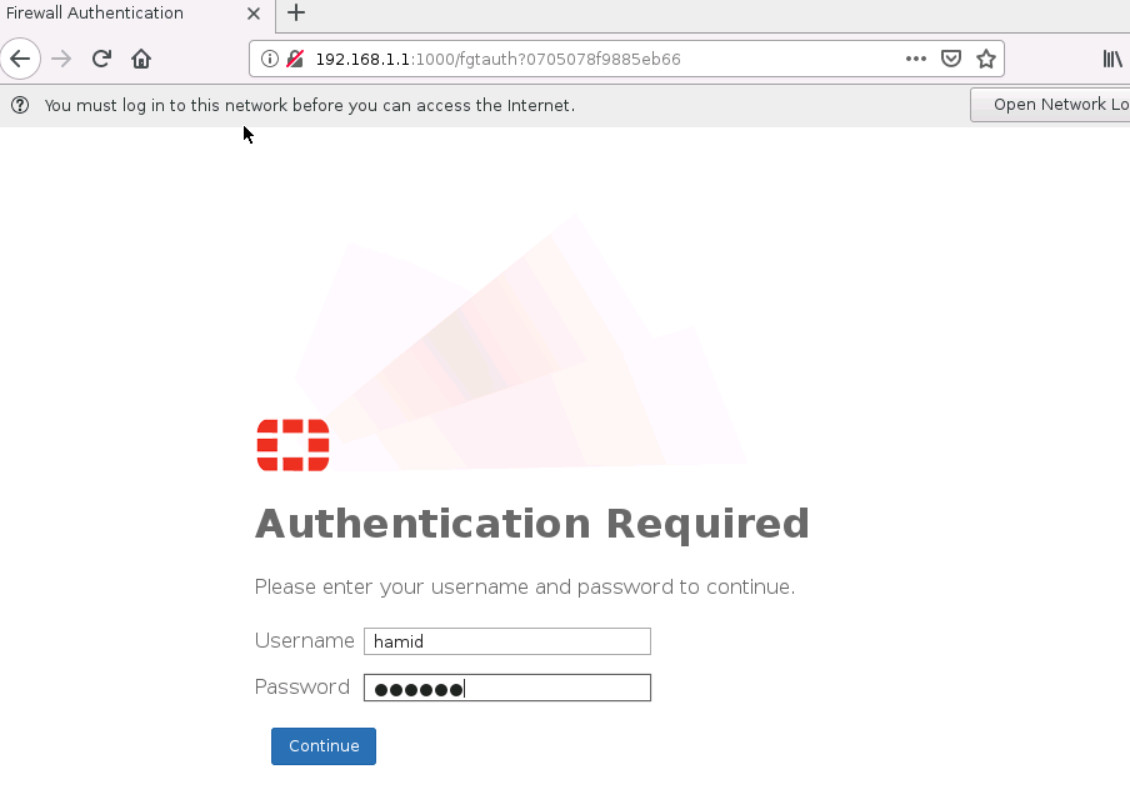
Figure 5.10: Verify Captive Portal
