Chapter 6. High Availability
6.1 High Availability
Learning Objectives
- Configure HA (Active-Passive) between two firewalls
Scenario: In this lab, we are going to have two firewalls. One of them is Primary or Active and the other one is Secondary or Passive. We are going to have High Availability between these two firewalls and if we shut down one of them, the other one will be Primary.

| Device | IP address | Access |
|---|---|---|
| WebTerm1 | 192.168.1.2/24 | – |
| WebTerm2 | 192.168.10.2/24 | – |
| EthernetSwitch1 | – | – |
| EthernetSwitch2 | – | – |
| FG-Primary | Port 1: 192.168.1.1/24
Port 5: 192.168.10.1/24 |
ICMP-HTTP-HTTPS |
| FG-Secondary | Port 1: 192.168.1.1/24
Port 5: 192.168.10.1/24 |
ICMP-HTTP-HTTPS |
- CLI Configuration for Primary and Secondary:
FG-Primary
FortiGate-VM64-KVM # config system global
FortiGate-VM64-KVM (global) # set hostname FG-Primary
FortiGate-VM64-KVM (global) # endFG-Primary # config system interfaceFG-Primary (interface) # edit port1FG-Primary (port1) # set mode staticFG-Primary (port1) # set ip 192.168.1.1/24FG-Primary (port1) # set allowaccess http https pingFG-Primary (port1) # endFG-Primary # config system interfaceFG-Primary (interface) # edit port5FG-Primary (port5) # set ip 192.168.10.1/24FG-Primary (port5) # set allowaccess http https pingFG-Primary (port5) # endFG-Secondary
FortiGate-VM64-KVM # config system global
FortiGate-VM64-KVM (global) # set hostname FG-Secondary
FortiGate-VM64-KVM (global) # endFG-Secondary # config system interfaceFG-Secondary(interface) # edit port1FG-Secondary (port1) # set mode staticFG-Secondary (port1) # set ip 192.168.1.1/24FG-Secondary (port1) # set allowaccess http https pingFG-Secondary (port1) # endFG-Secondary # config system interfaceFG-Secondary (interface) # edit port5FG-Secondary (port5) # set ip 192.168.10.1/24FG-Secondary (port5) # set allowaccess http https pingFG-Secondary (port5) # end - Go to System > HA in the FG-Primary:
- Select the Mode: Active-Passive
- Device Priority: 128 (The higher priority is primary)
- Group Name: HRT (The Group name between Primary and Secondary should be the same)
- Password: Set a password (The Password between Primary and Secondary should be the same)
- Monitor Interface: Port 3
- Heartbeat Interface: Port 4
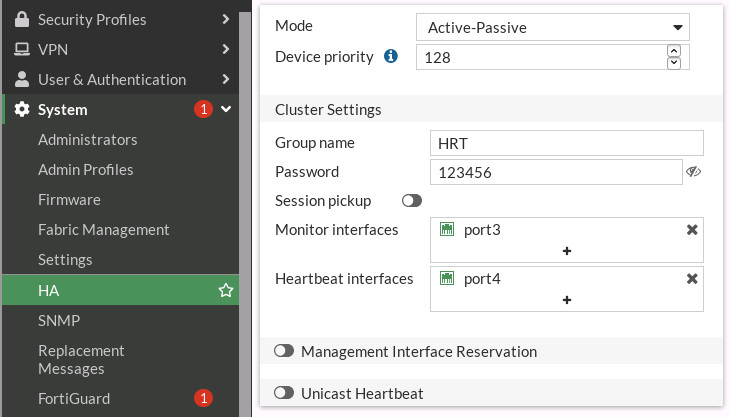
Figure 6.2: HA primary configuration Do the same configuration in the FG-Secondary but set the Device priority to 50.
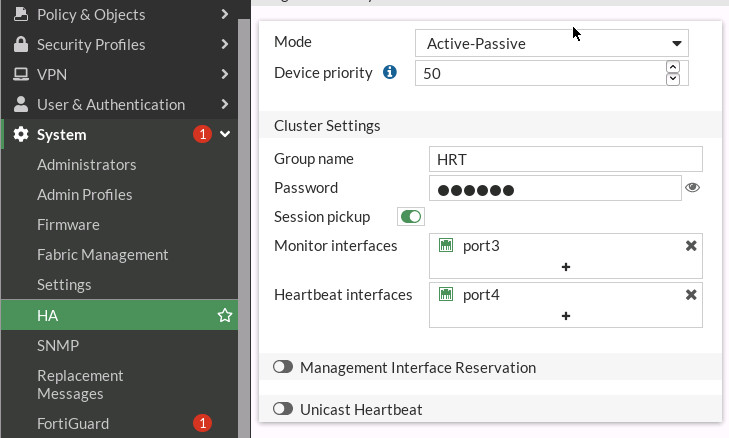
Figure 6.3: HA secondary configuration - After setting secondary device, no longer be able to access secondary device. Go to FG-Primary > System > HA and evaluate your result.
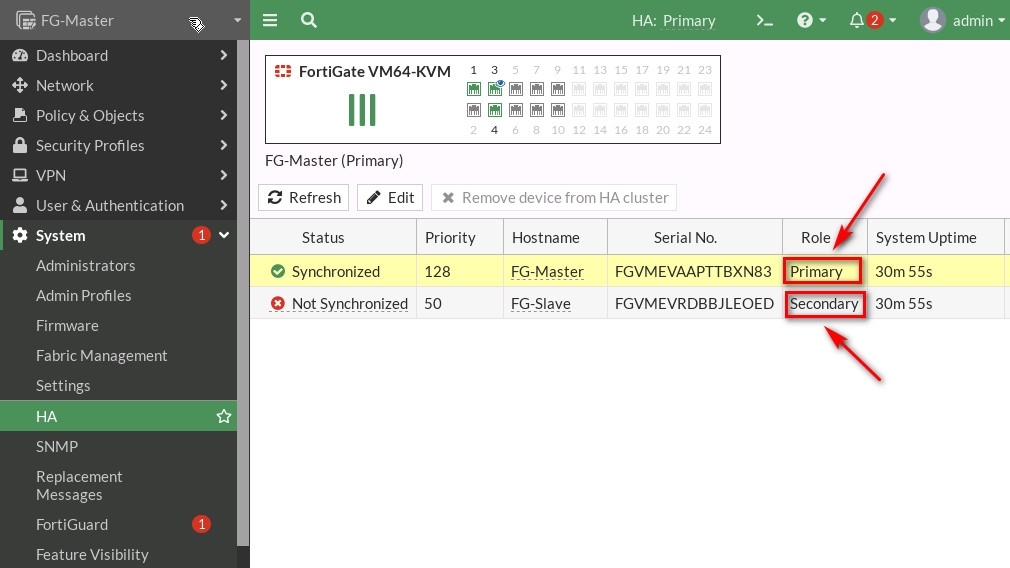
Figure 6.4: HA status Two devices will be synchronized after a while.
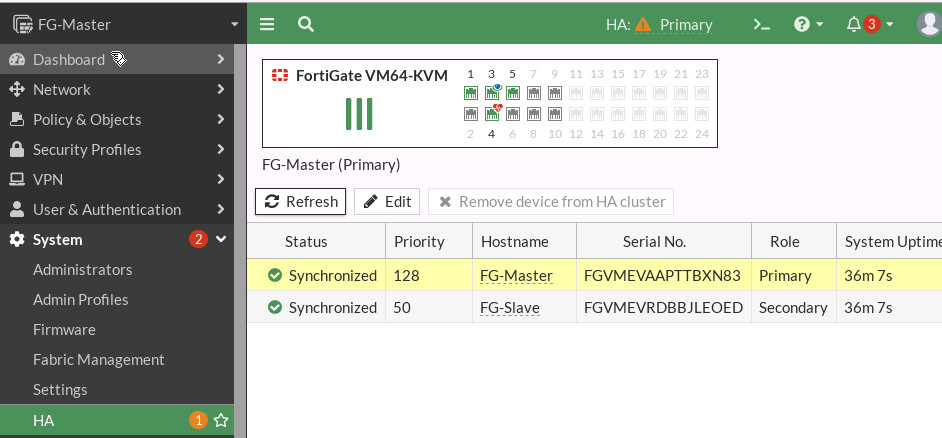
Figure 6.5: HA Synchronized status - Now, connect other interfaces like Figure 6.6.

Figure 6.6: Main scenario Try to Stop FG-Primary and go to WebTerm1. Can you reach the firewall?
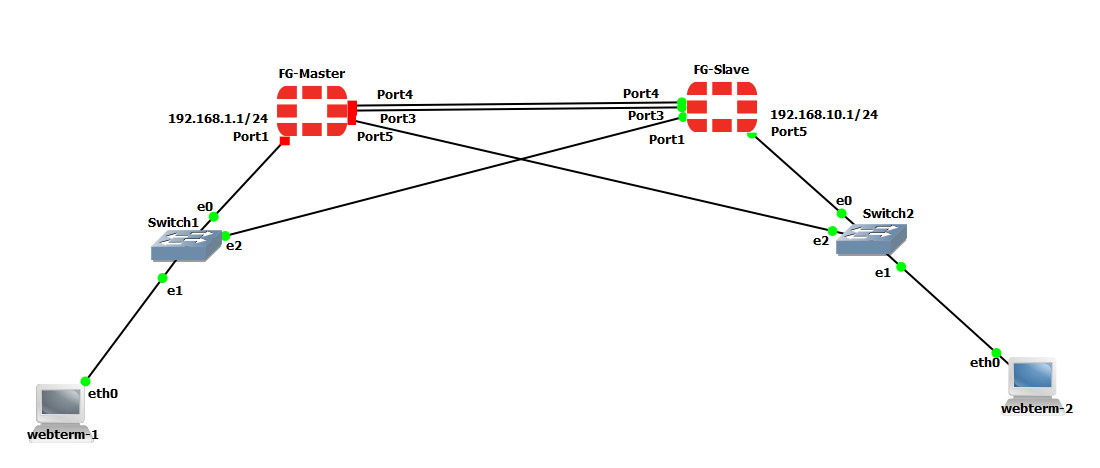
Figure 6.7: Stopping FG-Primary 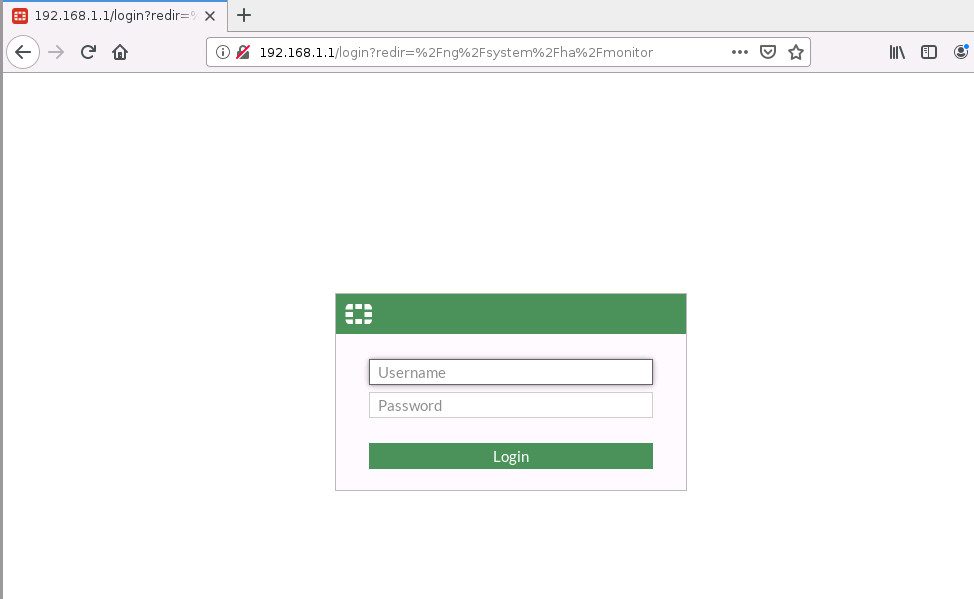
Figure 6.8: Verify connectivity to the firewall 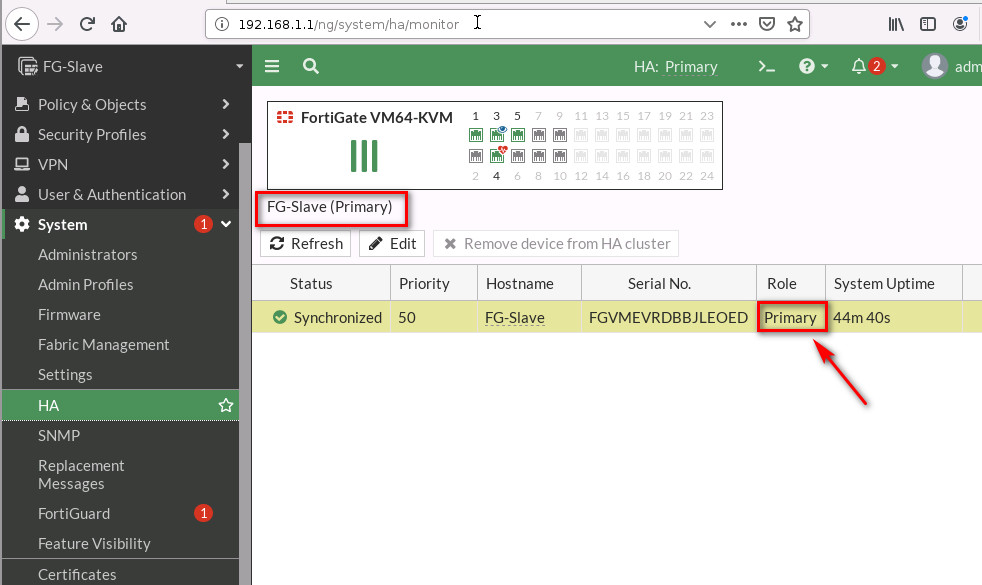
Figure 6.9: Verify firewall role after stopping FG-Primary - Go to Log & Report > Events > HA Events and download the log. Verify your result.
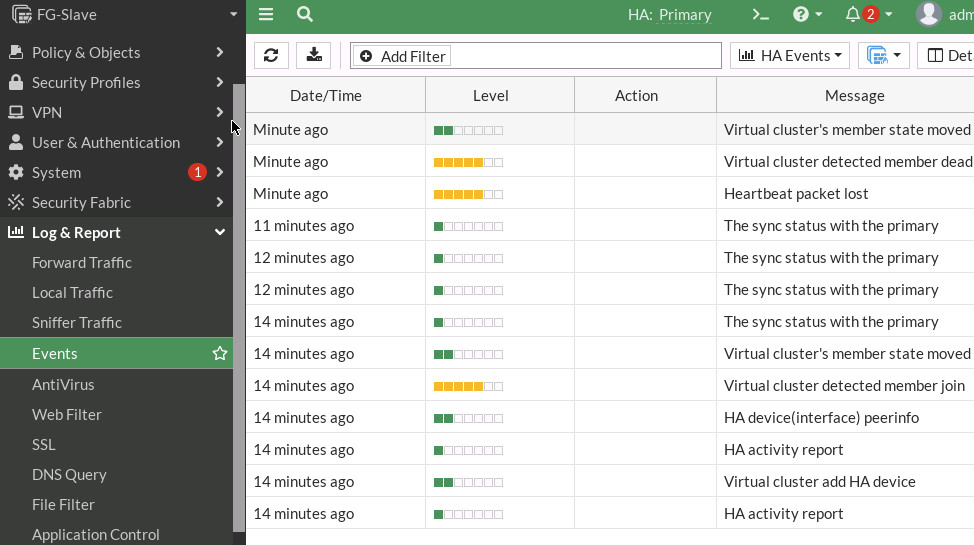
Figure 6.10: HA Events
