Chapter 7. Security
7.2 Security Profile
Learning Objectives
- Configure a Security Profile
Scenario: In this lab, we are going to become familiar with different types of Security Profile such as AntiVirus, File Filter, IPS and DNS Filter. WebTerm2 acts as a local computer and we set a Security Profile on traffic passing from Port2 to Port1.
- We will continue the previous scenario and set up a DHCP server on port2.
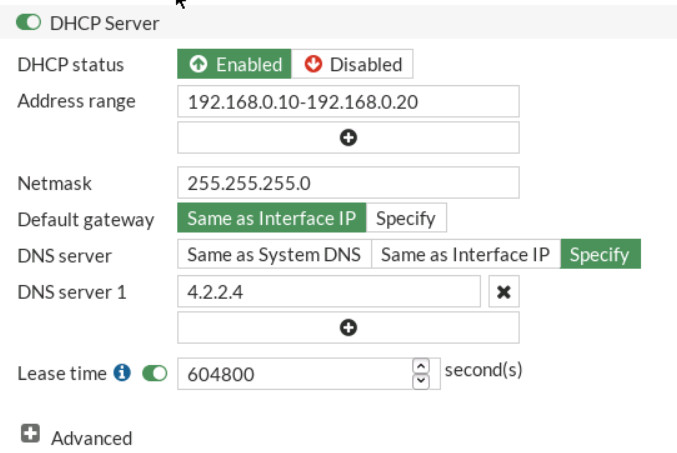
Figure 7.10: Enable DHCP Server on port2 - Go to security profile > Anti-Virus, create a new profile:
- Name: myantivirus
- Scan Mode: full
- Inspection Protocol: HTTP, SMTP, IMAP, POP3, FTP

Figure 7.11: AntiVirus Profile - Create a Firewall policy:
- Name: Port2-to-Port1
- Incoming Interface: Port2
- Outgoing interface: port1
- Source, Destination, Service: all
- Security Profile: myantivirus
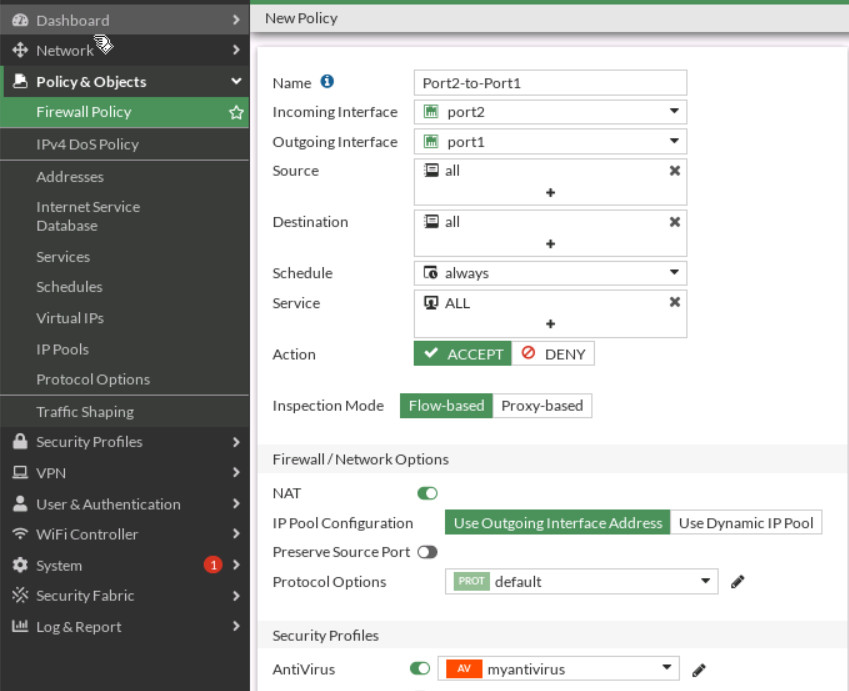
Figure 7.12: Create a Firewall Policy and assign AntiVirus Profile - Go to Security Profile > File Filter, Create a new profile:
- Name: MyFileFilter
- Create a New Filter rule
- Name: Block-PDF-ZIP
- Protocols: HTTP-FTP
- File Type: PDF-ZIP
- Action: Block
- Direction: any
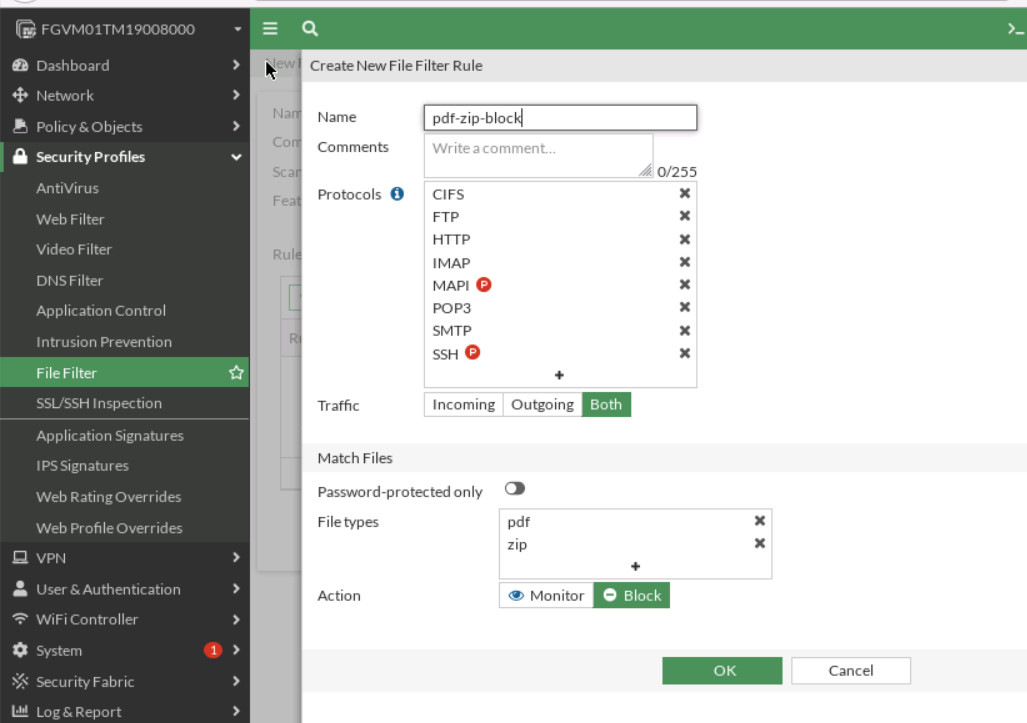
Figure 7.13: File Filter profile 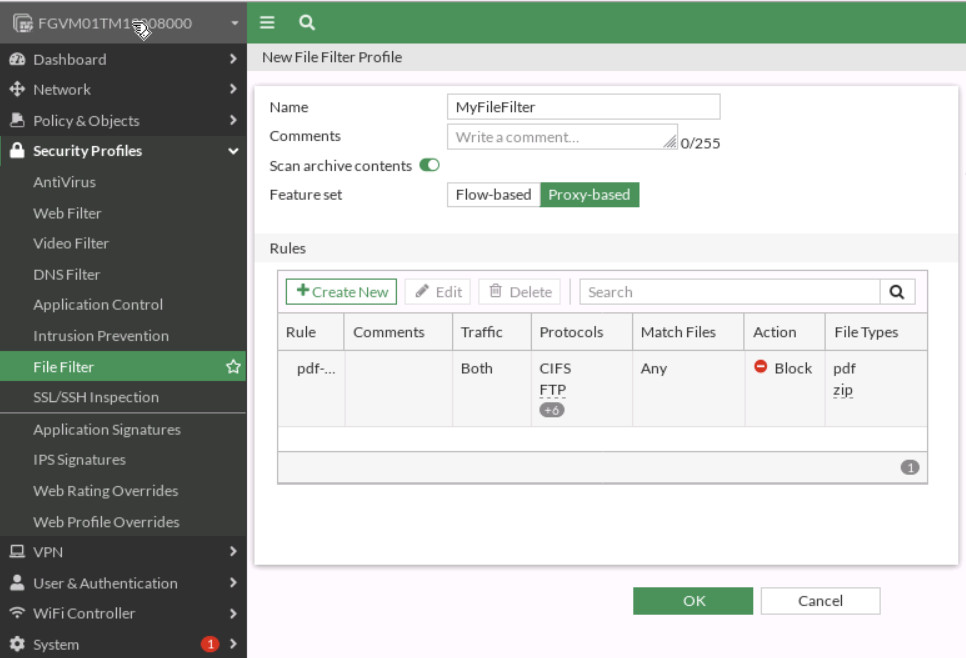
Figure 7.14: Blocking Pdf-Zip - Set the firewall Policy to Proxy mode.
- Go to Policy & Objects > Firewall Policy and assign MyFileFilter to the “Port2-to-Port1” policy.
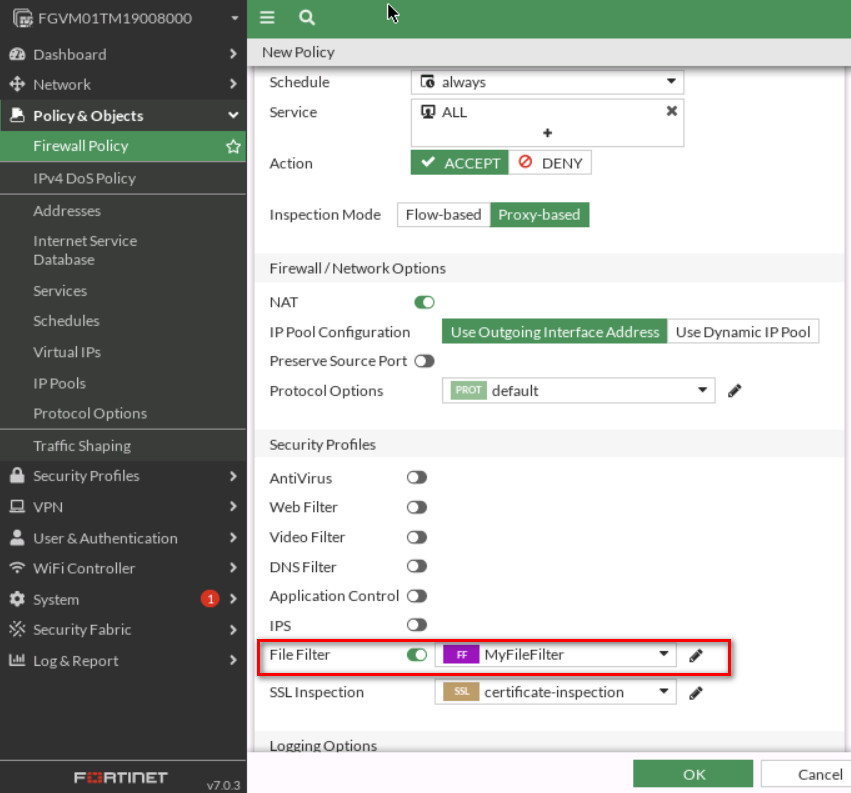
Figure 7.15: Assign File Filter profile to Firewall Policy - Go to http://talebi.ca/wp-content/uploads/2021/11/prtgdesktop.pdf and verify your result.
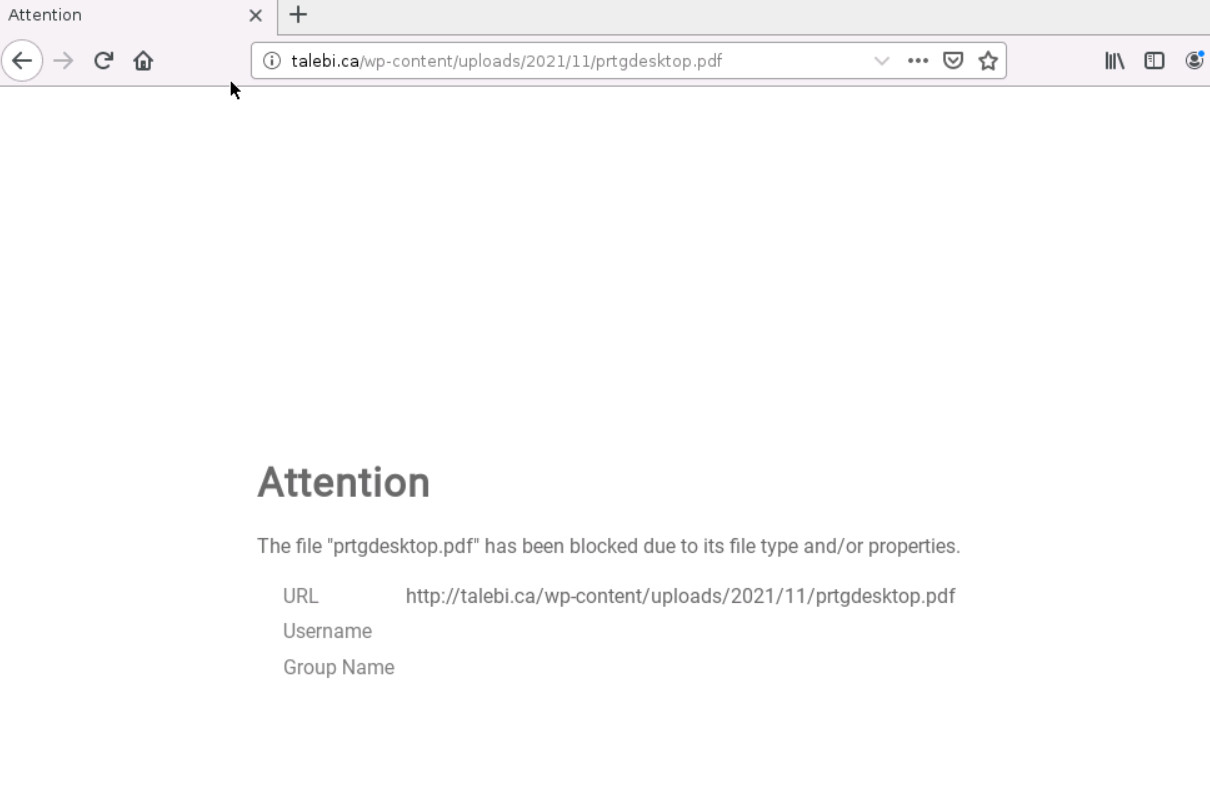
Figure 7.16: Verify configuration - Go to Security Profile > Intrusion Prevention, create a new profile:
- Name: MyIPS
- Add Signature: AAEH Botnet, Acuntix Web Vulnerability Scanner, Adobe Flash Player CSRF
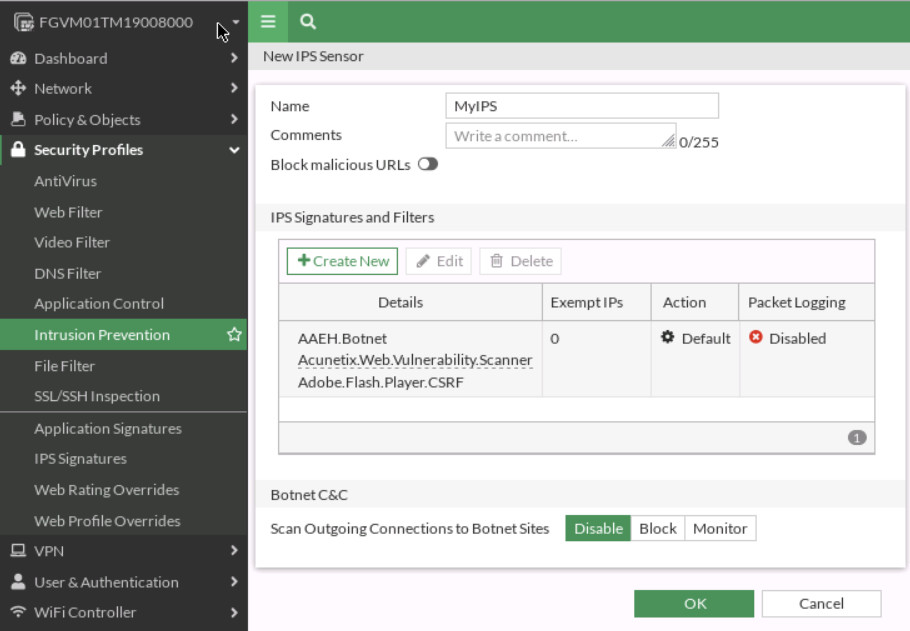
Figure 7.17: Intrusion Prevention Profile
- Go to Policy & Objects > Firewall Policy and assign MyIPS to the “Port2-to-Port1” policy.
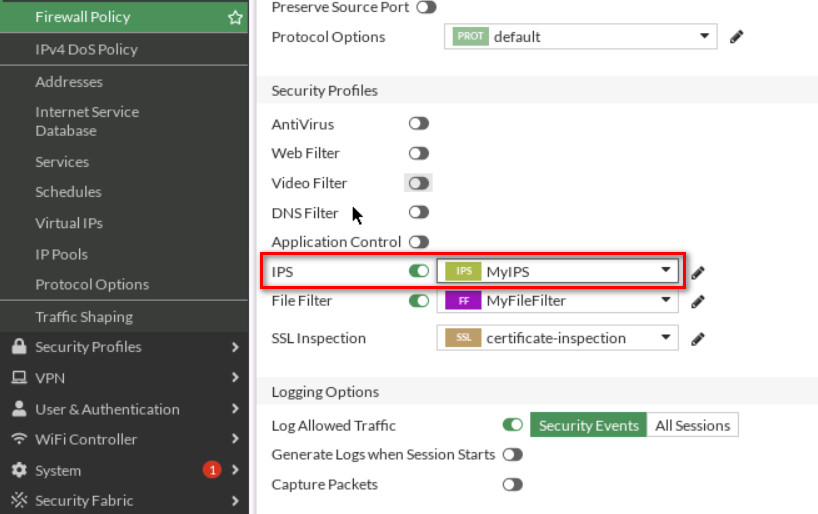
Figure 7.18: Assign IPS profile to Firewall Policy - Go to Security Profile > DNS Filter, create a new profile:
- Name: MyDNS
- FortiGate Category Based Filter:
- Bandwidth Consuming: Peer-to-Peer File Sharing: Block, Internet Radio and TV: Block
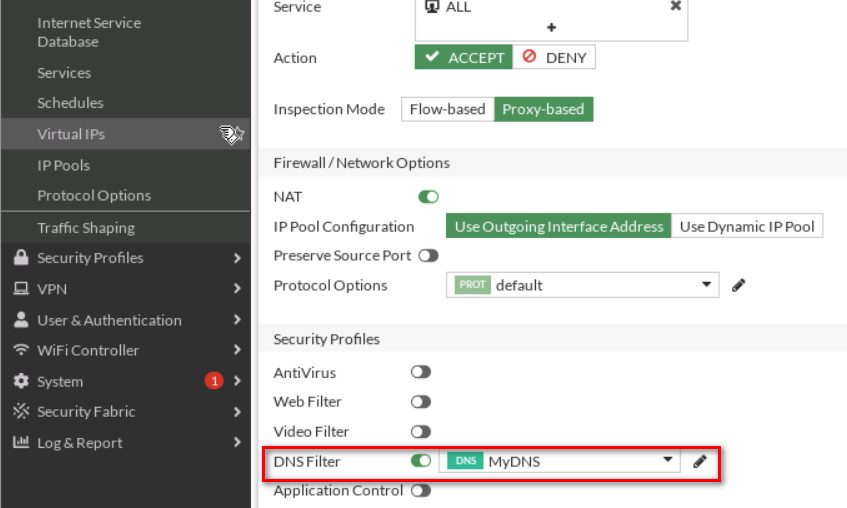
Figure 7.19: Assign DNS Filter Profile to Firewall Policy You can verify your configuration by visiting http://talebi.ca.
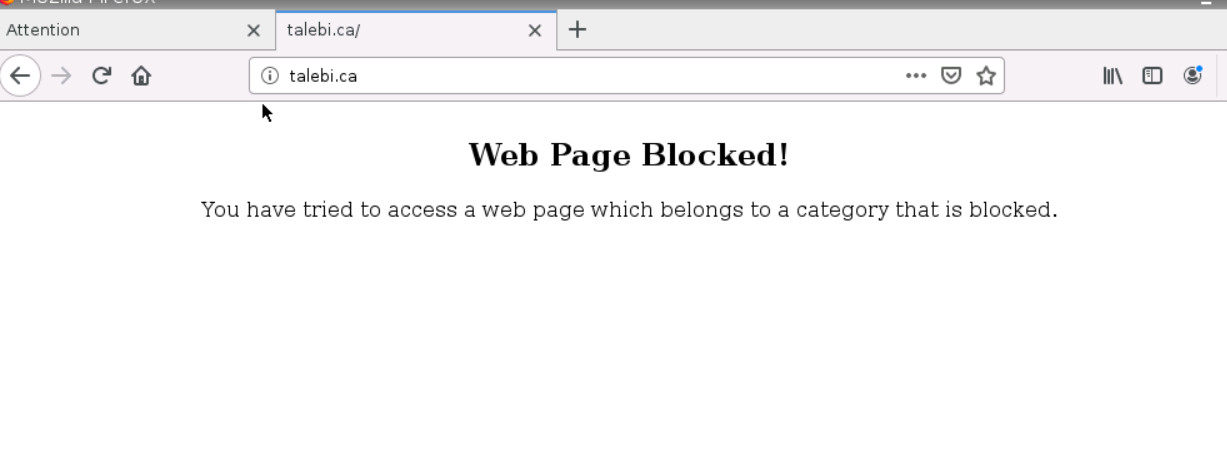
Figure 7.20: Verify configuration Verify your Log & Report > DNS Query.
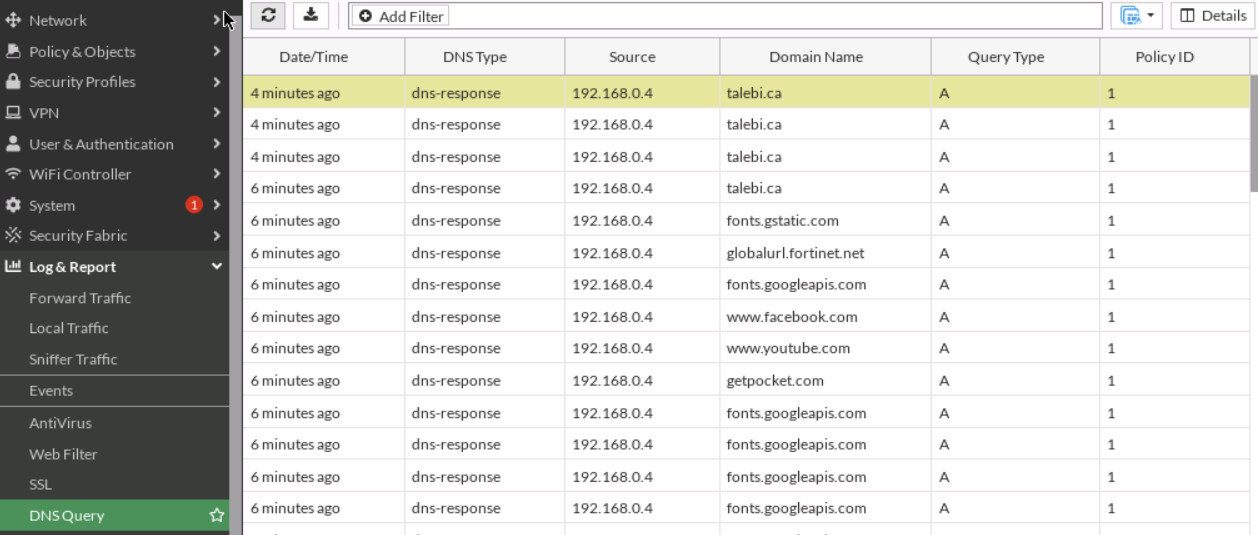
Figure 7.21: Verify
