Chapter 10. Cloud Technologies
10.5 Deploy FortiGate in AWS
Learning Objectives
- Create a VPC, public and private subnet, internet gateway, route tables
- Create a FortiGate firewall in AWS through Marketplace
- Identify FortiGate subnets in AWS
Scenario: In this lab, we’ll learn how to deploy FortiGate in AWS.
AWS Configuration
- Create a VPC.
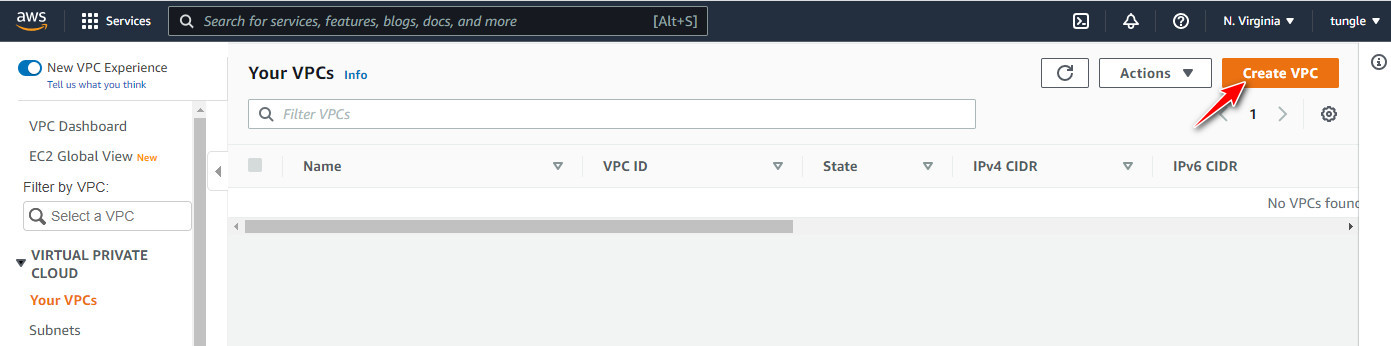
Figure 10.107: Create a VPC 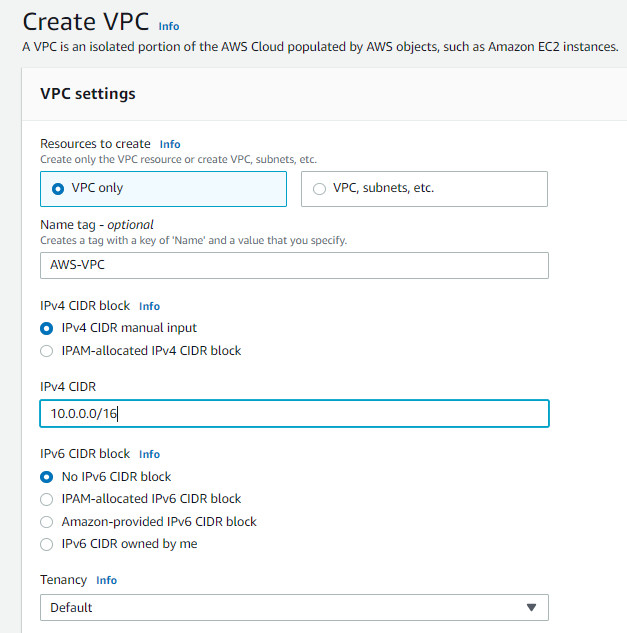
Figure 10.108: Create a VPC named “AWS-VPC” - Create a subnet.
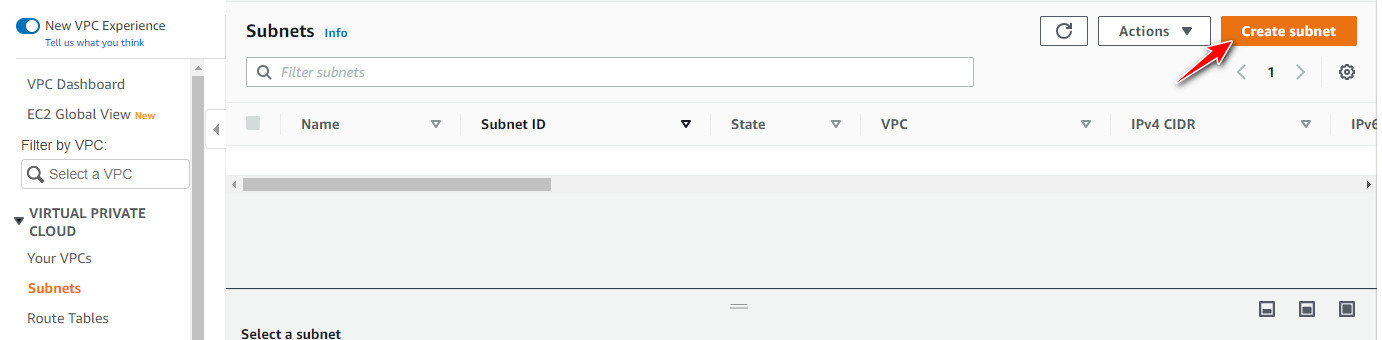
Figure 10.109: Create a subnet 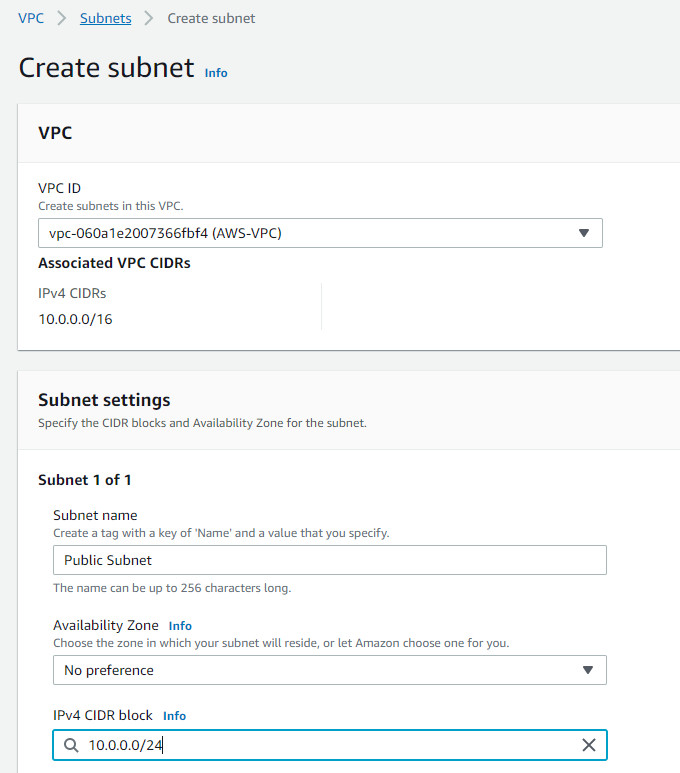
Figure 10.110: Create a public subnet under AWS-VPC 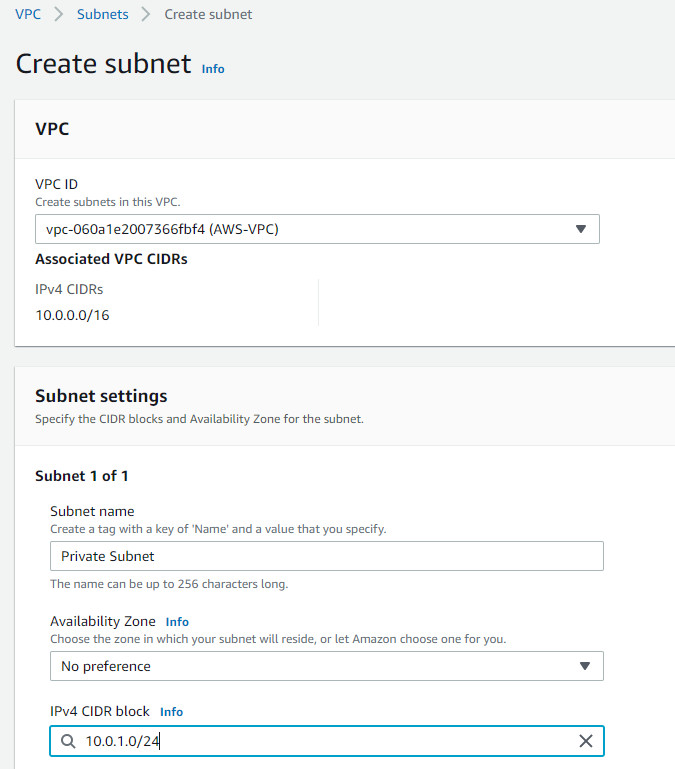
Figure 10.111: Create a private subnet under AWS-VPC - Create an internet gateway.
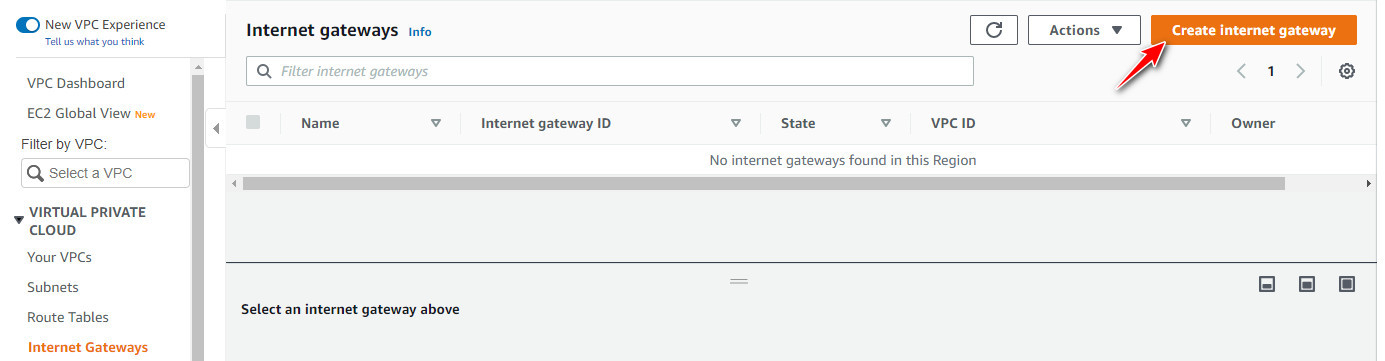
Figure 10.112: Create an internet gateway 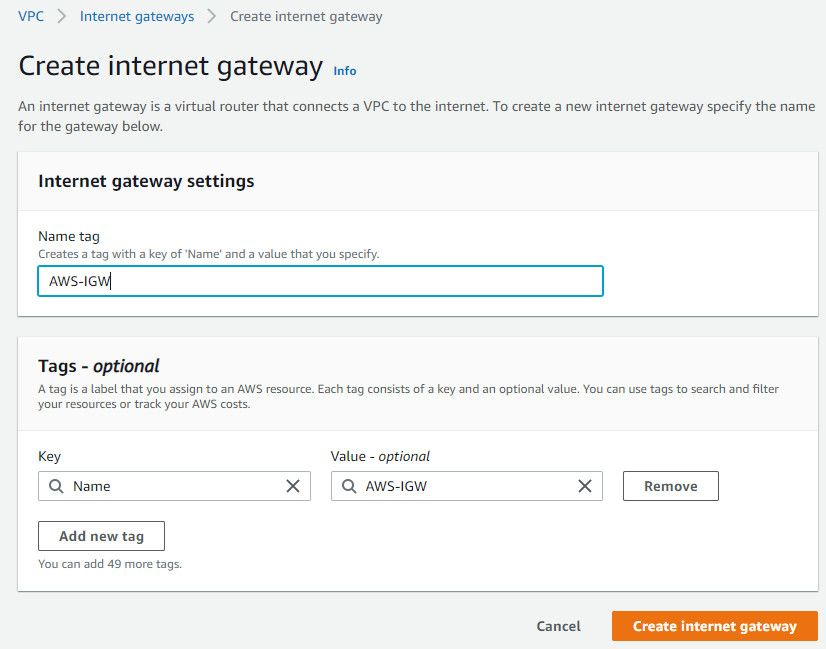
Figure 10.113: Create an internet gateway 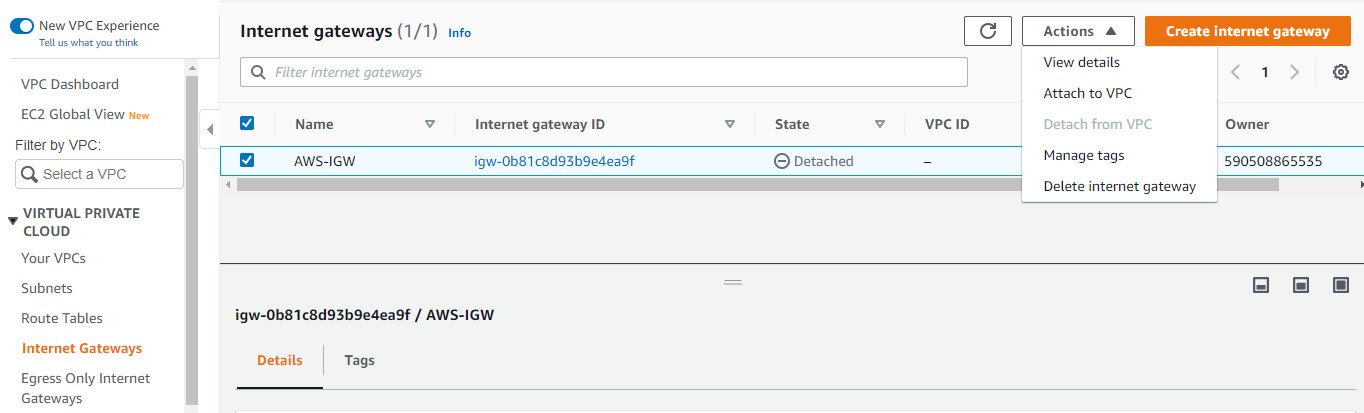
Figure 10.114: Attach an internet gateway to VPC 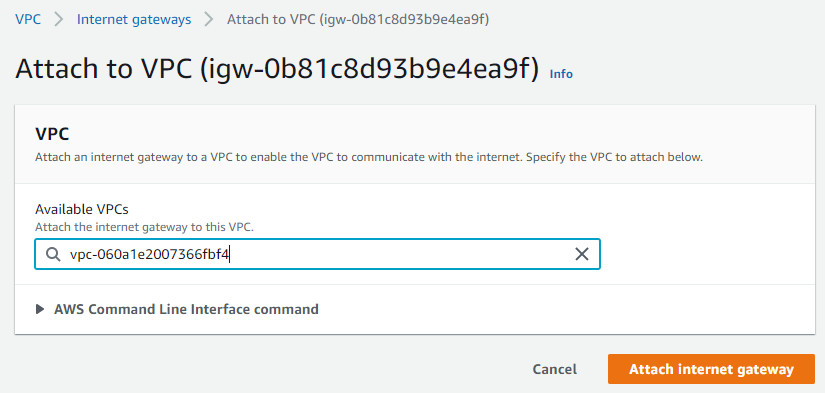
Figure 10.115: Attach an internet gateway to VPC - Create a new Public RouteBy default, name of the “built-in route” is “-”. Rename it to Private Route.
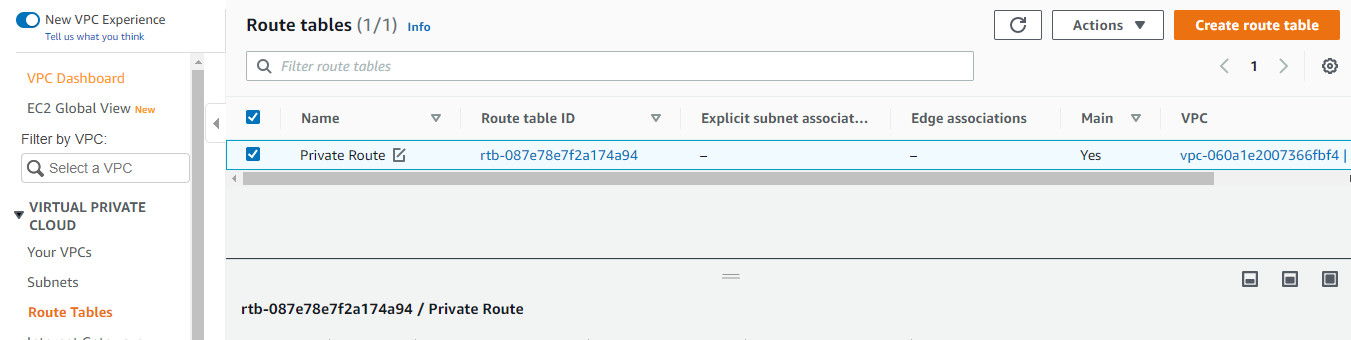
Figure 10.116: Edit private route Go to Route tables > create route table.
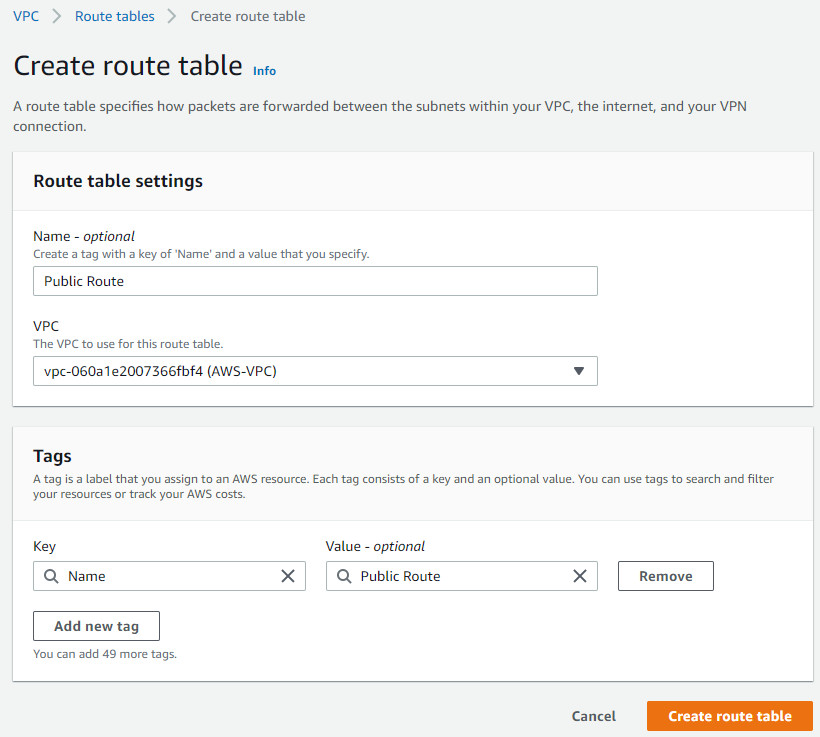
Figure 10.117: Create a public route 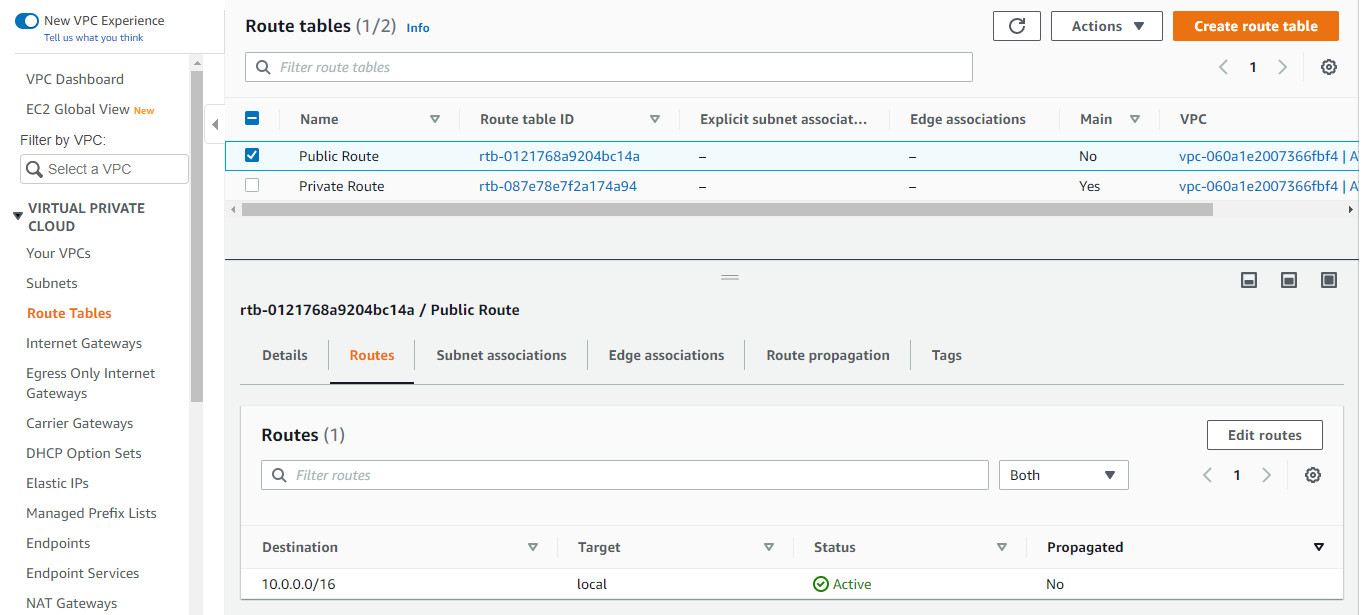
Figure 10.118: Edit routes on Public Route 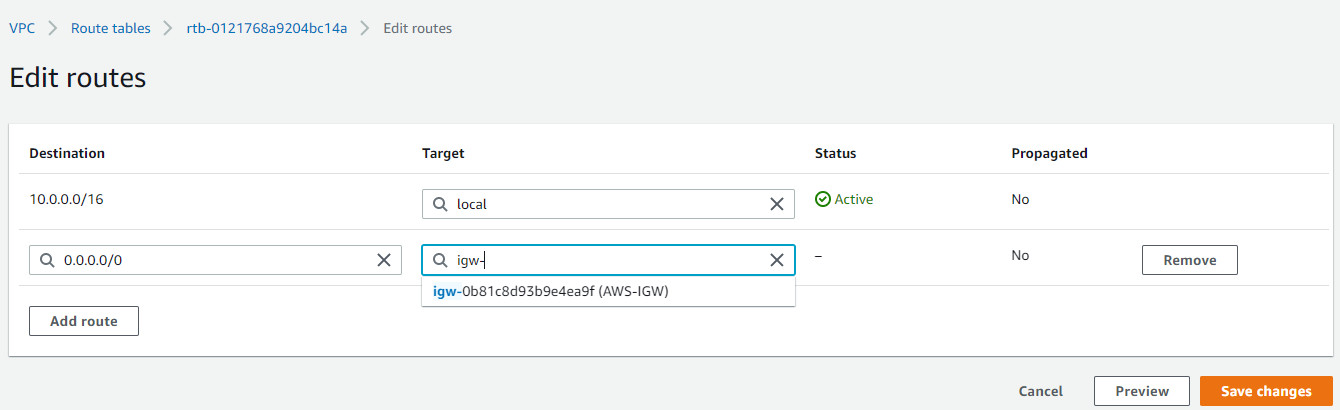
Figure 10.119: Create a new default route to the internet gateway 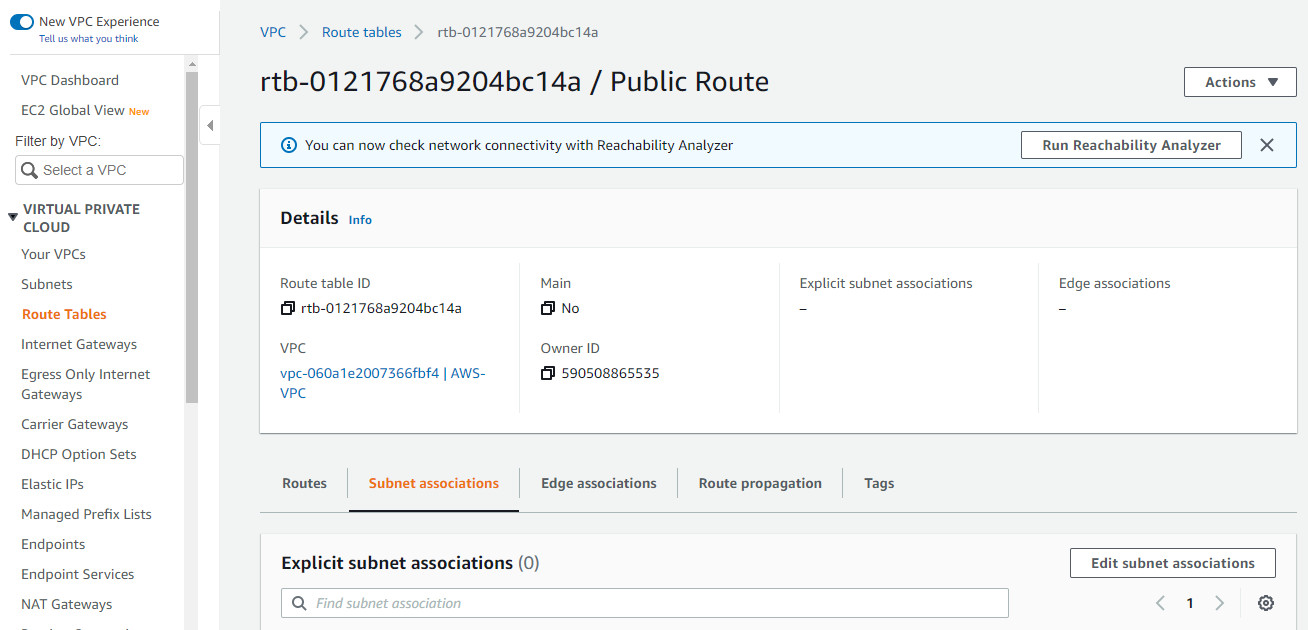
Figure 10.120: Associate Public Subnet to Public Route 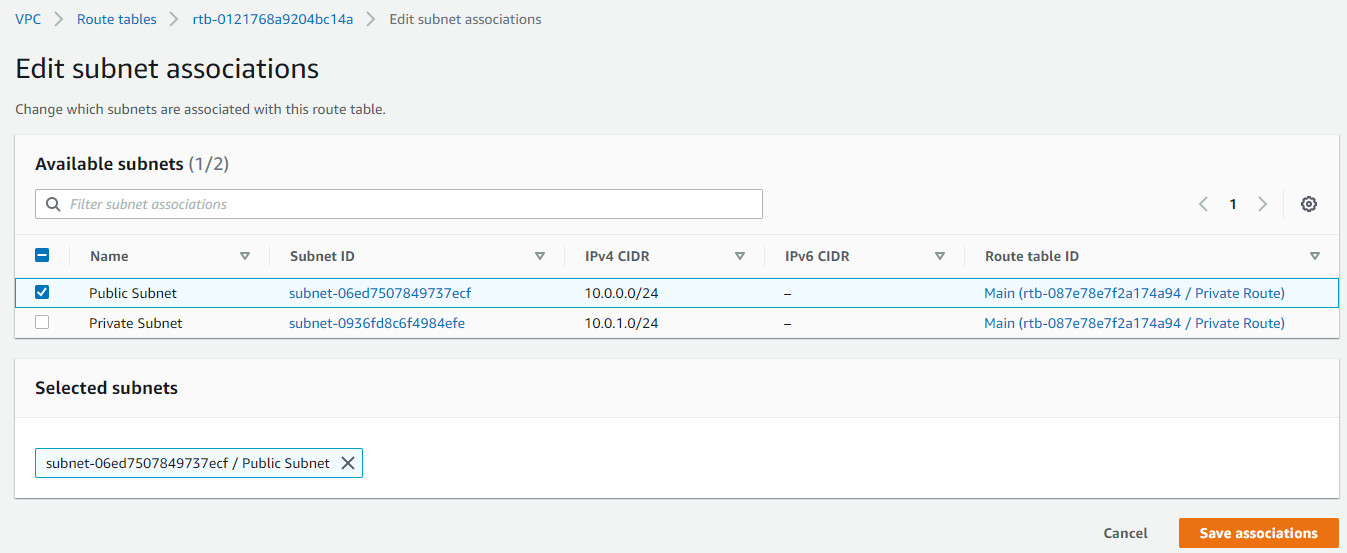
Figure 10.121: Associate Public Subnet to Public Route - Create Key Pair. Go to EC2 – Key Pairs > Create Key Pair.
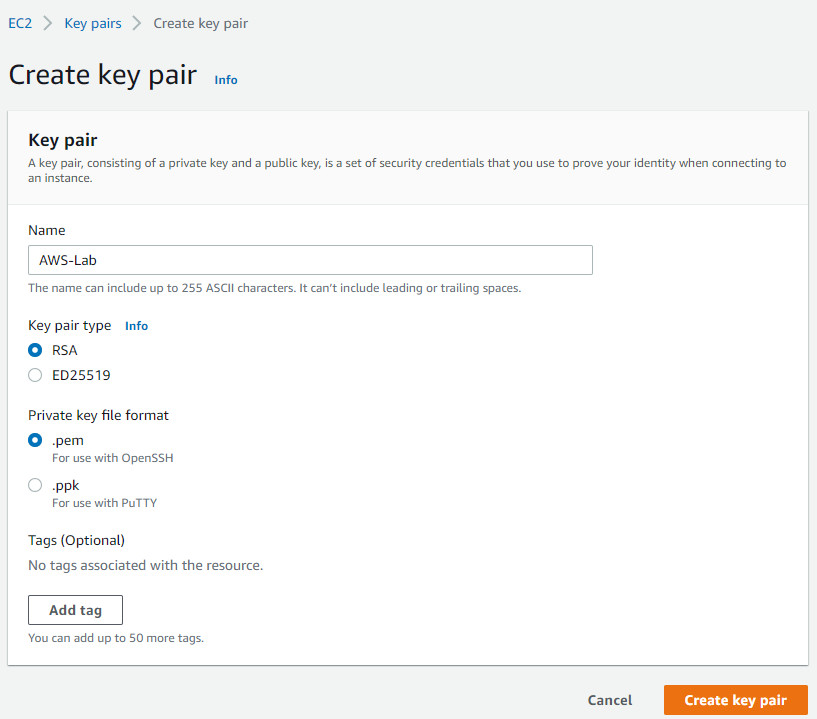
Figure 10.122: Create a key pair - Create Instances. Go to EC2 – Instances > Launch instances.
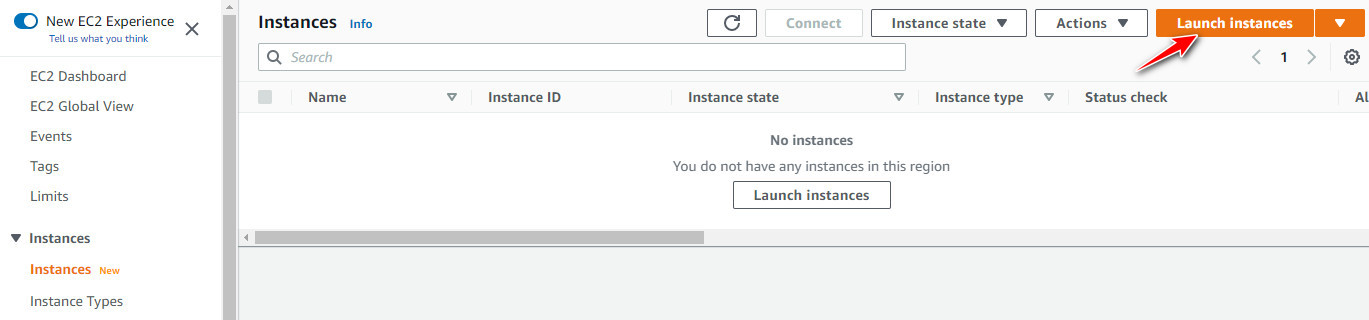
Figure 10.123: Launch a FortiGate instance 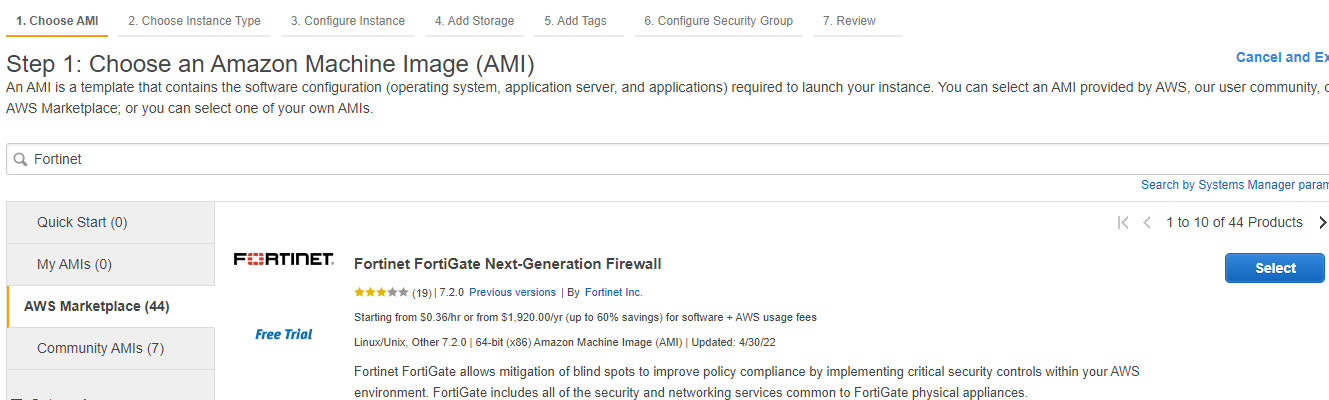
Figure 10.124: Select Fortinet FortiGate Next-Generation Firewall 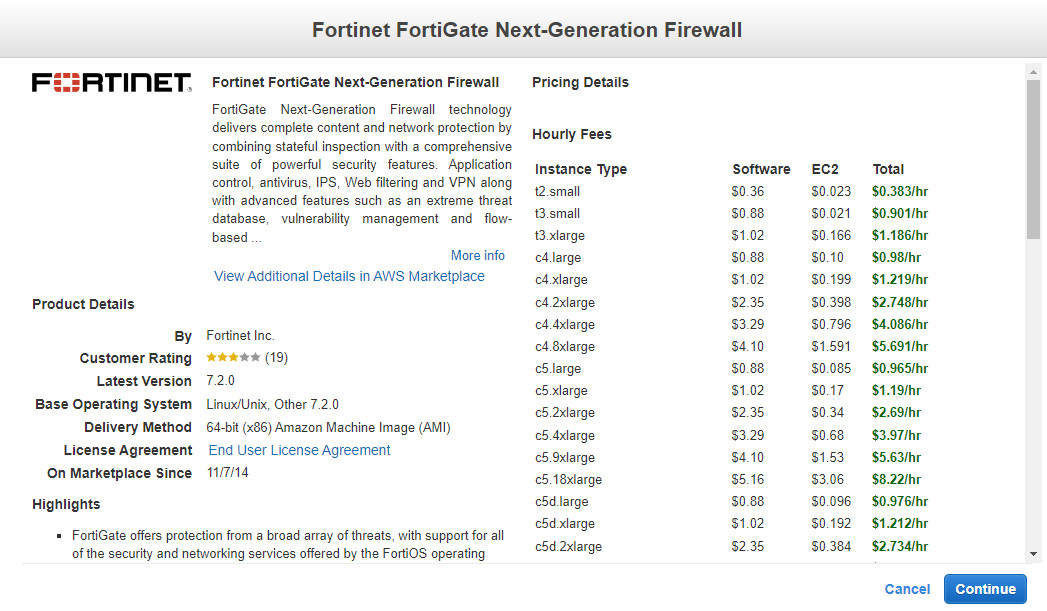
Figure 10.125: Accept FortiGate licence 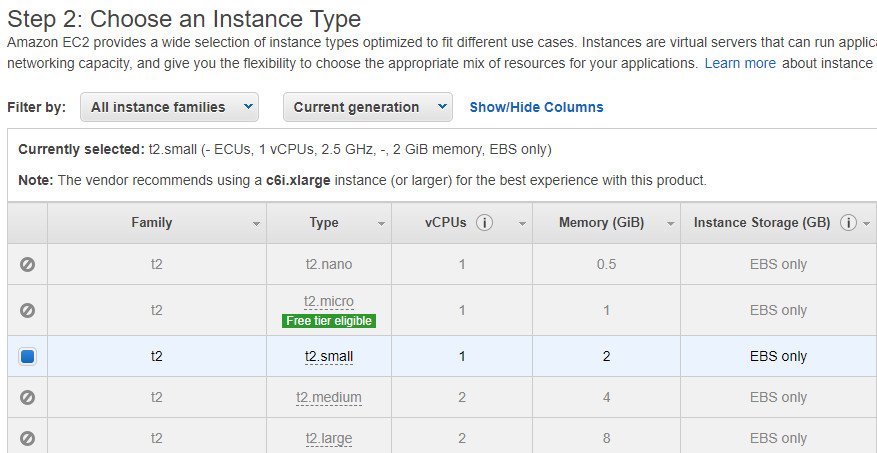
Figure 10.126: Select FortiGate instance type 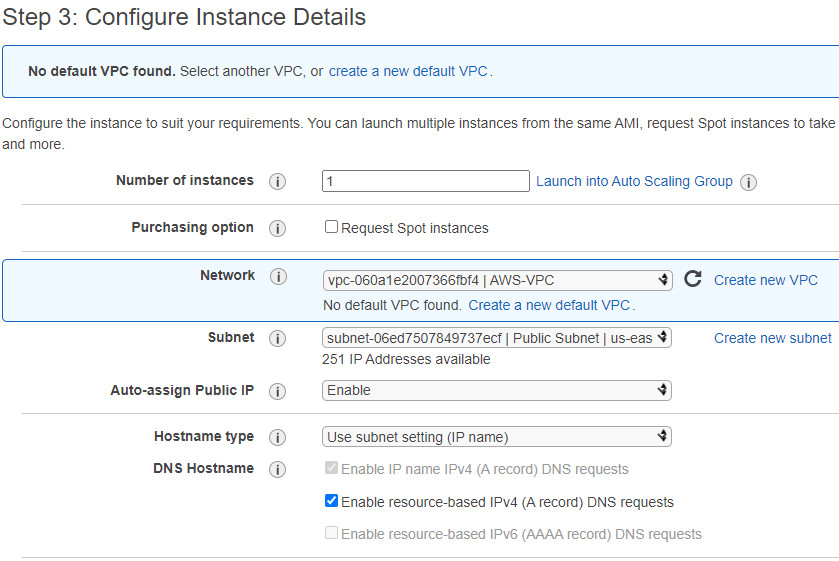
Figure 10.127: Select Network is “AWS-VPC”, Subnet is “Public Subnet” and Auto-assign Public IP is “Enable” 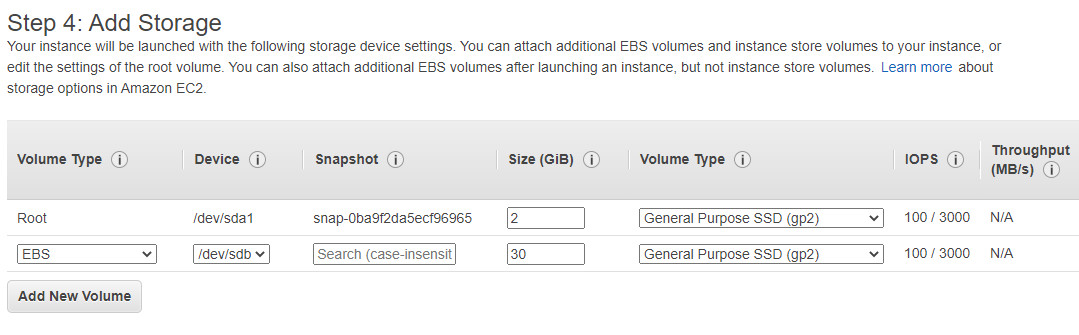
Figure 10.128: Leave the Add storage as the default 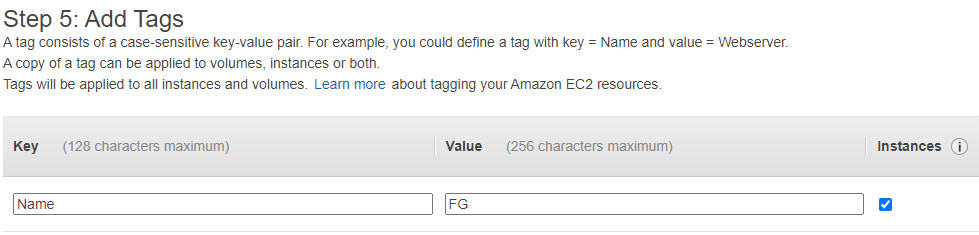
Figure 10.129: Assign Tag with Key is Name and Value is FG 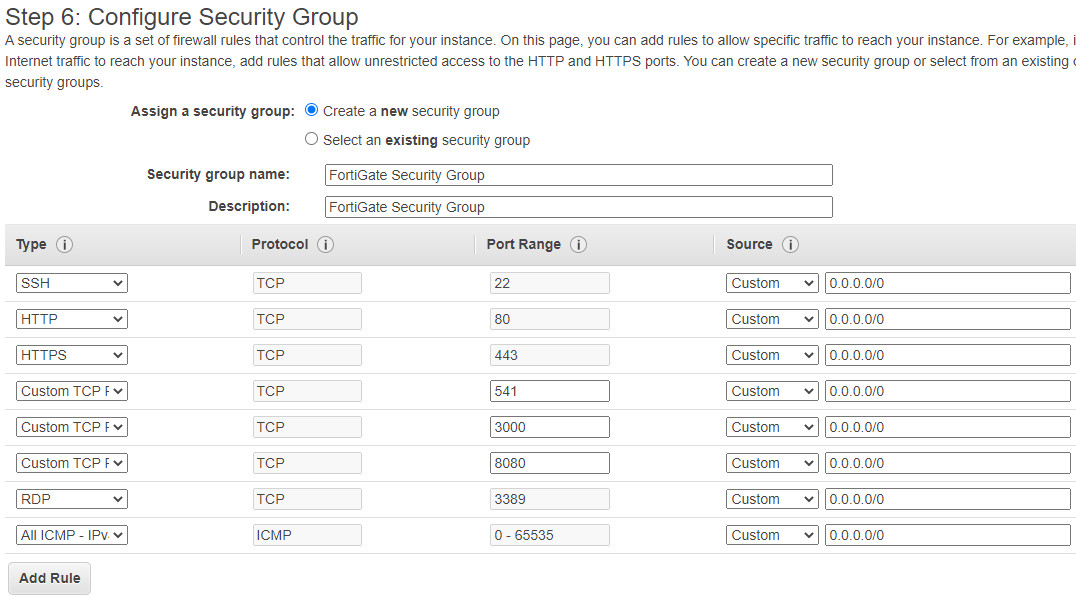
Figure 10.130: Change to FortiGate Security Group and add RDP and ICMP to the Security Group 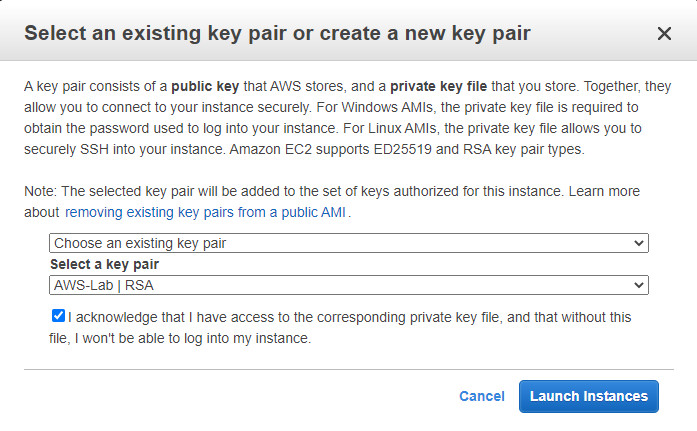
Figure 10.131: Accept key pair and launch instances 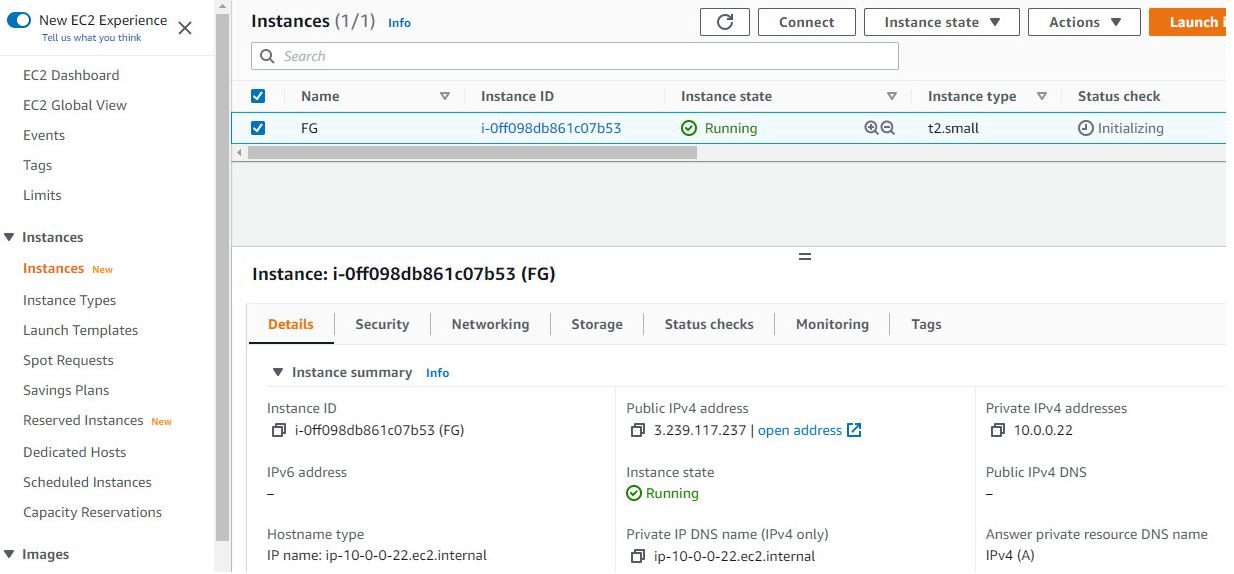
Figure 10.132: FG instance has been launched successfully 
Figure 10.133: Change default interface name to FG Public Subnet - Add a new private subnet interface.
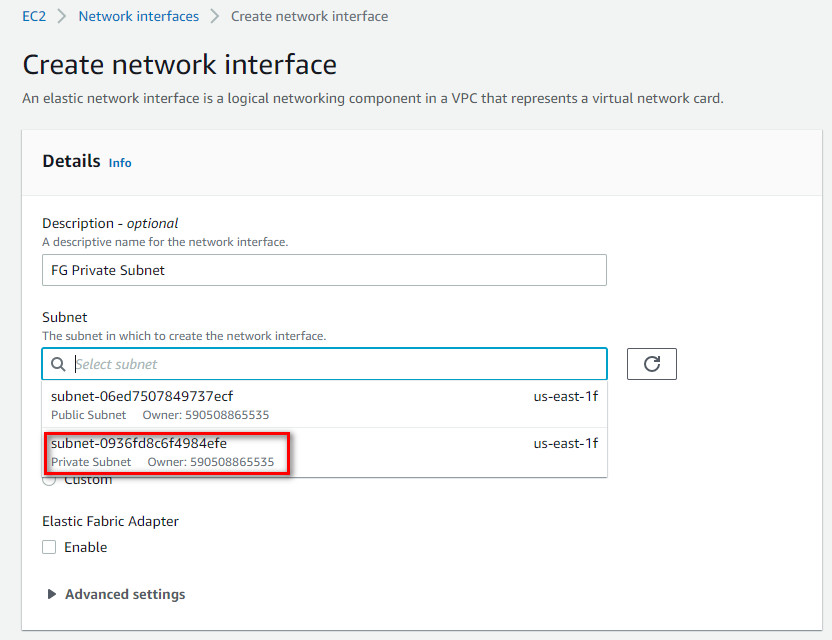
Figure 10.134: Create FG Private Subnet 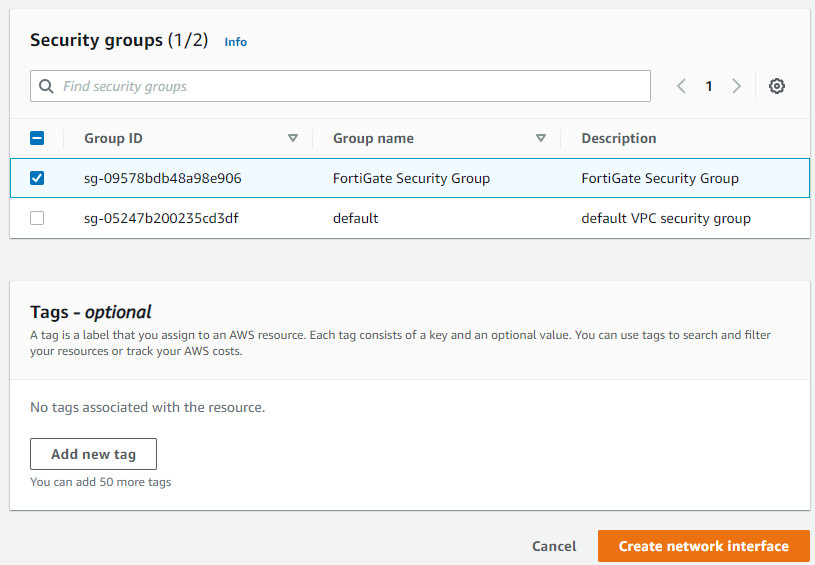
Figure 10.135: Create FG Private Subnet 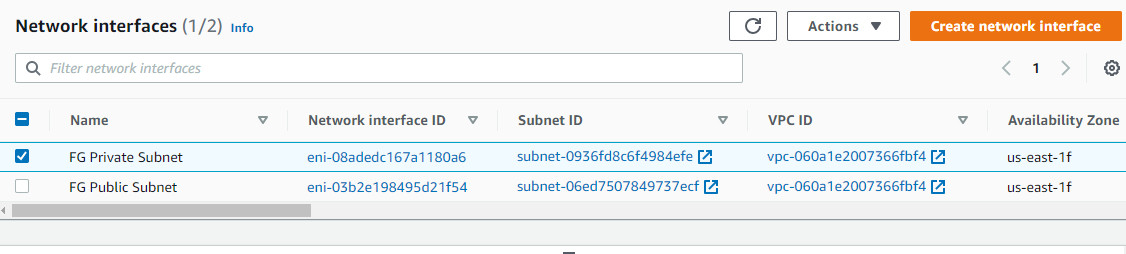
Figure 10.136: Change to FG Private Subnet 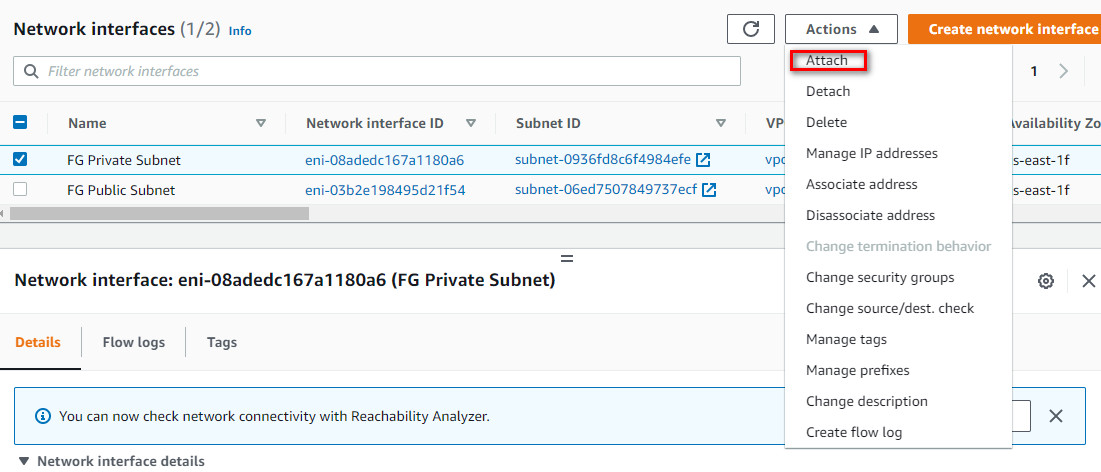
Figure 10.137: Attach the FG Private Subnet to FG 
Figure 10.138: Attach the FG Private Subnet to FG - Disable Source and Destination check on both FG Private and Public Subnet.
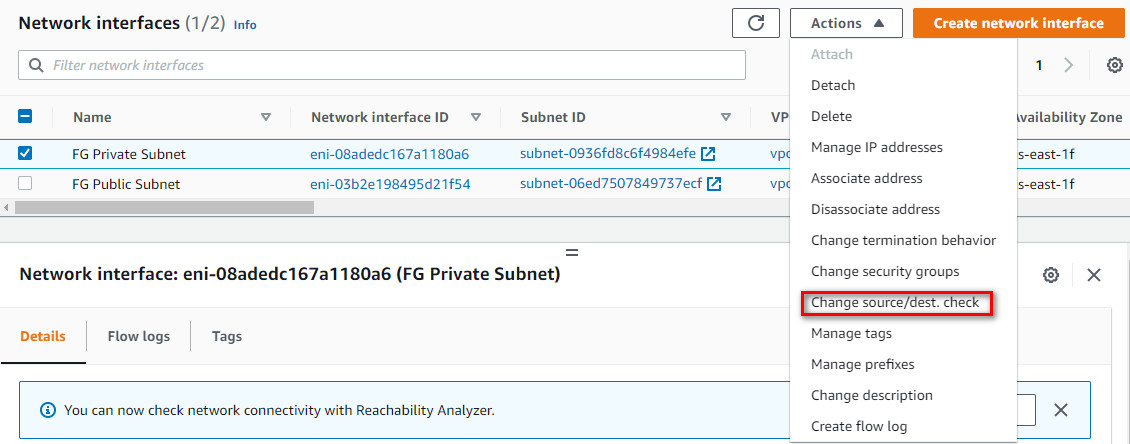
Figure 10.139: Disable source/destination check on FG Private Subnet 
Figure 10.140: Disable source/destination check on FG Private Subnet 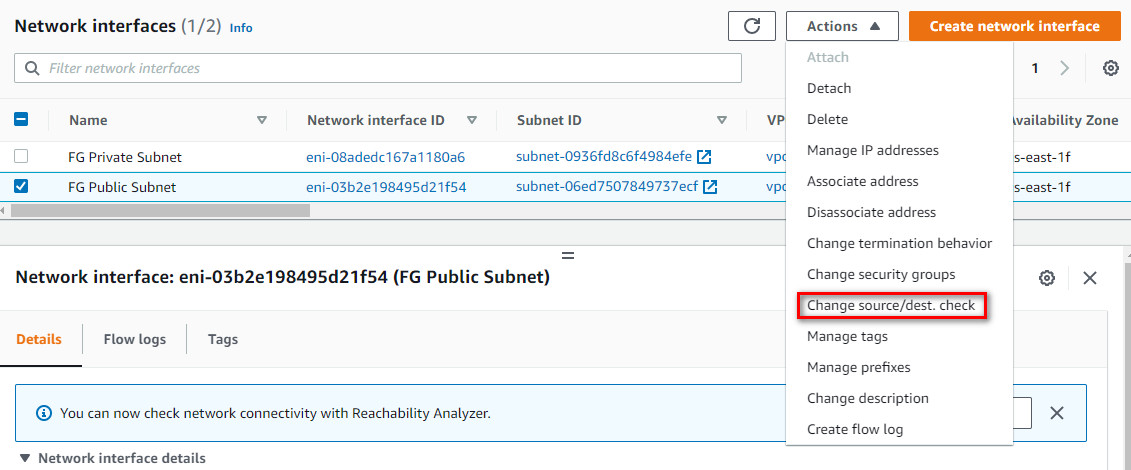
Figure 10.141: Disable source/destination check on FG Public Subnet 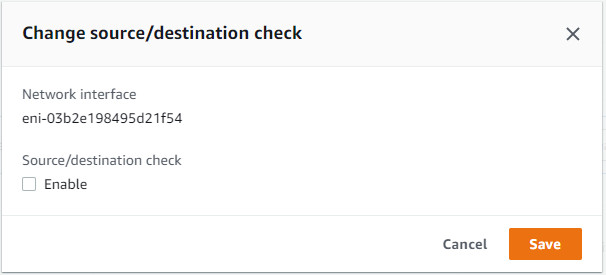
Figure 10.142: Disable source/destination check on FG Public Subnet - Edit private route table.
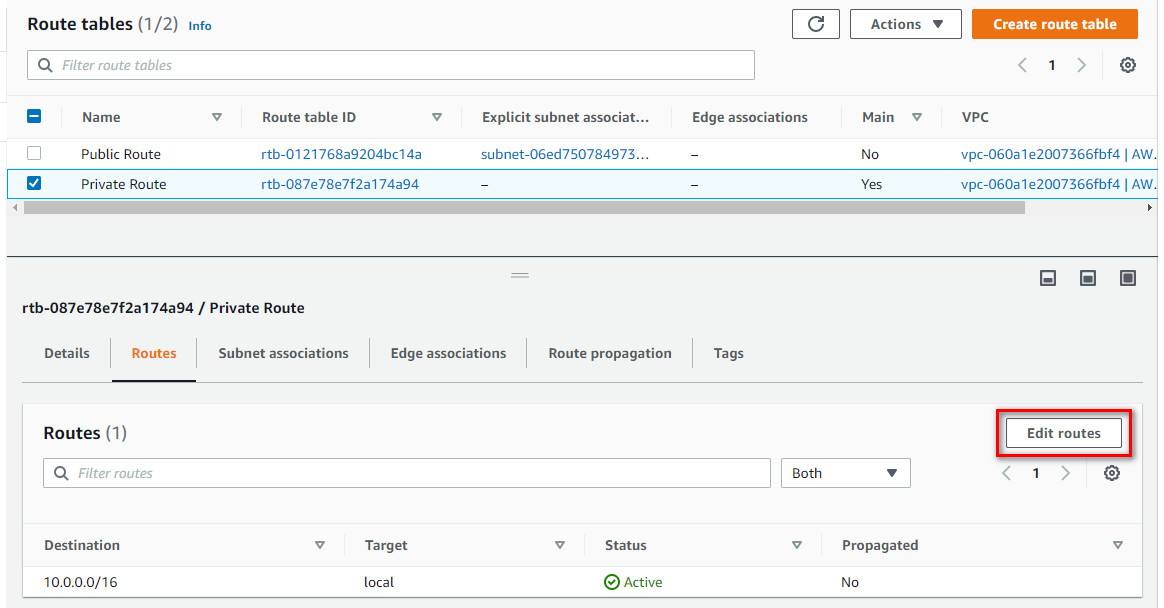
Figure 10.143: Edit Private Route 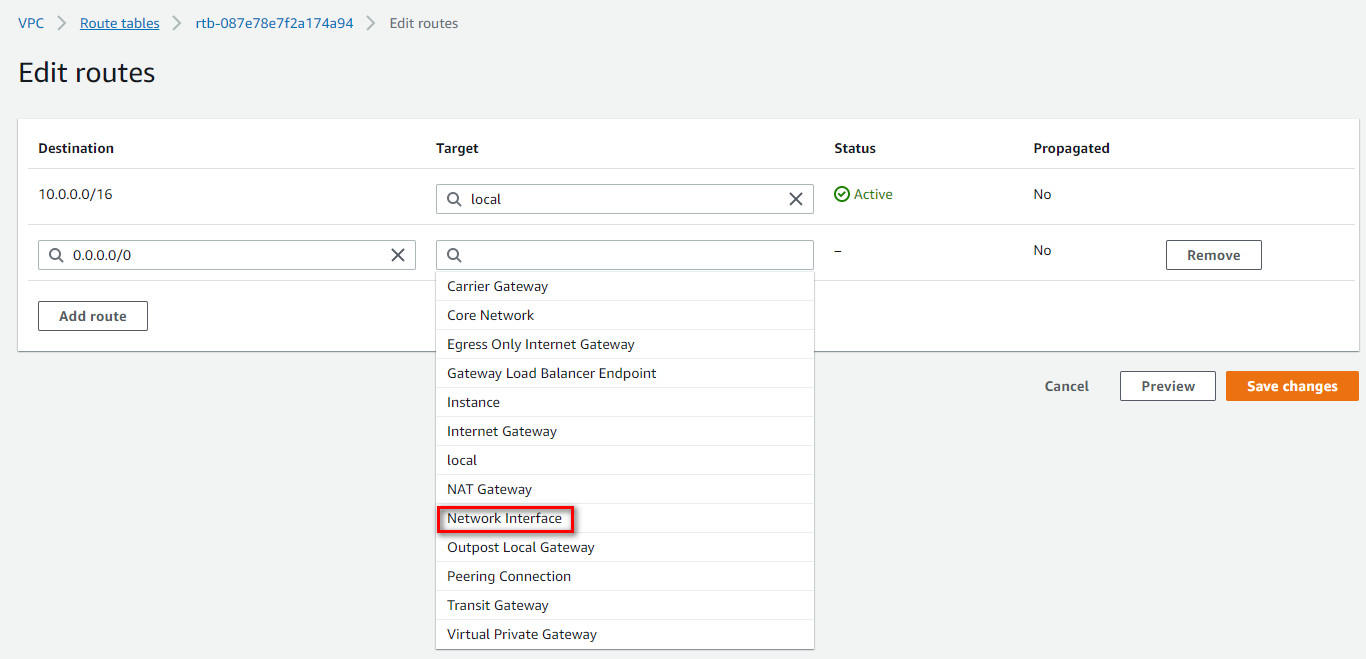
Figure 10.144: Add a default route and select Network Interface 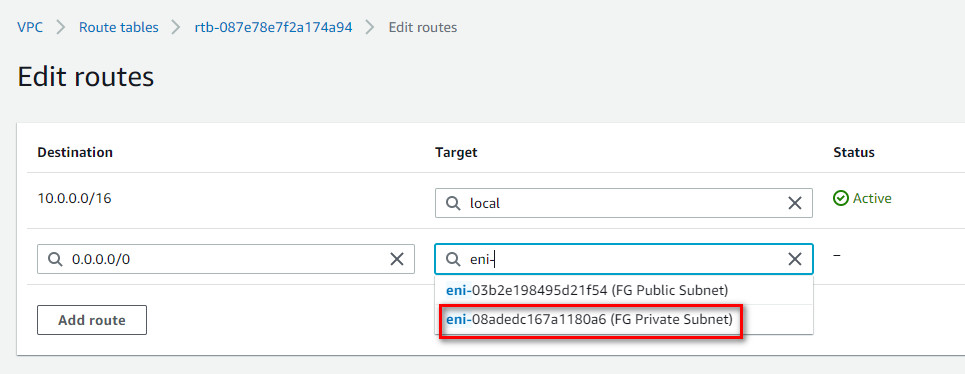
Figure 10.145: Add a default route to target FG Private Subnet - Verify Public and Private IP address of FG.
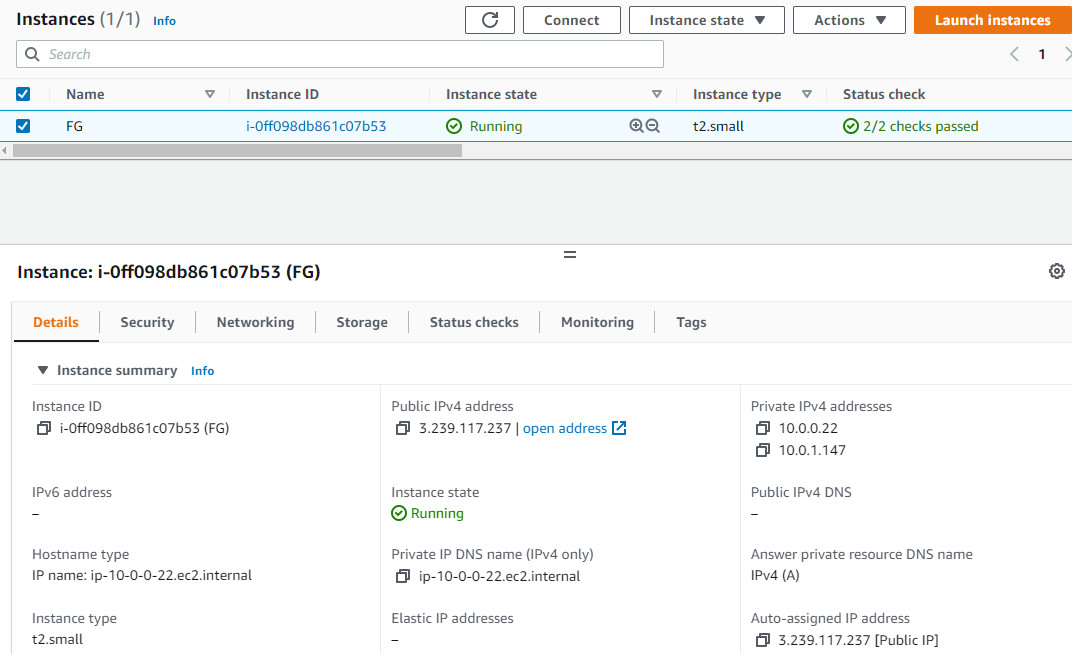
Figure 10.146: Verify public and private IP address of FG - Accessing FortiGate on AWS.Type the IP address in the browser. You should be able to see the FortiGate credentials page. Enter your username and password to login to the firewall.
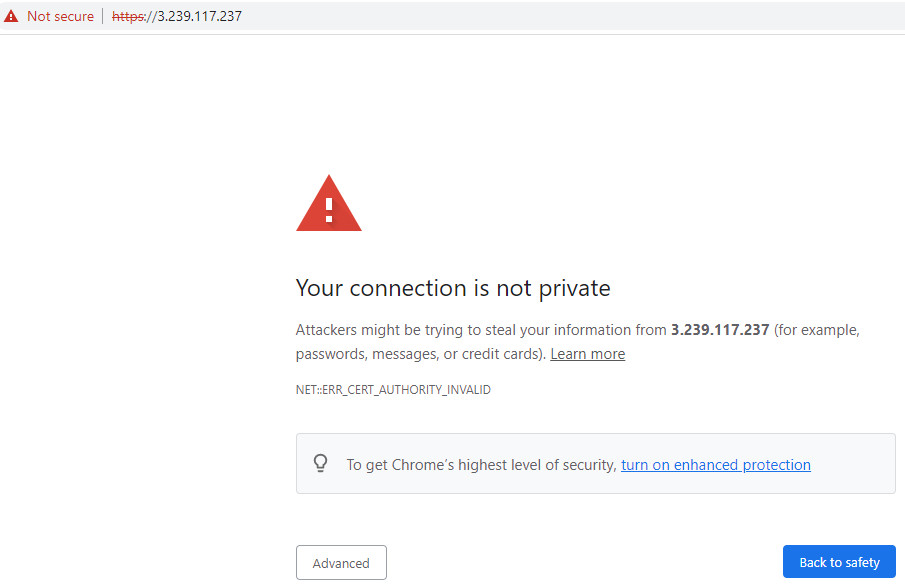
Figure 10.147: Access FortiGate 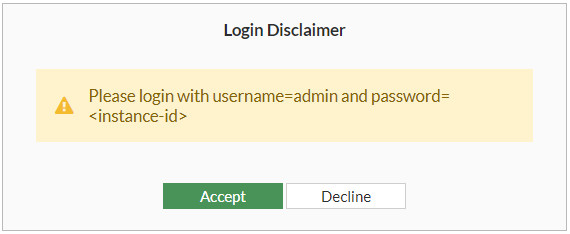
Figure 10.148: Access FortiGate 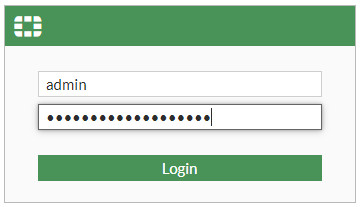
Figure 10.149: Username is admin and password is instance ID of FortiGate 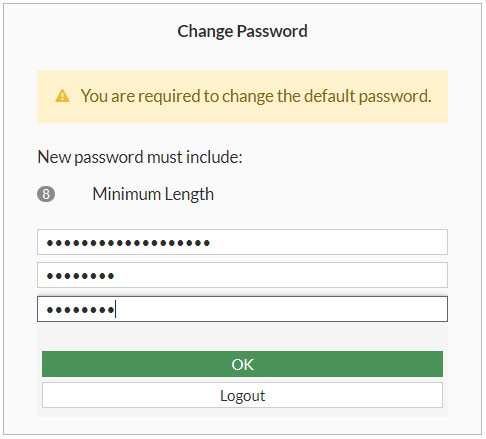
Figure 10.150: Change password 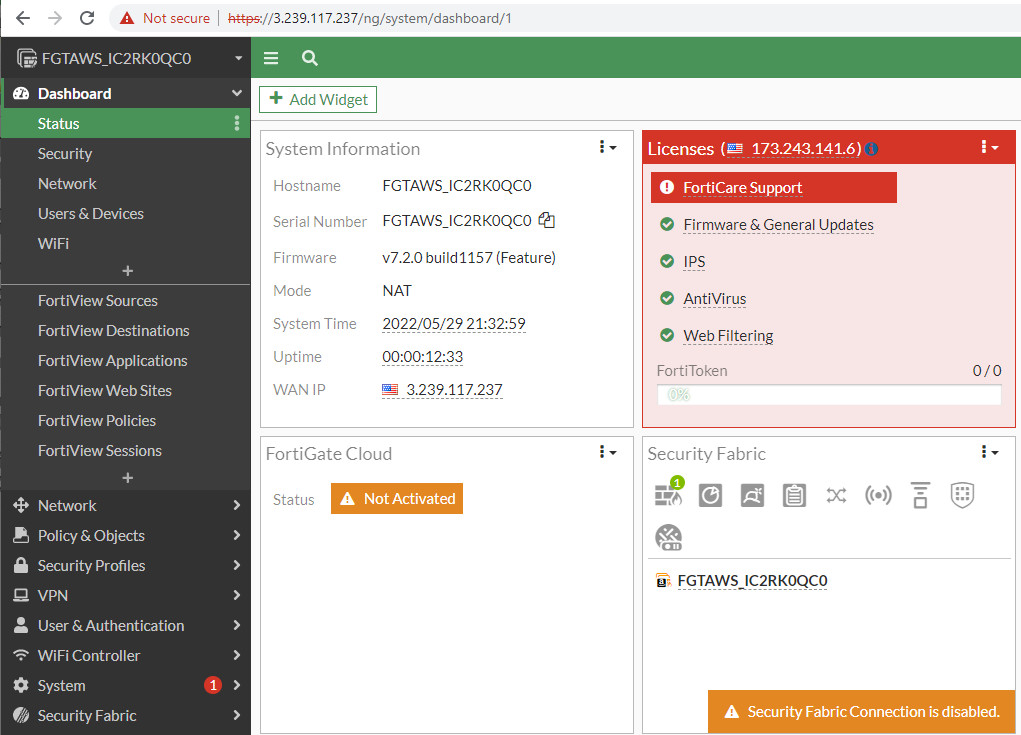
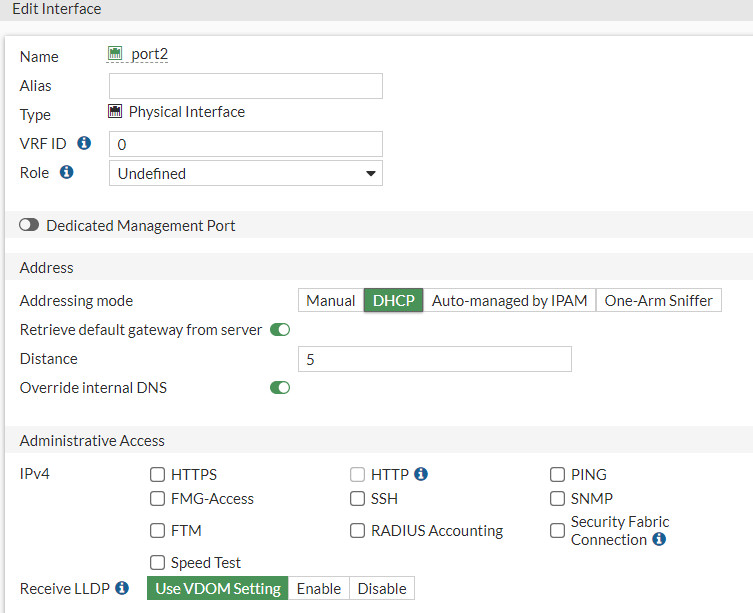
Figure 10.151: FortiGate dashboard You should set port1 and port2 as DHCP client to receive an IP address from External and LAN subnet. Port1 is belong to External subnet or the internet and port2 is belong to the LAN.
| Subnet | Description |
|---|---|
| Port1 | External subnet used to connect the FortiGate-VM to the internet. |
| Port2 | LAN subnet used to deploy services. |