Chapter 8. VDOM
8.2 Inter-VDOM Routing
Learning Objectives
- Configure a VDOM to pass traffic between VDOMs
- Configure an Inter-VDOM routing
Scenario: Inter-VDOM routing is the communication between VDOMs. VDOM links are virtual interfaces that connect VDOMs. A VDOM link contains a pair of interfaces, each one connected to a VDOM and forming either end of the inter-VDOM connection. We want to create a link between VDOM Sales and Accounting, then the traffic from WebTerm1 should be reached to WebTerm2.
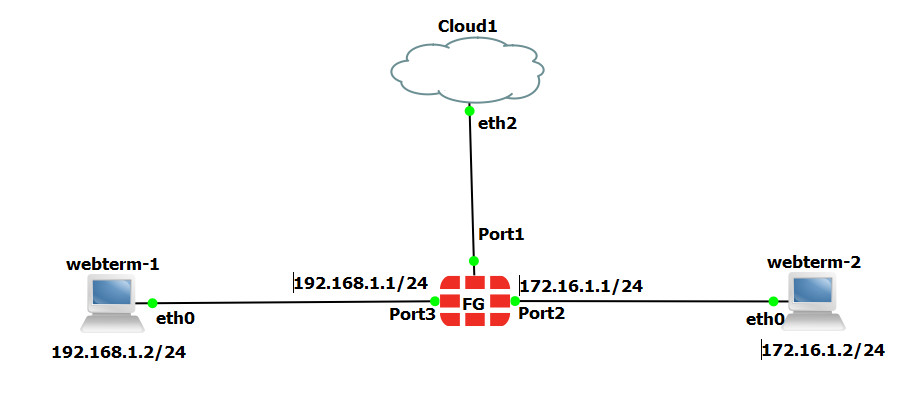
| Device | IP address | Access |
|---|---|---|
| WebTerm1 | 192.168.1.2/24 | – |
| WebTerm2 | 172.16.1.2/24 | – |
| FortiGate | Port 1: DHCP Client
Port 2: 172.16.1.1/24 Port 3: 192.168.1.1/24 |
Port 1: https, ping |
| Cloud1 | – |
- First, enable VDOMs in the firewall.
FGVM01TM19008000 # config system global
FGVM01TM19008000 (global) # set vdom-mode multi-vdom
FGVM01TM19008000 (global) # end
- Create two VDOMs, Sales and Accounting.
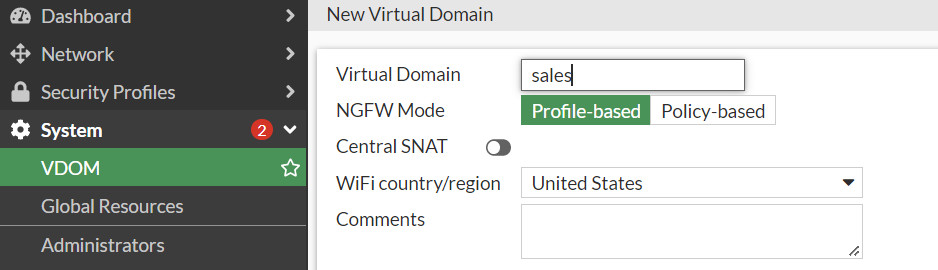
Figure 8.20: Create a VDOM Sales 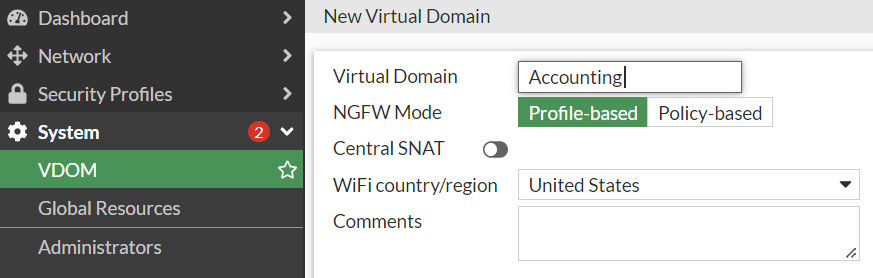
Figure 8.21: Create a VDOM Accounting - Configure IP addresses for the Interfaces port2 and port3. Assign port3 to Sales Vdom and port2 to Accounting Vdom.

Figure 8.22: Port2 and Port3 IP address configuration 
Figure 8.23: Port2 configuration 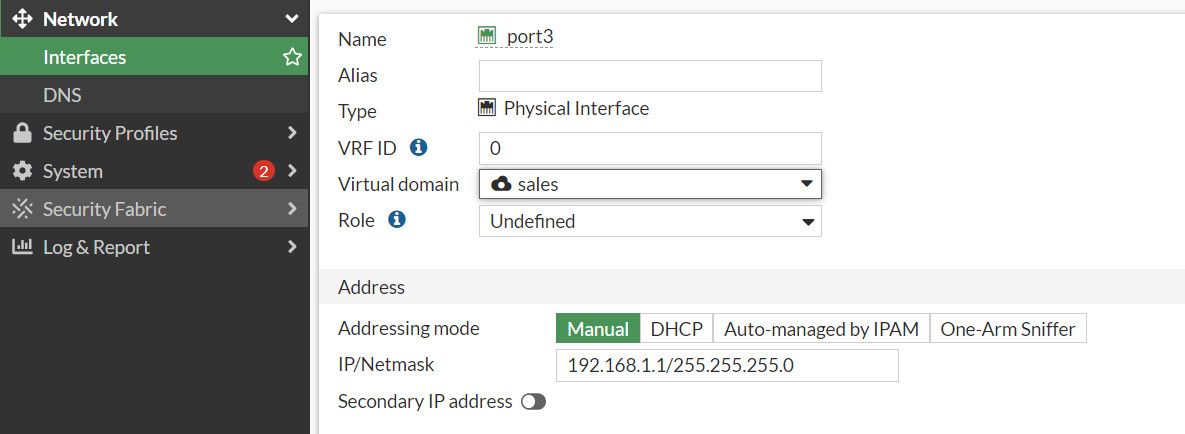
Figure 8.24: Port3 configuration - Go to Global VDOM > Network Interfaces > Create a new VDOM Link, and configure it as Figure 8.25:
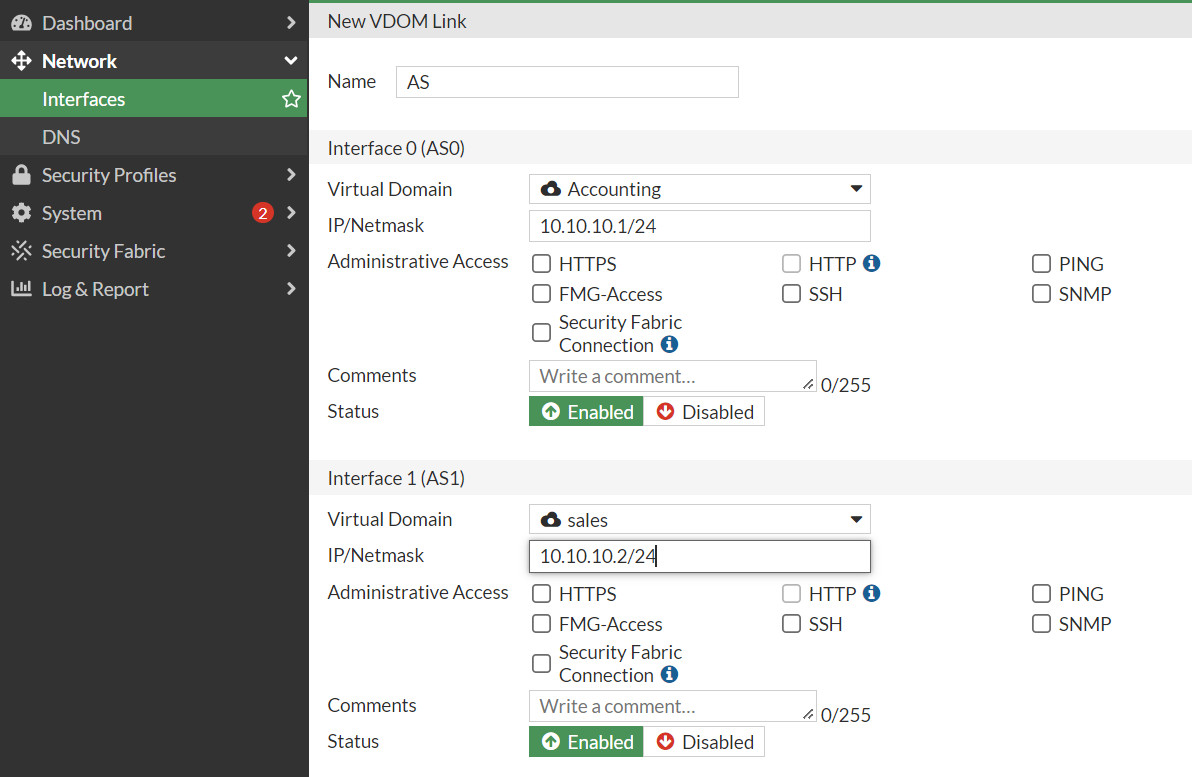
Figure 8.25: Create a VDOM link between Sales and Accounting - In Accounting VDOM, Create two static routes:
- Destination: 192.168.1.0/255.255.255.0
- Interface: Accounting-Sales
- Gateway: 10.10.10.2
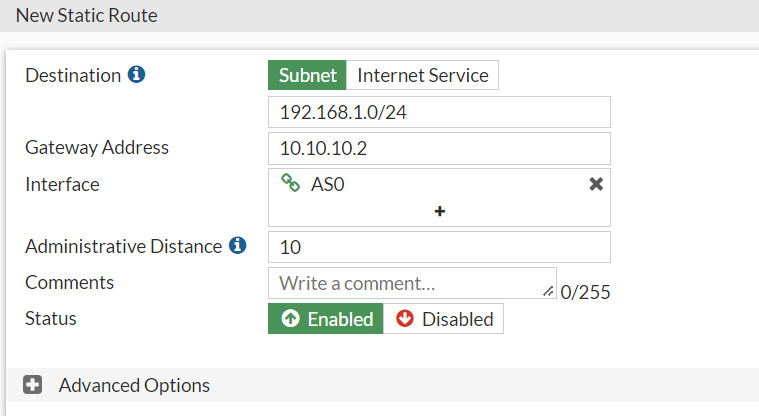
Figure 8.26: Create a static route in Accounting VDOM - Destination: 172.16.1.0/255.255.255.0
- Interface: Accounting-Sales
- Gateway: 10.10.10.2

Figure 8.27: Create a static route in Accounting VDOM - In Accounting VDOM, Create two Firewall Policies:
- Incoming: Port 2
- Outgoing: AS0
- NAT Disable
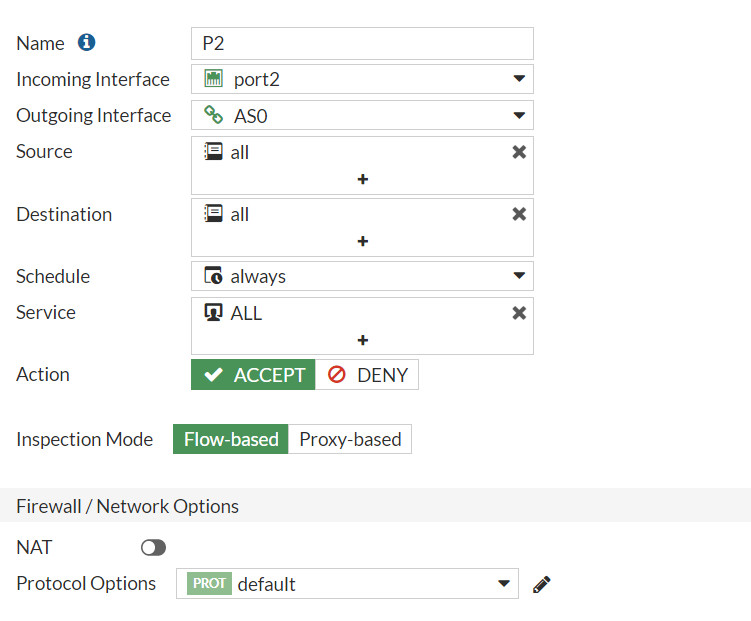
Figure 8.28: Create a Firewall Policy in Accounting VDOM from Port2 to AS0 Incoming:
- Incoming: AS0
- Outgoing: Port2
- NAT Disable
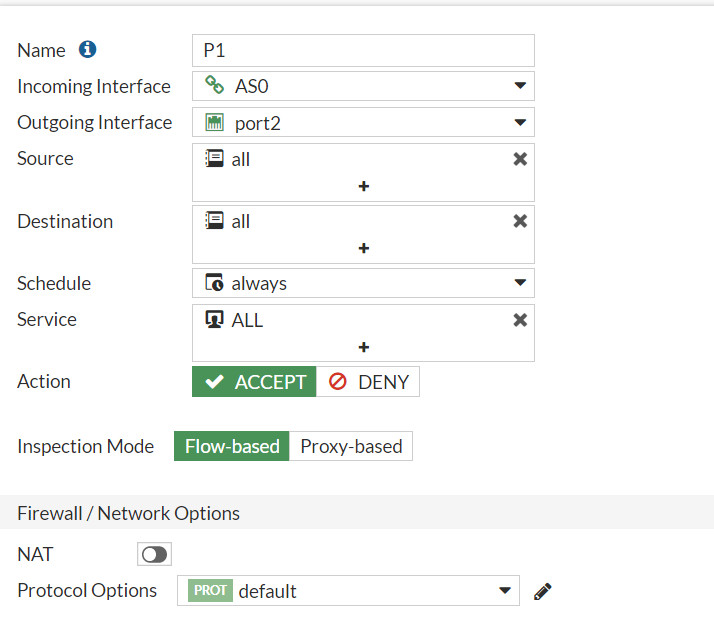
Figure 8.29: Create a Firewall Policy in Accounting VDOM from AS0 to Port2 - In Sales VDOM, Create two static routes:
- Destination: 192.168.1.0/255.255.255.0
- Interface: AS1
- Gateway: 10.10.10.1
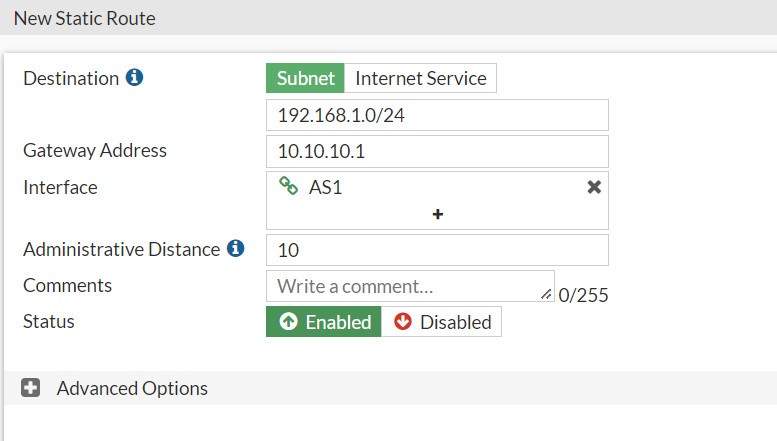
Figure 8.30: Create a static route in Sales VDOM - Destination: 172.16.1.0/255.255.255.0
- Interface: AS1
- Gateway: 10.10.10.1
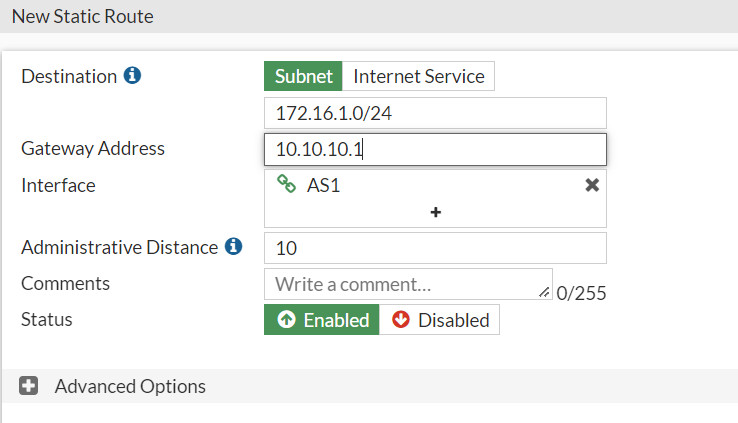
Figure 8.31: Create a static route in Sales VDOM - In Sales VDOM, Create two Firewall Policies:
- Incoming: Port3
- Outgoing: AS1
- NAT Disable
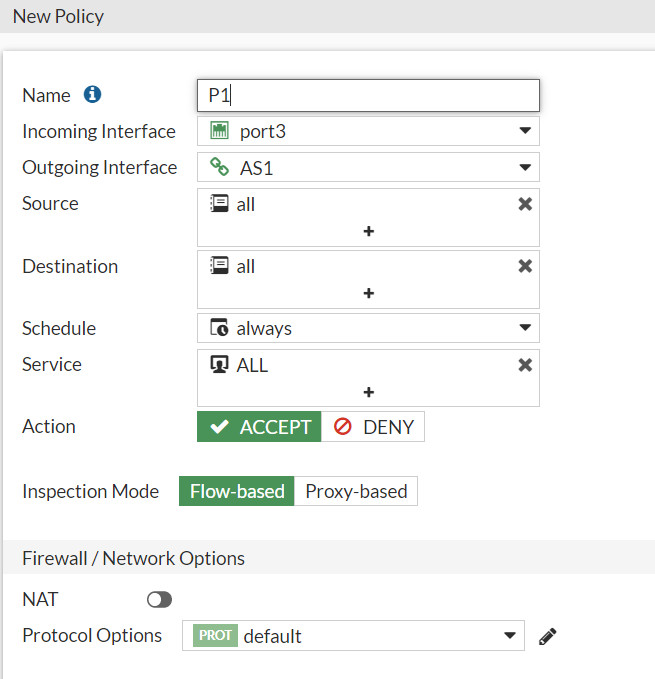
Figure 8.32: Create a Firewall Policy in Sales VDOM from Port3 to AS1 - Incoming: AS1
- Outgoing: Port3
- NAT Disable
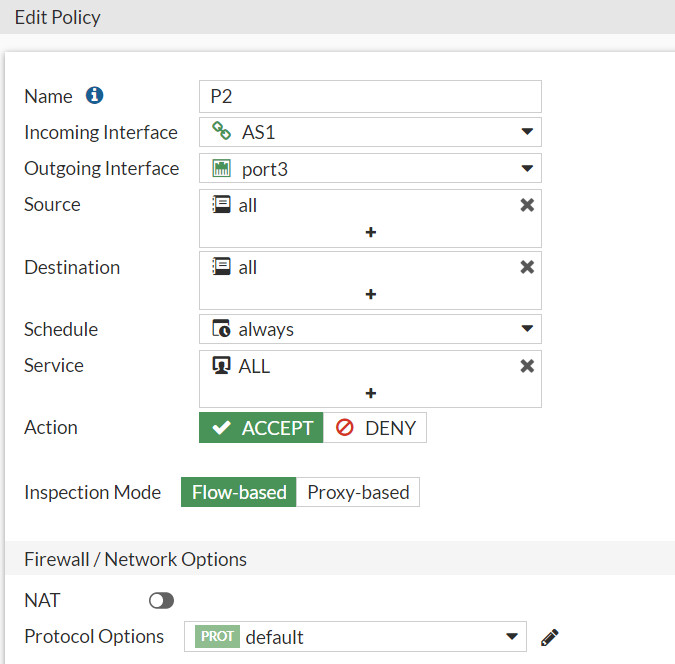
Figure 8.33: Create a Firewall Policy in Sales VDOM from AS1 to Port3 - Now, you should verify your configuration and should be able to ping from WebTerm1 to WebTerm2.
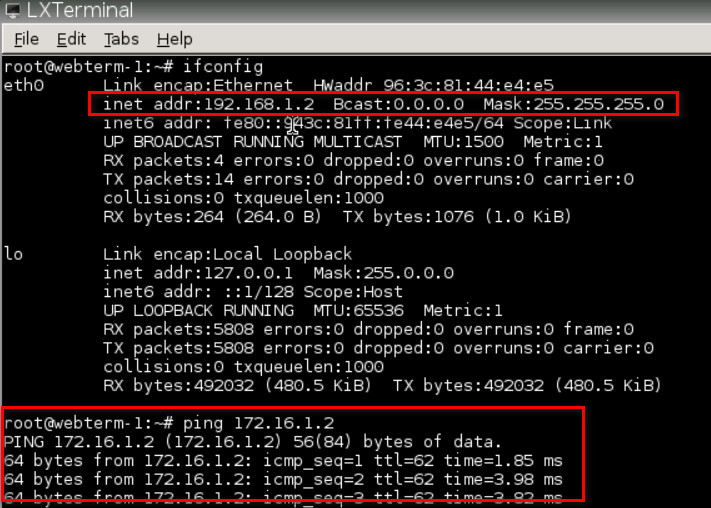
Figure 8.34: Verify configuration To delete a VDOM link in the CLI:
config system vdom-link
delete <VDOM-LINK-Name>
end
