Chapter 10. Cloud Technologies
10.1 IPsec VPN from FortiGate (on Premise) to Azure
Learning Objectives
- Configure a Virtual Network Gateway in Azure
- Configure a local network gateway
- Create an IPSEC VPN between Firewall on-Premise and Azure
Scenario: We are going to connect on premise FortiGate to Azure Virtual Gateway. This is going to be IPsec VPN between FortiGate and Azure. First, we will configure Azure and then connect FortiGate through Port1 to Azure Virtual Gateway.
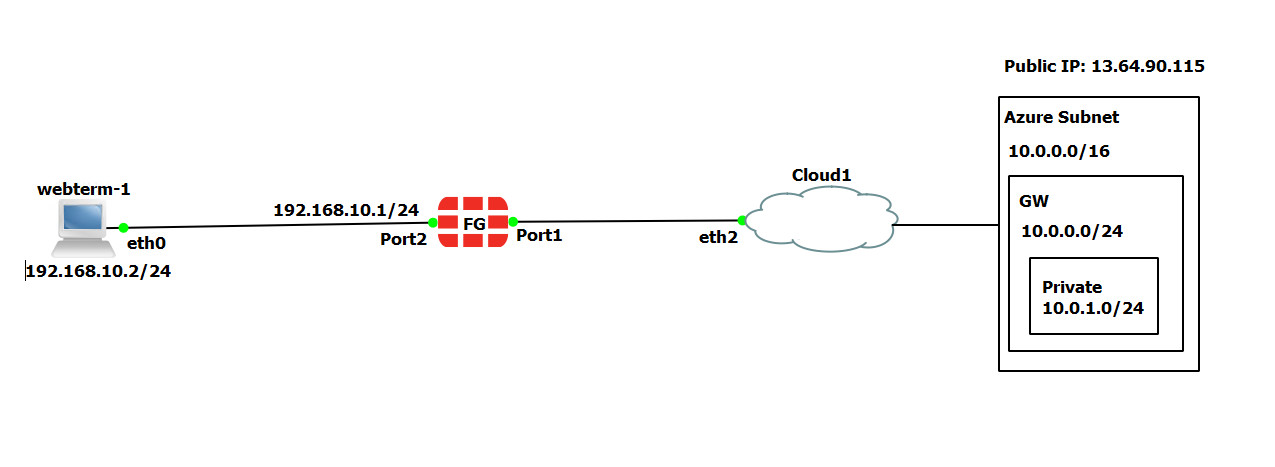
| Device | Configuration | Access |
|---|---|---|
| FortiGate | Port 1: DHCP Client
Port 2: 192.168.10.1/24 |
Port1: HTTP, HTTPS, PING
|
| WebTerm1 | 192.168.10.2/24 | – |
Azure Configuration
- Create a resource group in Azure as following:
- Resource group: FG
- Region: West US
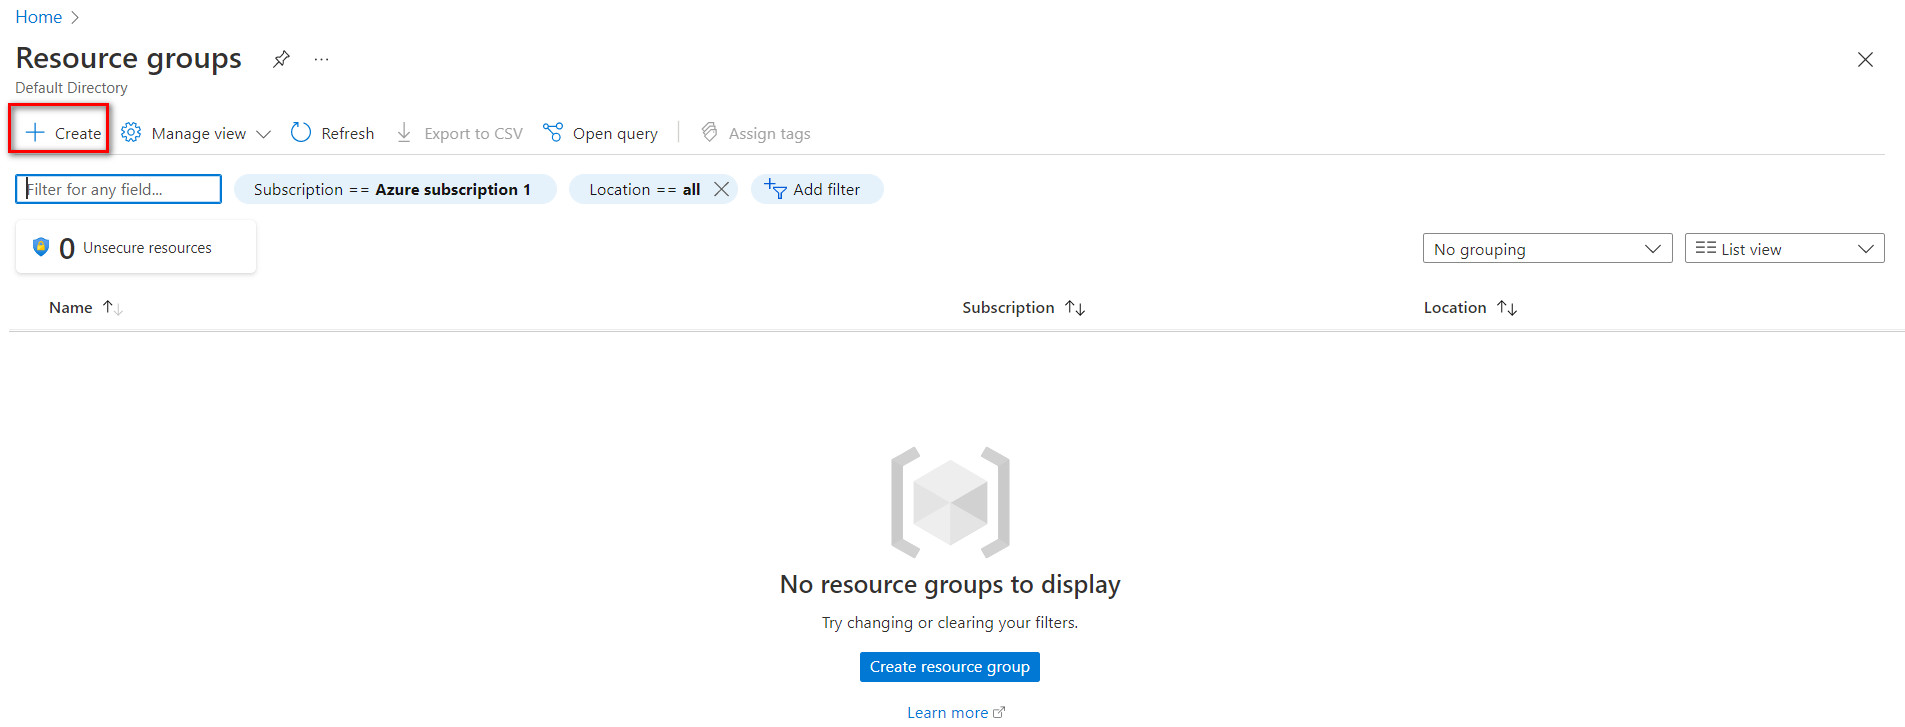
Figure 10.2: Create a resource group 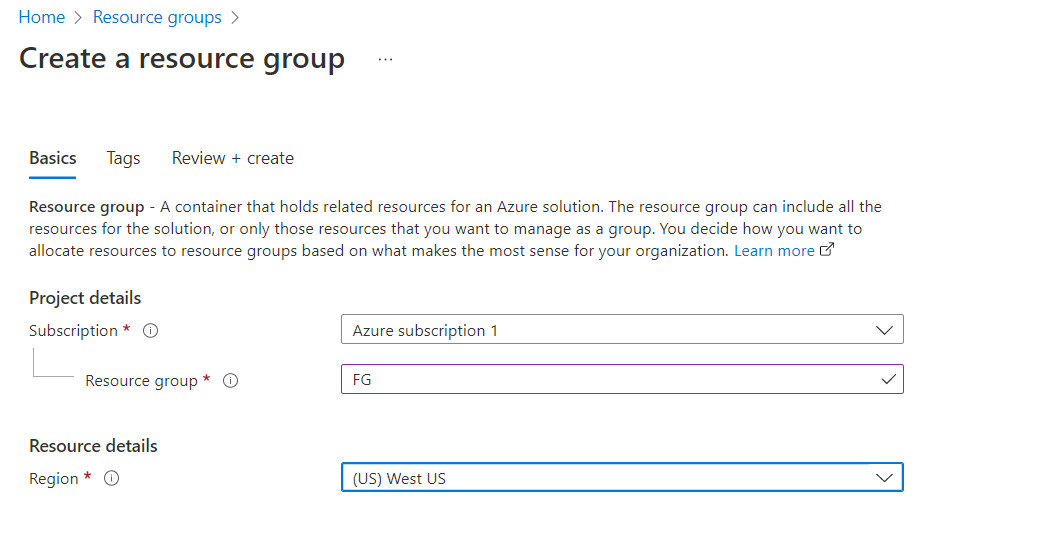
Figure 10.3: Create a resource group 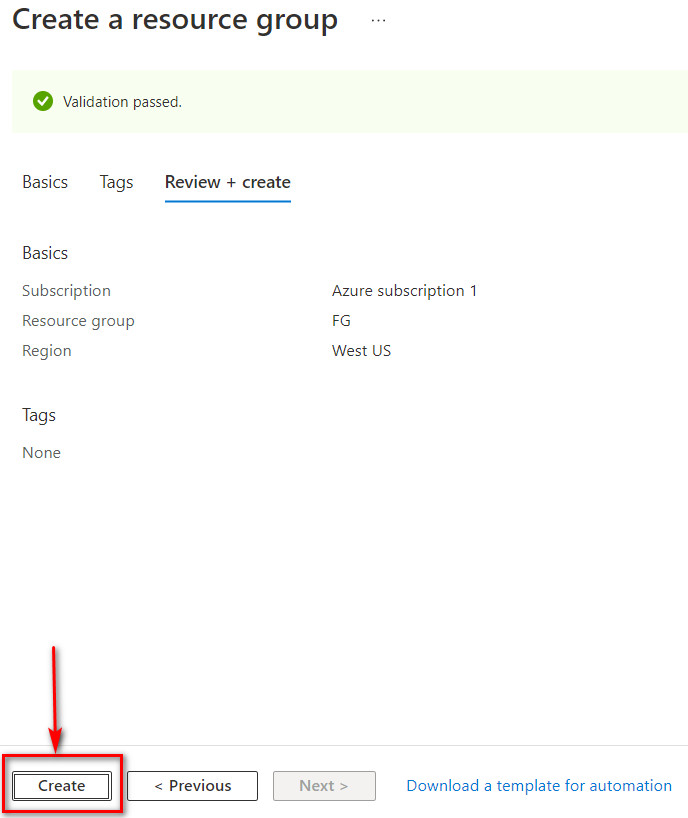
Figure 10.4: Create a resource group - Create a virtual network as following:
- Resource group: FG
- Name: Azure-FG
- Region: West US
- Change the default subnet: 10.0.1.0/24
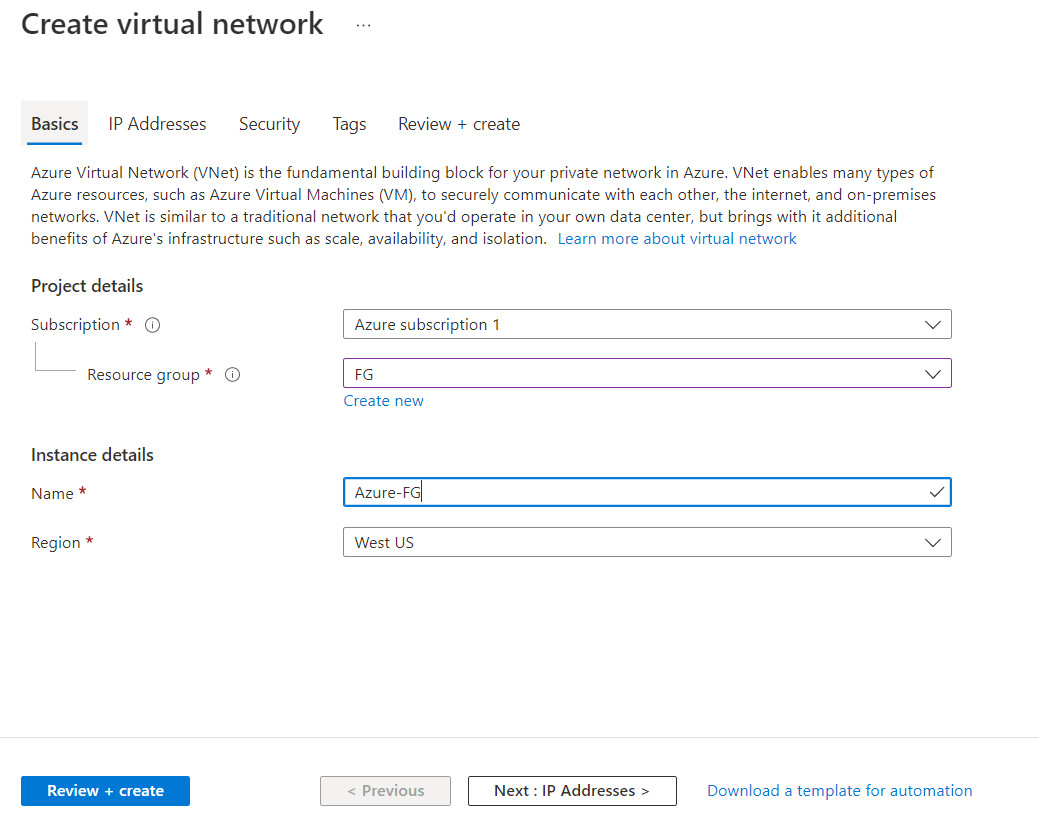
Figure 10.5: Create a virtual network 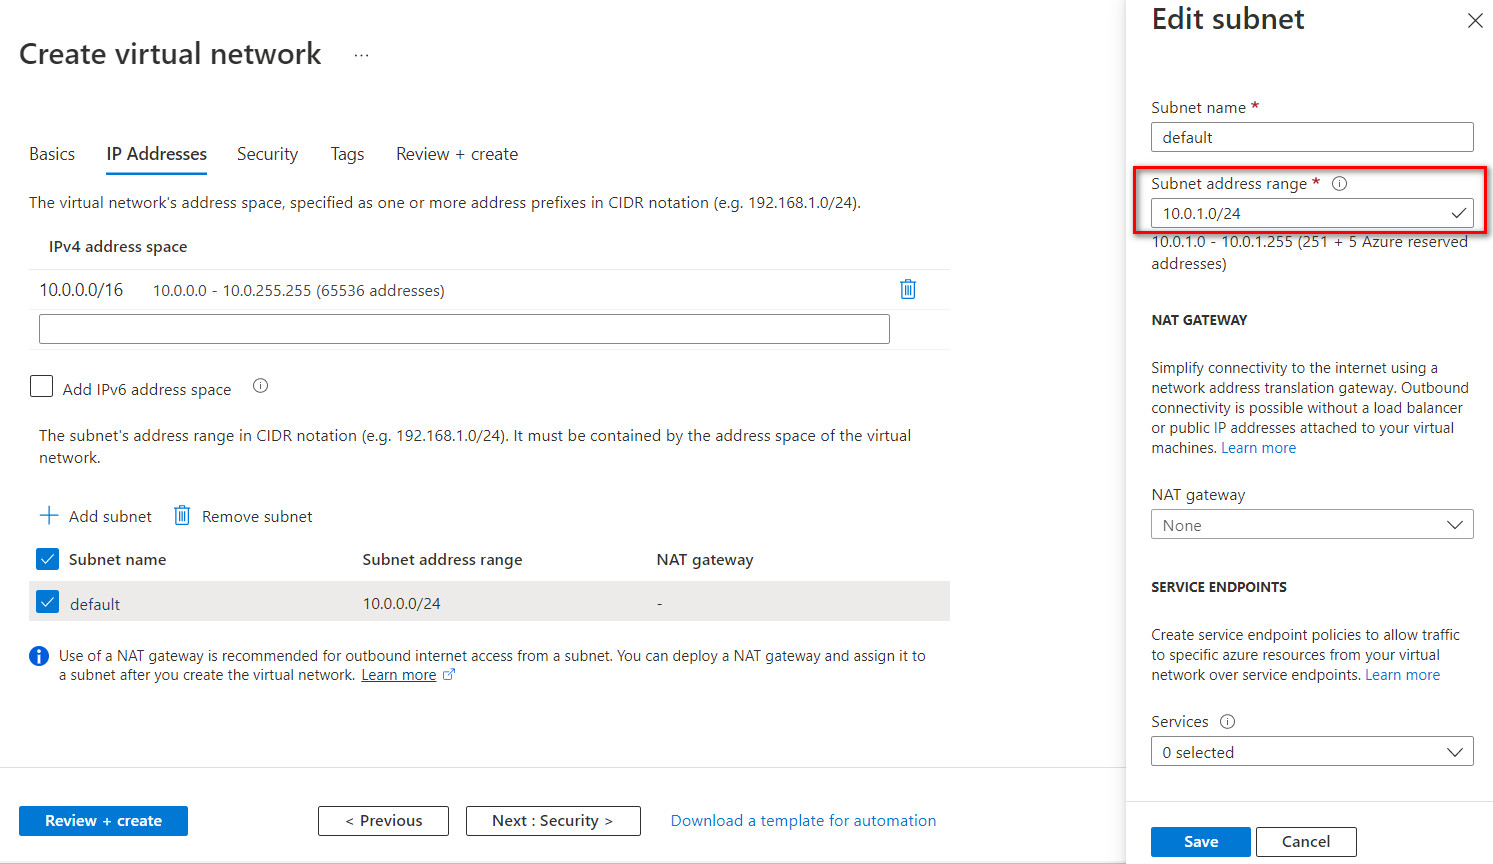
Figure 10.6: Create a virtual network (change default subnet) 
Figure 10.7: Create a virtual network 
Figure 10.8: Create a virtual network 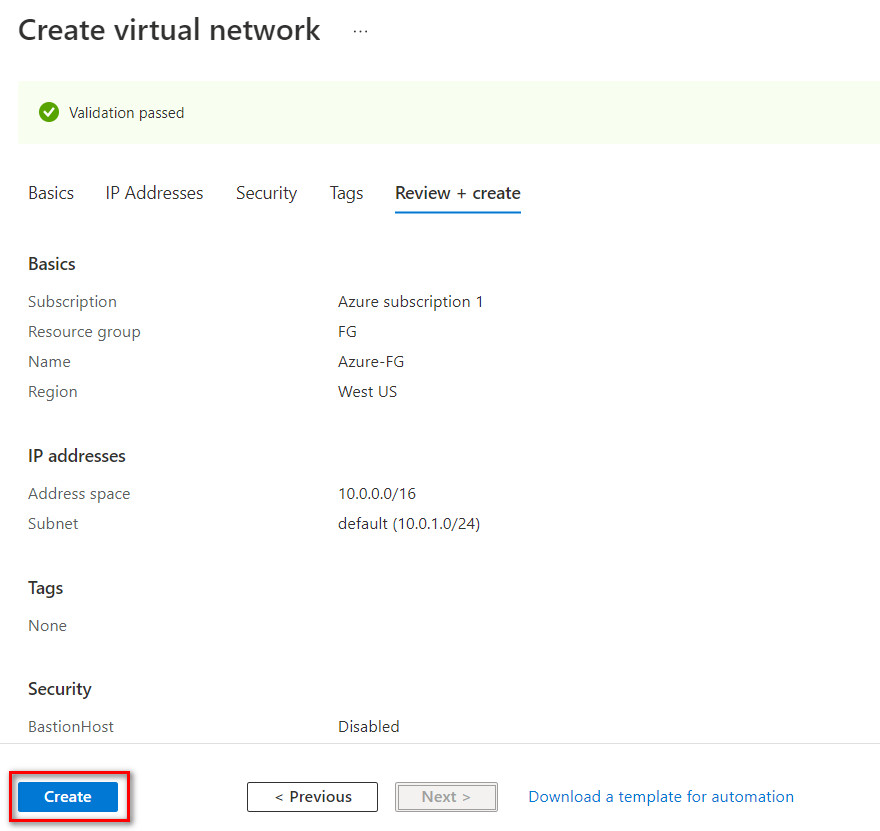
Figure 10.9: Create a virtual network - Create a virtual network gateway as following:
- Name: Azure-VPN-FG
- Region: West US
- Generation: Generation1
- Gateway subnet address range: 10.0.0.0/24
- Public IP address name: AzurePublic
Click on “Create and Review”. It takes around 25 minutes to deploy a virtual network gateway in Azure.
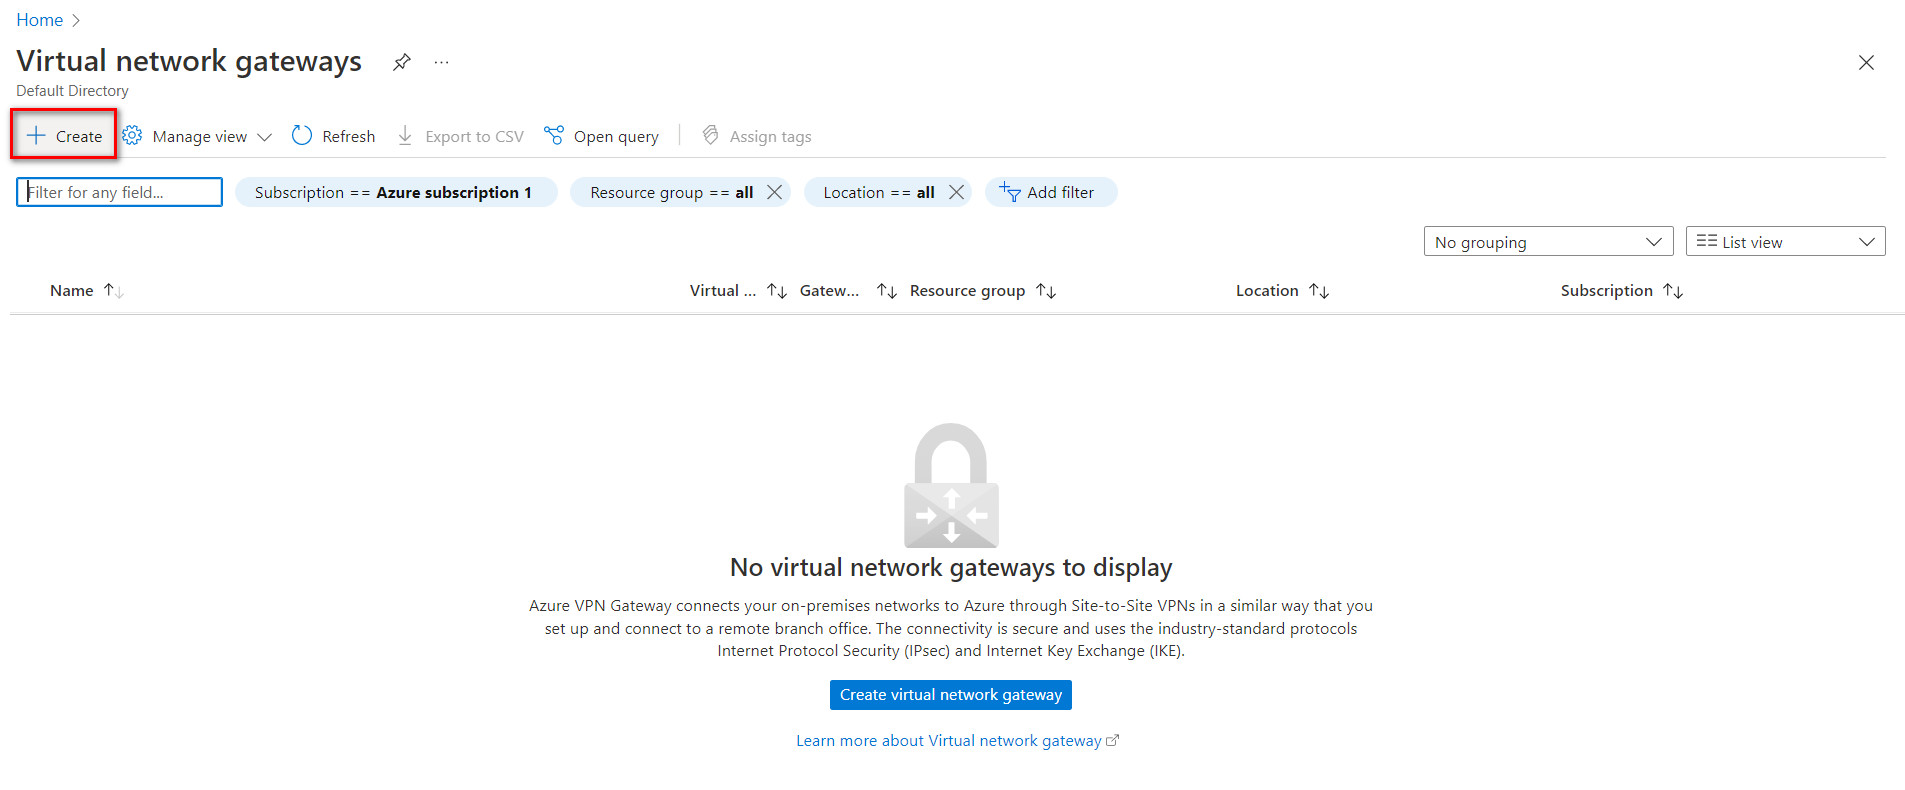
Figure 10.10: Create a virtual network gateway 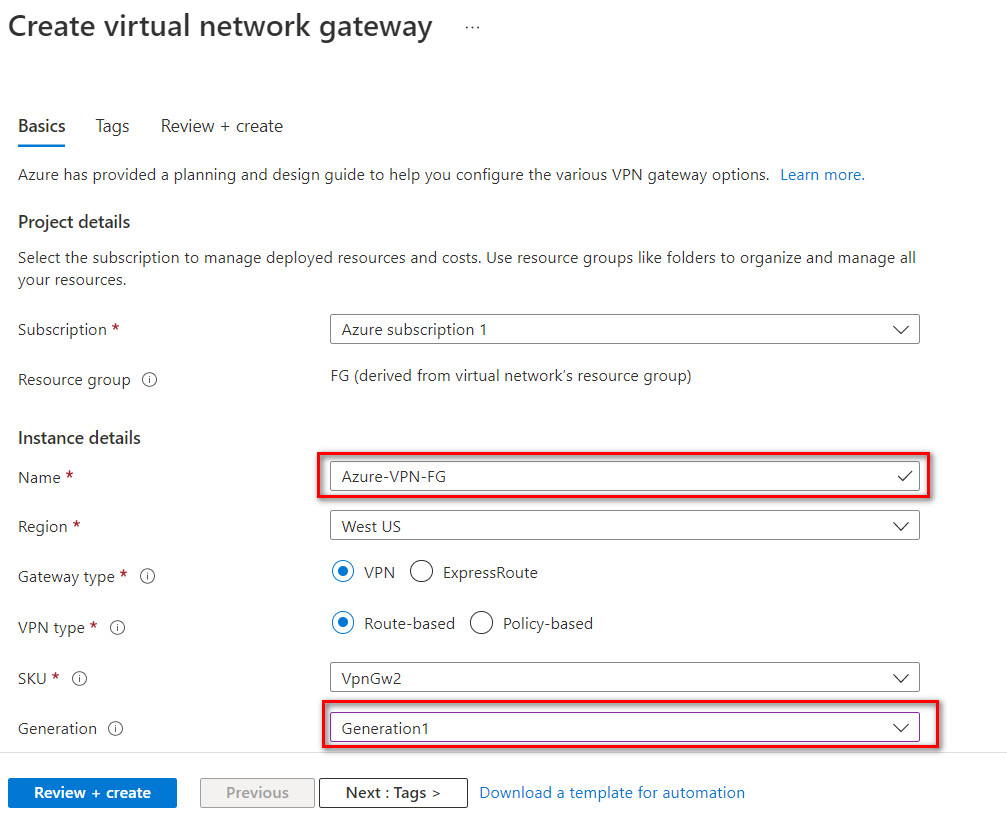
Figure 10.11: Create a virtual network gateway 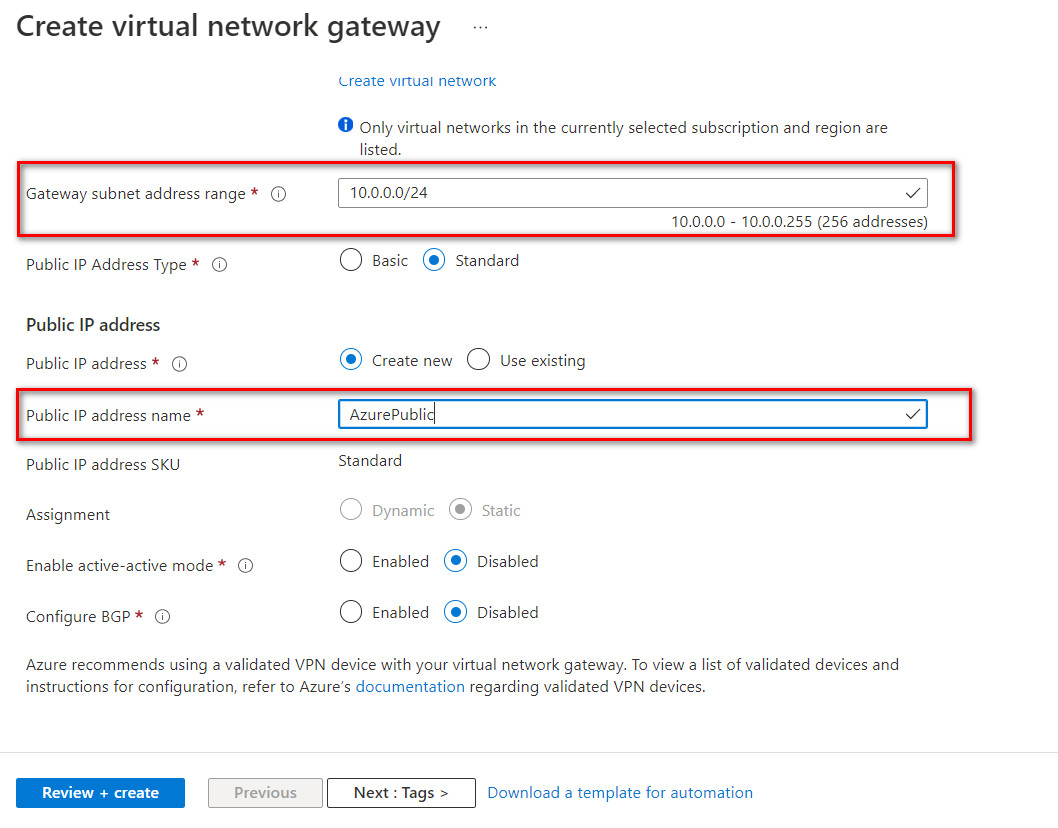
Figure 10.12: Create a virtual network gateway 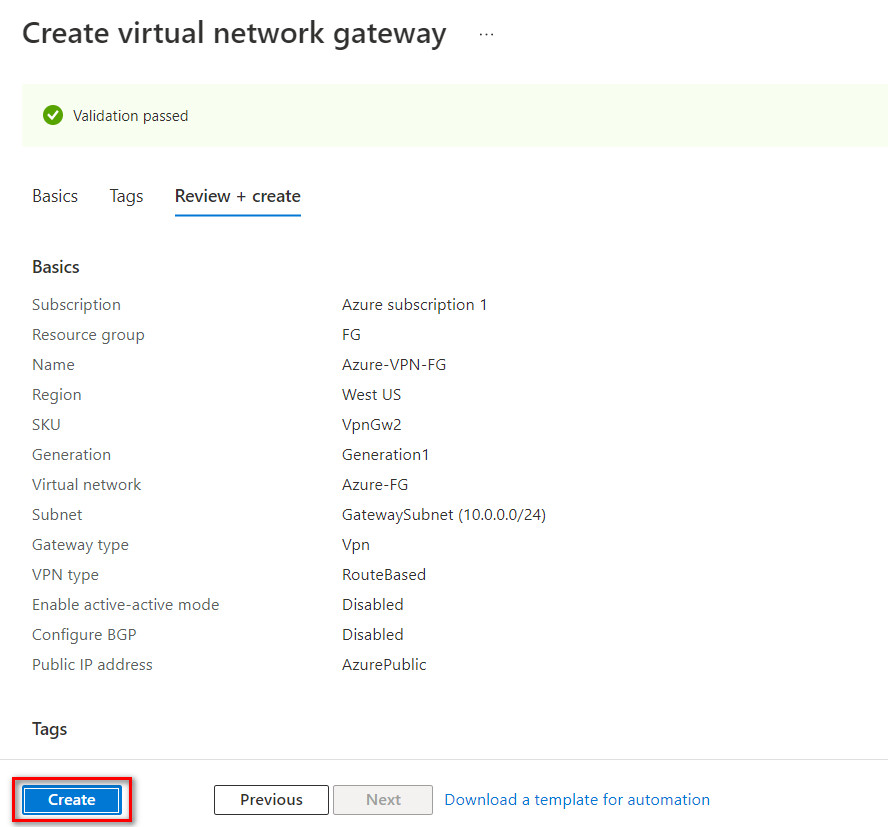
Figure 10.13: Create a virtual network gateway (review + create) 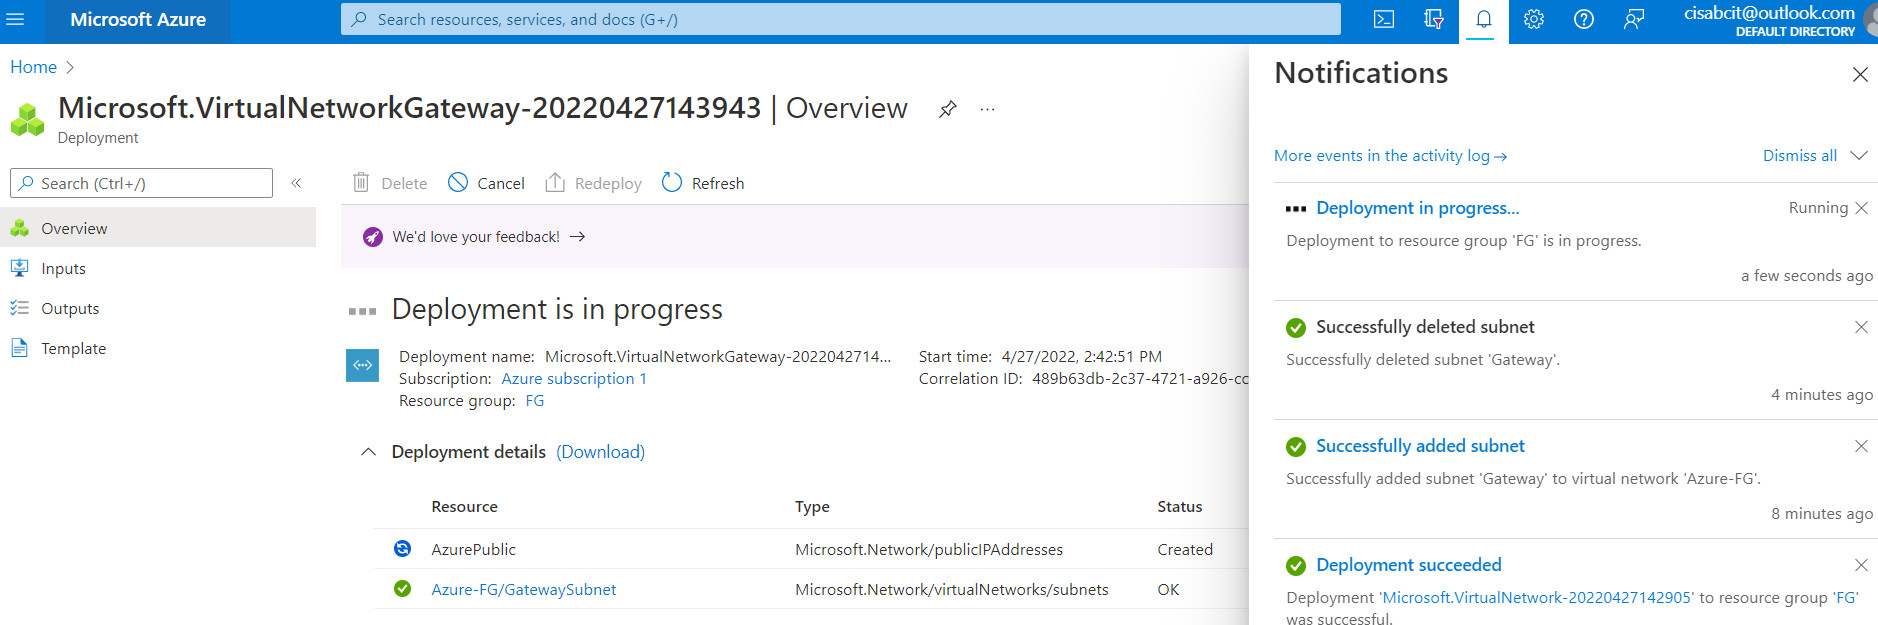
Figure 10.14: Create a virtual network gateway (deployment) 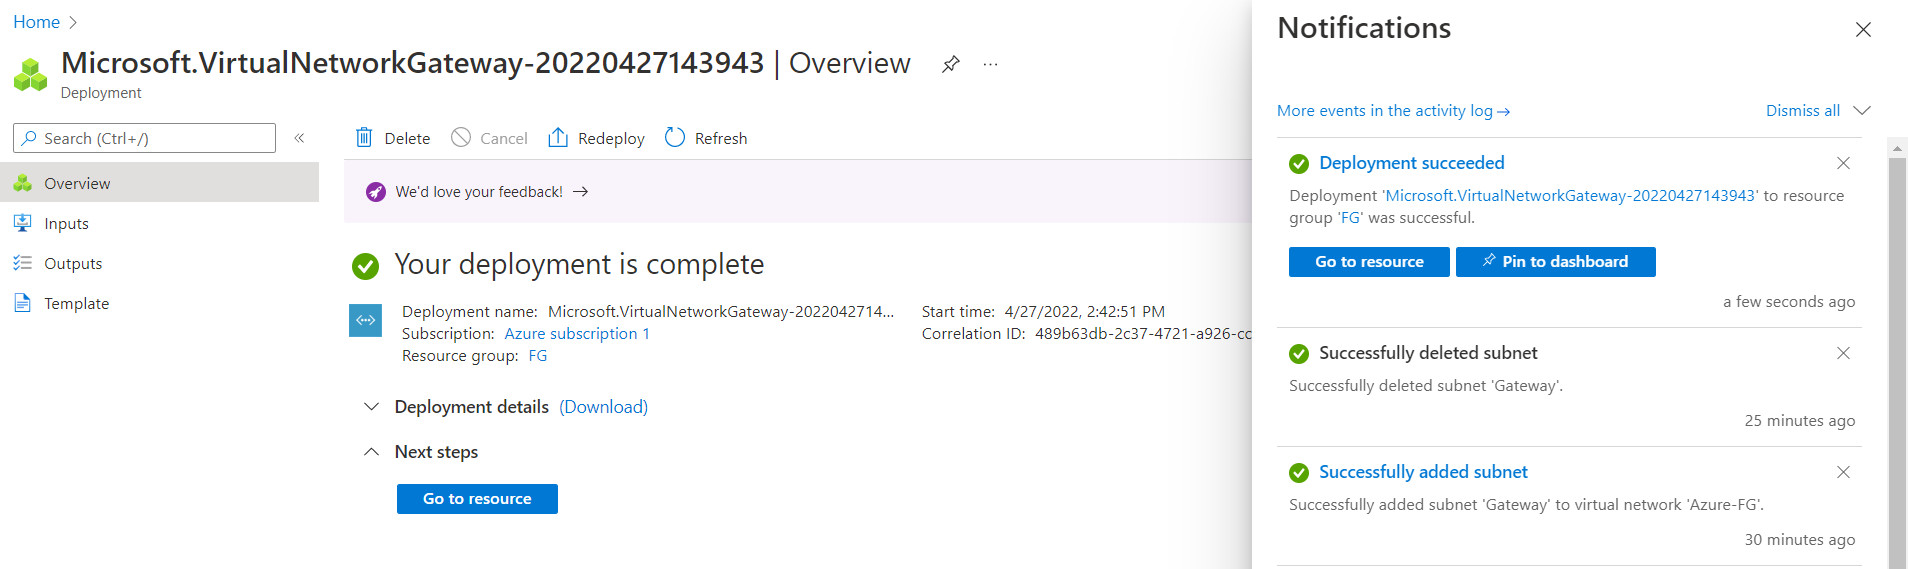
Figure 10.15: Deployment of virtual network gateway - Create a local network gateway as following:
- Resource Group: FG
- Region: West US
- Name: FortiGate
- IP Address: IP_Address_of_Port1_FortiGate (On premise)
- Address Space: IP_Address_LocalNetwork
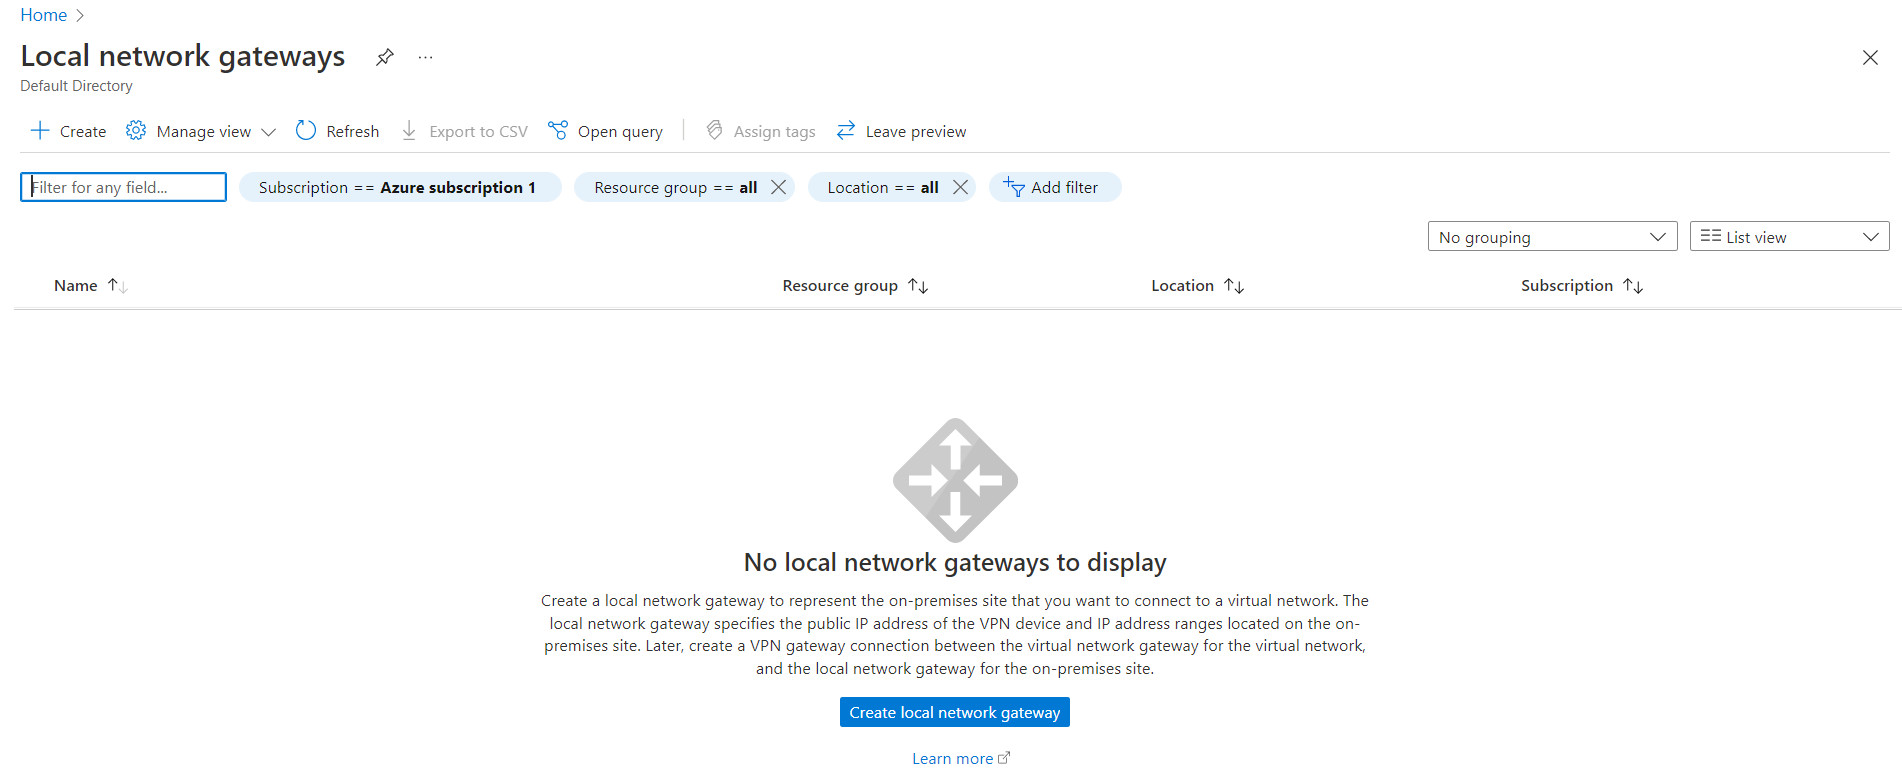
Figure 10.16: Create a local network gateway 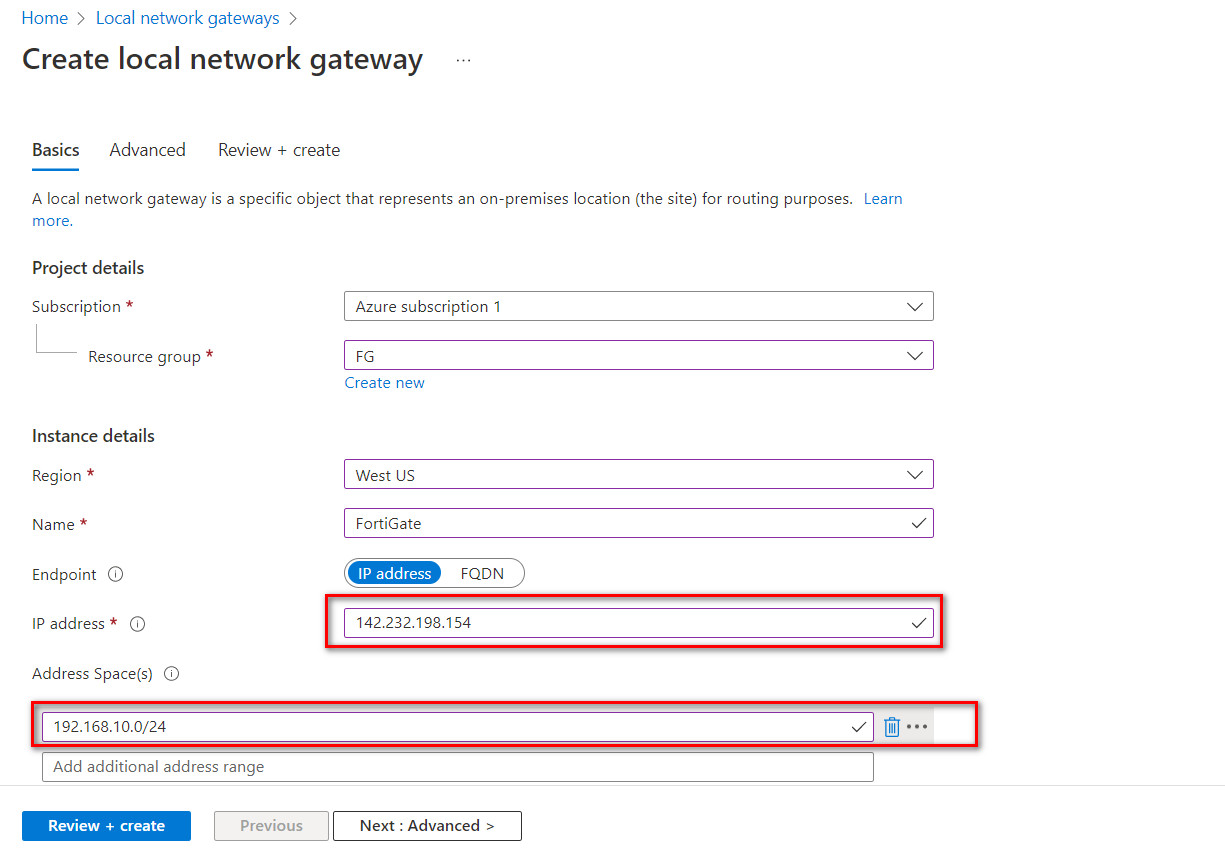
Figure 10.17: Create a local network gateway 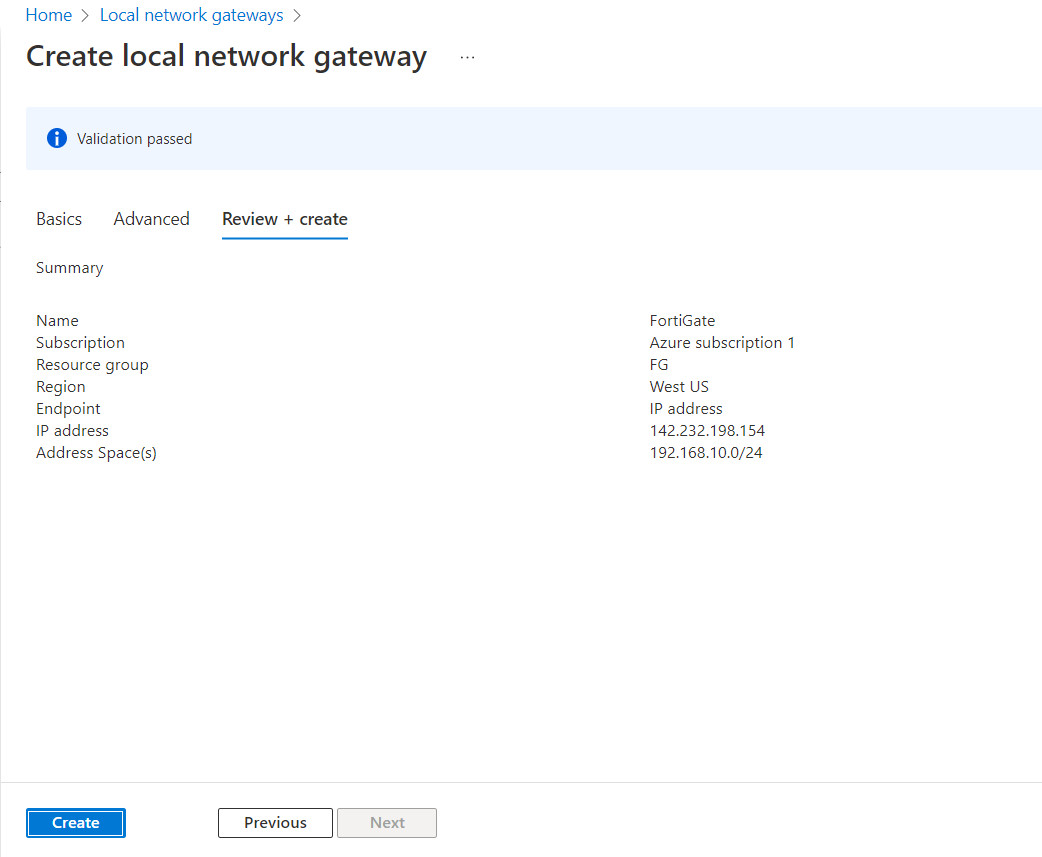
Figure 10.18: Create a local network gateway (review + create) 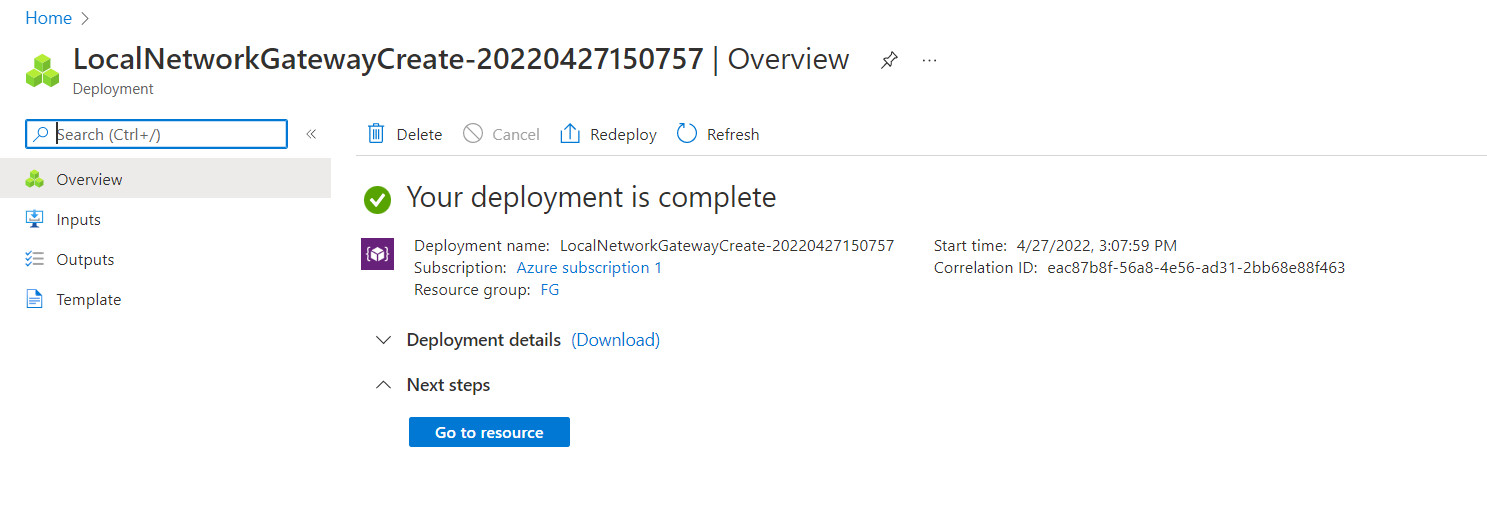
Figure 10.19: Verify local network gateway deployment - Go to Virtual network gateway and create a connection in Virtual network gateways > connections > Add:
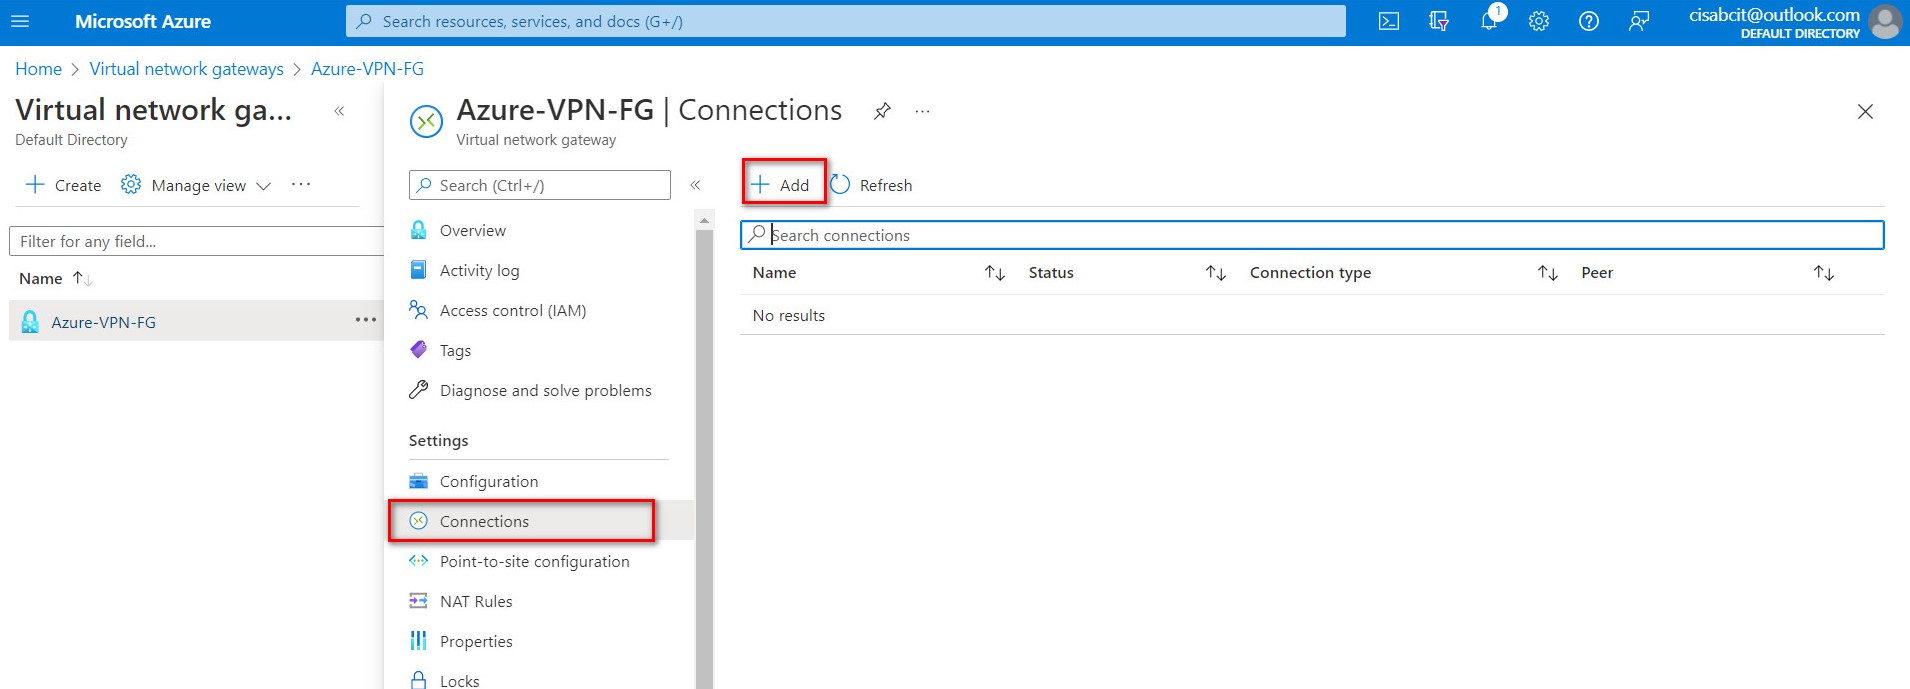
Figure 10.20: Add connections 
Figure 10.21: Connection configuration Based on the Microsoft article “About cryptographic requirements and Azure VPN gateways”, by default, integrity is SHA384, SHA256, SHA1, MD5 and encryption is AES256, AES192, AES128, DES3, DES. So, we will select SHA1 and AES128 in FortiGate. After doing this step, you should receive a Public IP address in Overview tab.

Figure 10.22: Verify public IP address
FortiGate Configuration
- First, we will configure port 2 IP address.
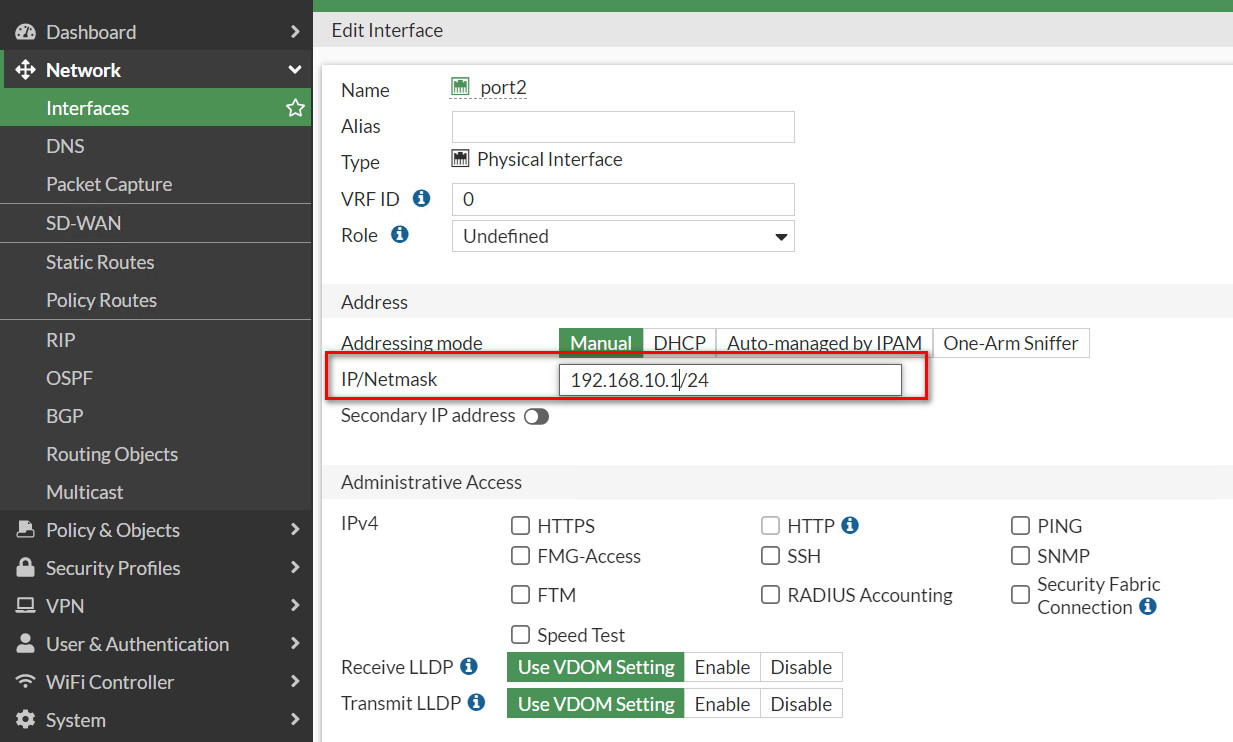
Figure 10.23: Set an IP address for port2 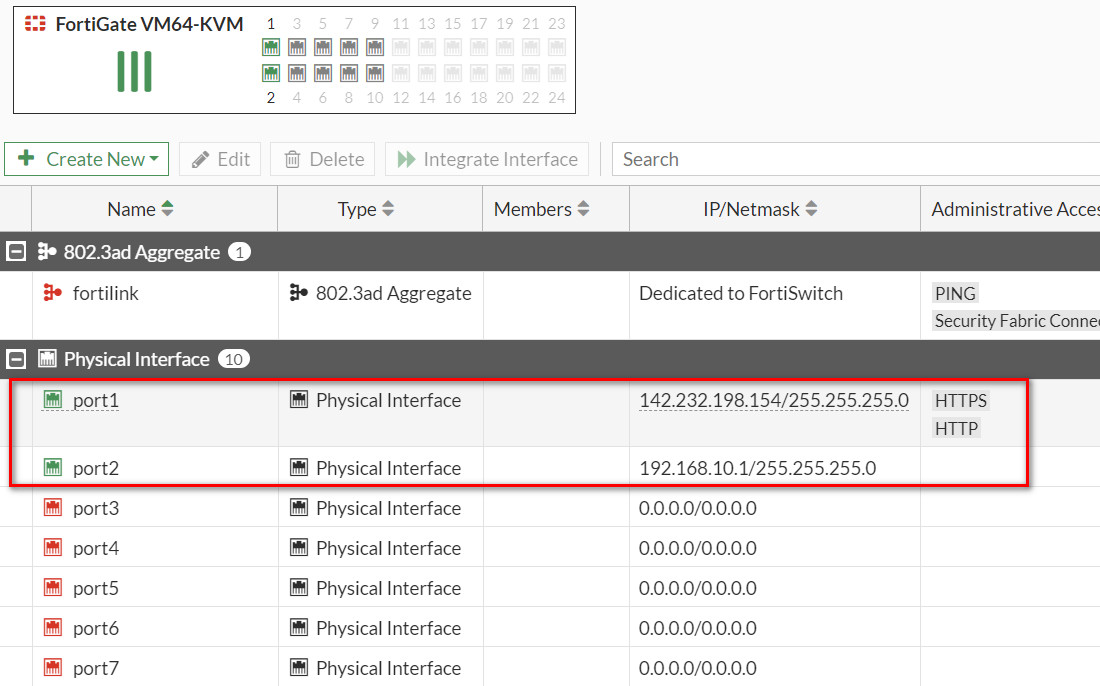
Figure 10.24: Port1 and Port2 IP addresses - Create a static route to port1 (WAN Port) as Figure 10.25.
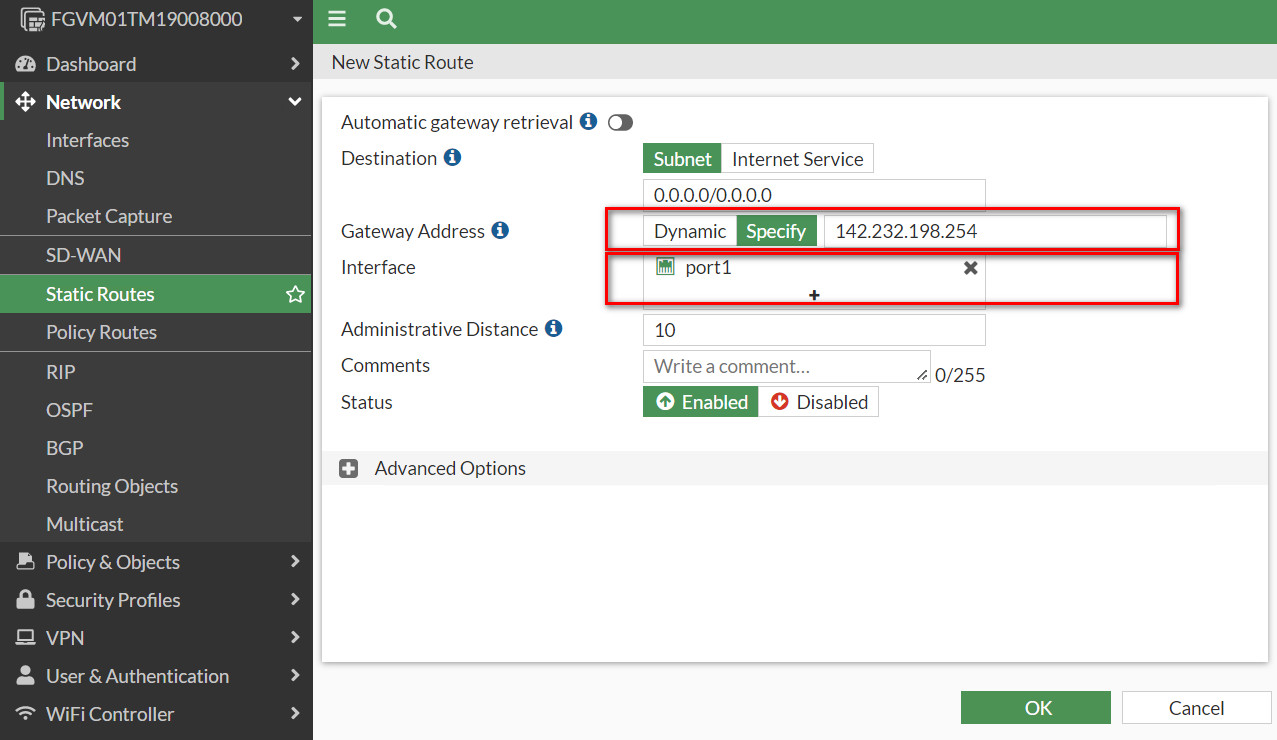
Figure 10.25: Create a static route - Create a IPsec Wizard as a custom.
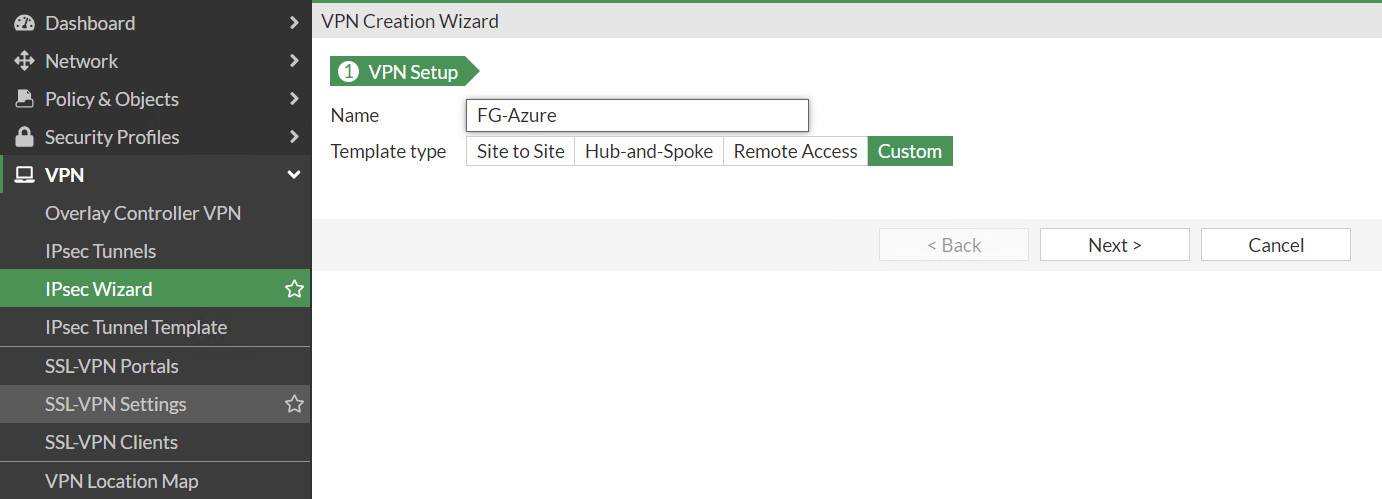
Figure 10.26: Create a custom VPN - Remote Gateway IP Address: Public_IP_Address_Azure_Virtual_Gateway
- Nat Traversal: Disable
- Pre-shared Key: The same as Azure key (123456789)
- Local Address: 192.168.10.0/24
- Remote Address: 10.0.0.0/16
- Phase 1: Encryption: AES128, Authentication: SHA-1, DH: 2, lifetime: 28800
- Phase 2: Encryption: AES128, Authentication: SHA-1, DH: 2, lifetime: 27000
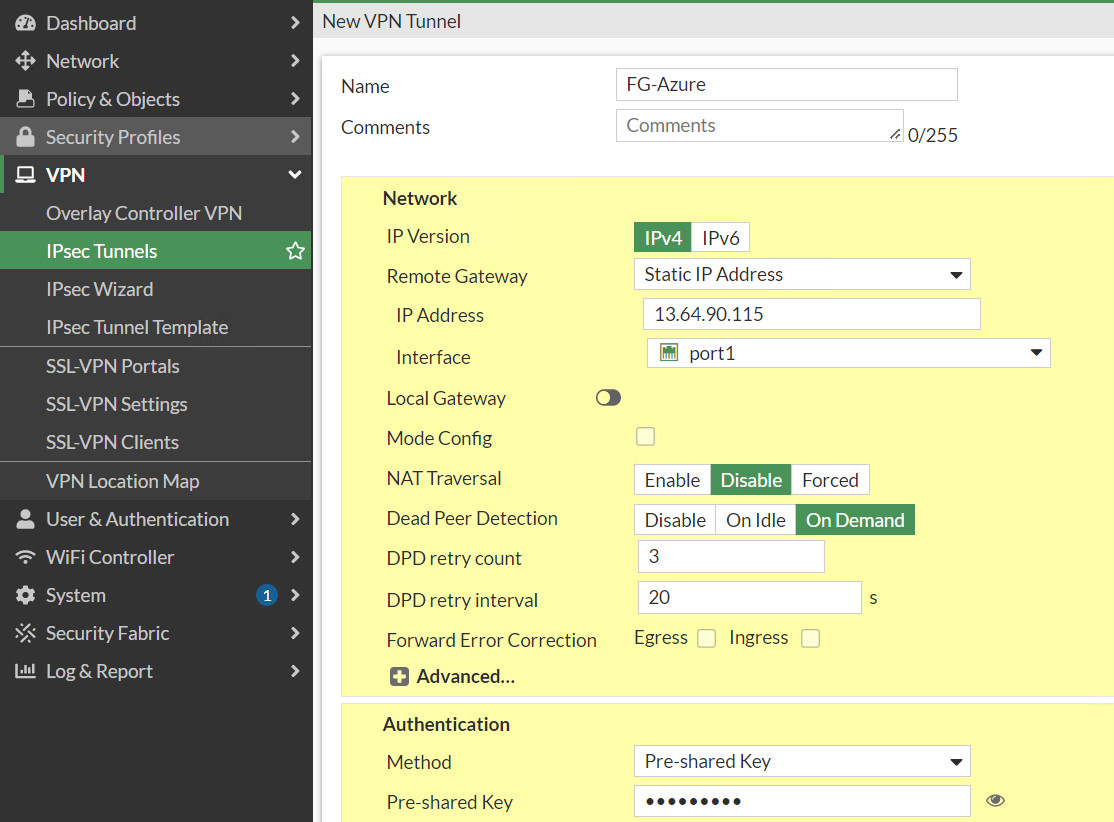
Figure 10.27: Create a custom VPN 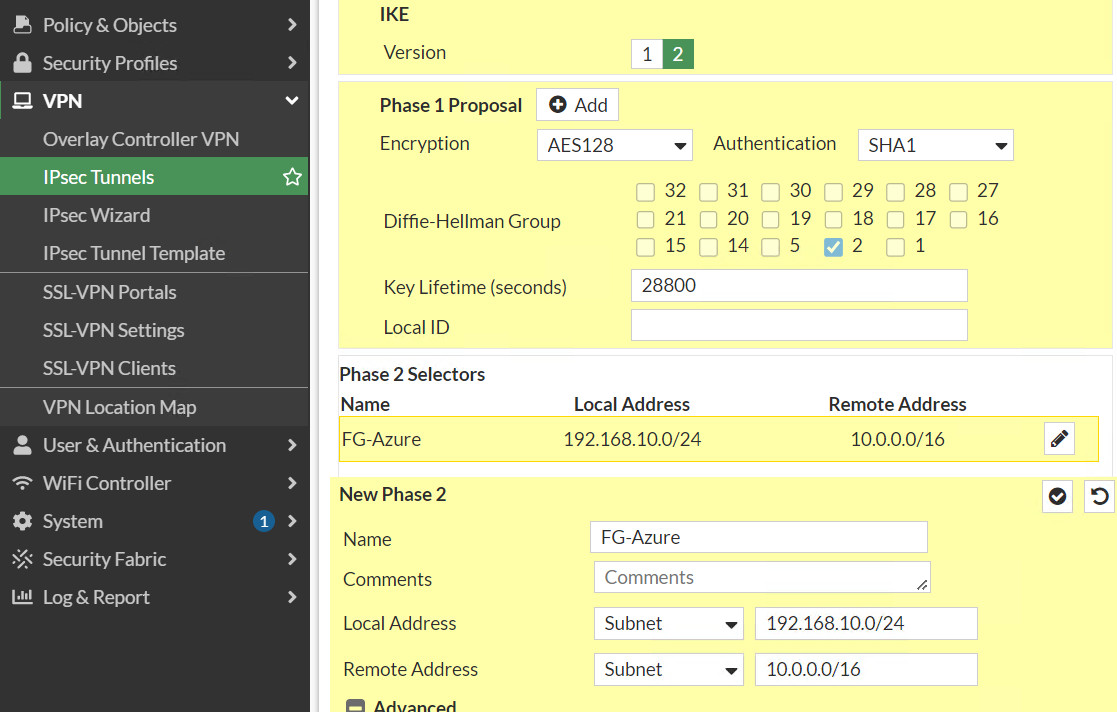
Figure 10.28: Create a custom VPN 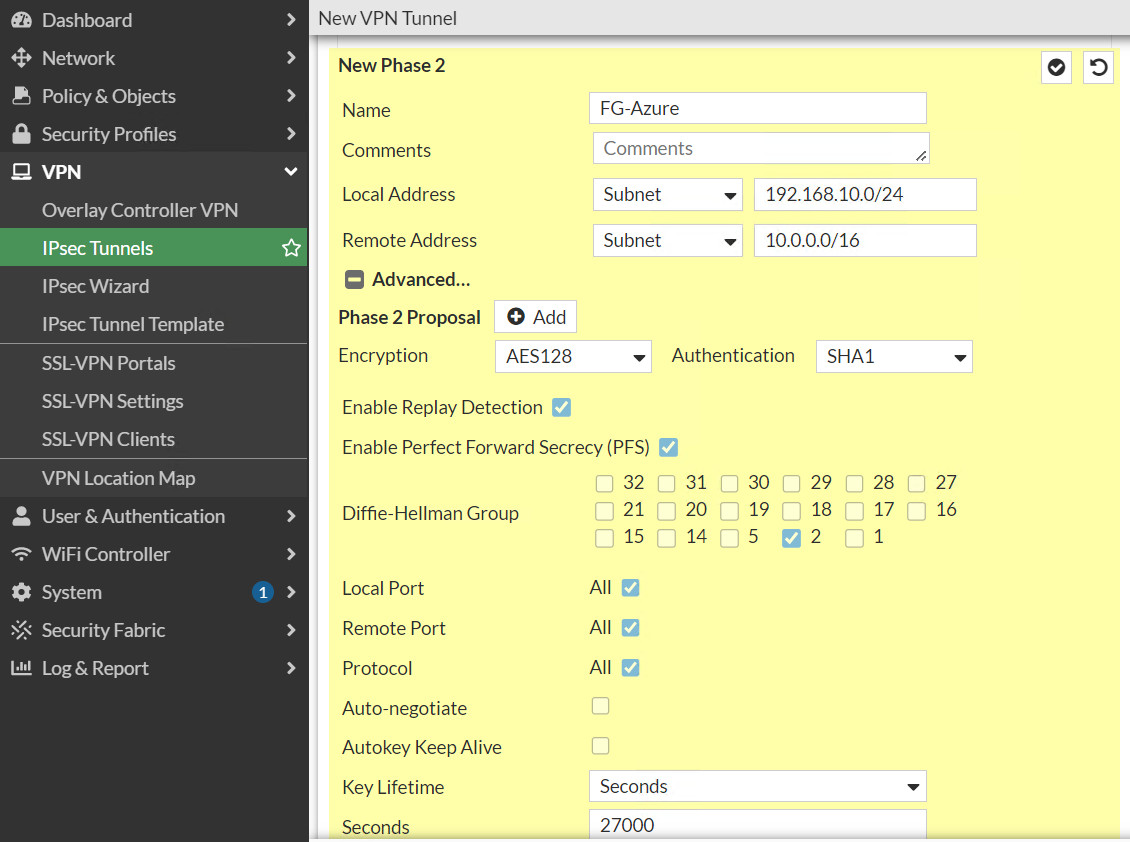
Figure 10.29: Create a custom VPN - Create a firewall policy from Port 2 to Tunnel and from Tunnel to Port2. We will create a subnet for LAN on premise and a subnet for Microsoft Azure. Like site-to-site VPN we learned previously, NAT should be disabled here.
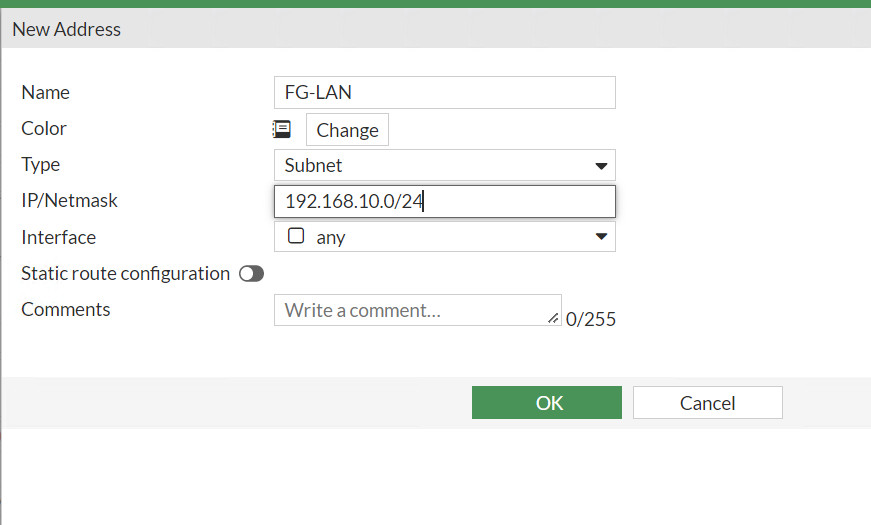
Figure 10.30: Create a subnet for local network 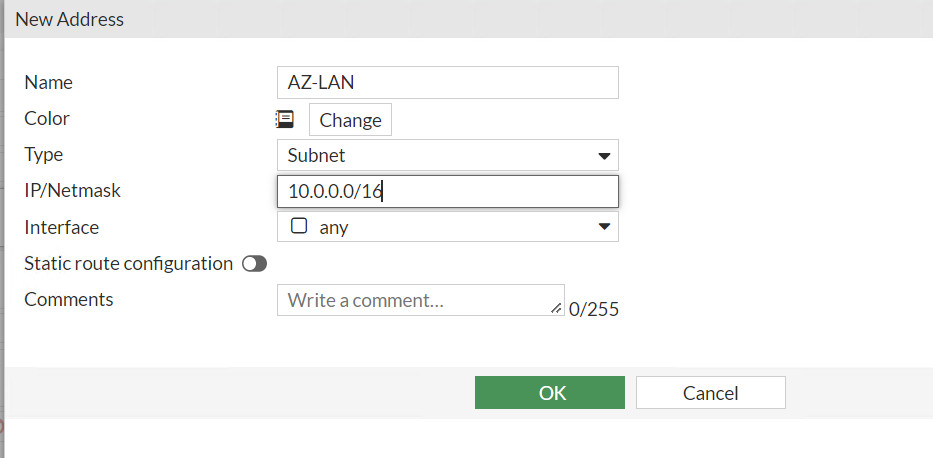
Figure 10.31: Create a subnet for Azure local 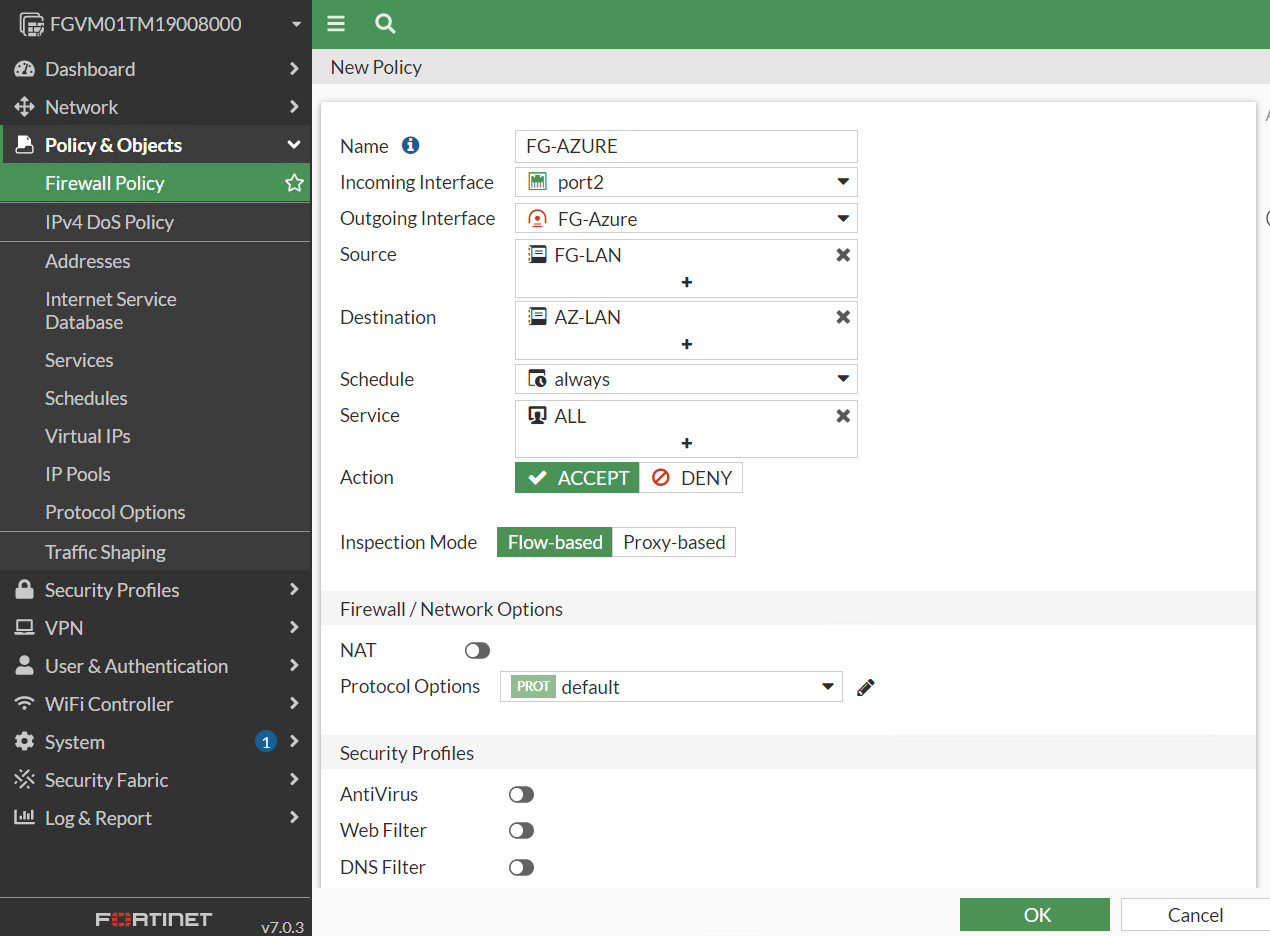
Figure 10.32: Create a policy from port2 to FG-Azure Tunnel 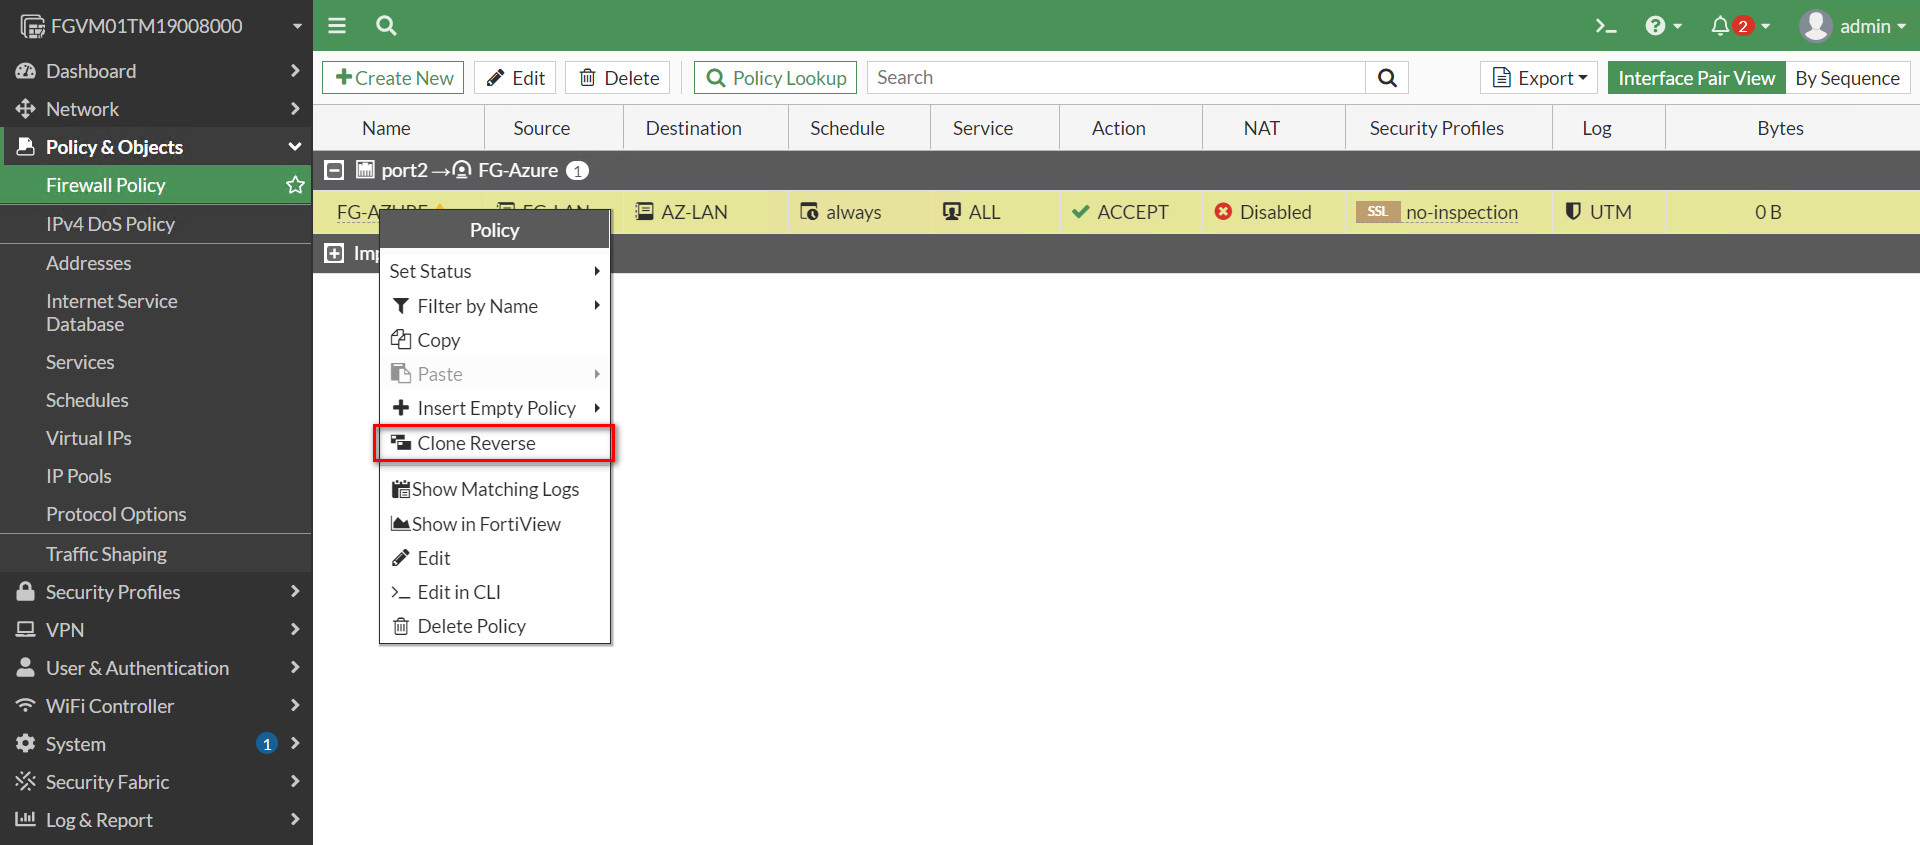
Figure 10.33: Create a policy from FG-Azure Tunnel to port2 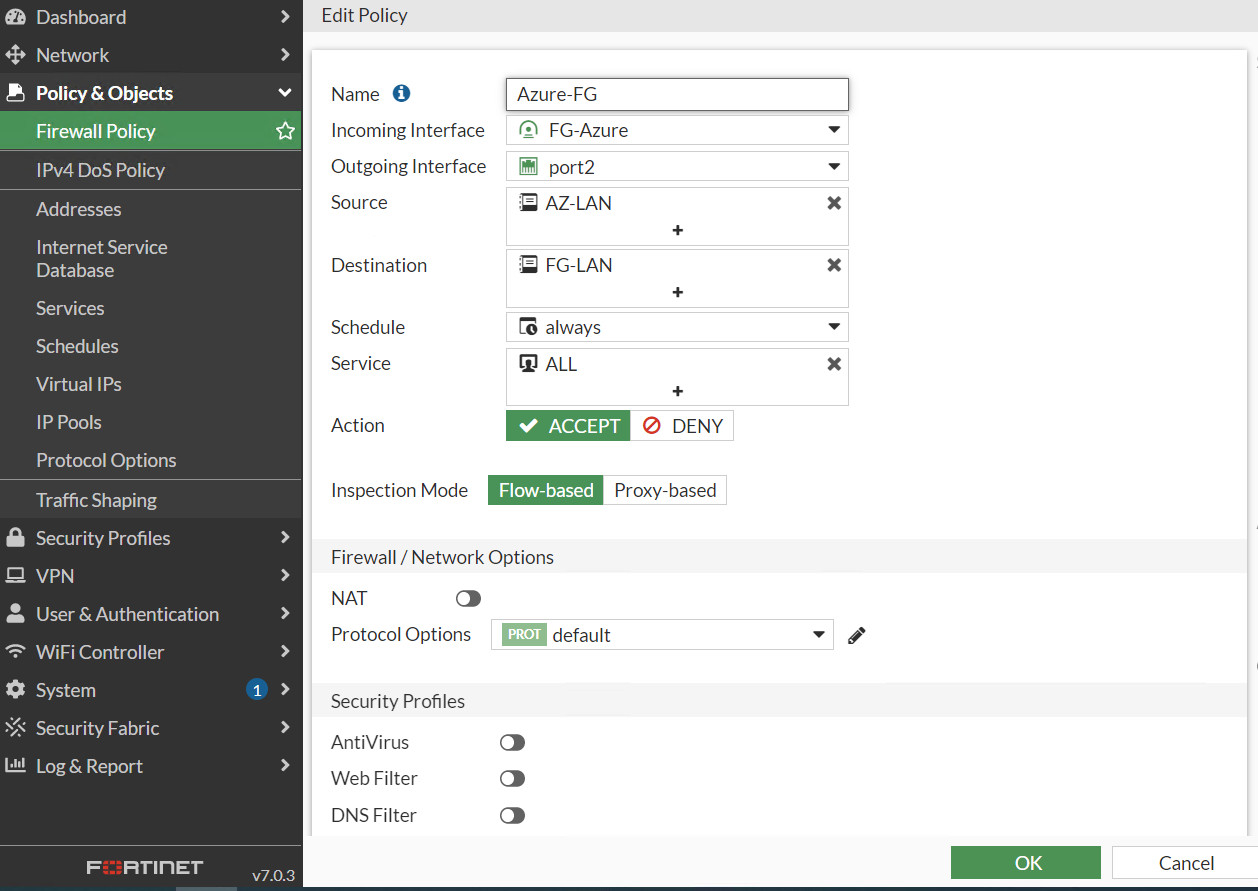
Figure 10.34: Create a policy from FG-Azure Tunnel to port2 
Figure 10.35: Firewall Policies
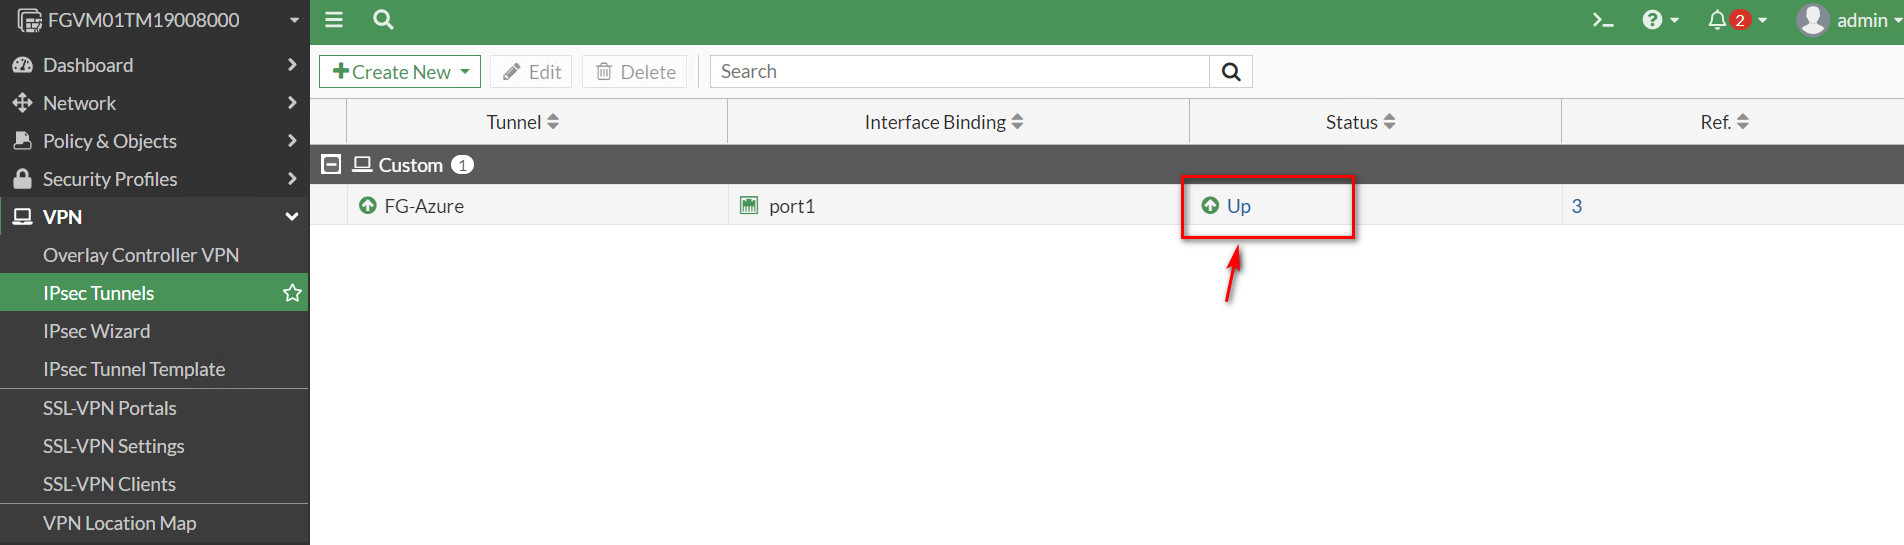
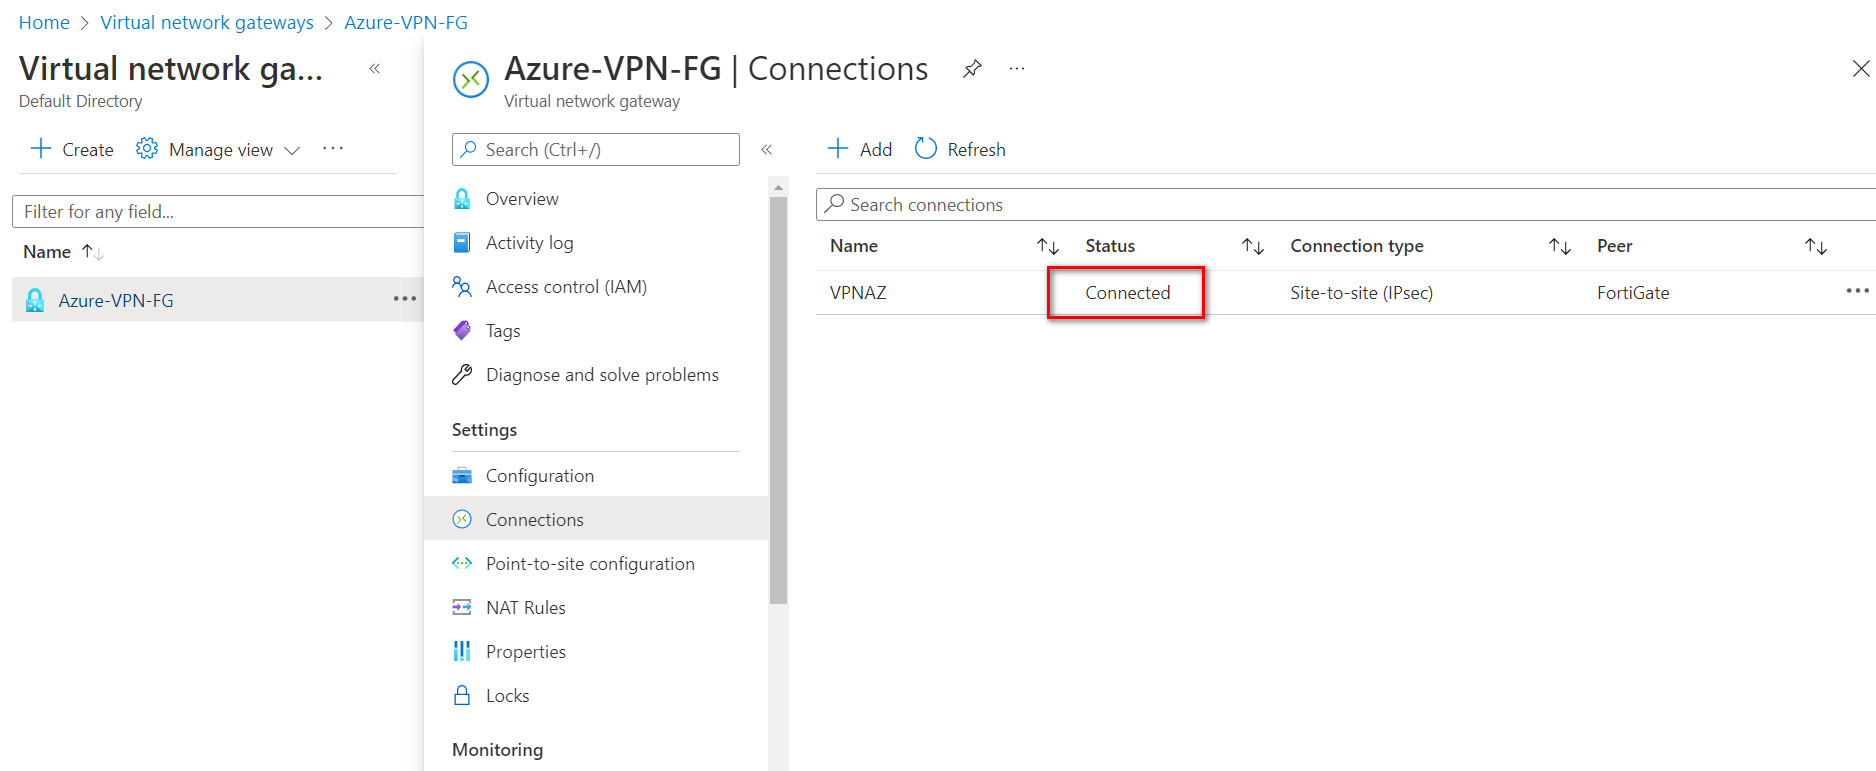
Verify Connections
If you navigate to IPsec Tunnel, the status should be up.