Chapter 2. Policy
2.1 Security Policy
Learning Objectives
- Create a Security Policy in FortiGate
- Reorder Firewall Policies and Firewall Policy Actions
Security Policy
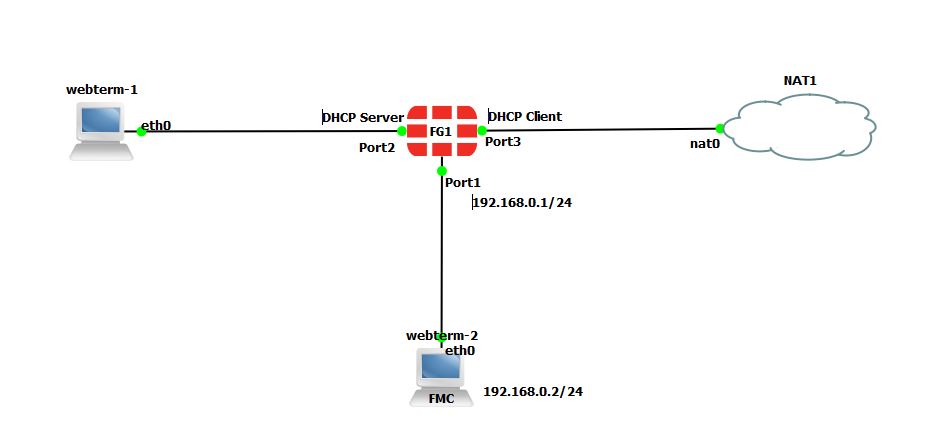
| Device | Configuration |
|---|---|
| FortiGate | Port 2: DHCP Server
Port 3: DHCP Client |
| WebTerm | DHCP Client |
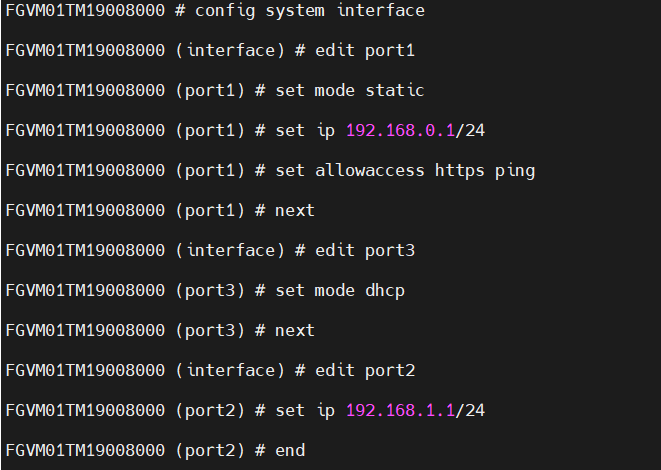
Configuration of port1 of the firewall in CLI is as follows:
- Open the browser in WebTerm2 and type https://192.168.0.1. You should be able to access the firewall.
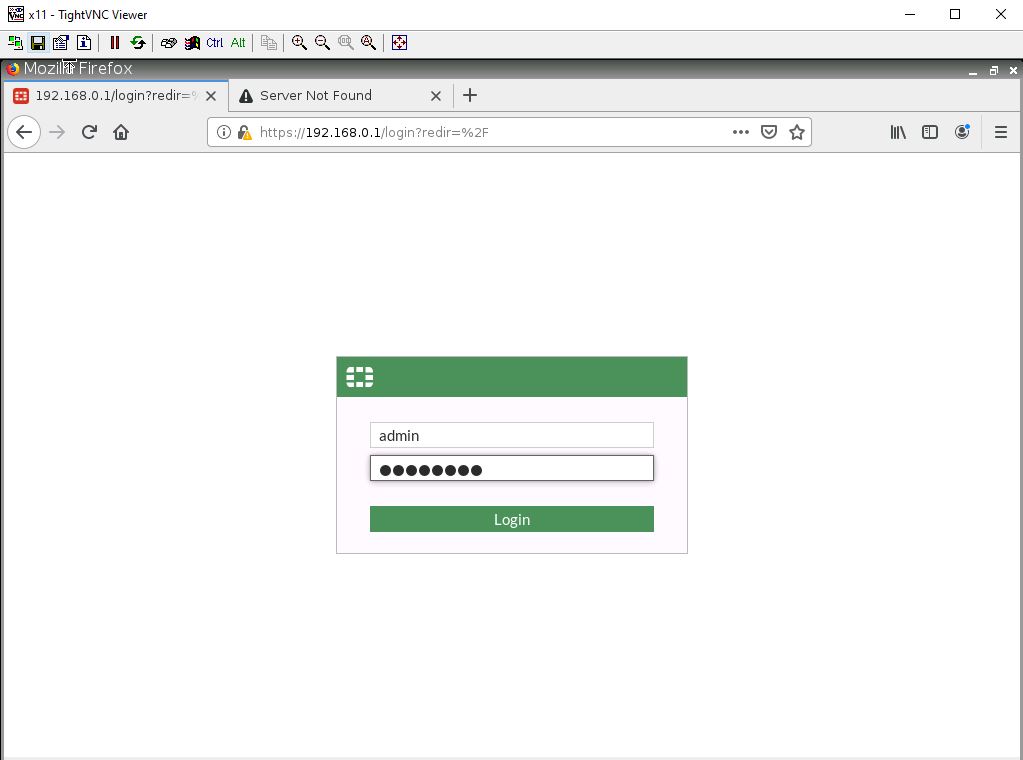
Figure 2.3: Log in to the FortiGate - Go to Network > Interfaces > Port2, set the interface IP address as 192.168.1.1/24 and configure DHCP server on interface port2 (Range of IP addresses should be: 192.168.1.20 to 192.168.1.30, DNS: 4.2.2.4) and Enable Device Detection under Port2.
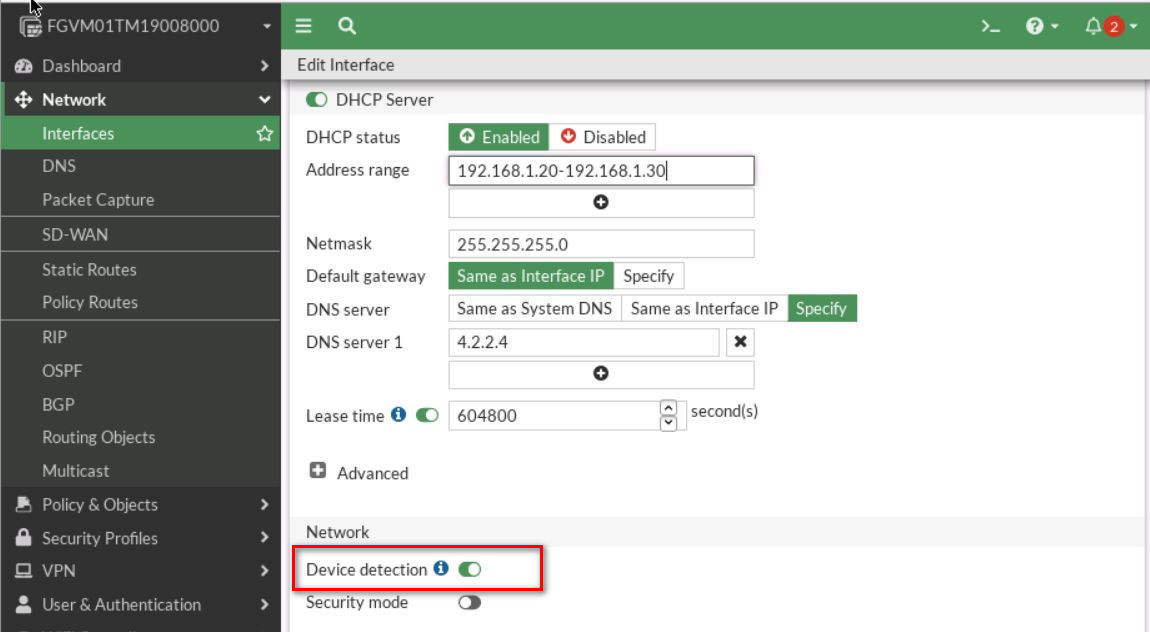
Figure 2.4: Enable DHCP Server - Set a port3 as a DHCP client and enable Device Detection under Port3.
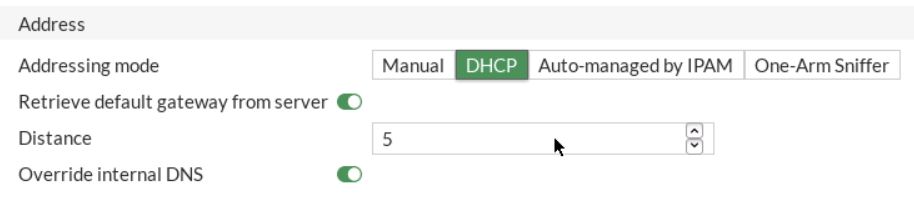
Figure 2.5: Enable DHCP Client - Set a Static route in the firewall to reach the NAT object. Go to Network > Static Route > Create a new.
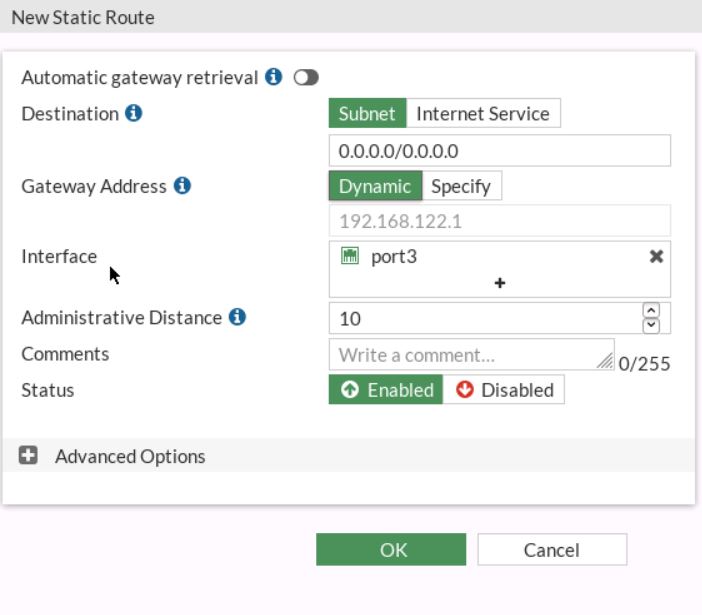
Figure 2.6: Configure a static route - Go to Policy & Objects > Firewall Policy section, click Create New to add a new firewall policy, and configure the following settings:
- Name: LocalToInternet
- From inside to outside (port2 to port3)
- Source: Create an address for local network (Subnet: 192.168.1.0/24)
- Destination: all
- Schedule: Always
- Service: Only HTTP, HTTPS, DNS, Ping
- Action: Accept
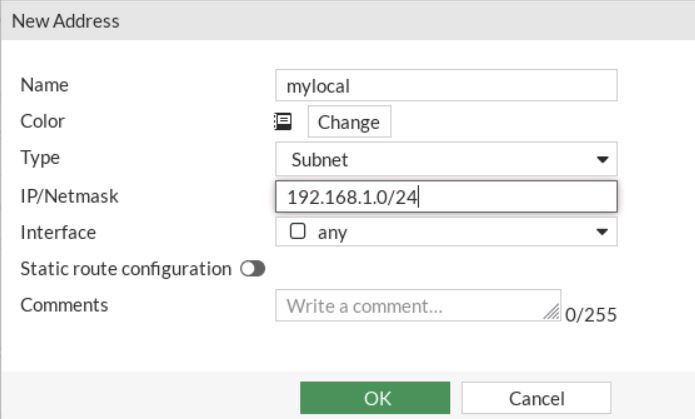
Figure 2.7: Set local subnet 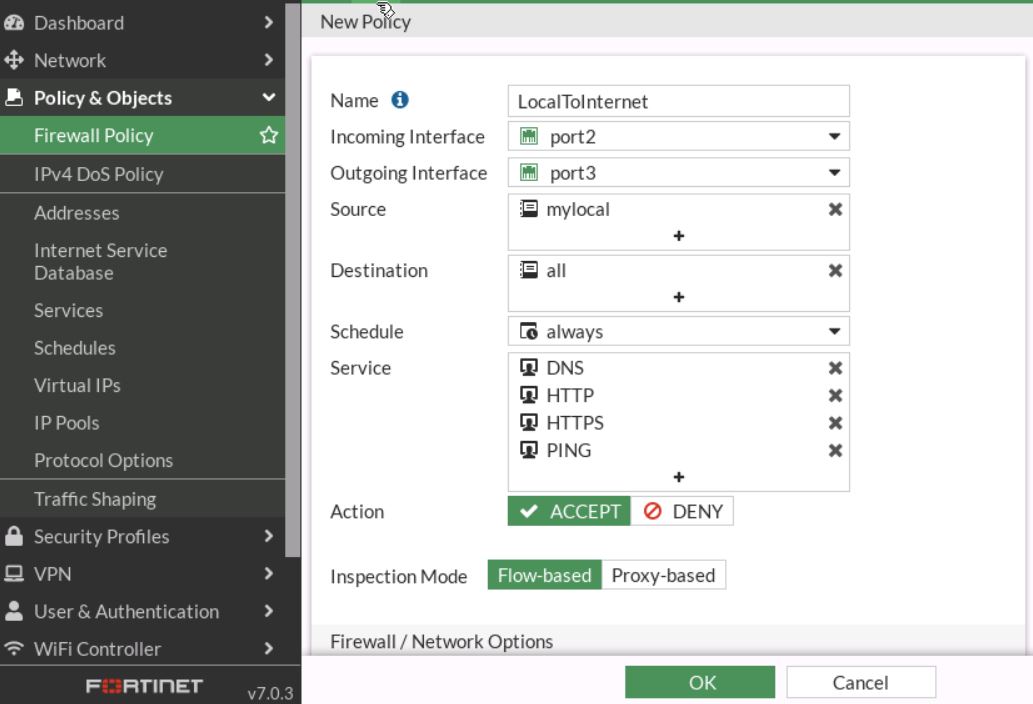
Figure 2.8: Set firewall policy - Go to WebTerm1, Set interface as DHCP and then open the browser, you should be able to access the internet.
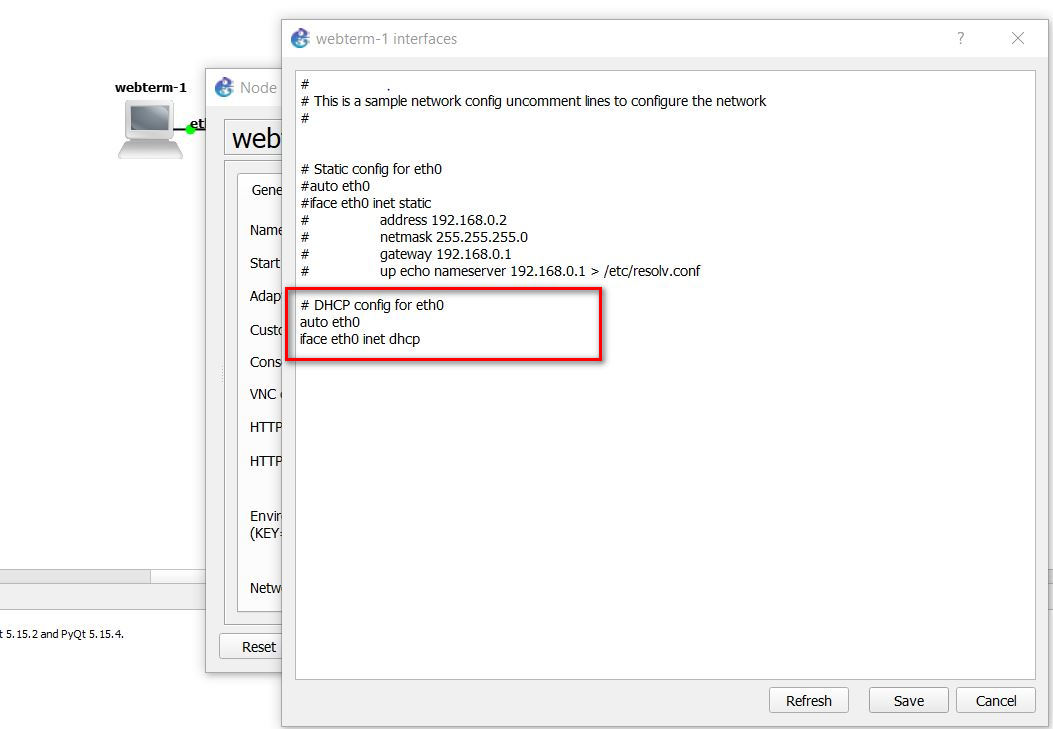
Figure 2.9: Enable DHCP Client on WebTerm1 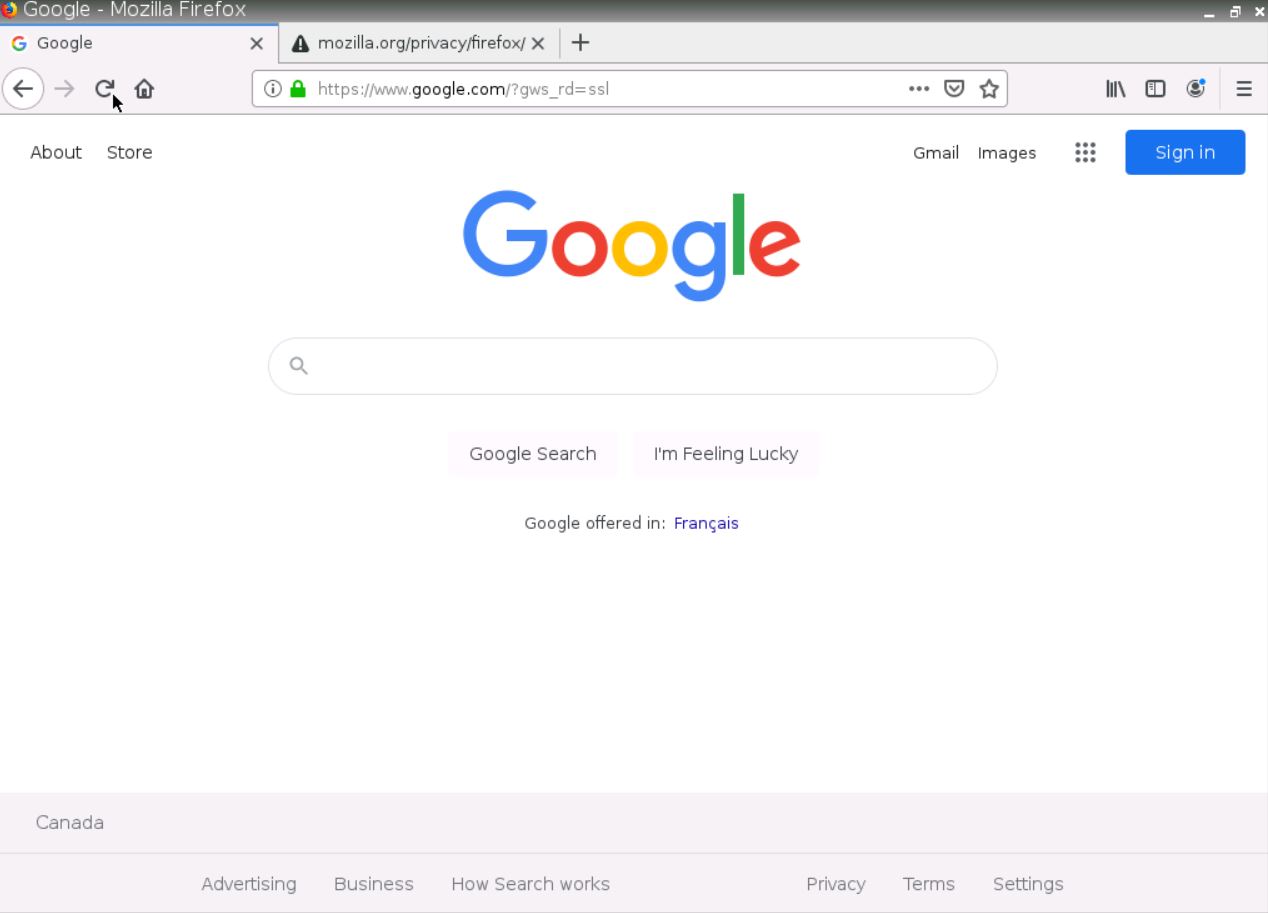
Figure 2.10: Verify your configuration by testing Google.com
Verify Your Configuration
- Go to Dashboard > FortiView Sessions. You should be able to see the traffic.

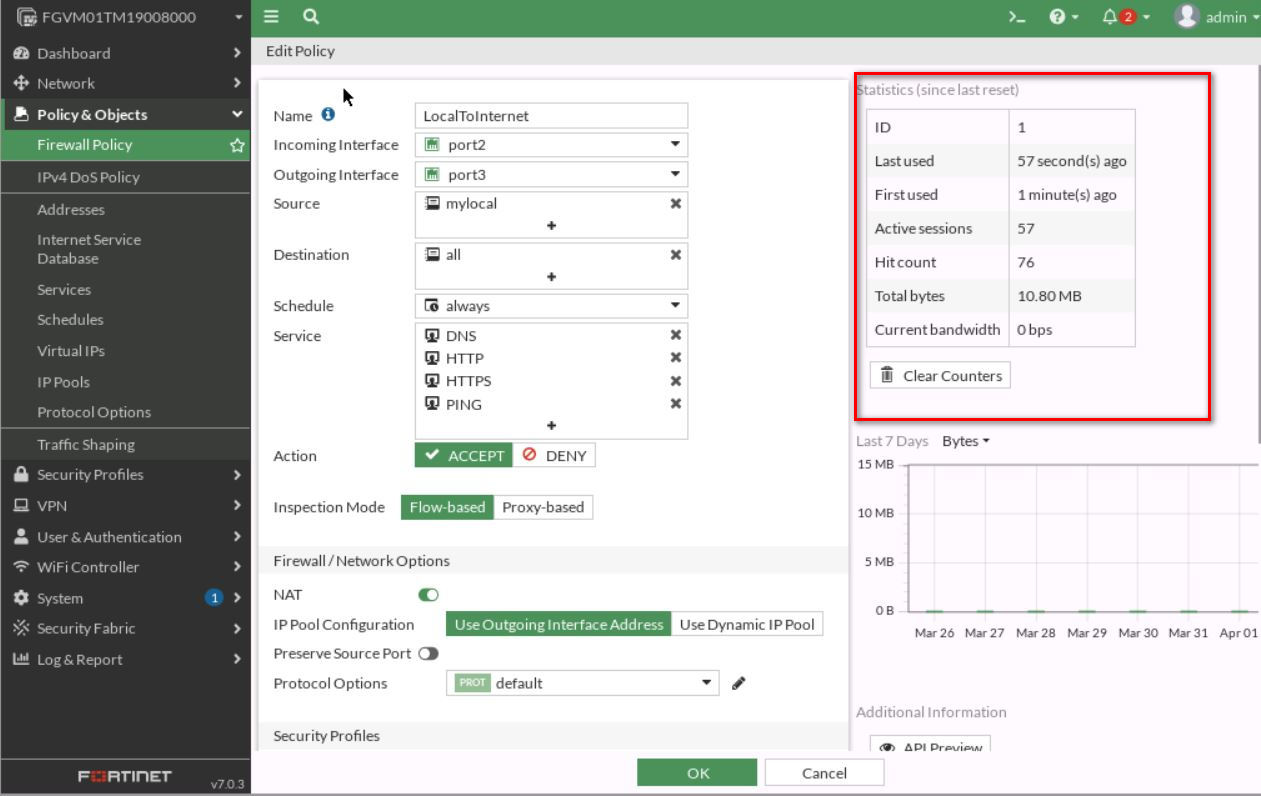
- Go to Firewall Policy and on the right side of the screen, you should be able to see Hit count.
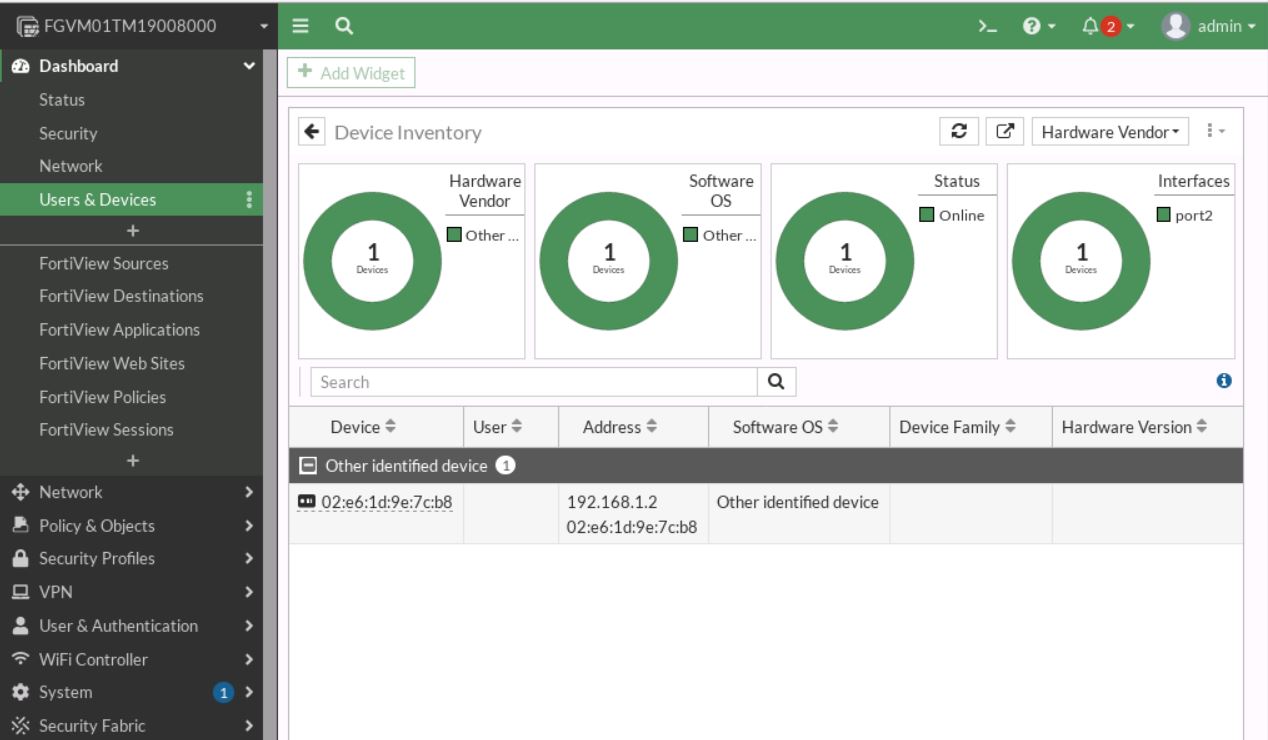
- Go to Dashboard > Users & Devices > Device Inventory and verify the IP and Mac address of the device.
Reordering Firewall Policies and Firewall Policy Actions
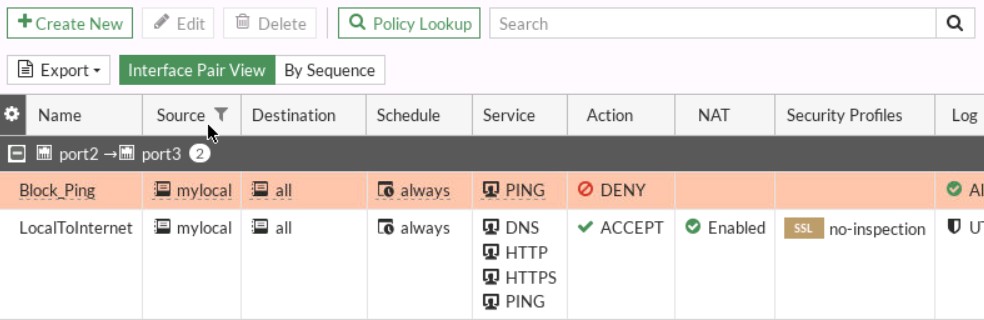
FortiGate will look for a matching policy, beginning at the top. Usually, you should put more specific policies at the top; otherwise, more general policies will match the traffic first, and your more granular policies will never be applied.
You will create a new firewall policy with more specific settings such as source, destination, service, and action set to DENY. Then, you will move this firewall policy above the existing firewall policies and observe the behaviour of firewall policy reordering.
Create a firewall policy
You will create a new firewall policy to match a specific source, destination, service, and action set to DENY.
| Field | Value |
|---|---|
| Name | Block_Ping |
| Incoming Interface | Port2 |
| Outgoing Interface | Port3 |
| Source | LOCAL_SUBNET |
| Destination | All |
| Schedule | Always |
| Service | PING |
| Action | DENY |
| Log Violation Traffic | <enable> |
| Enable this policy | <enable> |
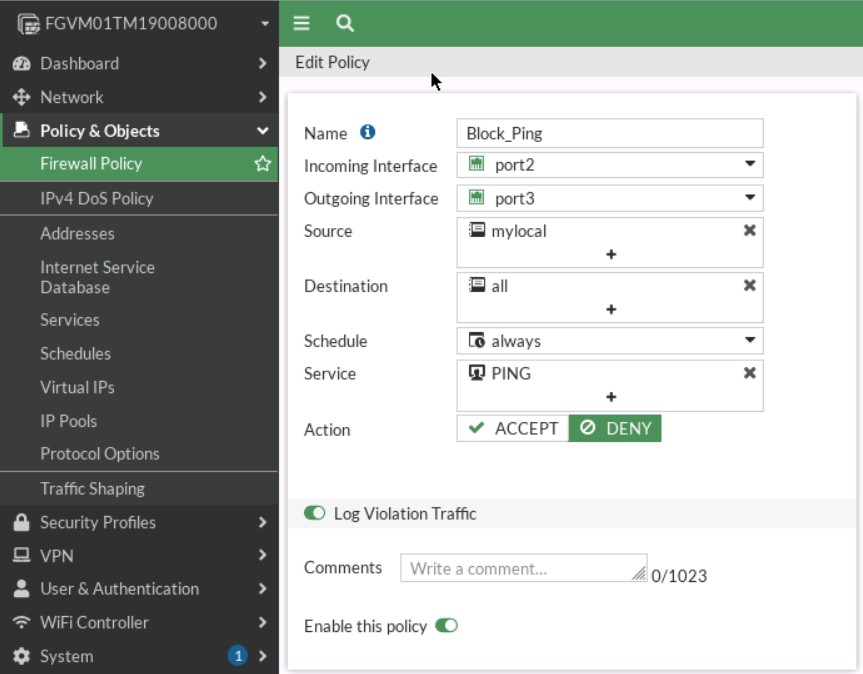
Click OK to save the changes. Add this policy on top of the previous policy.
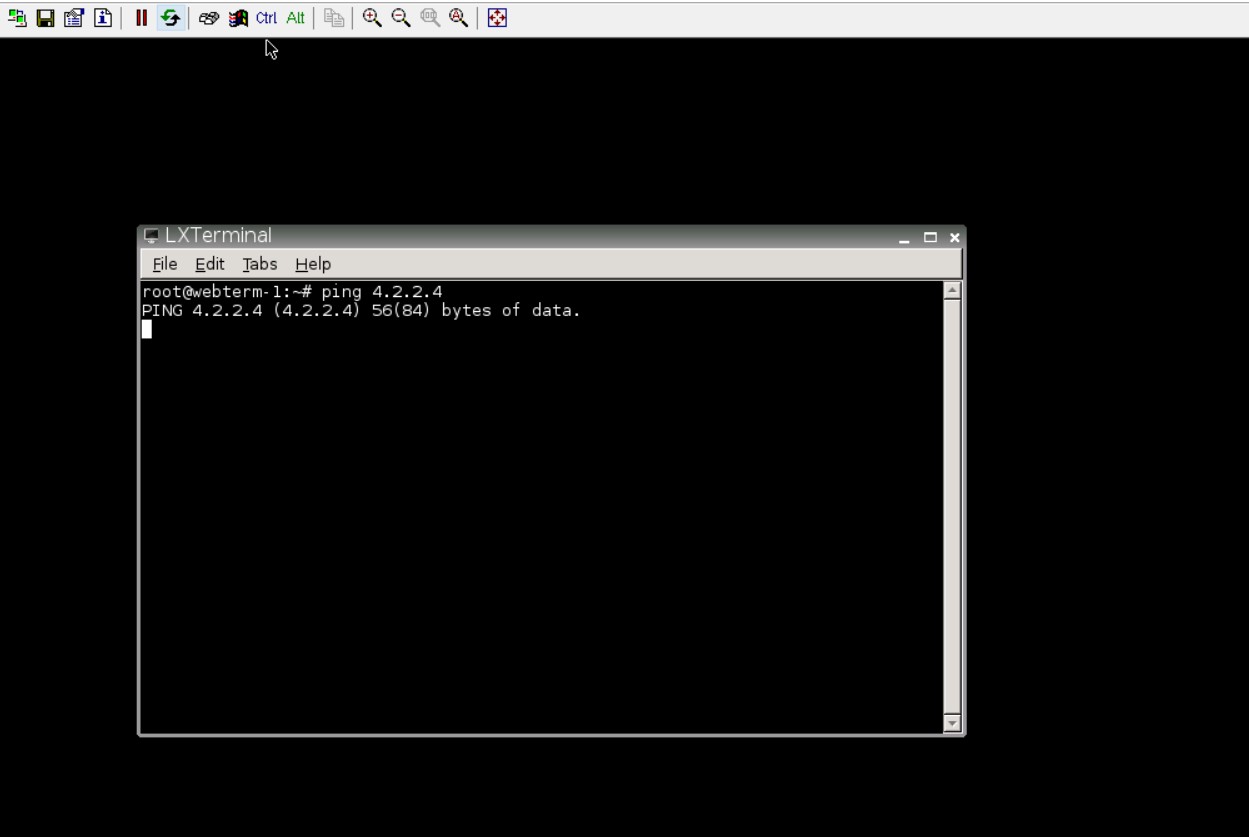
Go to Webterm1 and ping 4.2.2.4. You shouldn’t be able to ping!