Chapter 3. NAT
3.1 Source NAT
Learning Objectives
- Configure a NAT policy in FortiGate
- Identify source NAT
Scenario: We are going to enable Source NAT (SNAT) to reach the Internet from Kali. That means that all traffic from the local network to the Internet should be allowed.

Source NAT
| Device | IP address | Access |
|---|---|---|
| Kali | DHCP Client | – |
| WordPress/Kali | DHCP Client | – |
| Ethernet Switch | – | – |
| FortiGate | Port 2 – (192.168.1.1/24) – DHCP Server (192.168.1.10 to 192.168.1.20)
Port 3 – DHCP Client Port 4 – 10.10.10.1/24 |
ICMP-HTTP-HTTPS |
| WebTerm | 10.10.10.2/24 | – |
Basic Configuration
- Port configuration in the firewall as follows:
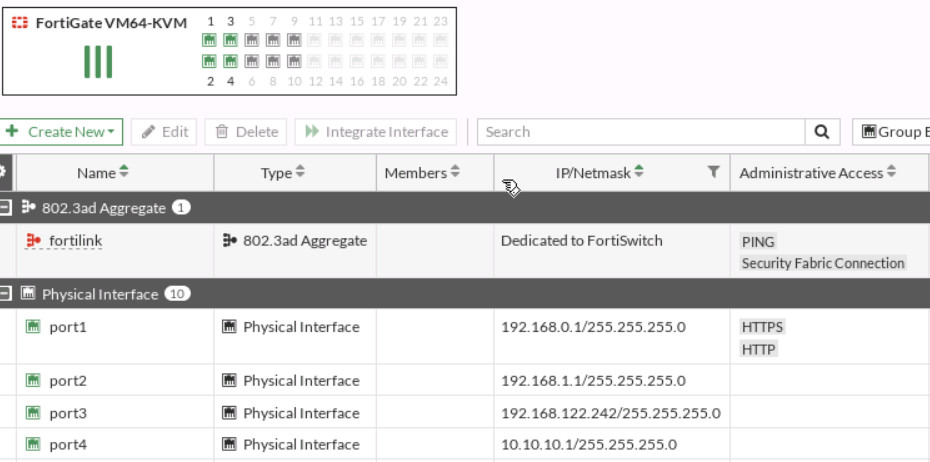
Figure 3.2: Ports configuration in the firewall - Set a DHCP server on interface port2 (Range of IP address should be: 192.168.1.10 to 192.168.1.20, DNS: 4.2.2.4).
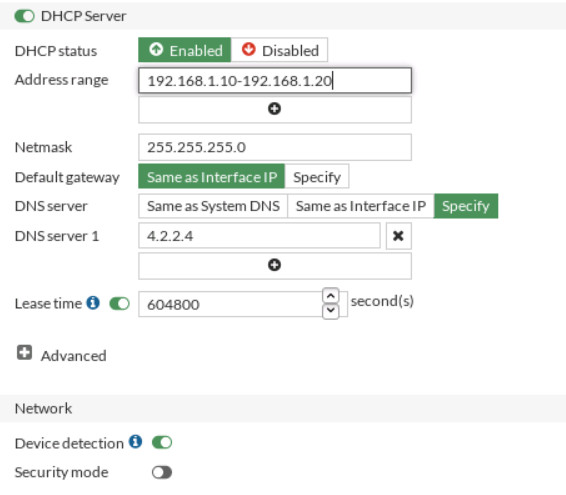
Figure 3.3: DHCP Server configuration - Set port3 as a DHCP client and connect to the NAT.
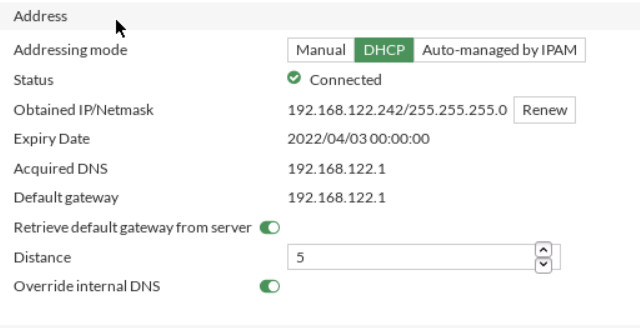
Figure 3.4: DHCP client configuration - Set a static route in the firewall to reach to NAT object.
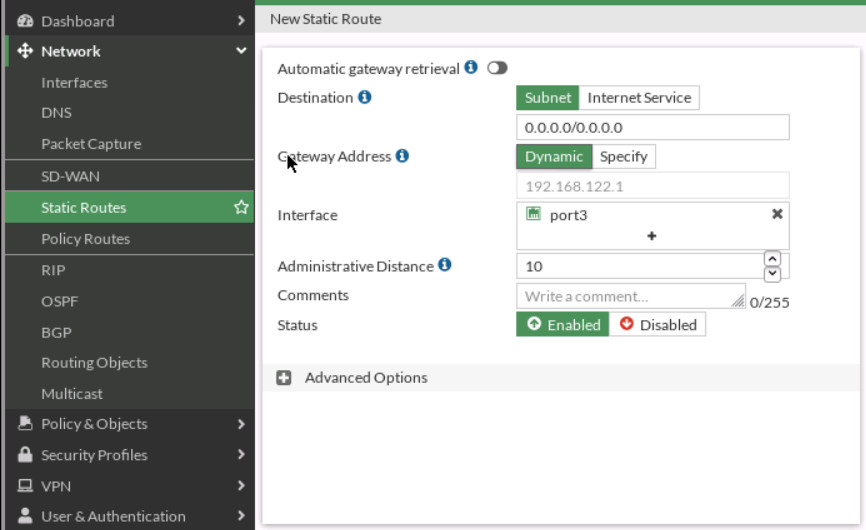
Figure 3.5: Set a static route - Go to Policy & Objects > Firewall Policy section, click Create New to add a new firewall policy, and configure the following settings:
- Name: LocalToInternet
- From inside to outside (port2 to port3)
- Source: Create an address for the local network (Subnet: 192.168.1.0/24)
- Destination: all
- Schedule: Always
- Service: Only HTTP, HTTPS, and DNS
- Action: Accept

Figure 3.6: Configure Firewall Policy and enable Source NAT - Open the browser in Kali, you should be able to access the internet.
Figure 3.7: Verify your configuration
