Part 1 – Preoperations
Chapter 1.2 – Assembling & Testing UAS
Overview
In the previous chapter, it was verified that all required components are present and in good visual order. In this section, all of the components are assembled and tested for proper functionality in the lab in preparation for mission planning.
Preoperations
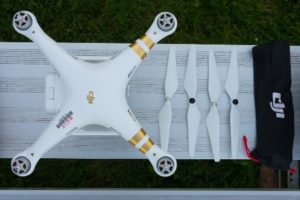
Before proceeding, it is very important to ensure that the protective camera and gimbal bracket has been removed. If the UAS is powered on with the bracket in place, it may seriously damage the gimbal motors.
To attach the propellers, note the silver and black center markings and match them up with the sliver and black dots on the motor centers. Also note the direction in which the sliver and black propellers are tightened.
Power on the iPad and use passcode 4679 to log in.
Check for Updates
- Check if iOS requires an update and proceed with update if necessary.
- Check if the DJI GO and Pix4Dcapture apps require an update and proceed with updates if necessary.
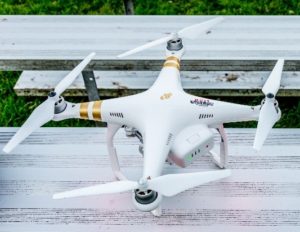
Power on the the controller by pressing the power button and then holding down the power button until all the white lights illuminate. Now insert a fully charged battery in the aft slot of the UAS by sliding it in with the correct orientation of contacts until it firmly clicks in place. Ensure that the battery cannot be removed without squeezing both tabs on the top and bottom of the battery.
Power on the UAS by pressing the power button once then holding it down until all the green lights illuminate on the battery. Verify that the green light on the controller is illuminated and that the rear indicator lights on the UAS are blinking green.
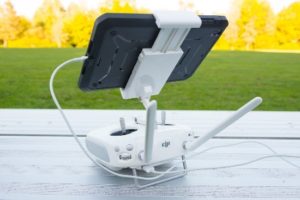
Attach the iPad to the controller and plug in the USB cable as shown below
In the iPad, enter the UAV folder and open the DJI GO app. On the welcome page, tap Camera at the bottom. Within a few seconds the UAS will connect to the controller and this will be reflected in the DJI GO app. If the UAS does connect with the controller after a few seconds, power cycle (turn off then on) the controller and UAS using the sequence above.
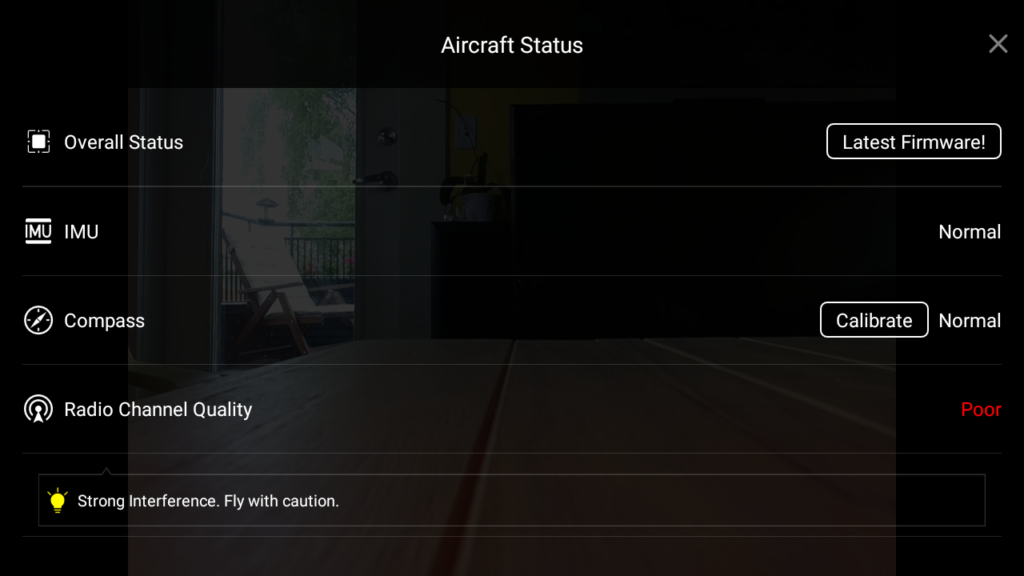
The first screen you will see is the one shown below. This screen provides important information about the status of the UAS and it is critical that this information is reviewed carefully prior to each mission. In the example below, the Radio Channel Quality is Poor indicating strong interference with other sources of radio signals such as WiFi routers, 2.4 or 5.8GHz phones or radios, etc. This is typical of an indoor environment.
Check for Updates
Check the Overall Status to make sure that that the latest firmware is installed. If not, tap Update Firmware and follow the instructions.
Tap the X in the top right of the status screen to close it once it has been carefully reviewed. The DJI GO app shows the view through the camera on the UAS as the main screen. This view reflects either the view of the still camera for taking photos, the video camera for recording video clips or the map.
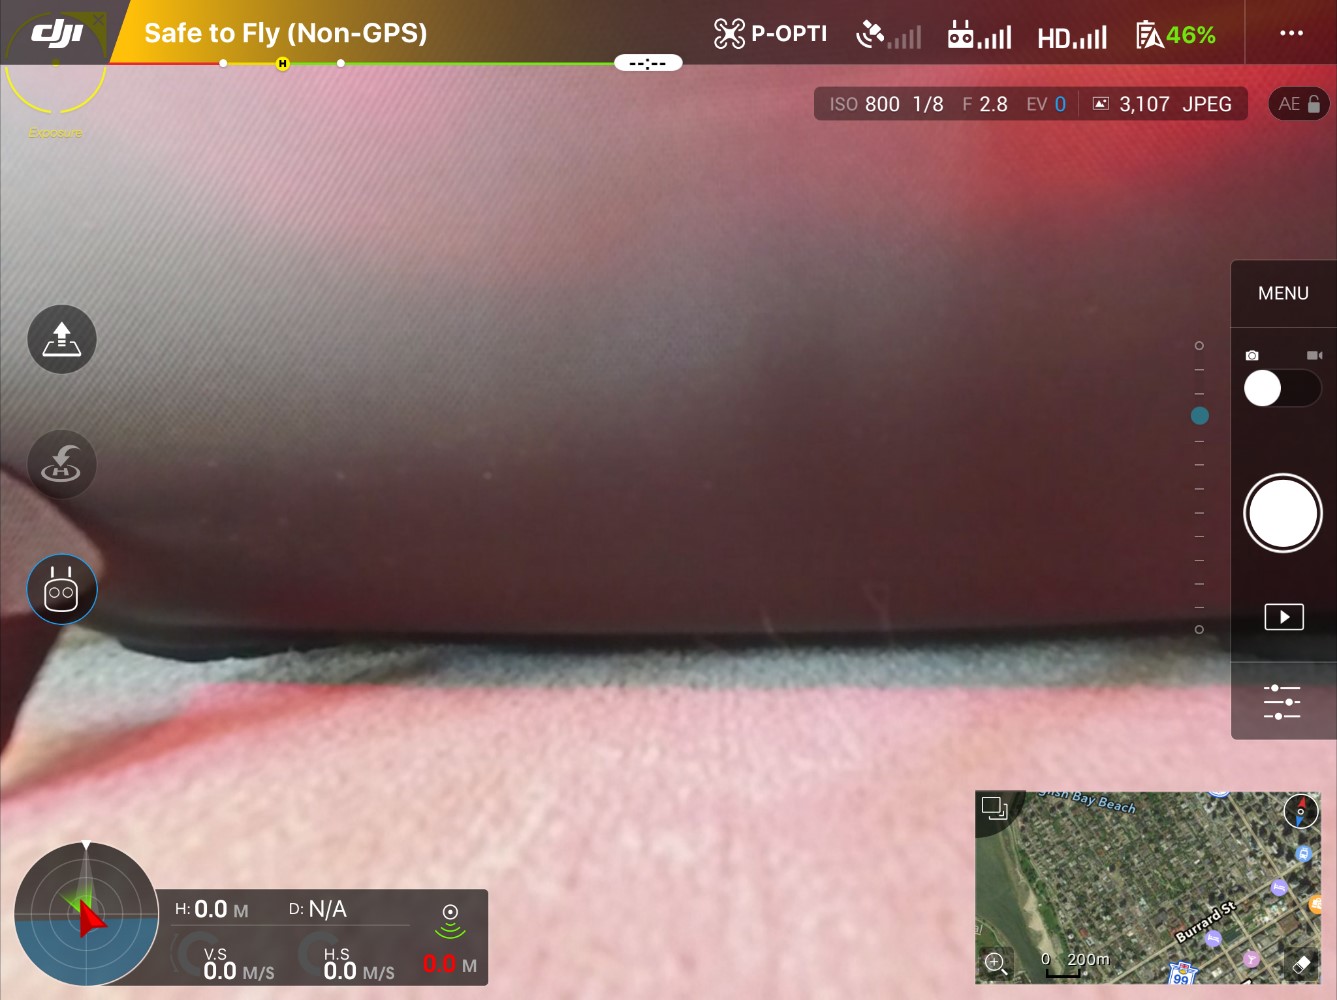
Along the right side of the screen, the toggle between photos and video is at the top, followed by manual or auto mode settings, then the shutter release button (for both photo and video), photo/video playback button and advanced camera settings at the bottom. Camera angle is indicated along the left side of the toolbar.
Along the top of the screen, there is an indication of the flight mode that the UAS is currently in (the sample shows that the UAS is in non-GPS mode because no satellites are visible indoors). To the right of this are symbols showing the flight mode of the UAS (currently in P-OPTI mode), the number of GPS satellites locked on (none), the signal quality between controller and UAS (high), the quality of the video feed from the camera on the UAS to the controller (high), the battery level of the UAS (46%) and access to menu settings (… symbol). Below the main bar is a read out of the camera settings including ISO, shutter speed, f-stop, exposure value (EV), number of frames remaining and auto-exposure lock status.
Along the left side of the screen, the top button is used to launch the UAS, second button from the top updates the Return-To-Home point (GPS lock to at least eight satellites is required) and the bottom button access the advanced flight modes.
Along the bottom of the screen, on the left side is the UAS telemetry cluster. The direction and flight path of the UAS are shown along with the height (H:), distance (D:), vertical speed (VS) and horizontal speed (HS) of the UAS and distance of the UAS to nearest obstacle. The bottom right of the screen shows either the map or camera view which can be toggled by tapping it.
Once all the settings in DJI GO have been verified, switch off the app by double-clicking the Home button to access the fast app switcher and flick the DJI GO app up and off the screen. This must be done before proceeding to the next step.
From the UAV folder on the iPad Home screen, launch the Pix4Dcapture app. Tap Settings in the top toolbar and verify that the Drone and Camera are set to DJI Phantom 3 Professional. Check that Units are set to Meter and that the Auto download images when mission ends option is switched off. Tap Close to return to the home screen.
Tap Project List, tap Project 00022 and tap Open. You should should see a view similar to one below.
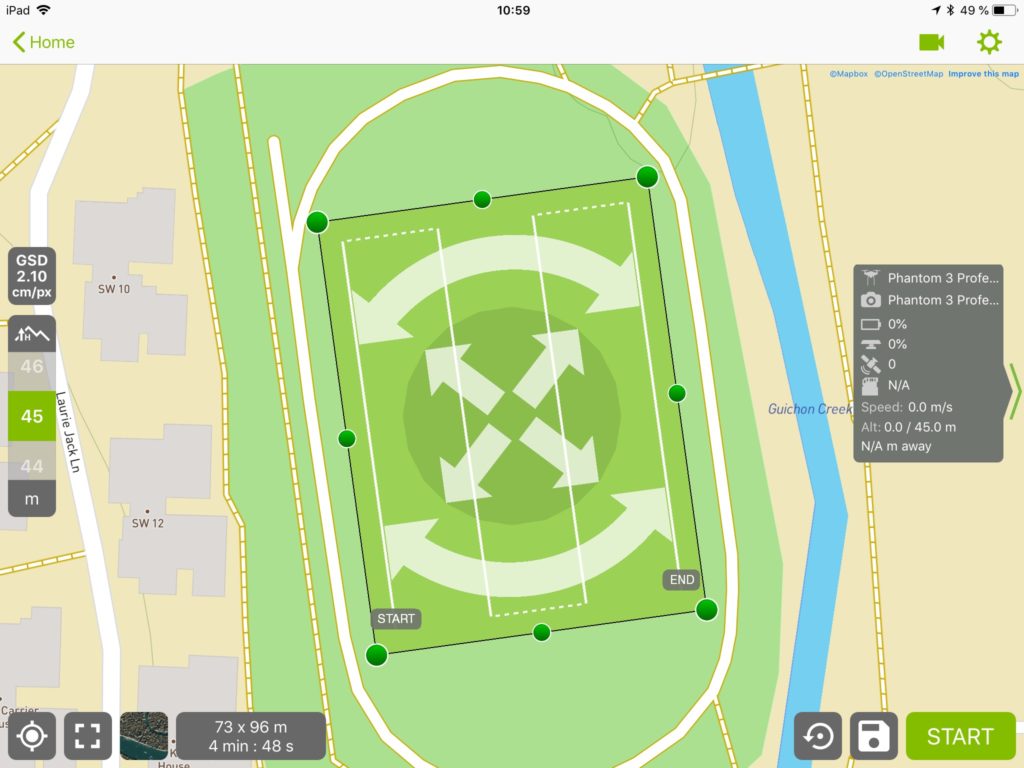
The main view shows the planned mission area in green overlaid onto a map or satellite view. The mission area can be resized (green grab handles), rotated (two curved arrows) or re-positioned (four directional arrow in the center).
Along the top of the screen, starting from the left side, there is a Home arrow to navigate back to the previous screen, a Camera icon to switch between map view (the current view) and camera view, and Gear icon (settings).
Along the left side of the screen, starting from the top, is the ground sampling distance (GSD) and the flying height adjustment scale.
Along the bottom of the screen, starting from the left, is the re-center on current position icon, the re-center on mission area icon, a toggle between map and satellite view, a read out of the mission area dimensions and estimated flight time, a reset mission area icon, save mission icon, and the start mission button.
Along the right side of the screen is the status pane showing the name of the UAS and the camera, percent battery remaining on the UAS, percent battery remaining on the Controller, number of satellites acquired, remaining capacity of MicroSD memory card, UAS speed, altitude and distance from Controller.
Tap the Gear icon (Settings) to verify mission settings as per the screenshot below.
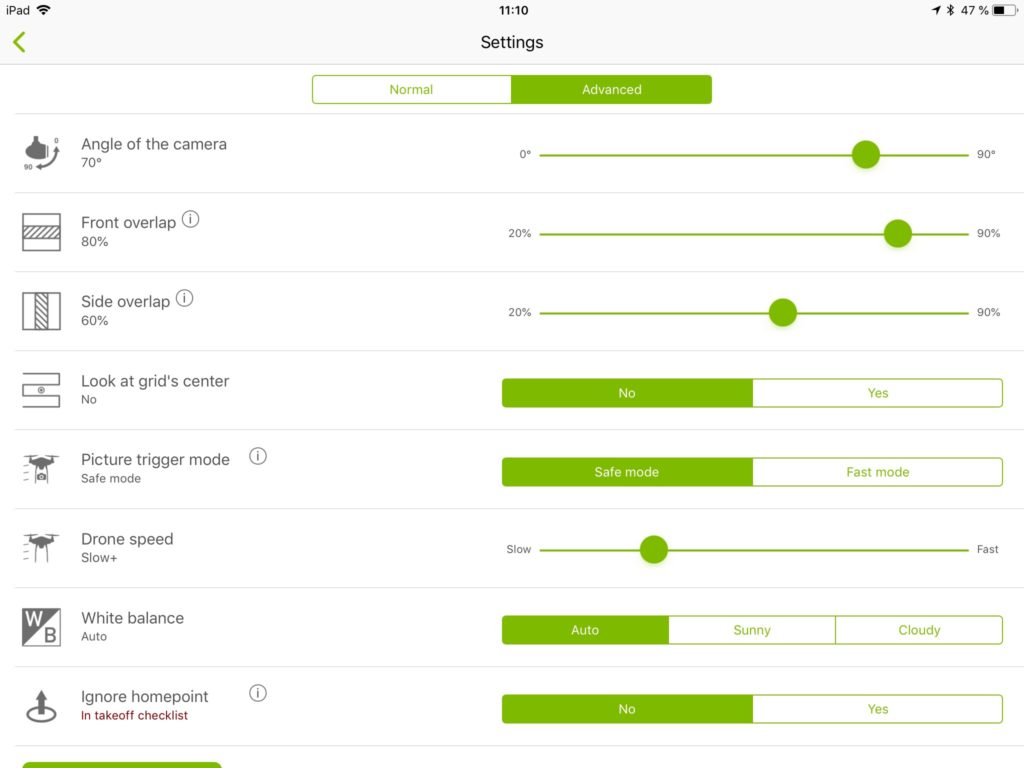
Tap the Gear icon to close the settings menu.
Packing Up UAS
All of the preoperational checks are now complete. Follow the steps below to pack up the UAS and prepare it for an image capture mission.
- Power off the UAS by pressing the power button on the battery once followed by a long press until the green indicator lights are off.
- Remove the battery from the UAS by squeezing the top and bottom buttons on the battery and sliding it out. Connect the battery to the charger if fewer than four indicator lights are displayed.
- Power off the Controller by pressing the power button on the battery once followed by a long press until the white indicator lights are off. Connect the charger if fewer than four indicator lights are displayed.
- Power down the iPad (fully off, not sleep mode), unplug the USB cable and connect the charger if battery is less than 90%.
- Remove the propellers and store them in the protective pouch.
- Replace the protective camera gimbal bracket by sliding it on as shown in the video below.
https://vimeo.com/273546958
Once all batteries have been fully charged, store the Controller, iPad, charger, propellers, battery, and UAS back in the case and secure the safety strap.
