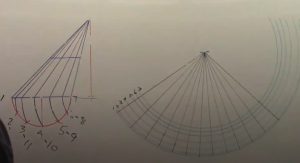
5 Scalene Cone
- Draw a elevation view of the cone

- Add a profile to the base, but do not include profile lines, only the 6 divisions.
- Label these points, 1-7.

- Drop a line straight down from the apex point to the baseline and where they intersect, label it X (red line).

- Using point X as a radius point, set your dividers to each of the 6 division points of and swing them to the baseline.
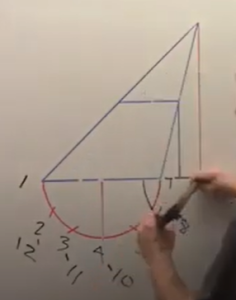
- Where these points meet the baseline, project them to the apex point.
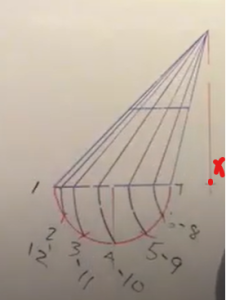
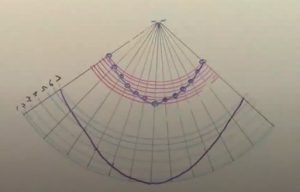
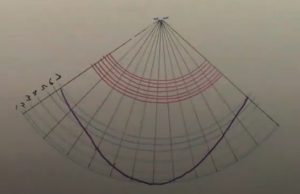
- These element lines are now Ture Length. Pick up the element lines 1-7 and swing them from a radius point. You can also use the apex as a radius point and swing the element lines directly off the elevation view.
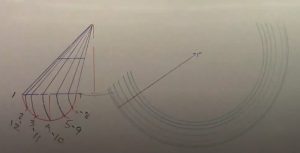
- Taking one of the 6 divisions as a step-off, transfer 12 step-offs around the pattern. This step-off needs to go starting from the inner arc, one by one, towards the outer arc. Once the outer most arc is reached, turn around and go back towards the inner arc. The pattern should finish where it started at the inner most arc, with 12 equal spaces.

- Draw all these points back to the apex point.
- If this is a frustum of a cone, swing all element lines which cross the top miter line as well.
- If this is a frustum of a cone, complete the top miter edge of the pattern by locating the corresponding cross-points of that line.
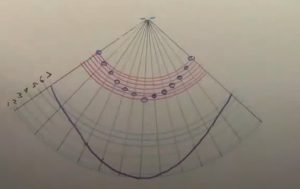
- Draw in the pattern.