9 Round to Round/Round Taper on a Pitch
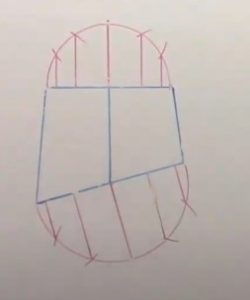
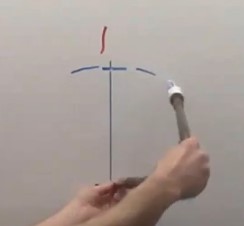
- Draw a complete elevation view. Keep in mind that any plan view would need to be projected from the elevation to keep the end on a pitch to correct shape, it will not be viewed as the original size or shape. Because of the pitch, in the plan view it will be viewed as an ellipse.
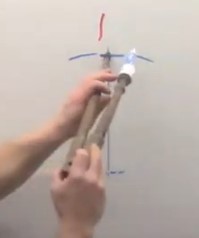
- Draw profiles at each end.
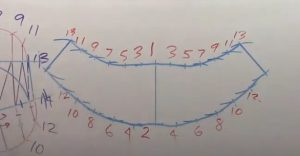
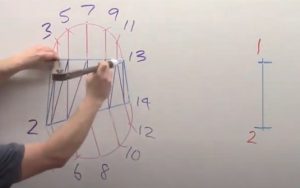
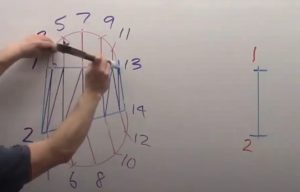
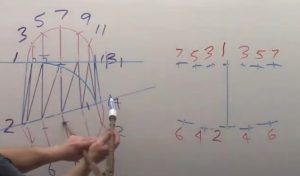
- Draw in all element lines and label the elevation view. It is recommended to zig-zag up and down to number this fitting.

- Find the TL of line 1-2. Since the outside edges are true length in an elevation view, start the pattern by drawing the true length of line 1-2 on a vertical plane. Similar to plan view triangulation a round to round should always be started from a vertical line.
- These instructions will cover 1 side of the fitting, but as you work through, work both sides symmetrically.
- Find the TL of line 2-3. To find the TL of line 2-3, swing element line 2-3 from point 3 and transfer it to the top line of the elevation view. The top line may have to be extended for the element line to fit.
- Next we will find the “difference in profile” for this line. Since there is no profile height at point 2, the full distance of point 3 is the difference.
- The TL of line 2-3 will be the hypotenuse of the triangle formed by profile 3 and element line 2-3 along the top. From the difference in profile to the length of line 2-3 on the top line.
- Pick up the TL of line 2-3 and swing it from point 2 on the pattern.
- Pick up step-off 1-3 from the elevation view and swing it from point 1 on the pattern. This creates point 3.
- Find the TL of line 3-4. Swing element line 3-4 from point 4 and transfer it to the baseline of the elevation view.
- Take profile line 3 and transfer it to profile line 4, make sure to locate it from the outside towards the inside.
- Pick up the TL of line 3-4 and swing it from point 3 on the pattern.
- Pick up step-off 2-4 from the elevation view and swing it from point 2 on the pattern. This creates point 4.
- Find the TL of line 4-5. Swing element line 4-5 from point 4 and transfer it to the baseline of the elevation view.
- Take profile line 5 and transfer it to profile line 4, make sure to locate it from the outside towards the inside.
- Pick up the TL of line 4-5 and swing it from point 4 on the pattern.
- Pick up step-off 3-5 from the elevation view and swing it from point 3 on the pattern. This creates point 5.
- Find the TL of line 5-6. Swing element line 5-6 from point 6 and transfer it to the baseline of the elevation view.
- Take profile line 5 and transfer it to profile line 6, make sure to locate it from the outside towards the inside.
- Pick up the TL of line 5-6 and swing it from point 5 on the pattern.
- Pick up step-off 4-6 from the elevation view and swing it from point 4 on the pattern. This creates point 6.
- Repeat this process for points 7-12.
- Find the TL of line 12-13, swing element line 12-13 from point 12 and transfer it to the baseline of the elevation view.
- Because there is no profile line at 13, we will use the full height of the profile line at point 12.
- Pick up the TL of line 12-13 and swing it from point 12 on the pattern.
- Pick up step-off 11-13 from the elevation view and swing it from point 2 on the pattern. This creates point 13.
- Find the TL of line 13-14. Because we are back to the outside edge, this line is true length in the elevation view.
- Pick up the TL of line 13-14 and swing it from point 13 on the pattern.
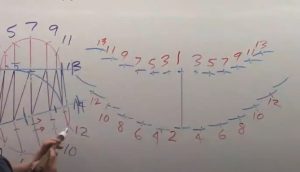
- Pick up step-off 12-14 from the elevation view and swing it from point 12 on the pattern. This creates point 14 and finishes the pattern.