13.2 Exercise 2: Creating B-Master
xtine burrough and Michael Mandiberg
The document we are creating contains only two pages, so only one master page is needed. However, in larger documents that have several layout variations, it is often necessary to use multiple master pages. We will make a second master page in this document in order to demonstrate the process.
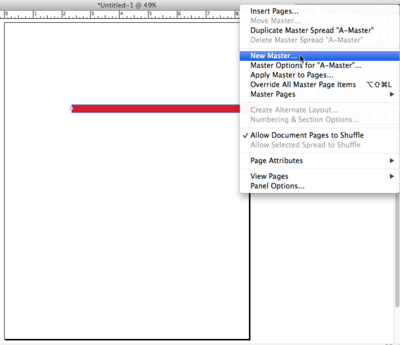
- Click on the pull-down menu at the top right corner of the Pages panel, and choose New Master.

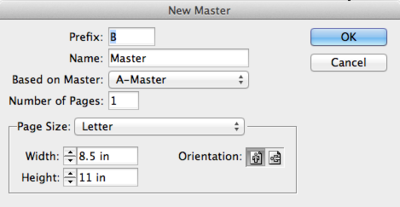
Create a New Master Page - In the New Master dialog box, set B-Master to be based on A-Master using the pull-down menu. (Fig 13.#) Click OK to create the new master page. Tip: To view all the master pages without having to scroll to find them, drag the horizontal divider line in the Pages panel downward.

The New Master dialog box allows you to create a new master page or a master page based on an existing master page. - In this document, B-Master will be similar to A-Master, but we will modify the color of the line so that it is cyan instead of red. Since B-Master contains all of the A-Master elements, those elements cannot be changed unless they are modified on the A-Master page or they are overridden. Try selecting the red line with the Selection tool and you will notice that it cannot be edited. Override the red line (and not the guides) by Shift+Command-clicking on the line with the Selection tool.
Note: You can right-click or Control+click on any page icon in the Pages panel and choose “Override All Master Page Items.” This would make master page items editable on the entire page.
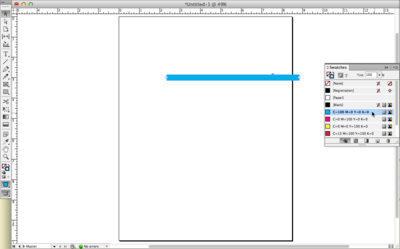
- Use the Swatches panel to change the color of the line to cyan (C=100, M=0, Y=0, K=0).

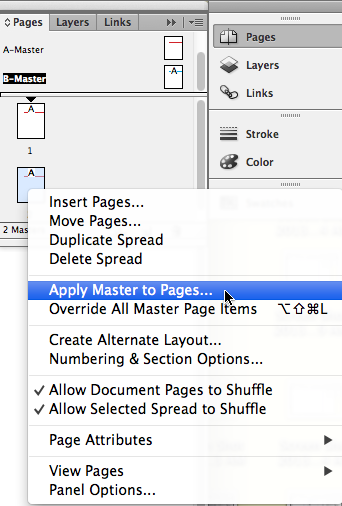
Use the Swatches panel to change the color of the line. Make sure your line is selected. - Apply the B-Master page to page 2 by right-clicking or Control-clicking on the page 2 icon in the Pages panel and choosing Apply Master to Pages from the context menu. In the Apply Master dialog box, choose B-Master from the pull-down menu.

Apply the B-Master page to page 2 - Double-click the page 2 icon in the Pages panel to view the second page. We will now create a typographic headline that will be copied to page 1. In theory, this is something that would normally be done on the A-Master page, but we want to demonstrate a useful paste function that is not available in every Adobe® program. Click and drag with the Type tool to draw a text frame, which is like a text box in Illustrator®. Type the words “Unity on the Grid” into the frame.
Watch Out: Unlike Photoshop® and Illustrator®, type cannot be made by simply clicking on the page with the Type tool and typing text. In InDesign®, type can only be created within a text frame.
Now format the headline by selecting all the text with the Type tool and then specifying a font and type size. In the following example, we are using Futura Condensed Extra Bold at 48 points. Pay attention to the kerning, making sure that the spaces between the characters in the headline are visually equal. If necessary, use the same manual kerning techniques we learned in Chapter 4 to improve the kerning. To kern quickly and visually, place your cursor between any two letters; then press Option (Mac) or Alt (Windows) and click the left or right arrow keys on the keyboard. Next, use the Selection tool to select the text frame and then reposition it so that the left edge of the frame aligns with the left edge of the cyan line and the baseline of the text aligns with the top of the line.

Use kerning to format the headline - Now we will copy the headline to page 1. With the text frame still selected, choose Edit > Copy. Double-click the page 1 icon in the Pages panel, and then choose Edit > Paste in Place. The headline appears in the same position on this page as it is on page #2. The Copy command in InDesign® copies both the type and its location on the page. Be sure to Save!

Copy the headline and use the Edit> Paste in Place command to assure the second headline is in the exact positioning as the other headline.

