4.1 Exercise 1: Using guides to create a grid
xtine burrough and Michael Mandiberg
- Create a new document (File > New) using the “Print” pull-down menu at letter size, in portrait orientation (8.5 by 11 inches, as opposed to 11 by 8.5 inches), named “the_grid.” Click on the small arrow located next to Advanced ▷ to view more options. Choose the color mode RGB.
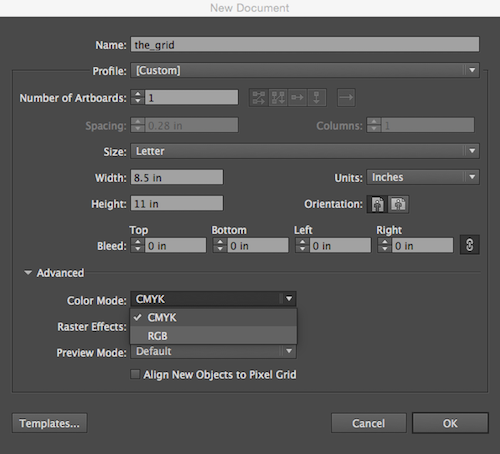
Create a new document dialog box. - Rulers can be turned on or off. They appear at the top and right side of the document window. If the rulers are off, turn on the rulers by choosing View > Rulers > Show Rulers . Right-click or CTRL-click on the ruler to see all of the available units of measurement. Choose inches from the pull-down menu.
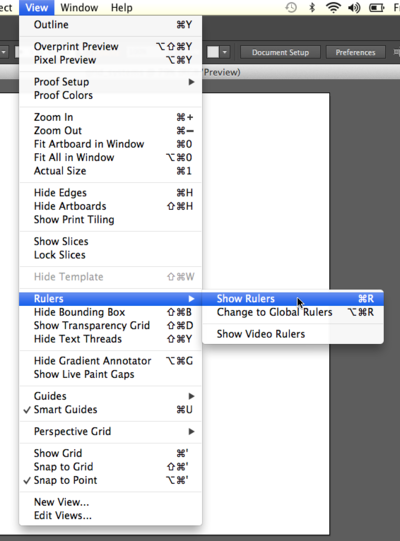
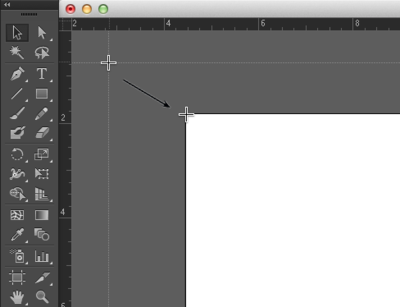
View > Show Rulers” width=”400″ height=”541″> The location of the Show Rulers command Hot Key: CMD-R reveals and hides rulers.The rulers will now demonstrate that the Artboard is 8.5 by 11 inches. Sometimes the rulers load with zero at the top, left edge of the document, orizontally; but vertically, zero begins at the lower left corner of the document.To reposition zero so that it is located in the same place both vertically and horizontally, put the mouse in the top left corner of the ruler area, where the vertical and horizontal rulers seem to overlap, then click and drag to the top left corner of the page on the Artboard. Clicking and dragging from this area repositions zero on the Artboard.
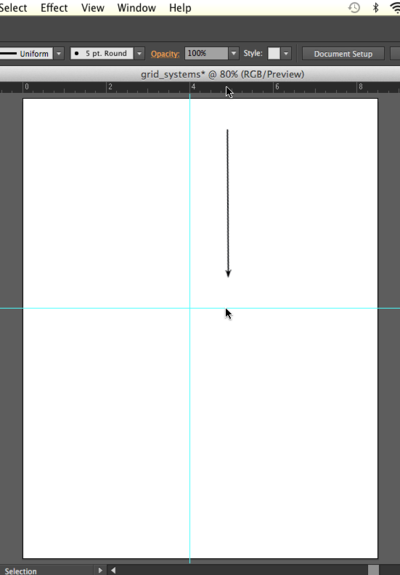
Location of the Ruler Guides - In this step we will pull guides from within the rulers of the document. Guides are available in all Adobe® Creative Cloud® applications. They are always pulled from the rulers. Guides are used to create a grid on the page. The grid occurs when two guides (one horizontal and one vertical) intersect. The grid is used for assessing the relationship of the formal elements within the composition (images and text) to the positive and negative space (where other elements are and where there is nothing but empty space).Click on the Selection Tool, then place your mouse cursor within the ruler area at the top of the document. Click on the ruler and drag the mouse in a downward motion. A guide will be set in place when you release the mouse. Release the first guide at 5 inches on the ruler against the left edge of the page.
Watch Out! If you release the mouse too soon, guides will be made in places where you don’t want them! In Illustrator®, guides are automatically locked when they are released. To get rid of a guide that is locked into position, first unlock it by clicking View > Guides > Lock Guides. When the guide is not locked, simply click on it with the Selection Tool and press Delete on the keypad.
- Repeat this step for the vertical guide, by pulling from the vertical ruler on the left edge and releasing the mouse at 4 inches on the ruler against the top edge of the page.
Moving and adjusting guides Remember to save your files as you work!
