10 Spreading
Spreading
For some insects, spreading and flattening the wings makes for a nicer-looking specimen, but it is not necessarily important for identifying the insect. For others, wings are absolutely essential for identification, and you must spread the wings properly. This is particularly important for the Lepidoptera, the butterflies and moths.
To spread the wings of a Lepidoptera, you will use the spreading board provided with your kit. You will also need the wing paper, a pair of scissors, lots of spare pins, a considerable amount of patience, and a steady hand. I recommend starting with a large specimen, preferably one of which you have several examples.
Setting up the Spreading Board
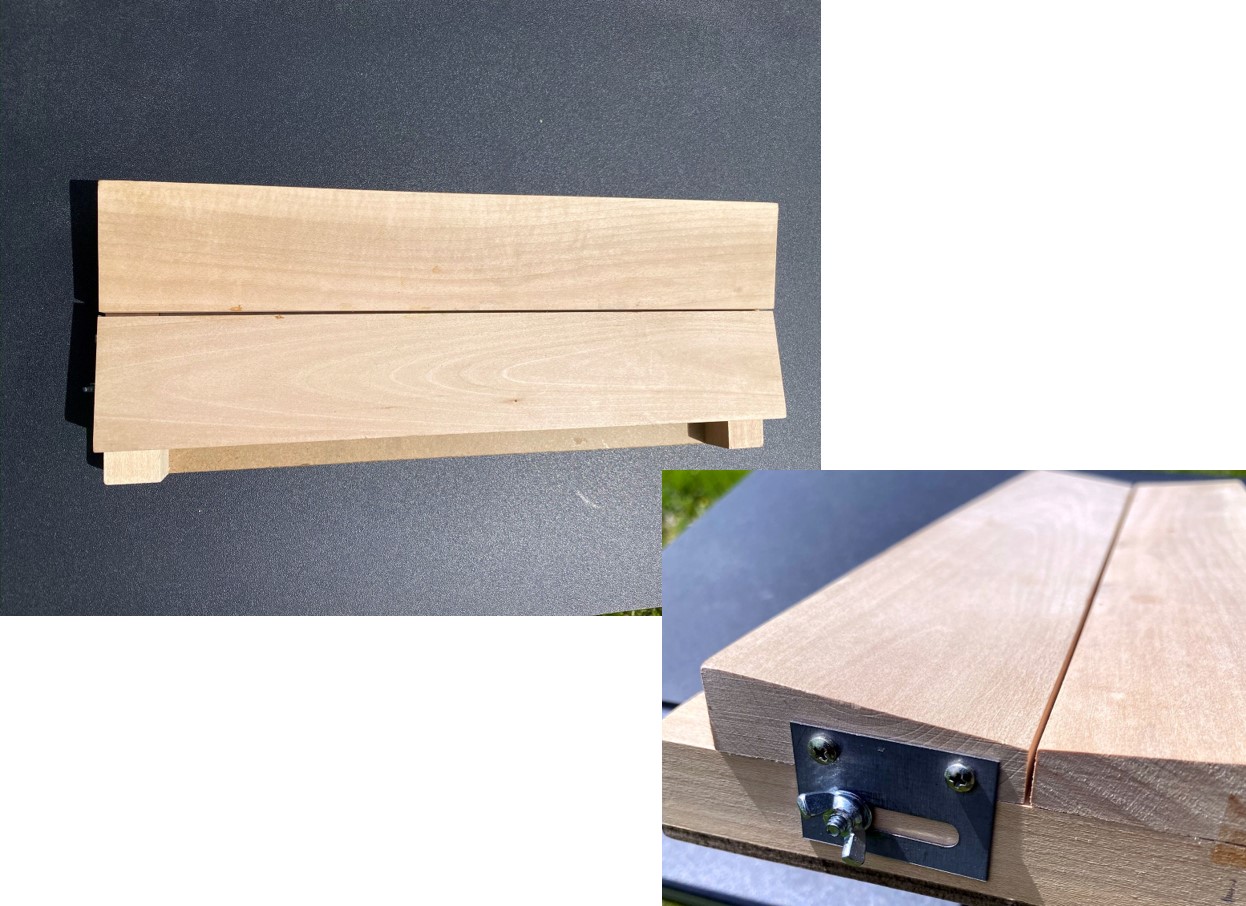
First, pin the specimen through the thorax, and set it to the correct height on the pin using your pinning block. Now, loosen the butterfly nuts on either end of the spreading board. You want the groove in the centre of the spreading board to just accommodate the body of the specimen. Set the groove to the width of the body, and then tighten the nuts again. The pin, with the insect on it, can be pushed into the centre of the groove until the wings, if they were spread out flat, would just rest on top of the board.
Next, you need to convince the wings to flatten. If they are folded straight up above the insect’s body, then use a small strip of wing paper to slide between the wings and draw them down to the surface of the board. If they are folded like a tent over the back, you need only spread them out.
Spreading the Wings
The next step is to spread the wings out flat. Your goal is to get the hind margin of the front wings to lie perpendicular to the body of the insect. Start on one side, and use a pin or your forceps to move the wing forward gently until it is in the right position. Use a piece of wing paper to anchor that wing in place (use plenty of pins in the wing paper to surround the wing, but don’t put pins through the wing). Next, the hindwing is drawn up so that the front margin of the hindwing just barely overlaps the hind margin of the forewing. Anchor everything in place with wing paper and lots of pins. Don’t neglect the outer parts of the wings – they will curl up around the paper as the specimen dries, so make sure they are totally covered with wing paper, and the wing paper is pinned down firmly.
Air Drying
Leave the specimen for 7-10 days to air dry. After that, you should be able to remove the pins and wing paper, pull the specimen out of the groove (handling only the pin it is mounted on), and place it in your collection.
There are helpful videos at the following links, or ask me and I can demonstrate.

Feedback/Errata