5 What’s in My Kit (and what do I do with it)?
What’s in My Kit (and what do I do with it)?
This presentation will give you a tour of the insect collecting kit you have received, including a brief introduction to the uses for the various components.
Other demonstration videos and links will provide further information about using your kit to collect, prepare and preserve insects for your Insect Collection assignment (worth 20% of your grade for BIOL 322).
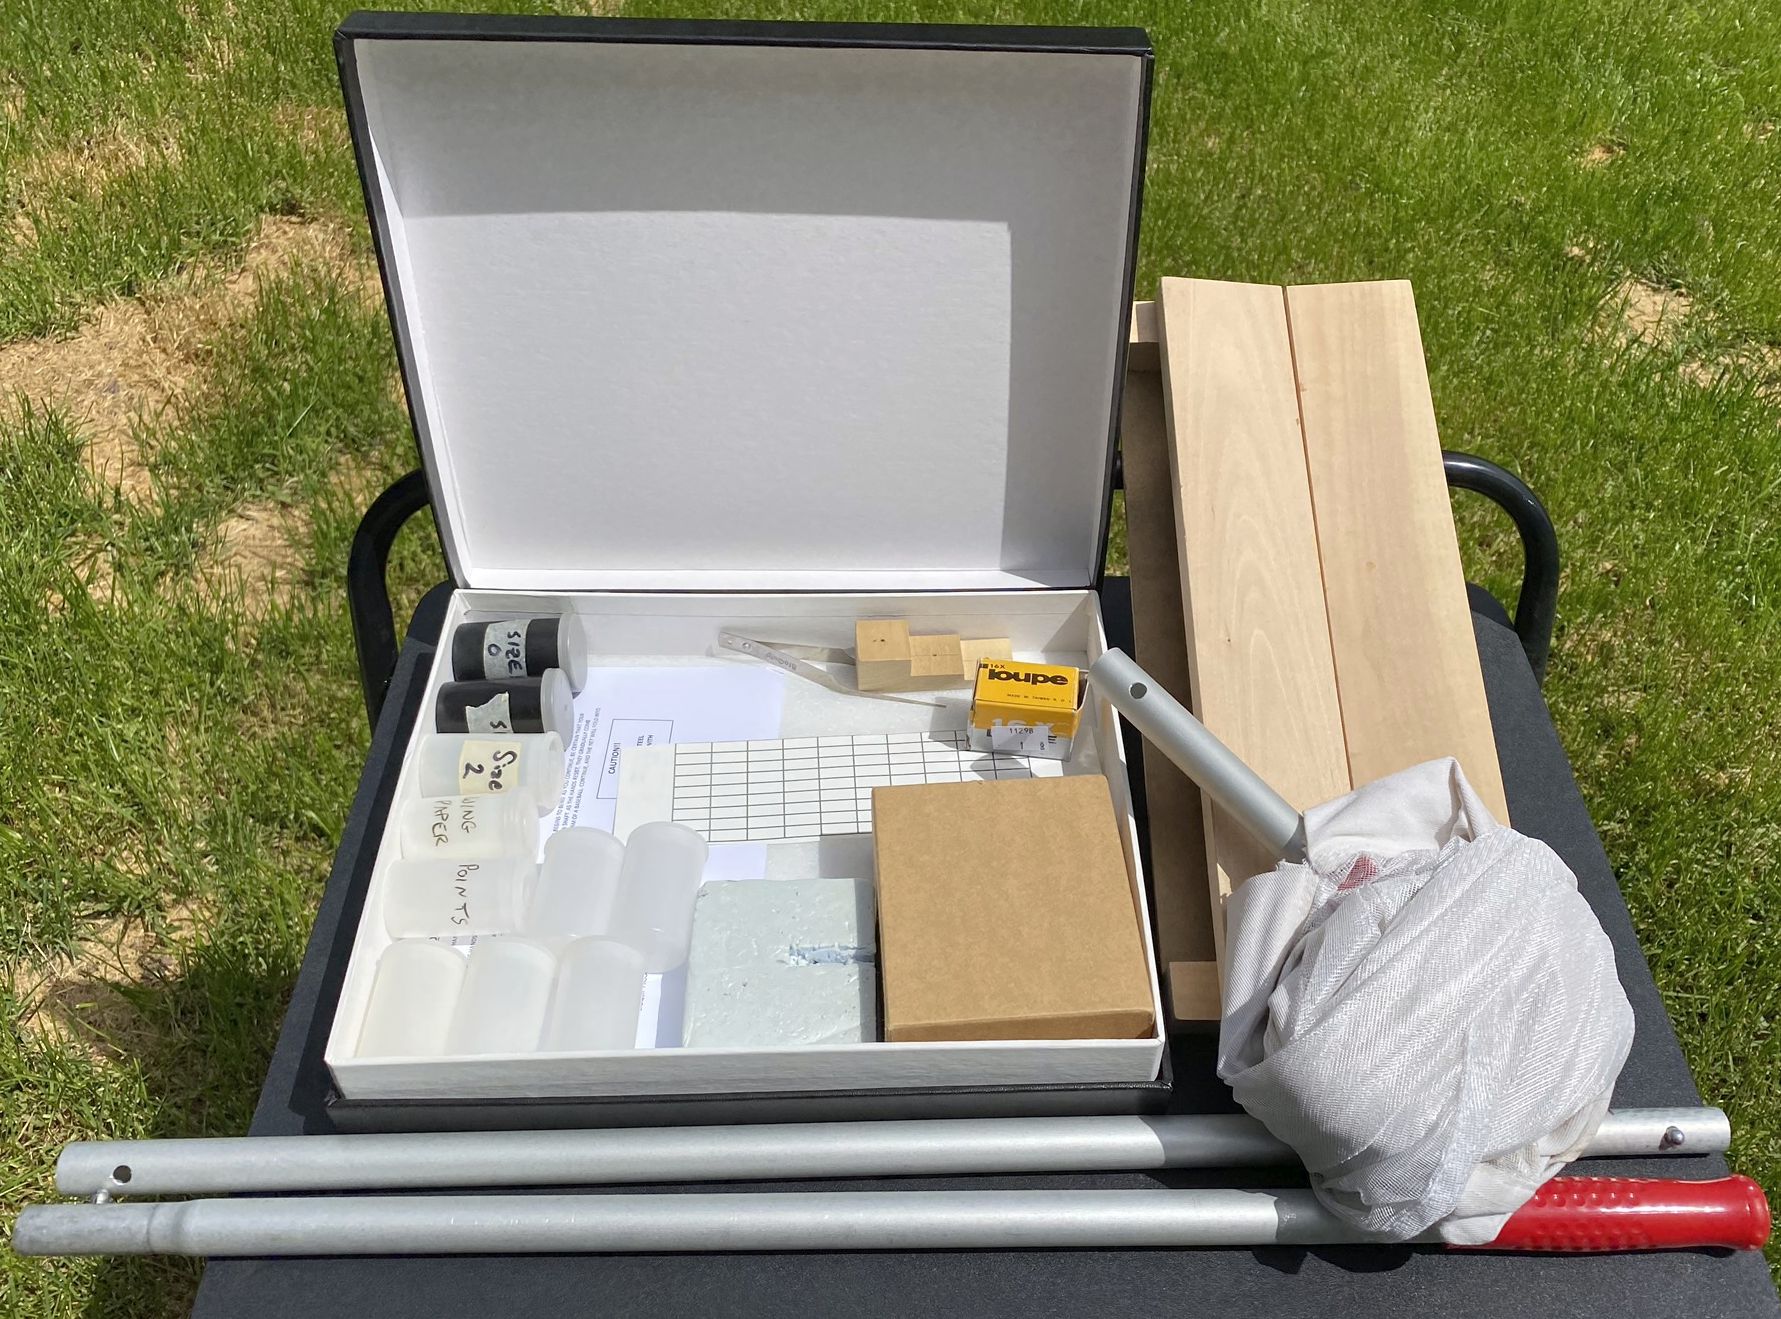
When you receive it, your kit should look something like this.
Most of the components will be inside the black box, but the spreading board and the three parts of the collecting net will be separate.
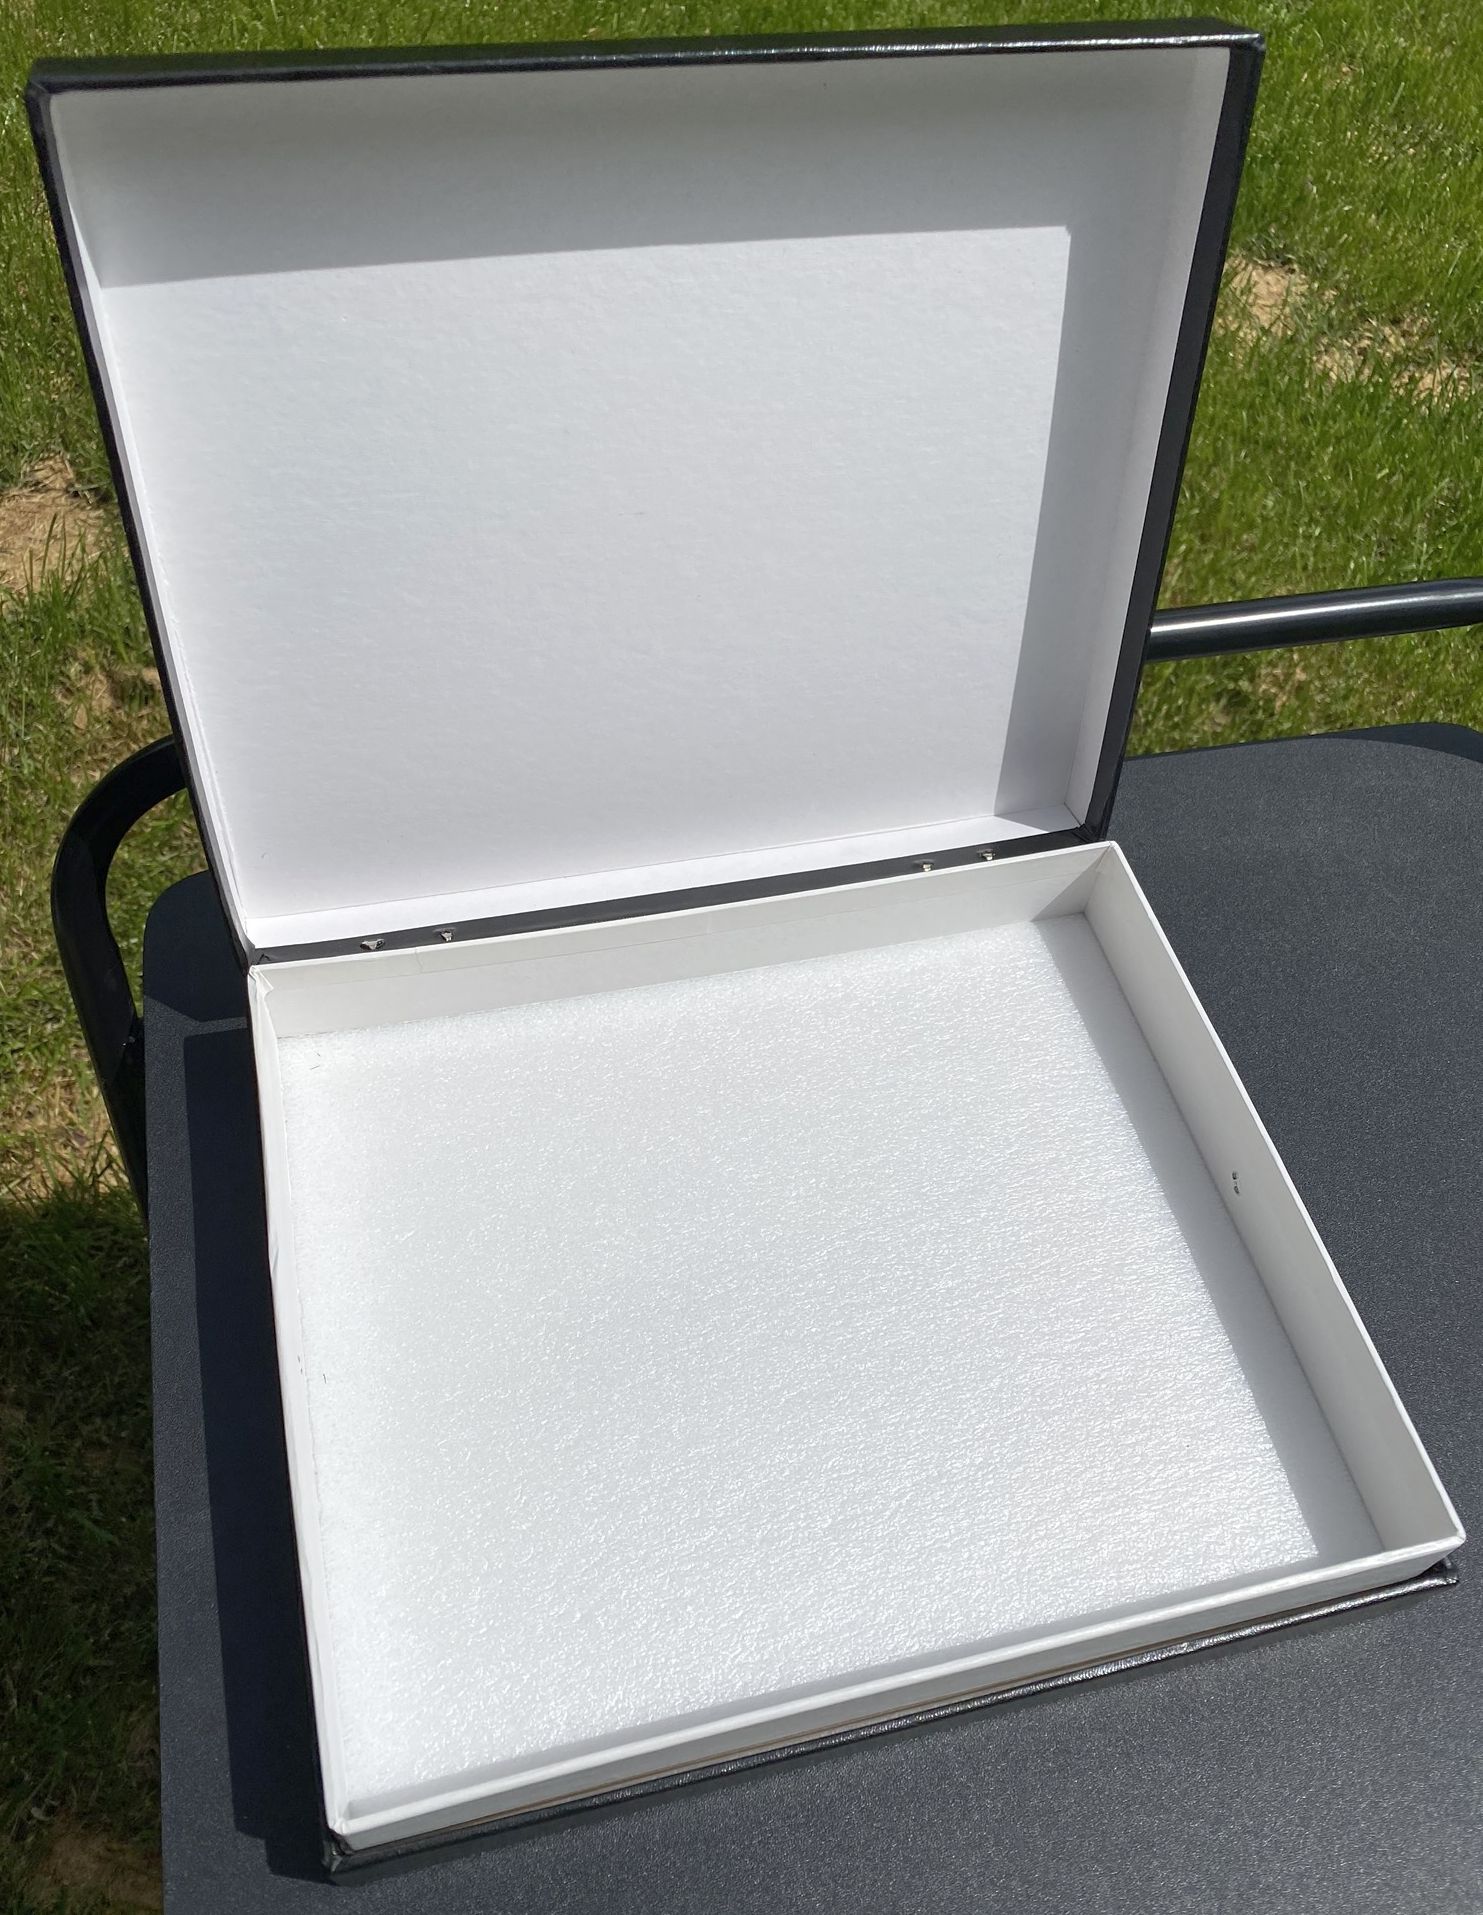
The black box itself is called a display box. Notice that the bottom is lined with a high-density foam.
Once your insects are mounted on pins, you will be able to push the pins into this foam bottom to organize and display your specimens.
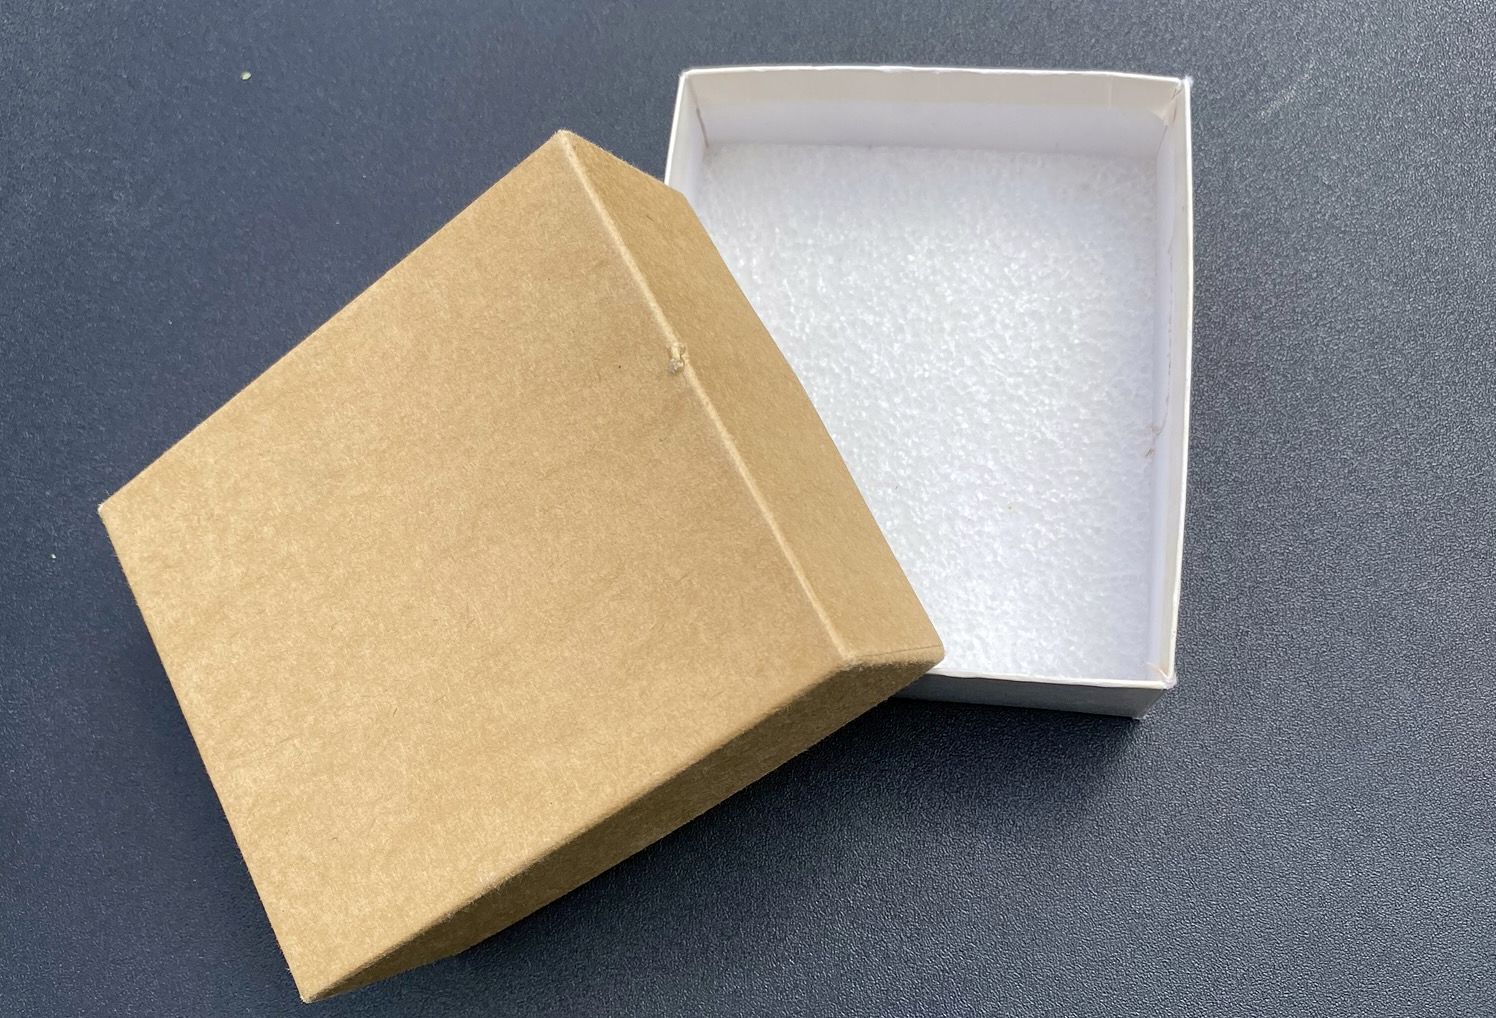
Also included is a smaller box, called a shipping box, which also has a foam-lined bottom. Note that the lids are often very tight on these boxes, as they are intended for mailing specimens.
For your collections, the shipping box may be useful for sorting specimens, for protecting them while they dry, and for various other purposes.
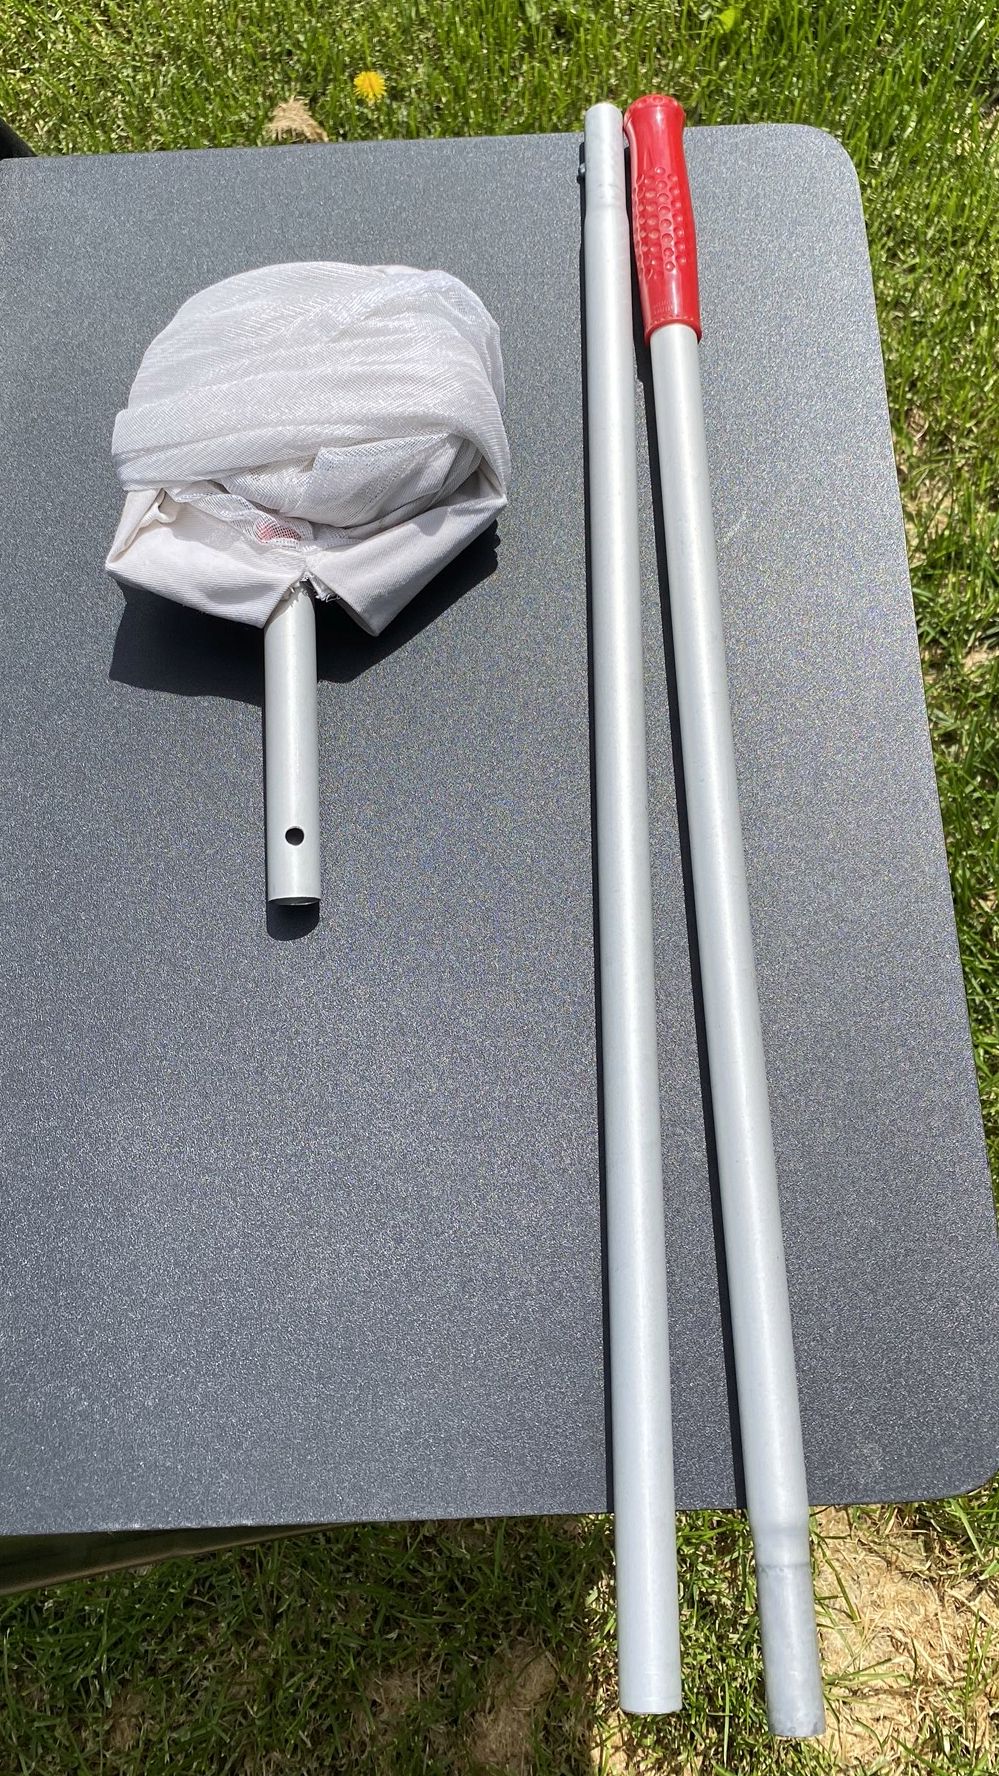
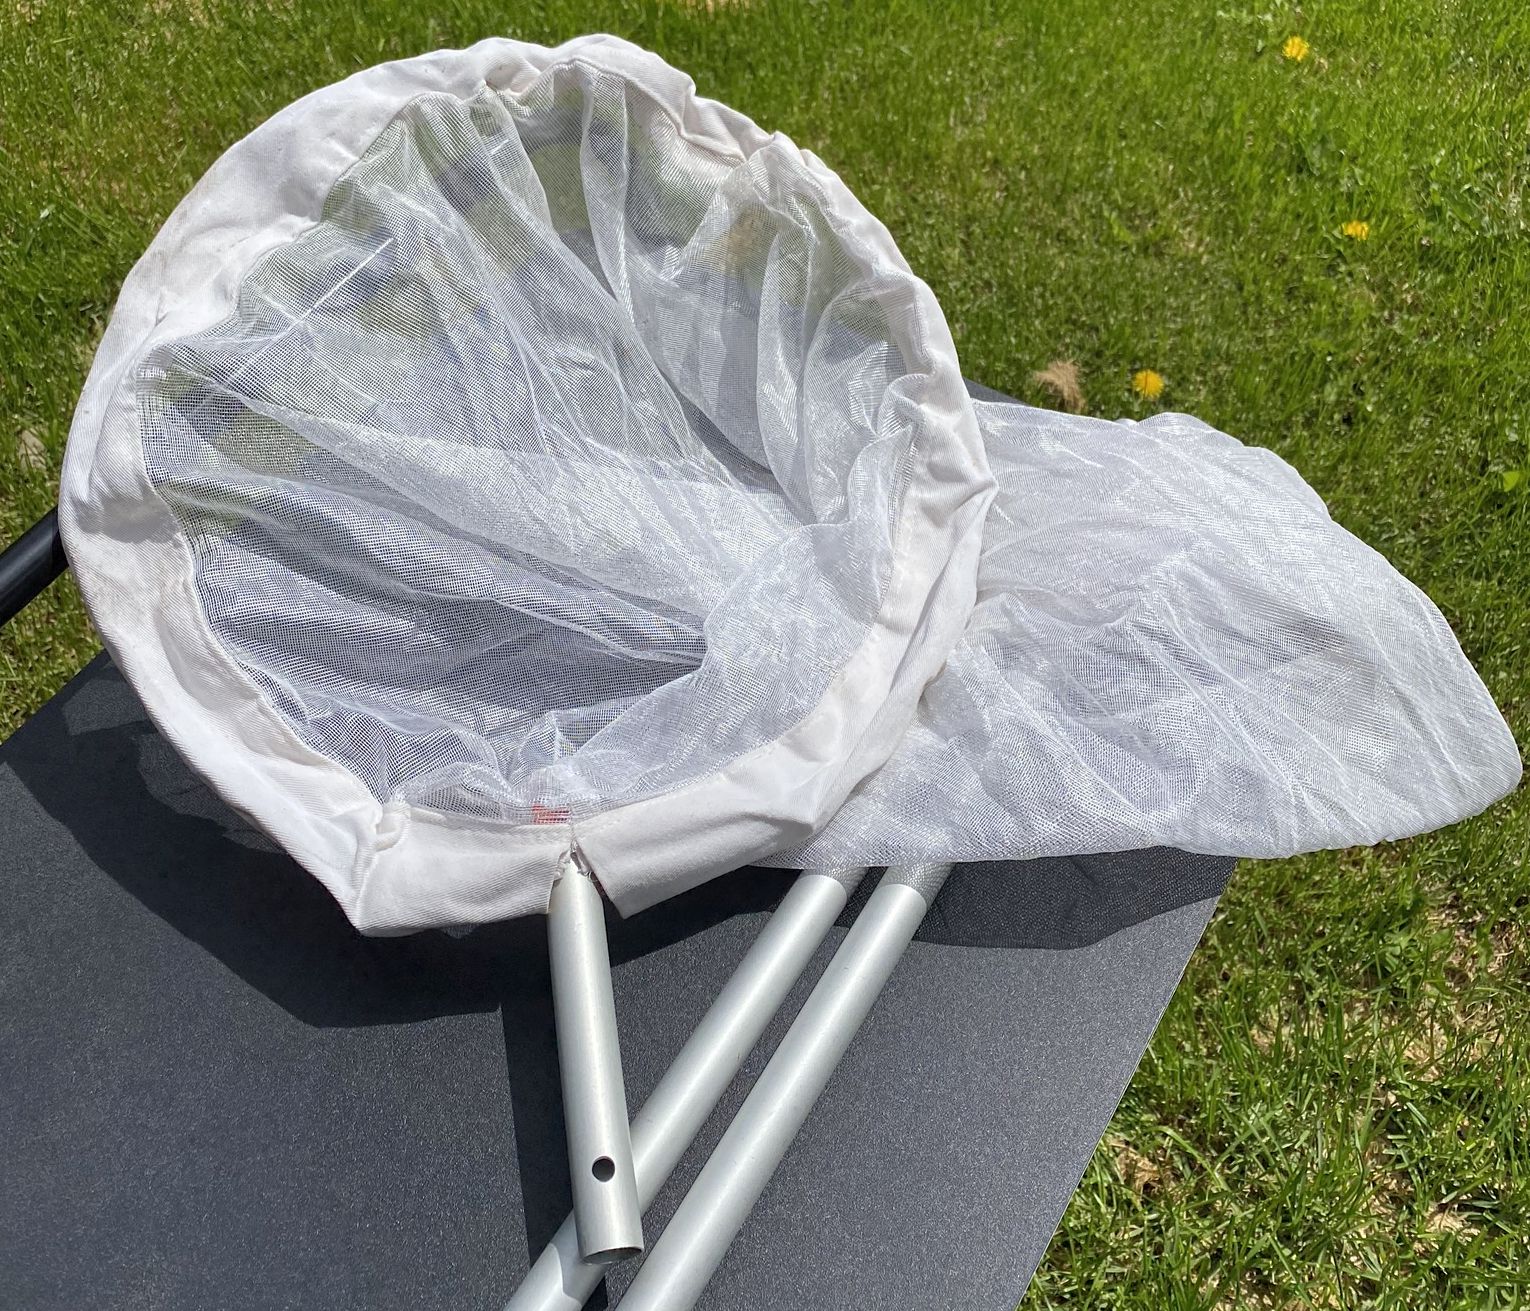
Your insect collecting net comes in three pieces: one with the actual collapsed net, one long tube with a red handle on one end, and one long tube with no handle.
You will need to assemble this into a single net.
To begin with, carefully unwind the net and let it expand.
The frame of the net is a springy, metal ring, which collapses when it is twisted (more on this later).
When you are expanding the net, please do it carefully, and don’t let the net frame hit anything (especially your face!) as it expands.
There is an excellent video on YouTube, https://www.youtube.com/watch?v=axaZAlXA0u0, (and a rather less excellent one in the lab materials!) that explains how to expand and collapse the net.
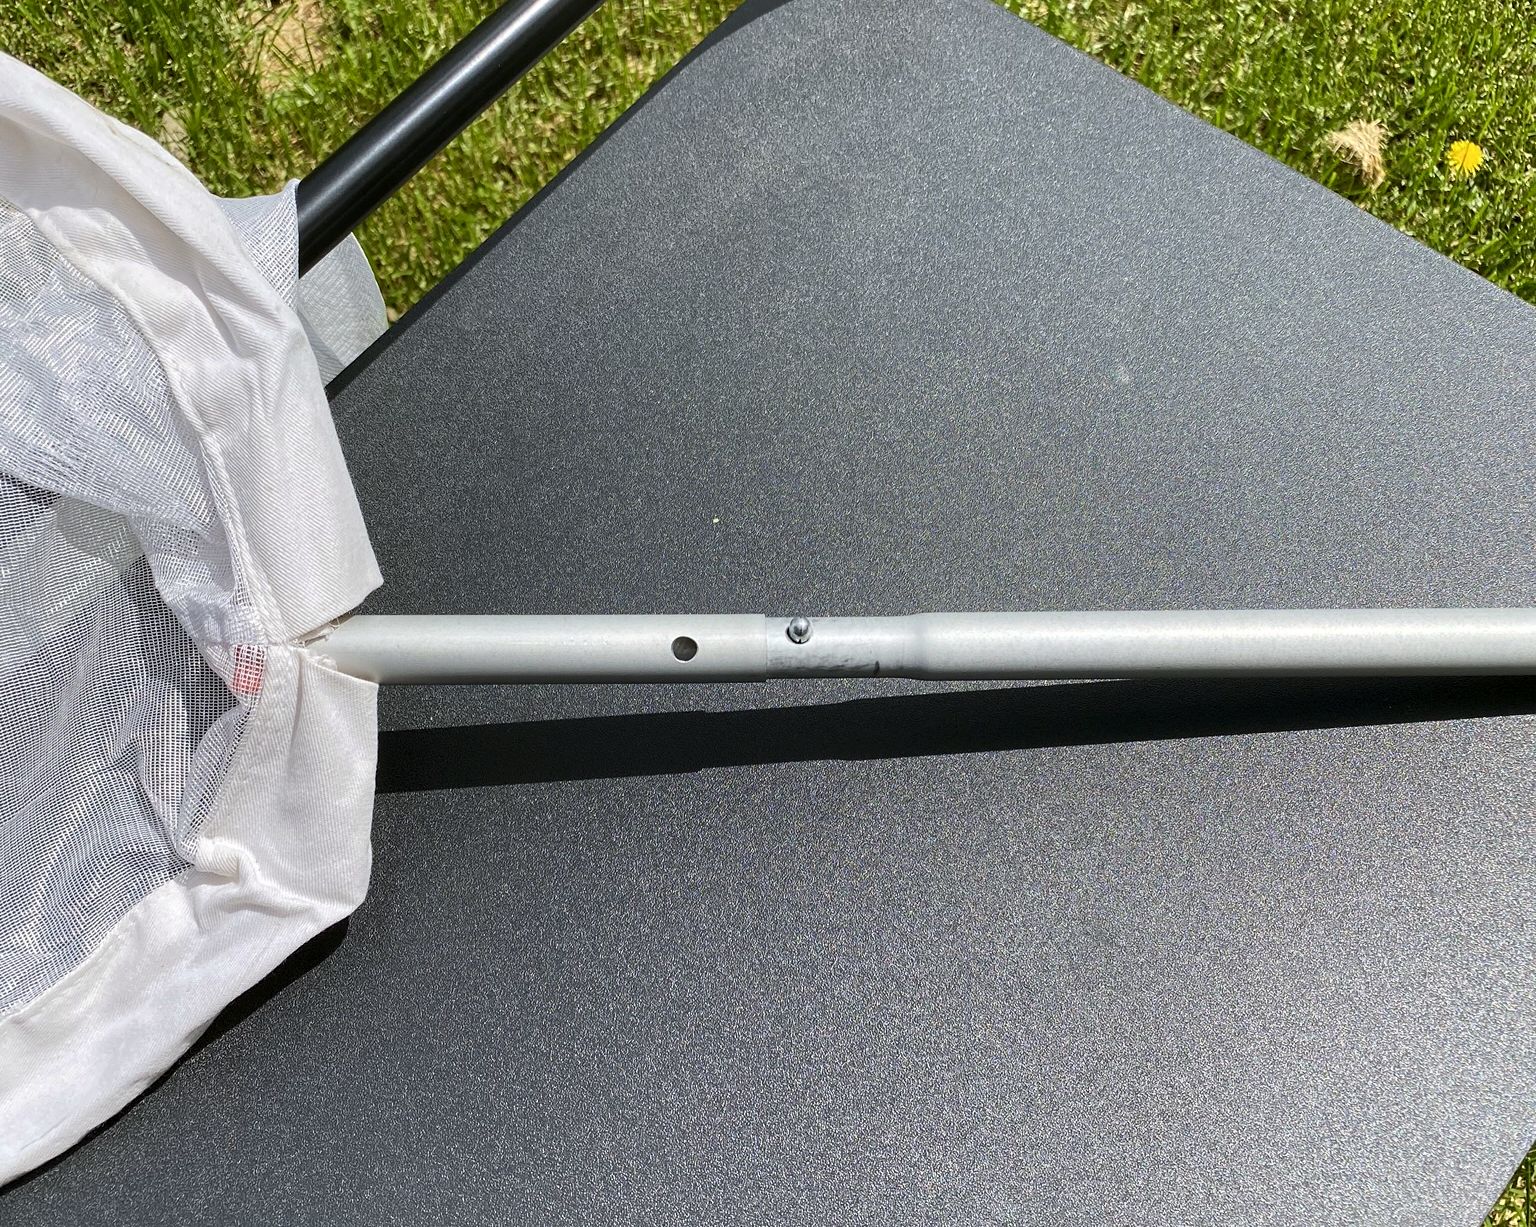
Next, you can assemble the net handle. The pieces fit together much like the pieces of a vacuum cleaner tube.
The piece without the red handle attaches to the net frame, and the piece with the red handle is attached to the end of that assembly.
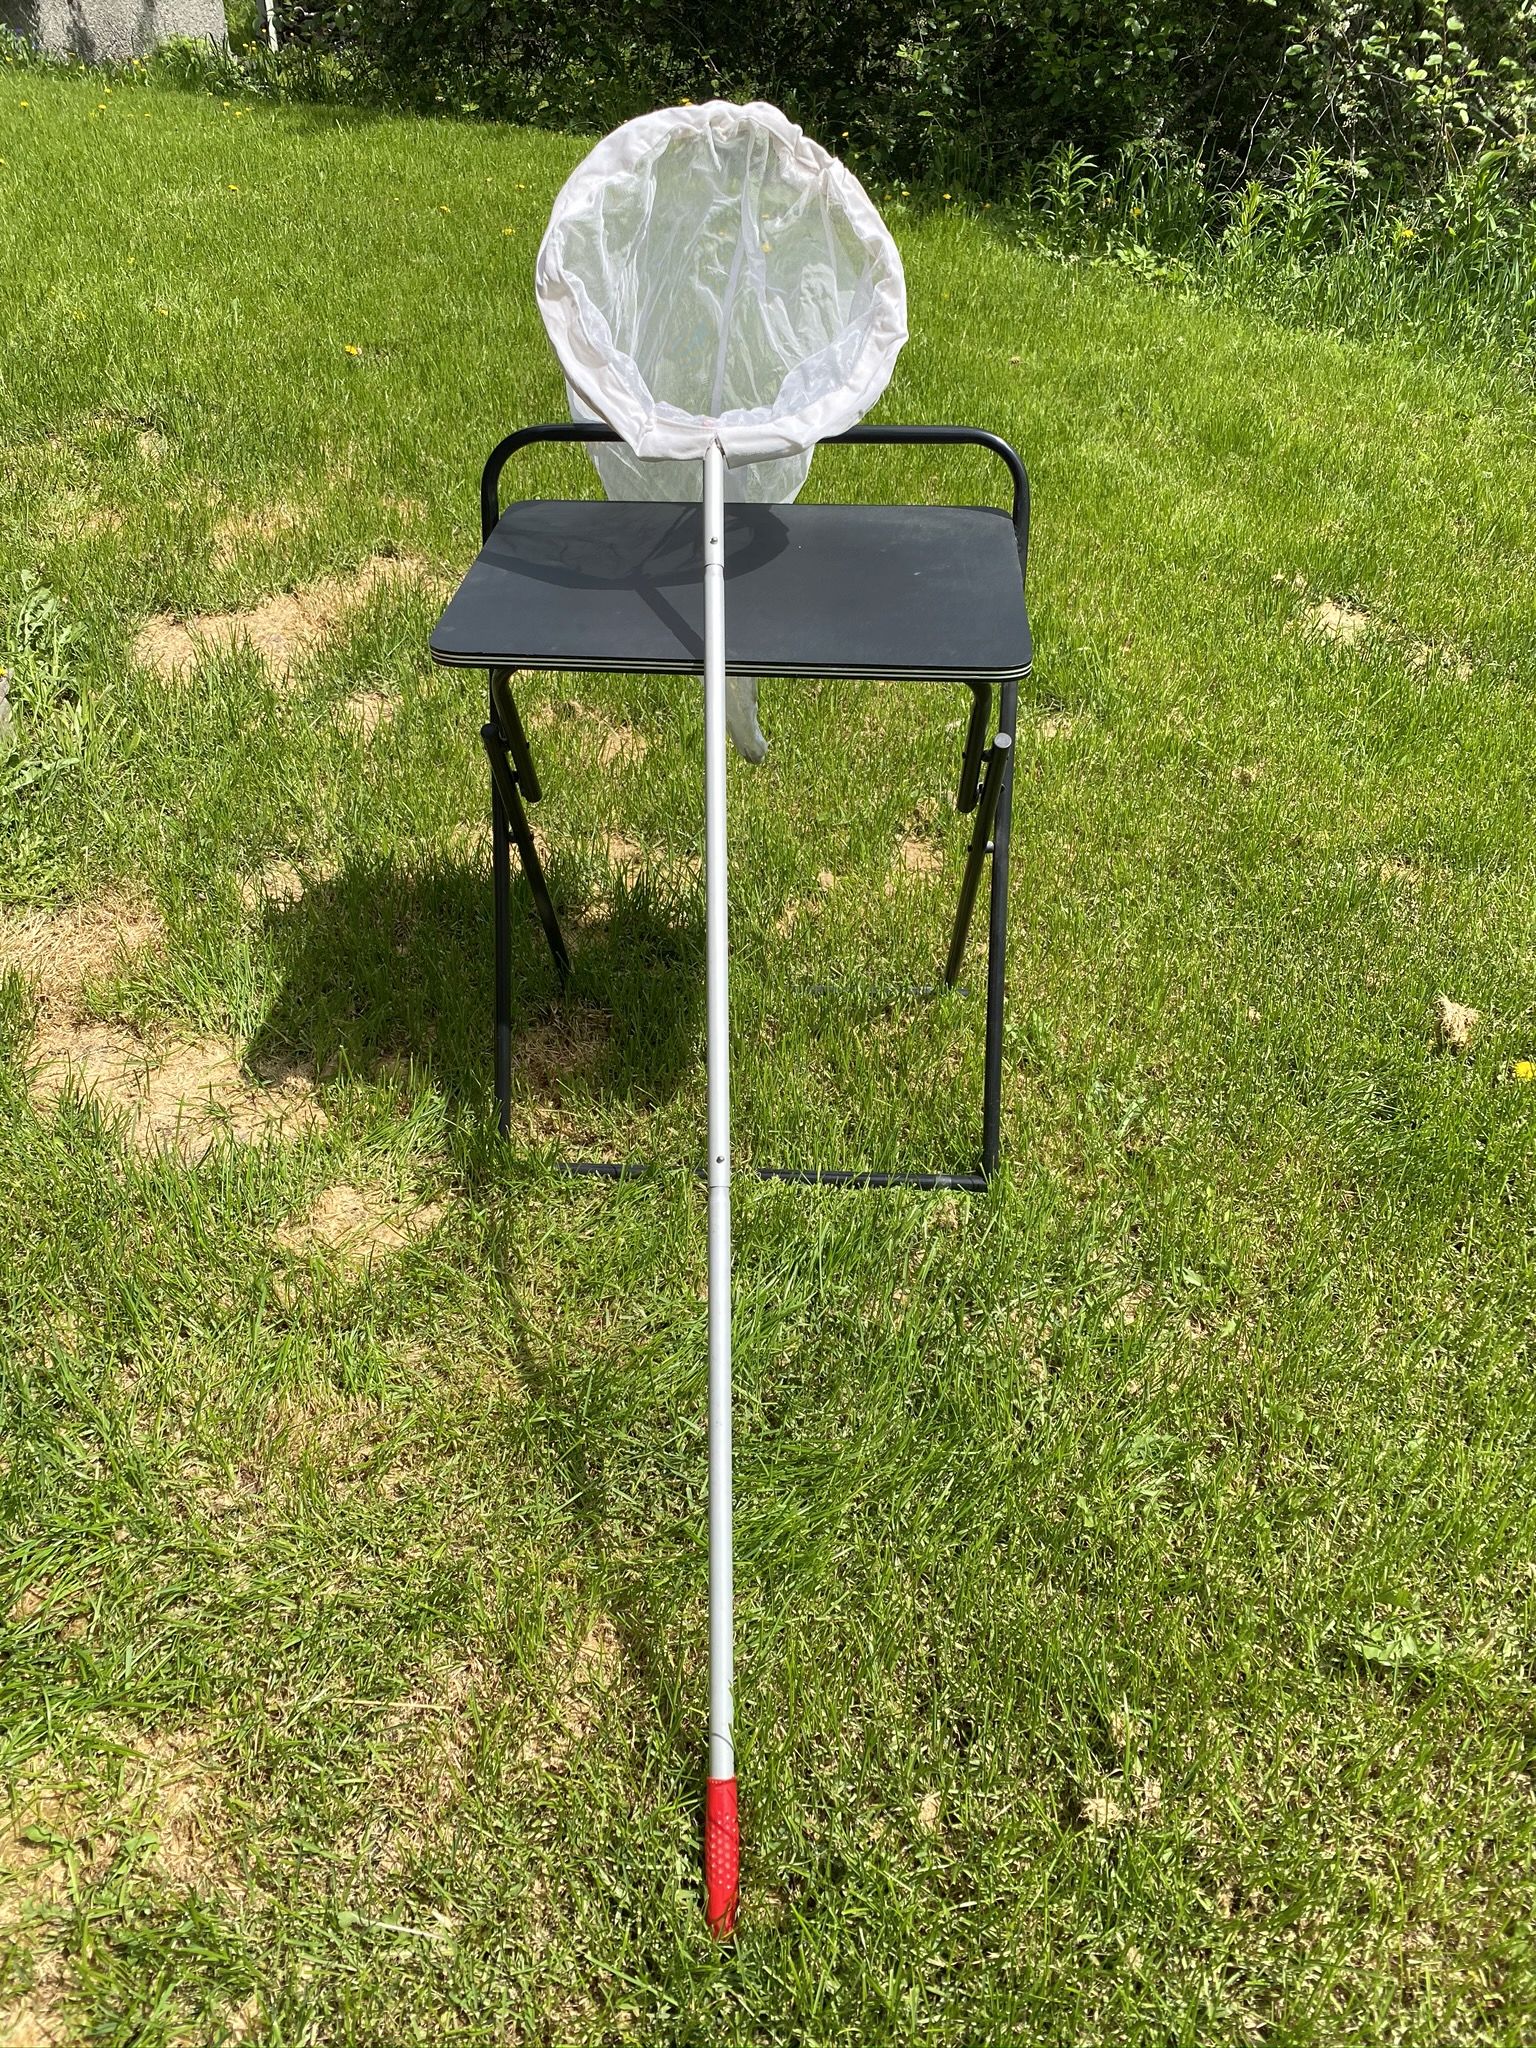
You should end up with a net that looks more or less like this, with a long handle and an expanded bag.
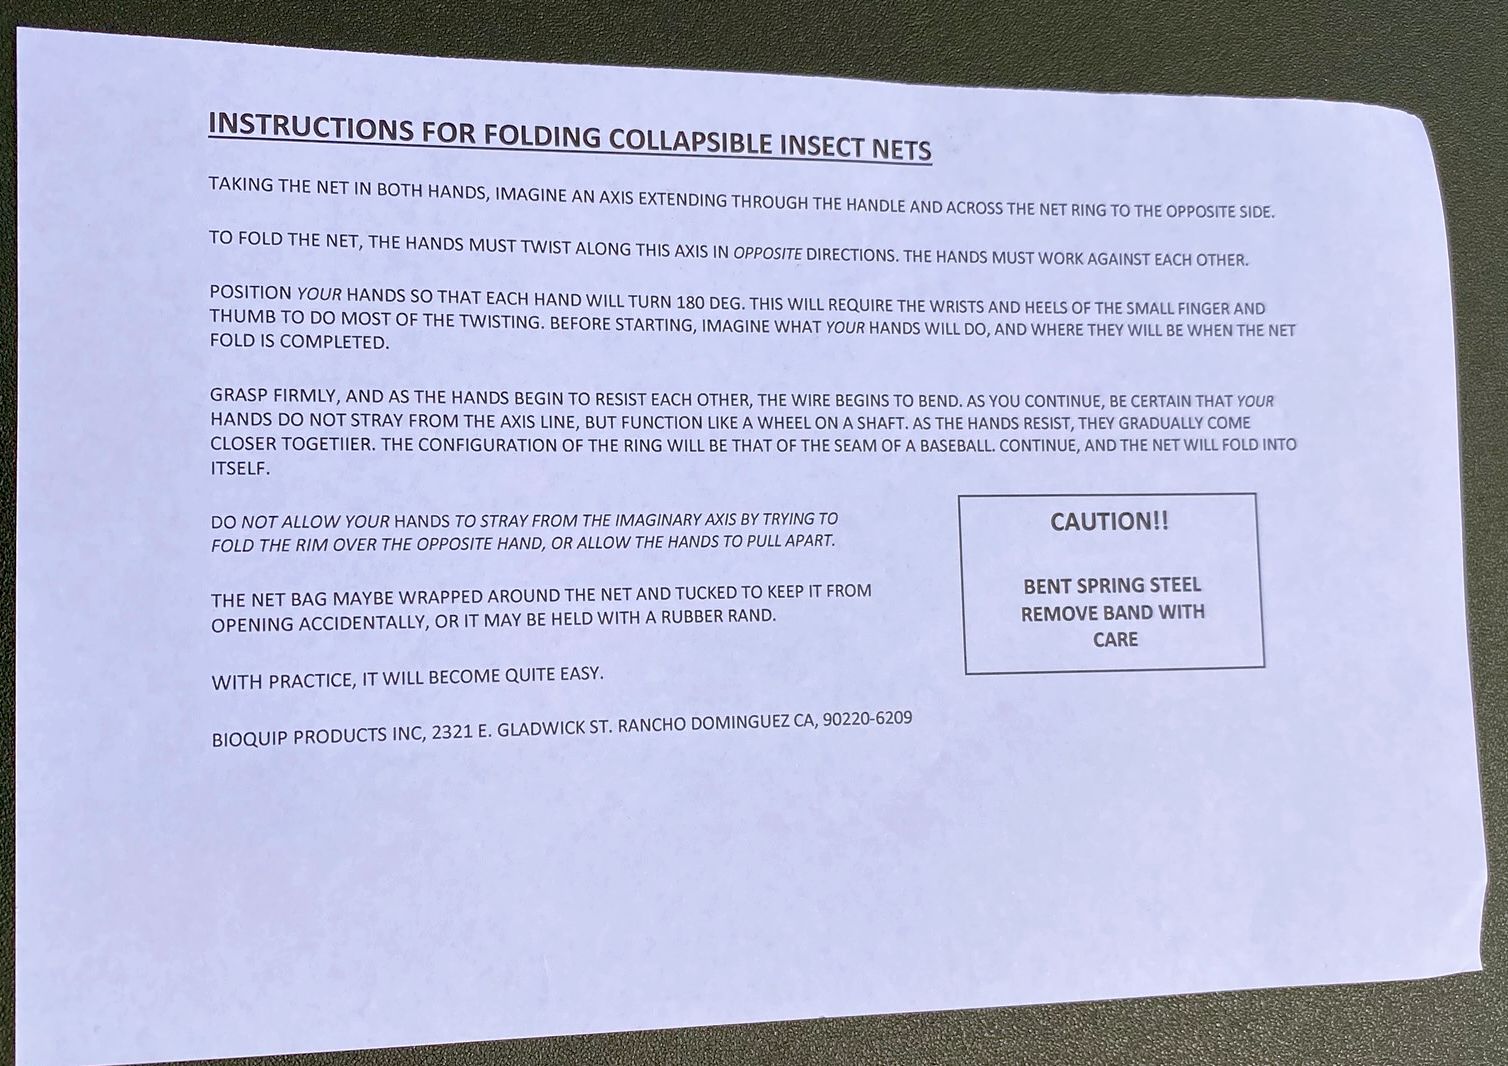
You may disassemble and collapse the net for easy storage and transportation, but please always make sure that it is clean, empty, and dry before you do so.
Instructions for folding your collapsible net are included in your kit.
I will also post a short video clip of me doing this.
My tips:
- – be patient
- – don’t force the frame into position
- – practice!
It is a good idea to tuck the end of the net under itself, and/or use an elastic band or other means to hold it in place, so that it doesn’t expand accidentally!
A folding loupe, or hand lens, is included in your kit.
It magnifies at 16x power. Our dissecting microscopes in the teaching labs at UNBC magnify to ~40x or higher.
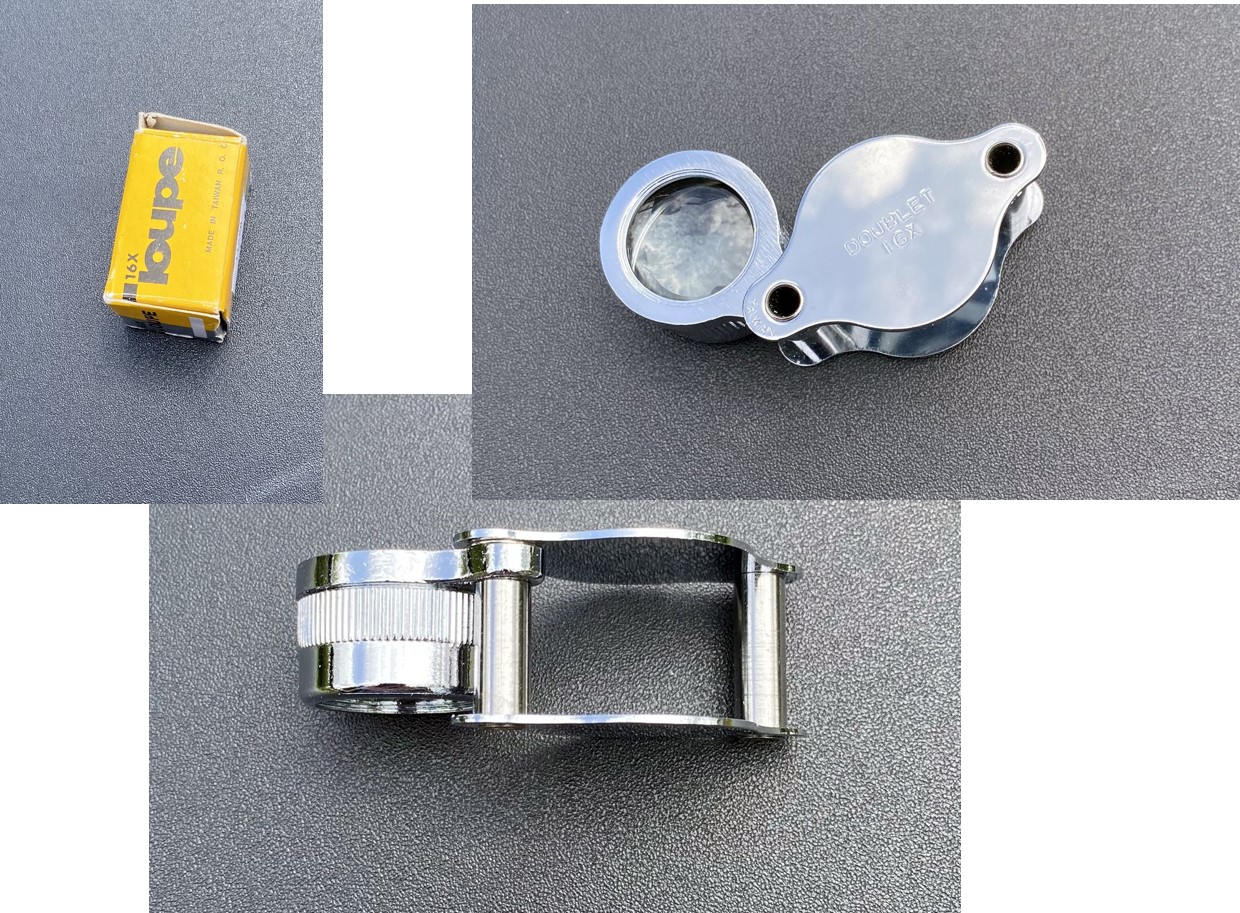
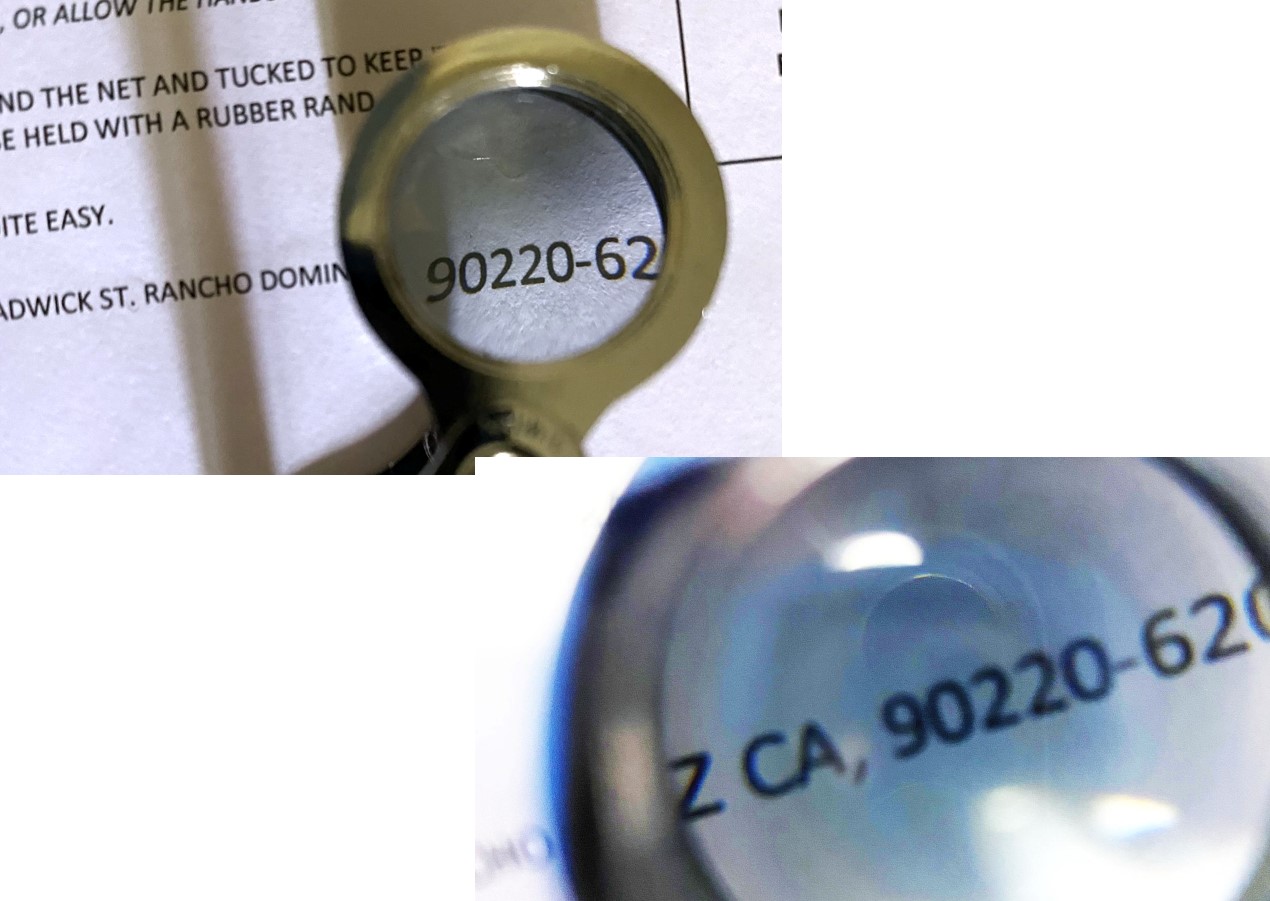
However … if you have a camera phone, you may be able to improve the magnification somewhat by photographing your insect through the lens, and then zooming in on the image.
I don’t guarantee this will work, and it may need some image adjustments. It will certainly require creativity and patience!
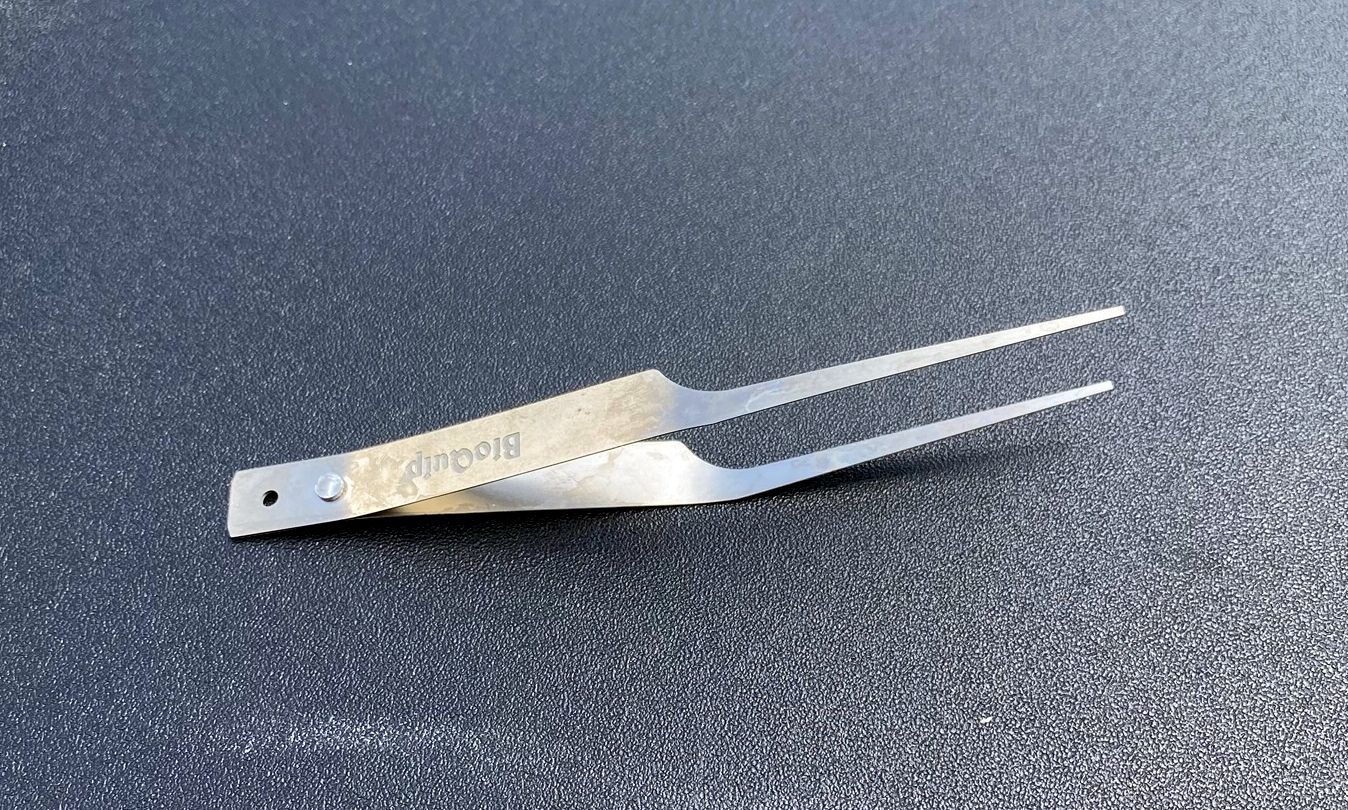
Next up are the forceps.
Your kit comes with a pair of soft-touch forceps, which can be useful for handling flexible specimens, and positioning wings and other body parts before the specimen has dried.
Once the specimen has air-dried, you will not be able to move any of its appendages or adjust its height on the pin – everything must be adjusted while the insect is still fresh and (reasonably) flexible!
Most adult insects are mounted on entomological pins for preservation and display. The pin allows specimens to be presented in foam-lined boxes, and they can be handled and moved by touching only the pin. Dried insects are extremely fragile, so the pin means you do not need to touch a dried specimen.
Your kit includes three sizes (thicknesses) of pins: 0, 1, and 2. Both larger and smaller sizes exist, but these should be suitable for most of the insects you will encounter. It is very difficult to tell the sizes apart by eye, so be sure to keep your pins separated in their individual containers. The general rule is to use as large a pin as you can without damaging the specimen.
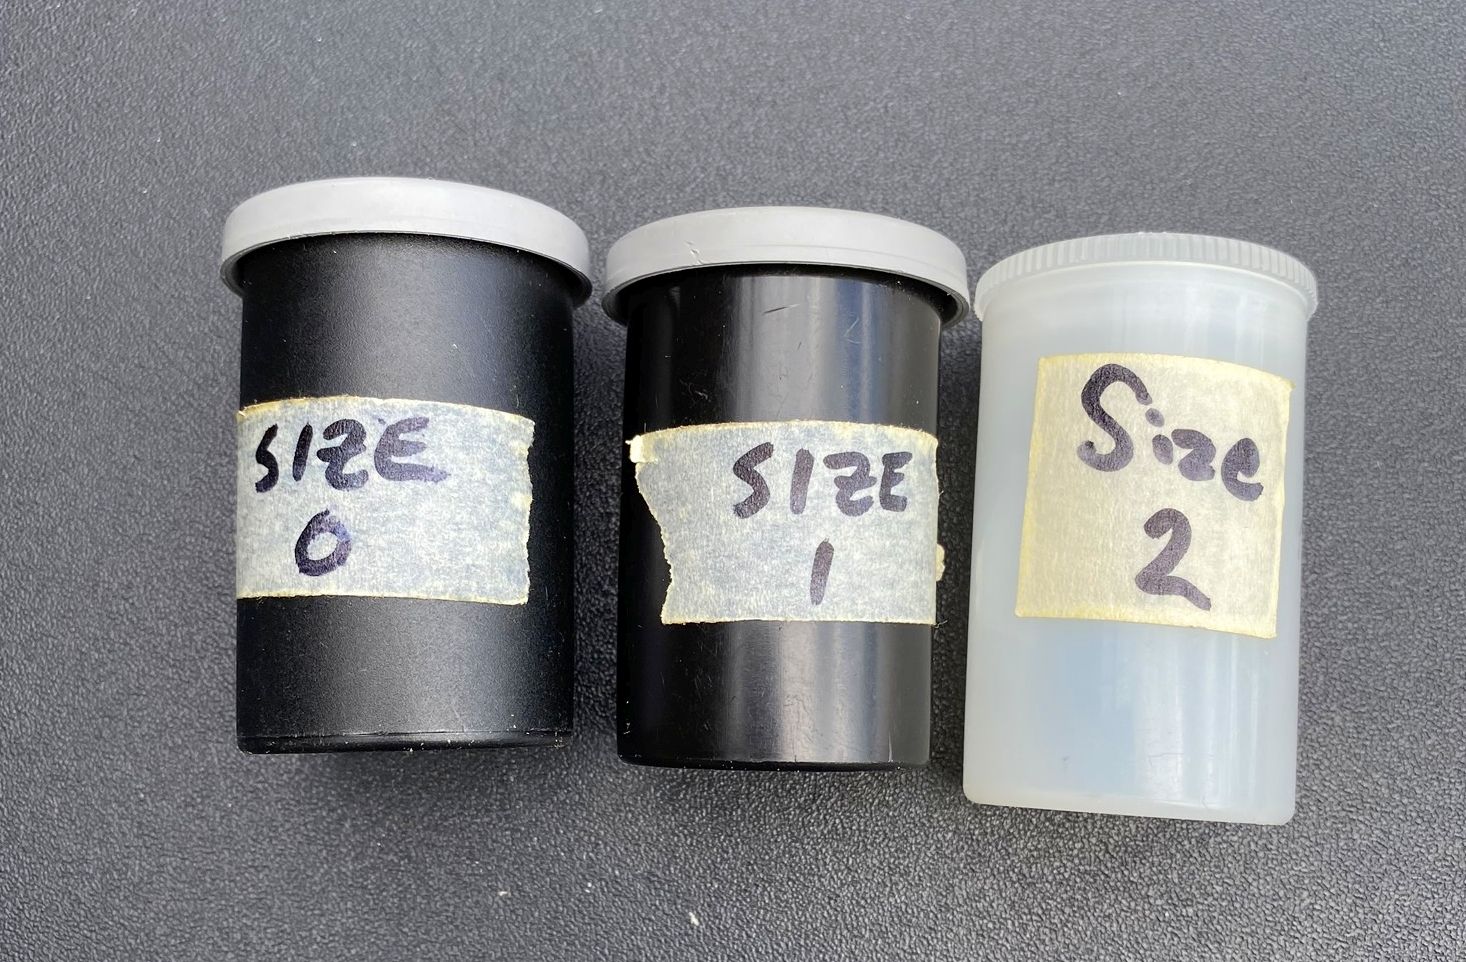
Notice that these are not the same as sewing pins! They have special coatings that keep them from oxidizing over time, and a small nylon ball on the top for easier handling.
They are also extremely sharp, so try to be careful not to drop them (especially around pets, family members, or roommates), lose them, or (of course) poke yourself!
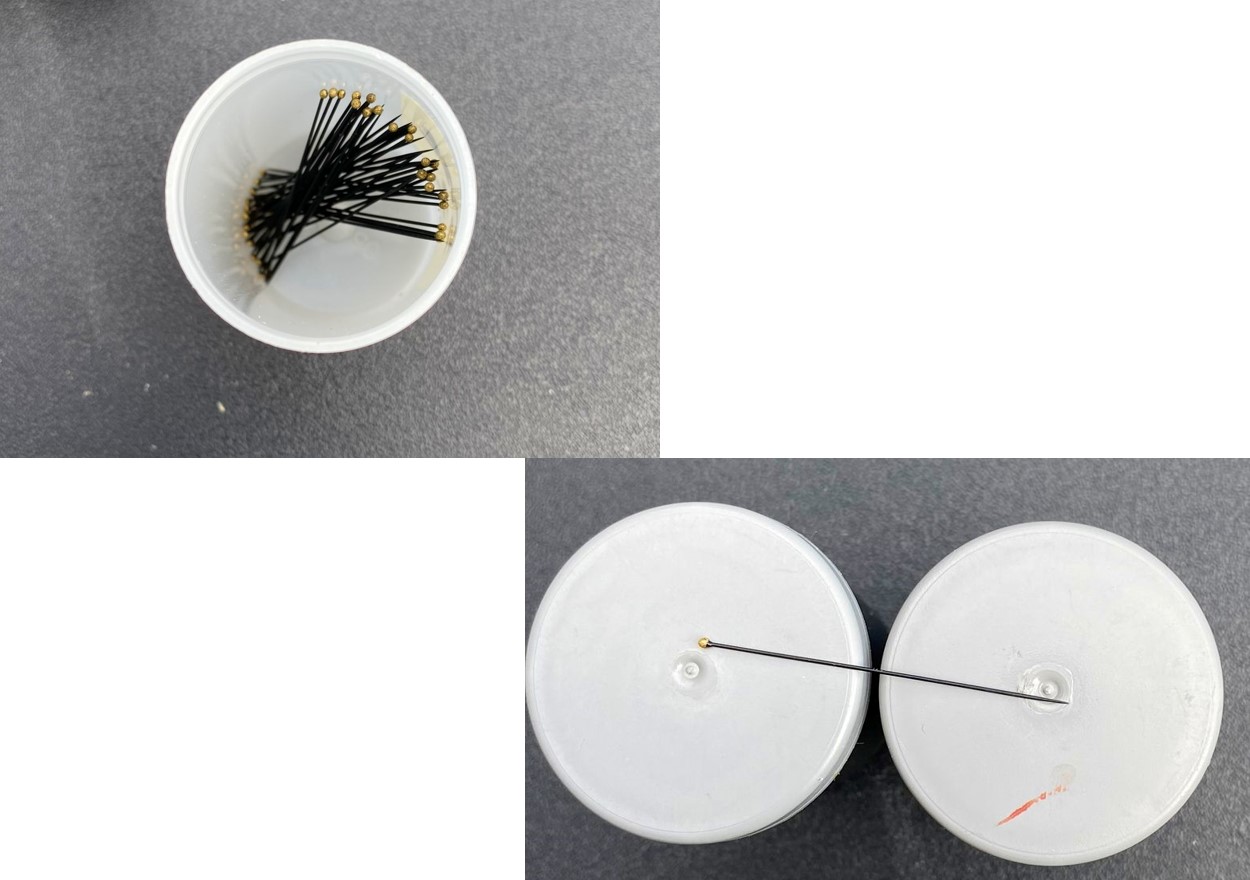
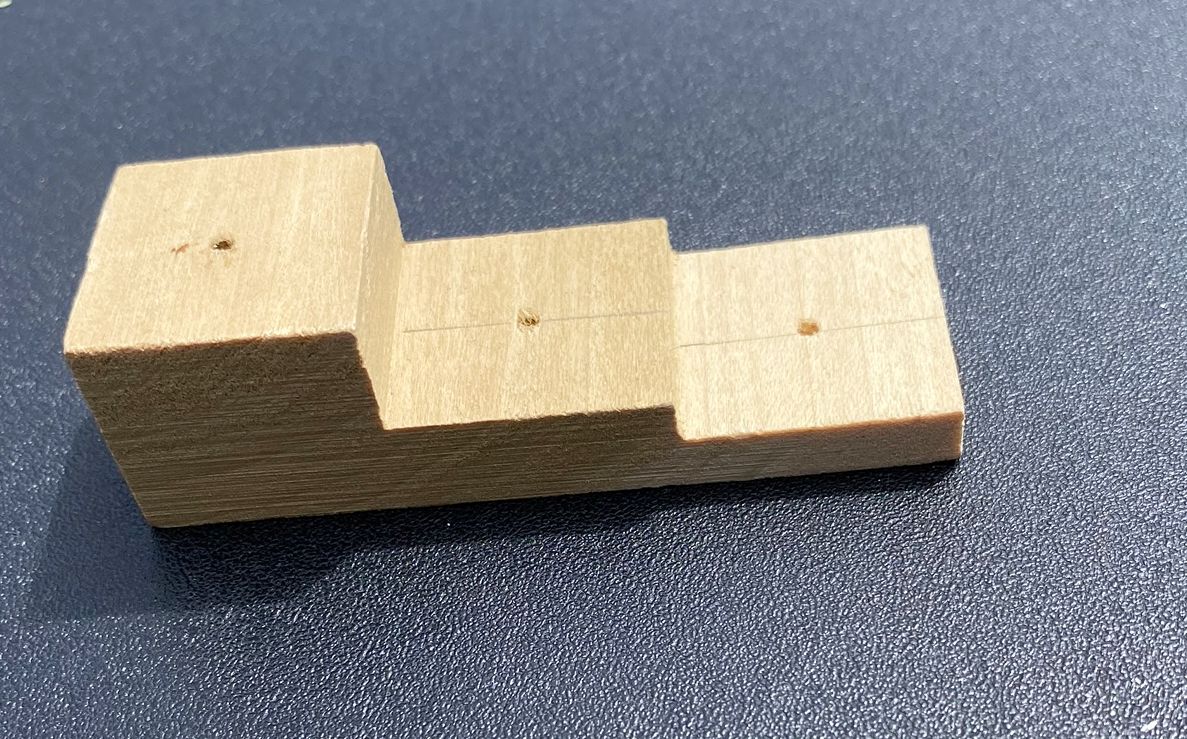
This next little tool is called a pinning block. It is used to help you set the height of the insect and labels on each pin. The pin is pushed through the insect in the correct location (depending on the type of insect – more on that later!). The pinning block is then placed on a flat, hard surface, and the pin is pushed further through the insect and through the small hole on the top level of the block. When the pin goes all the way through the hole, and reaches the hard surface, the insect is set at the correct height. That way, every insect in your collection will be set at the same height on the pin, and will have enough pin showing at the top that you can pick up the pin and move the specimen without ever touching the dried insect.
The exception to this method – if you have a very heavy-bodied specimen, e.g. a bumble bee, you may need to push the specimen a little bit lower on the pin. It is really important to leave enough of the top of the pin showing so that you can handle it without touching the insect!
The lower levels of the block are used to set the heights of the labels that you will include with your collection: the collecting data on the middle level, and the identification label or other information on the third level.
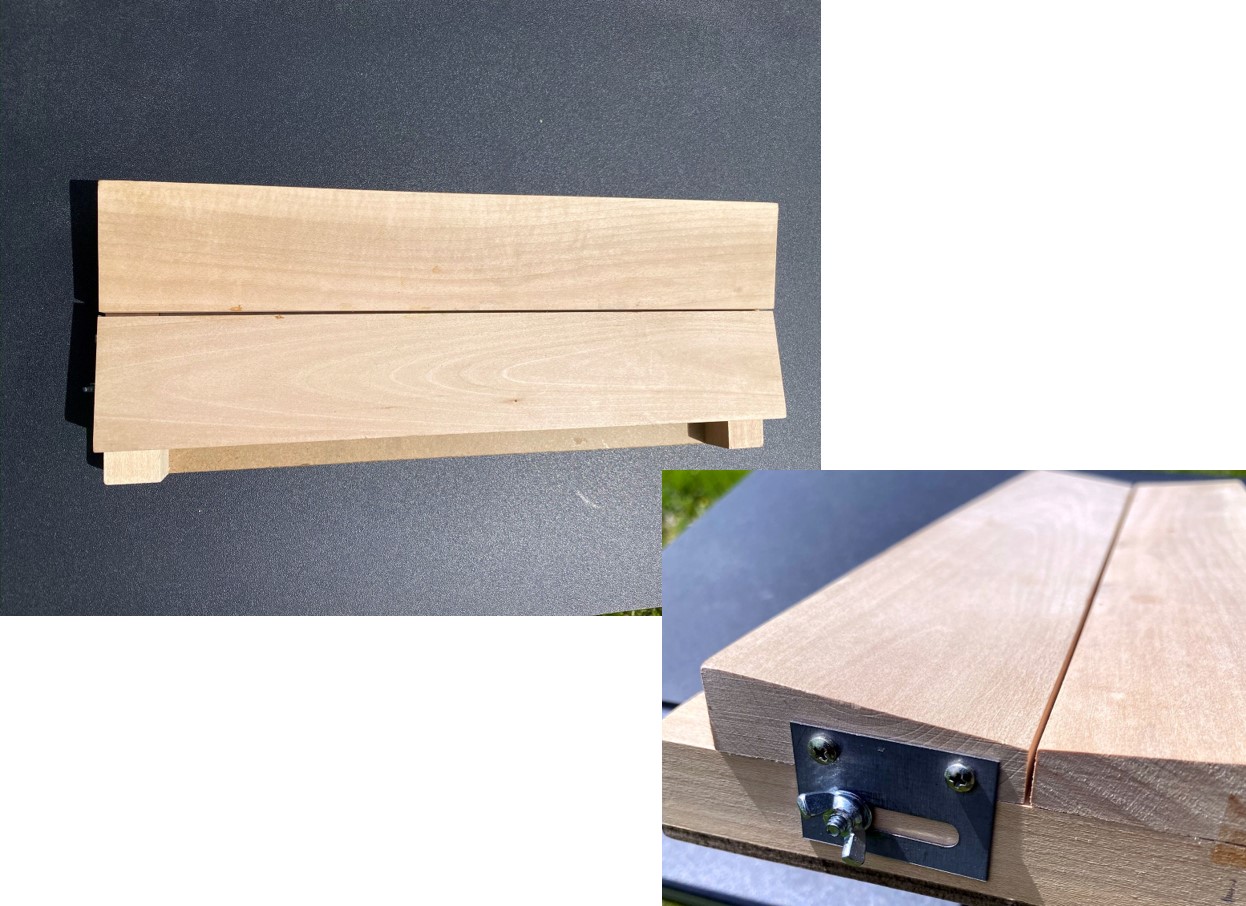
This is a spreading board, and it is used to spread the wings of moths, butterflies, and some other insects. Once mounted on its pin, the body of the insect is positioned in the central groove, which is foam-lined. Notice that the width of the groove can be adjusted, so that it just fits the insect’s body, using the nut on either end of the board (please be careful not to lose these parts!). The wings are then spread out on the board surface, and anchored in place with paper and pins until the insect is completely dried. This is a challenging technique, that requires some practice, so I suggest not trying it first on your favourite butterfly specimen! I will supply a short demonstration/video on the technique along with the first lab materials.
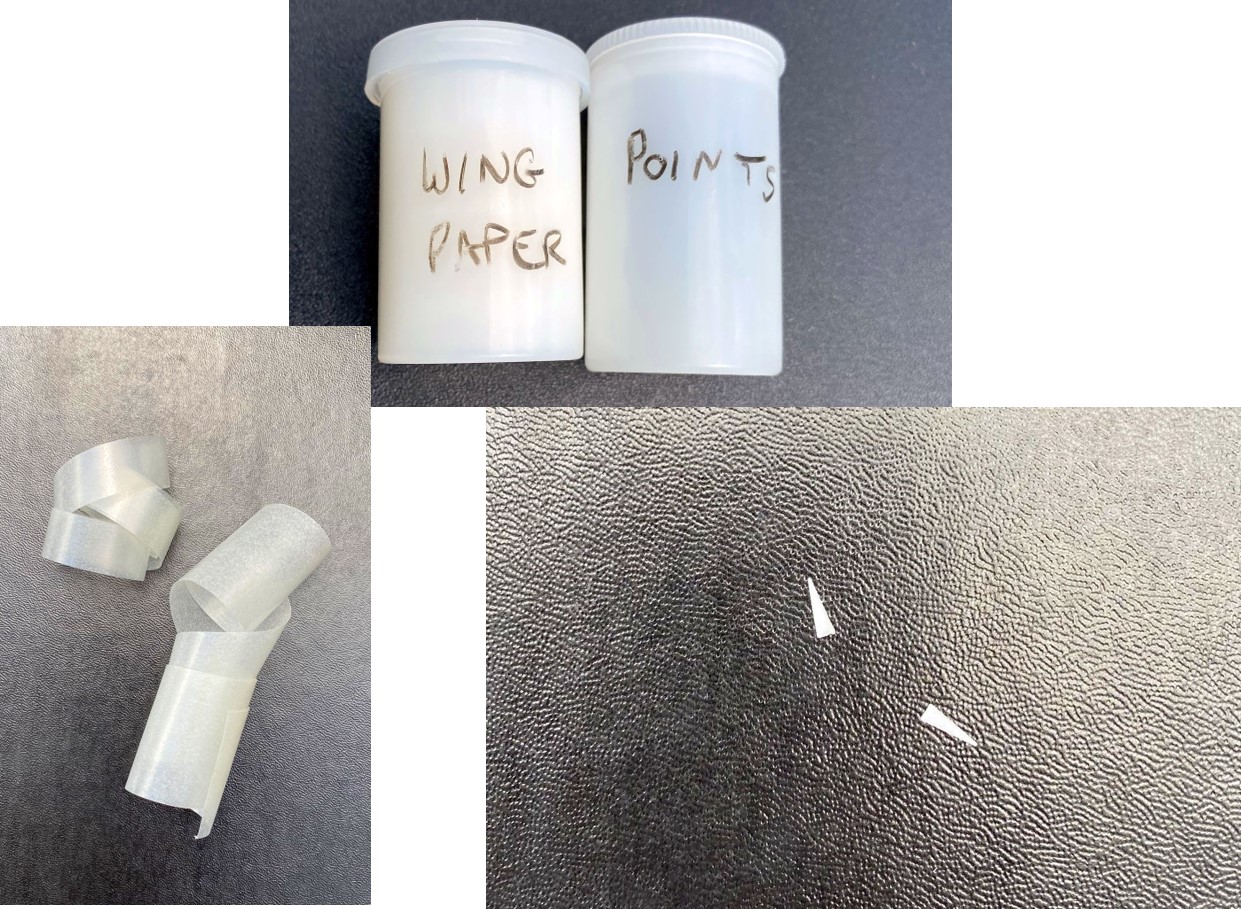
Two other types of mounting supplies are included in your kit: wing paper and points.
Wing paper is used, along with the spreading board, to help anchor wings and other body parts in place. Pinned flat on top of an extended wing, it keeps the wing from curling or moving as it dries in place. It looks much like waxed paper, but isn’t. It is glassine paper, which is much less sticky, and removes fewer scales from the wings of butterflies and moths.
If an insect is too small for a size 0 pin to be used without causing damage to the specimen, it should be mounted on a point. Points are small triangles of heavy paper. The pin is inserted through the wider end of the triangle, and the very tip of the point of the triangle is bent down slightly. A tiny drop of glue is placed on the bent-down tip, and the glued part is then touched to the right side of the insect’s thorax. The insect should be upright and level in all directions, and will sometimes require creative support (e.g. pieces of paper on pins at the right height) until the glue and insect have dried. There is a fine balance between having enough glue to hold the insect in pace when it has dried, and having too much glue so that the specimen’s features are obscured. The nice thing about this technique is that it can be used on specimens that have already dried (but they must be too small for a size 0 pin!).
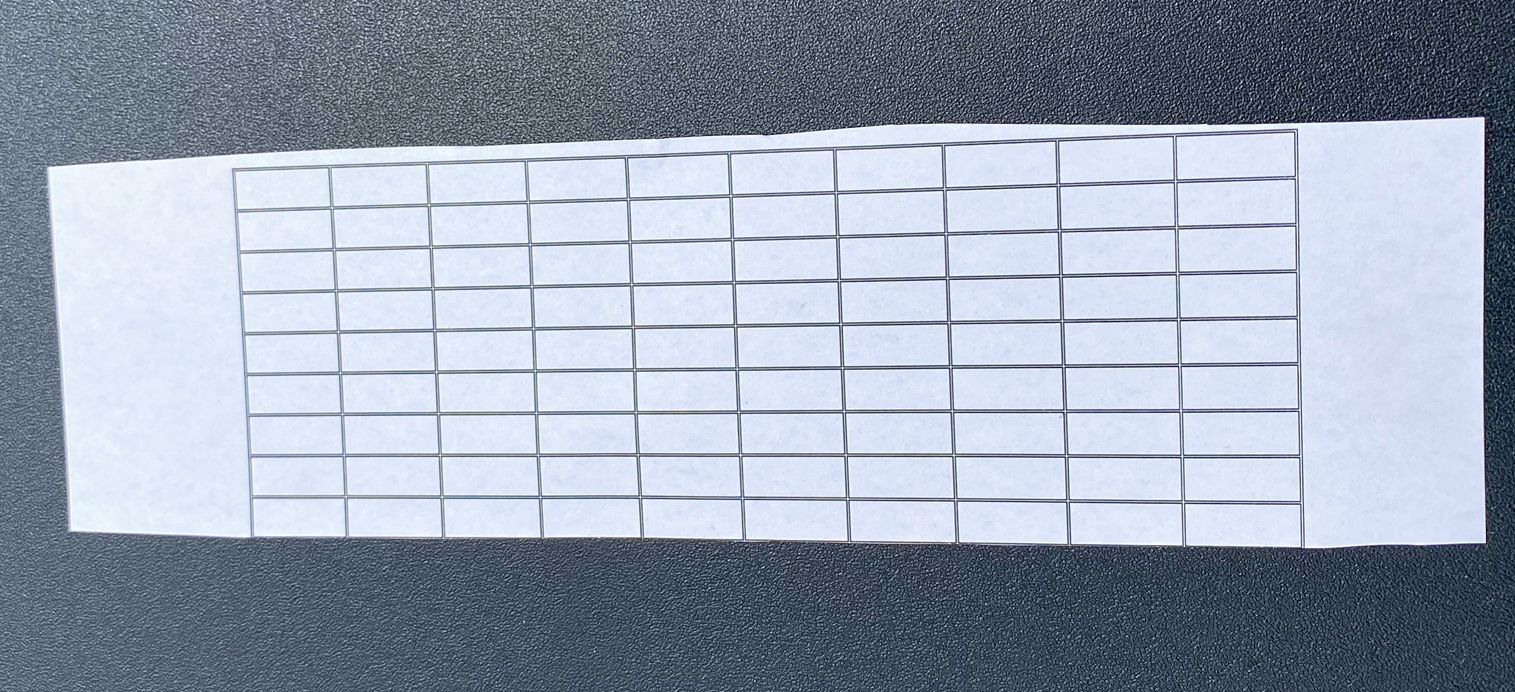
Your kit also comes with a supply of blank labels, 17 mm long by 6 mm wide. These are printed on archival-grade paper, and are the correct size for insect labels. The handout that provides information about your collection tells you what needs to go on each label, and they should be completed in pencil, not pen.
If you have access to a laser printer, and an iron, I can send you the MS Word template for labels. Other printer inks and media are not archival, and must not be used. That means you are probably going to have to write very, very small in order to fit everything on each label!
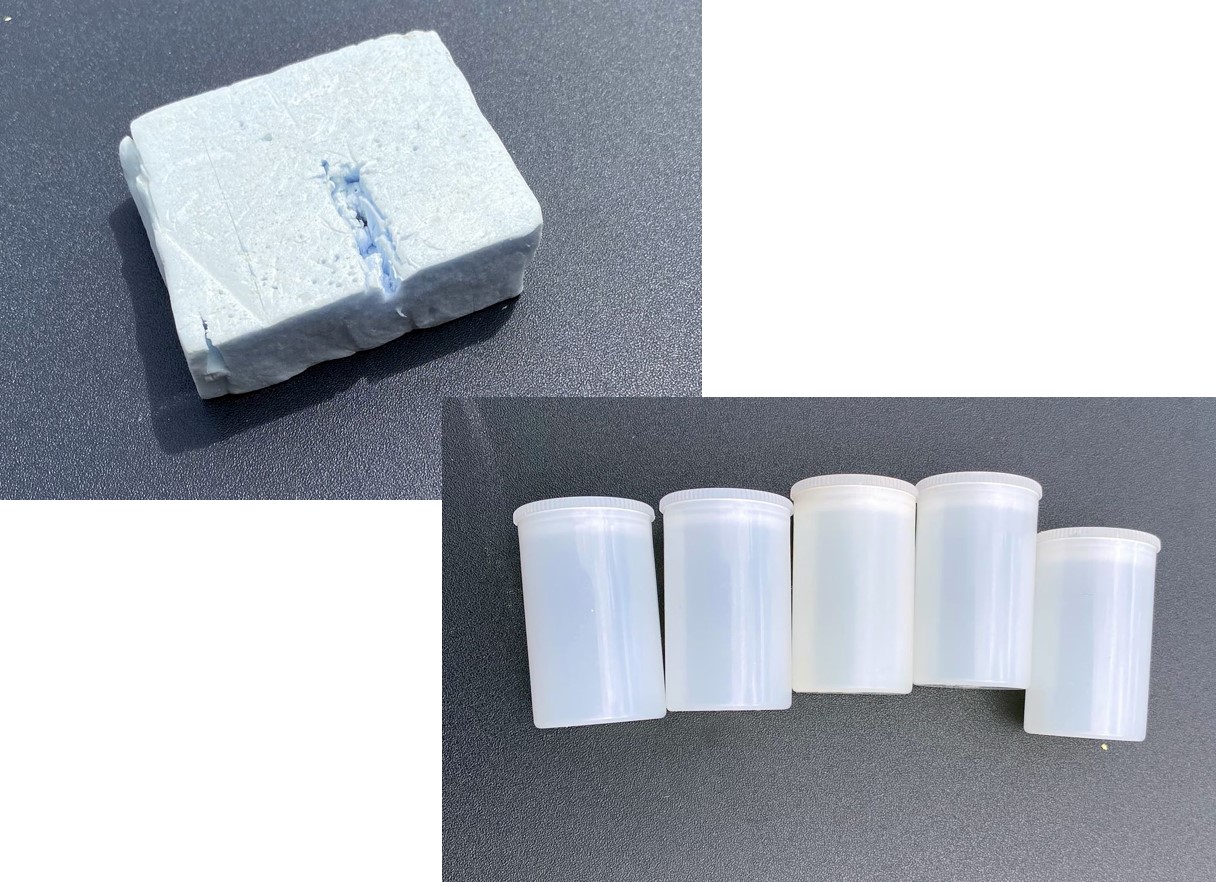
Finally, I have included a spare piece of foam and five empty film canisters in your kit.
The foam is useful for holding pins, and pinned insects, as you work on your collections. Pinned specimens can be inserted at various angles, even completely upside down, so that you can see various body parts. Any foam will work, so, if you have some Styrofoam packaging around, feel free to make yourself extra blocks.
The film canisters are getting harder to come by, but they make excellent containers for specimens while you are collecting. Held in one hand, they can be maneuvered up inside the net to catch insects; they can be placed over top of flying insects; insects can be encouraged to walk into them; and they don’t break easily in the freezer. Any container you have on hand will do, but these should get you started.
Please feel free to ask me your collecting questions and photos, or share them with the class!
For more information, ask me! or, check out:
http://www.entsocalberta.ca/guide.pdf
http://esc-sec.ca/wp/wp-content/uploads/2017/03/AAFC_insects_and_arachnids_part_1_eng.pdf
https://entomologytoday.org/2013/10/18/videos-on-how-to-pin-insects/
https://www.youtube.com/watch?v=QFG4ri7AiP0
https://extension.oregonstate.edu/sites/default/files/documents/9591/pinning-insects.pdf

Feedback/Errata