Chapter 1. Basics
1.2 DORA the DHCP Provider
Learning Objectives
- Set up a DHCP server on Palo Alto
- Set up zones
- Connect clients to the Internet with Palo Alto
Scenario: In this lab, we are going to configure our friend DORA (Discover Offer Request Acknowledge) the hander of addresses. And we’ll also be configuring internet access so that clients may finally browse their precious Internet with SNAT (Source Network Address Translation).
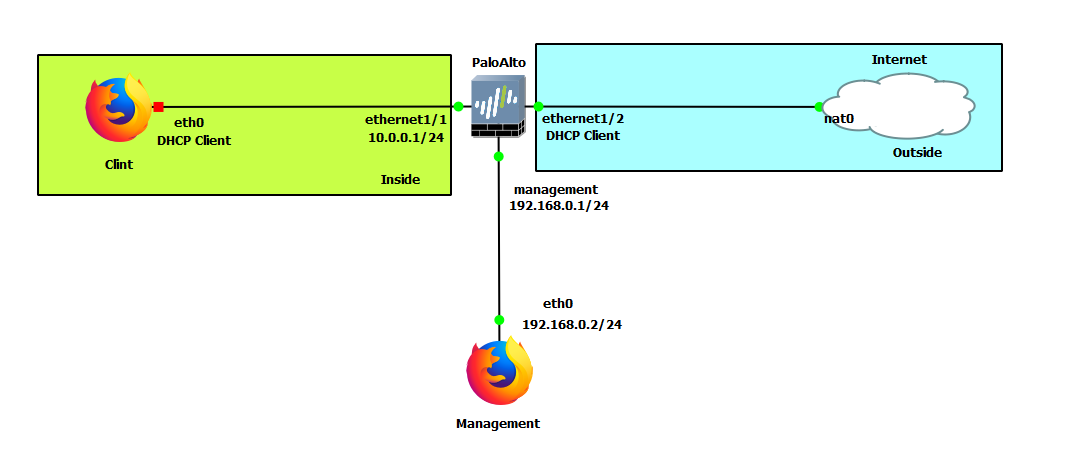
| Device | Configuration |
|---|---|
| PaloAlto | management: 192.168.0.1/24 Ethernet1/1: 10.0.0.1/24 Ethernet1/2: DHCP |
| Client (WebTerm) | eth0: DHCP |
| Management (WebTerm) | eth0: 192.168.0.2/24 |
| Zones | Interfaces |
|---|---|
| Inside | Ethernet1/1 |
| Outside | Ethernet1/2 |
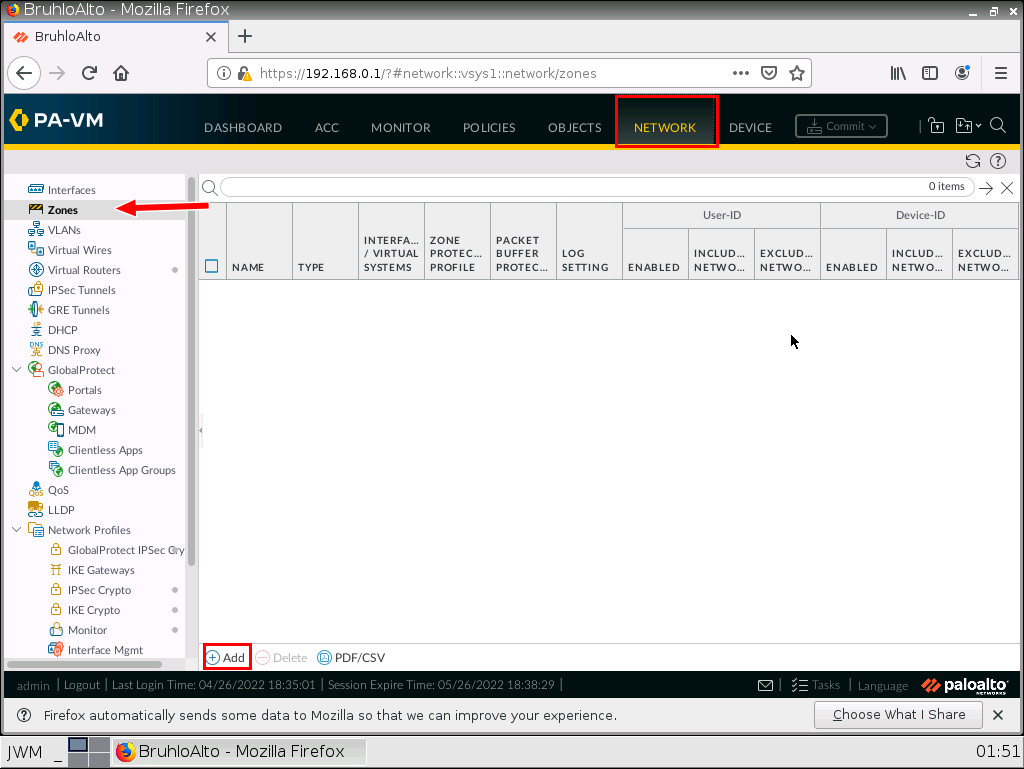
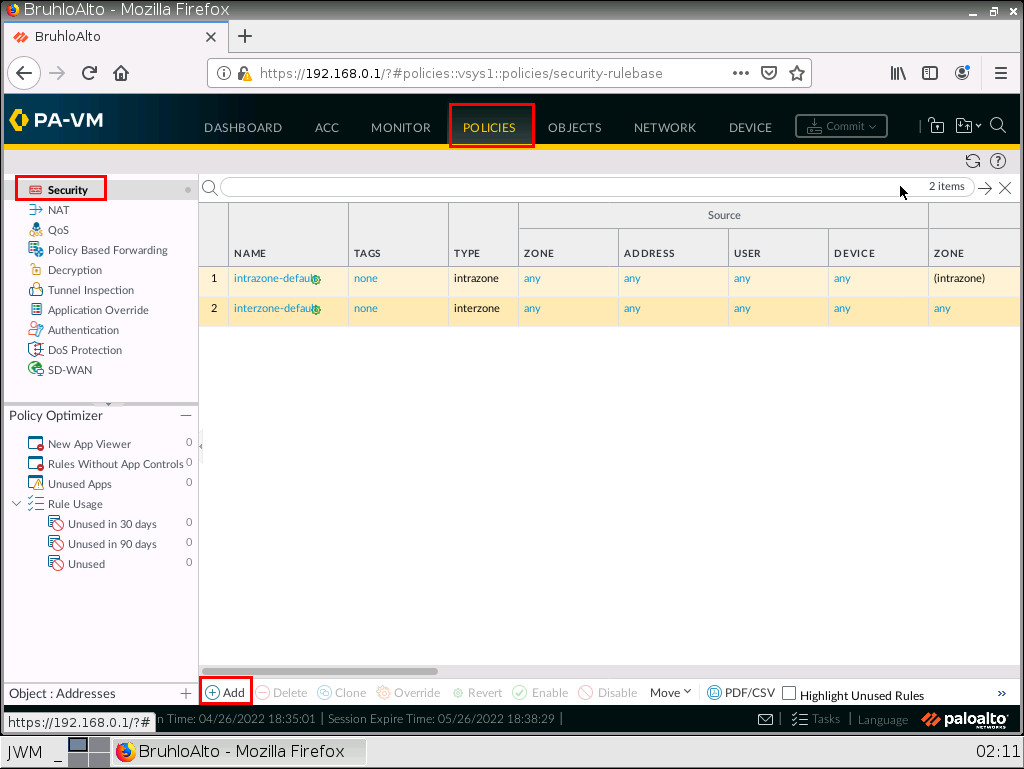
Create Zones in the Palo Alto Web Interface
Under the network tab, click zones, then add on the bottom left of the screen.
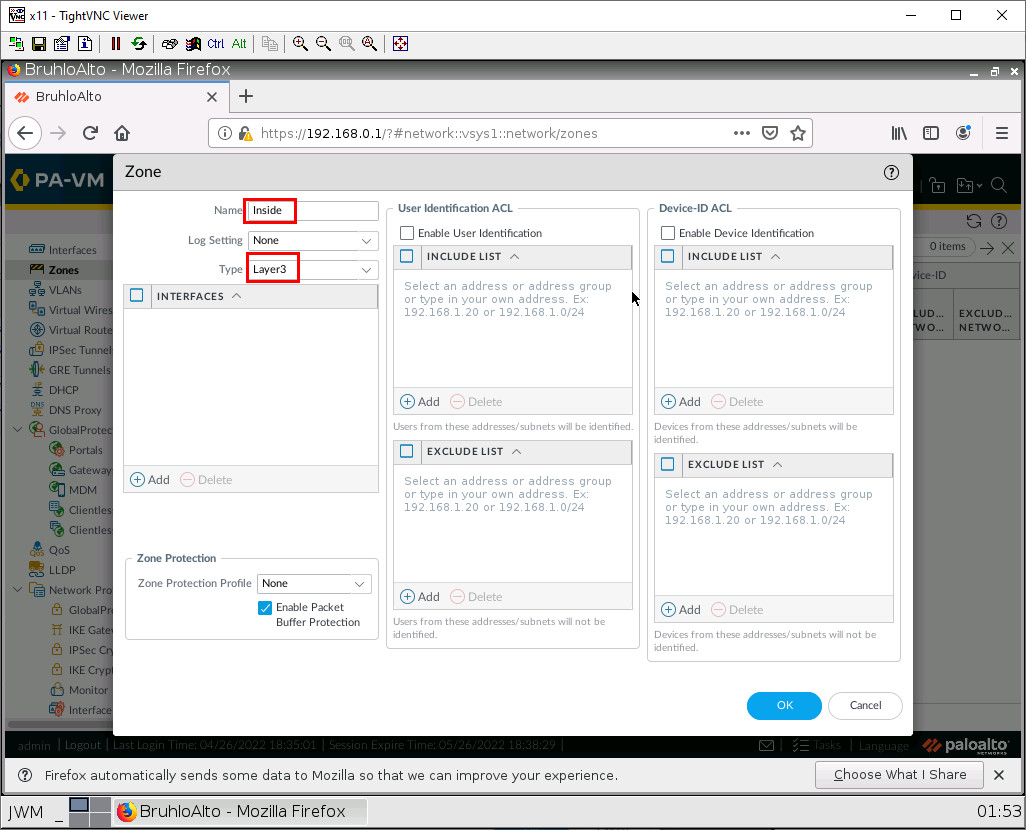
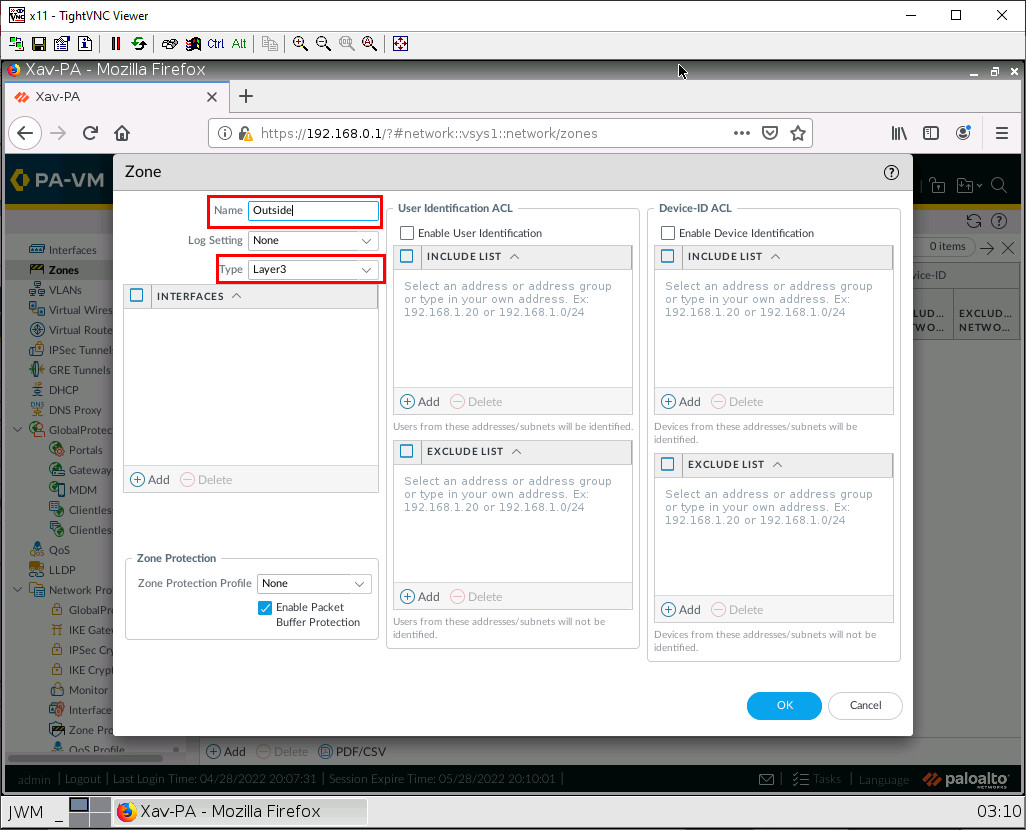
In here, we just change the name and type of zone. For information’s sake. We will only be dealing with (mostly) layer 3 things in Palo Alto for this book. After that, press OK. Remember to create Inside and Outside zones (Remember to also commit changes from time to time!)
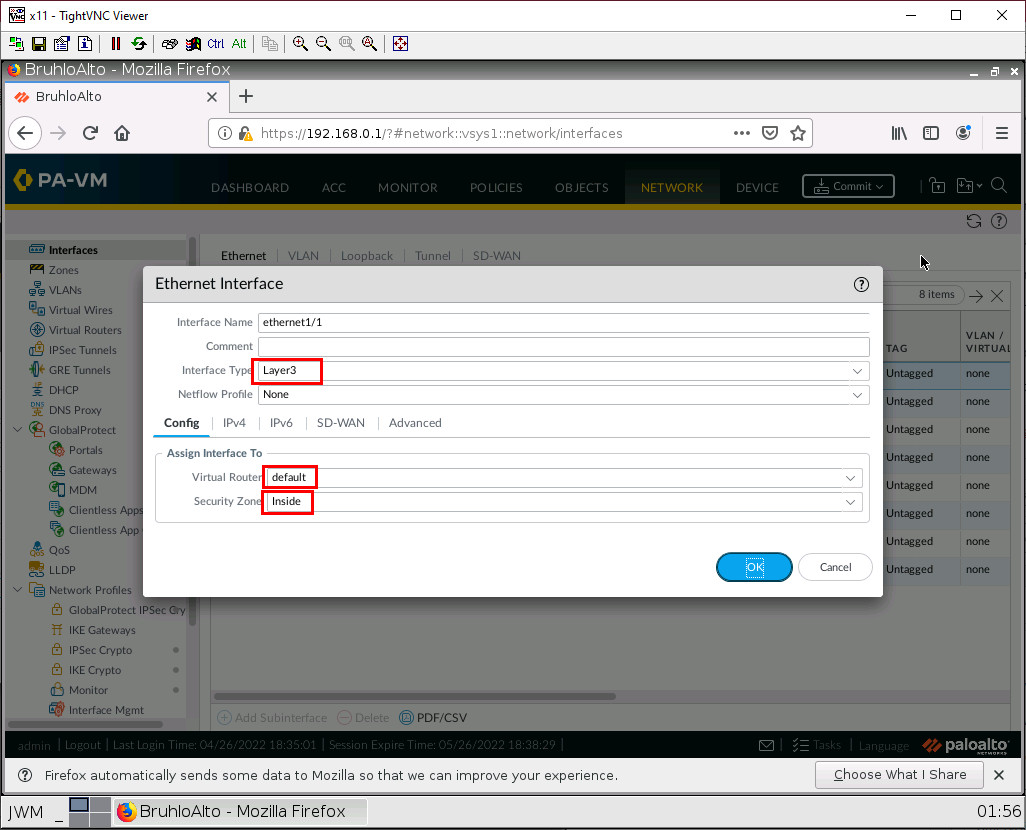
Set Up a Static Interface IP Address in Palo Alto
Go under the network tab, and click on ethernet1/1.
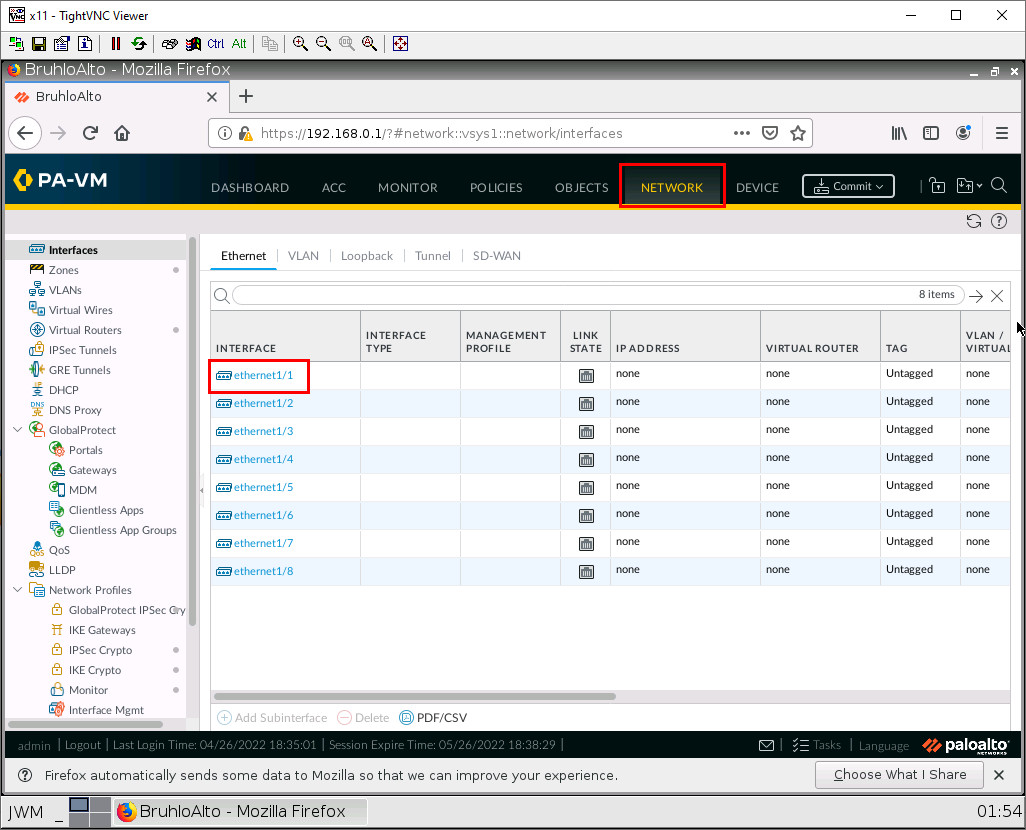
The first thing we want to do when configuring an interface is changing the interface type to layer 3, the virtual router to default, and changing the security zone to the desired zone. In this case, we have to change it to inside for ethernet1/1, and outside for ethernet1/2.
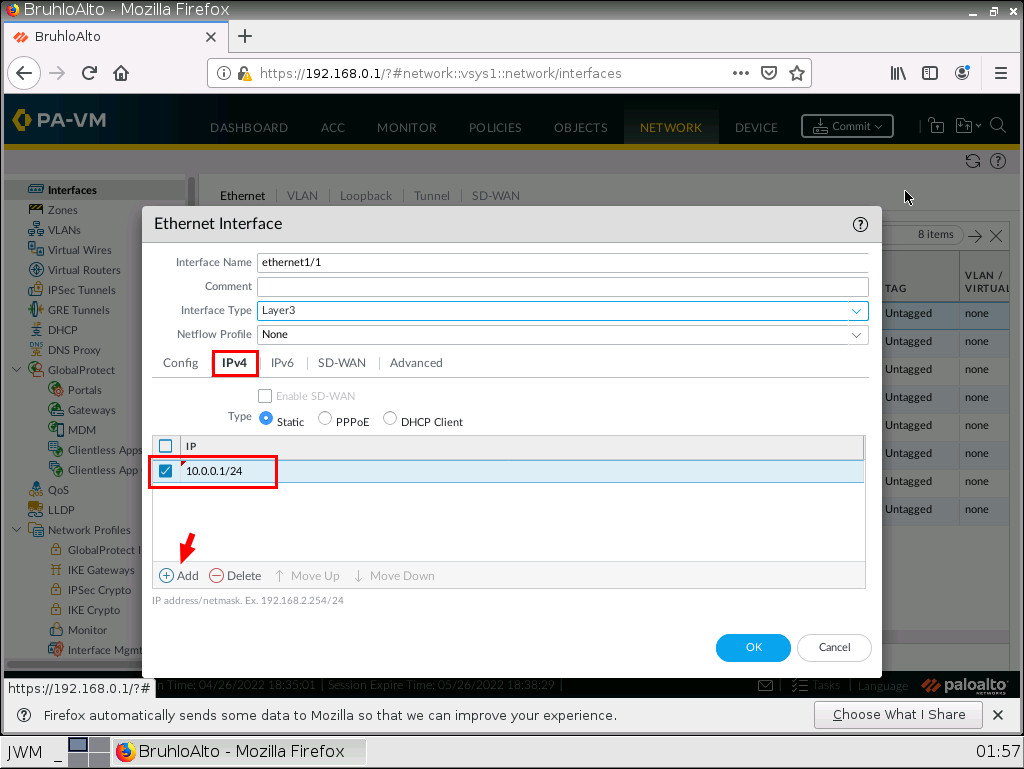
Now, under the IPv4 tab of the opened window, click on Add, then type in the address and prefix of the interface.
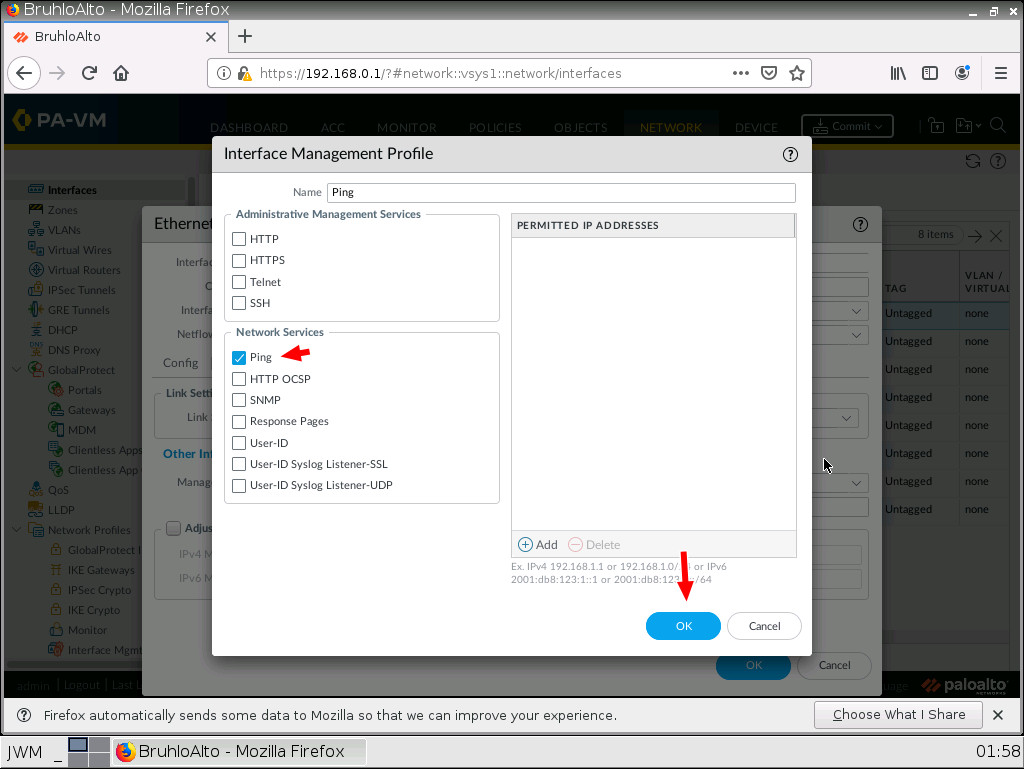
Ping an Interface in Palo Alto
By default, a Palo Alto interface is not pingable. In a lab environment, checking if pings are working is a good sanity test. Go to the advanced tab, click the drop-down menu next to the management profile, then click New.
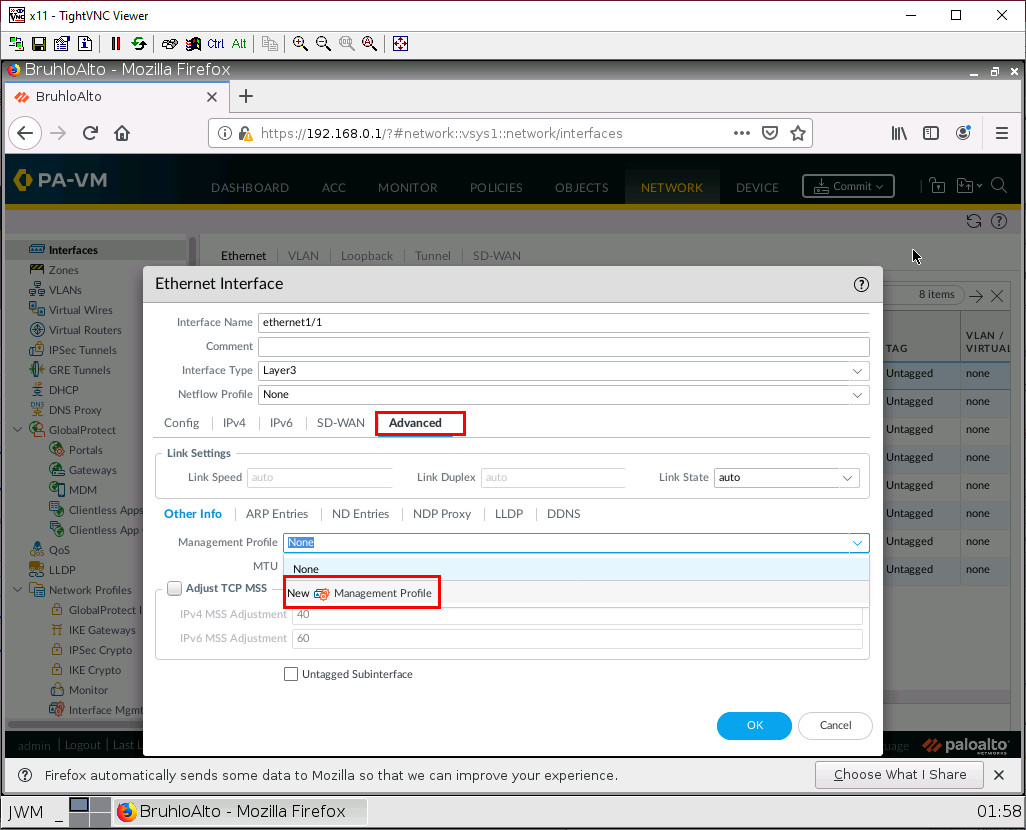
Call this whatever you want, but make sure to tick the ping option under networking services. Then press OK.
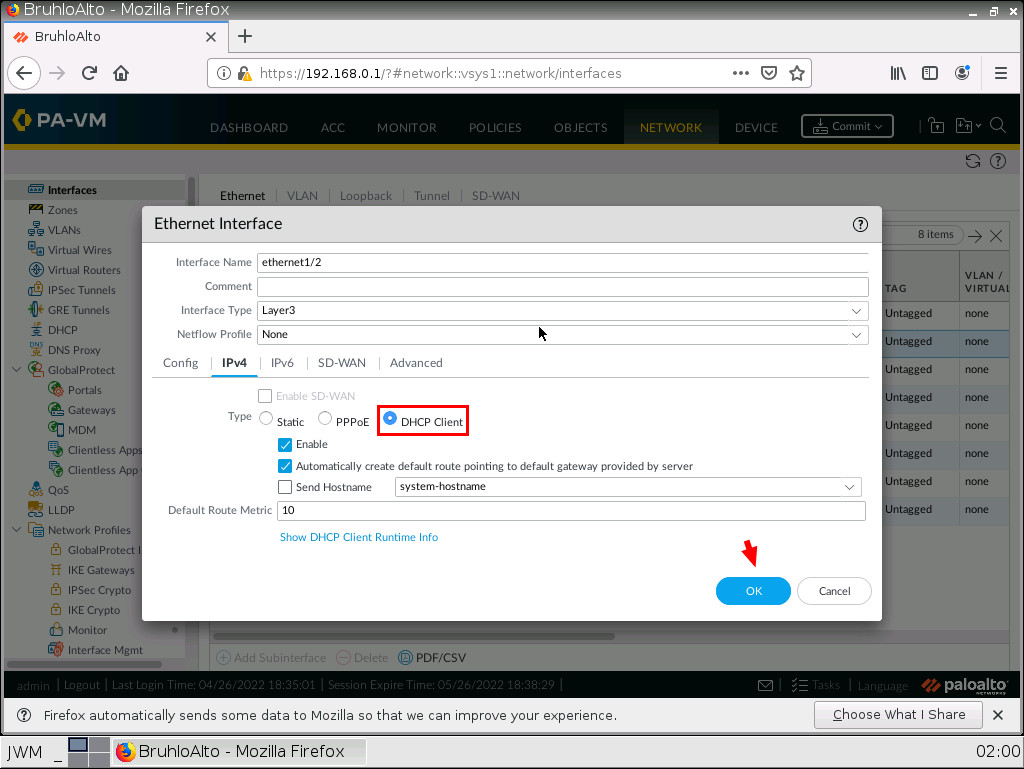
Enable DHCP on an Interface in Palo Alto
It’s almost the same thing as setting up a static interface, but you act differently in the IPV4 menu. Instead of typing in an IP address and mask, you just specify that this is a DHCP client.
Don’t forget to commit your changes!
If all is well after a commit, you will be able to check your DHCP IP address by clicking “dynamic DHCP client” in the main network menu.
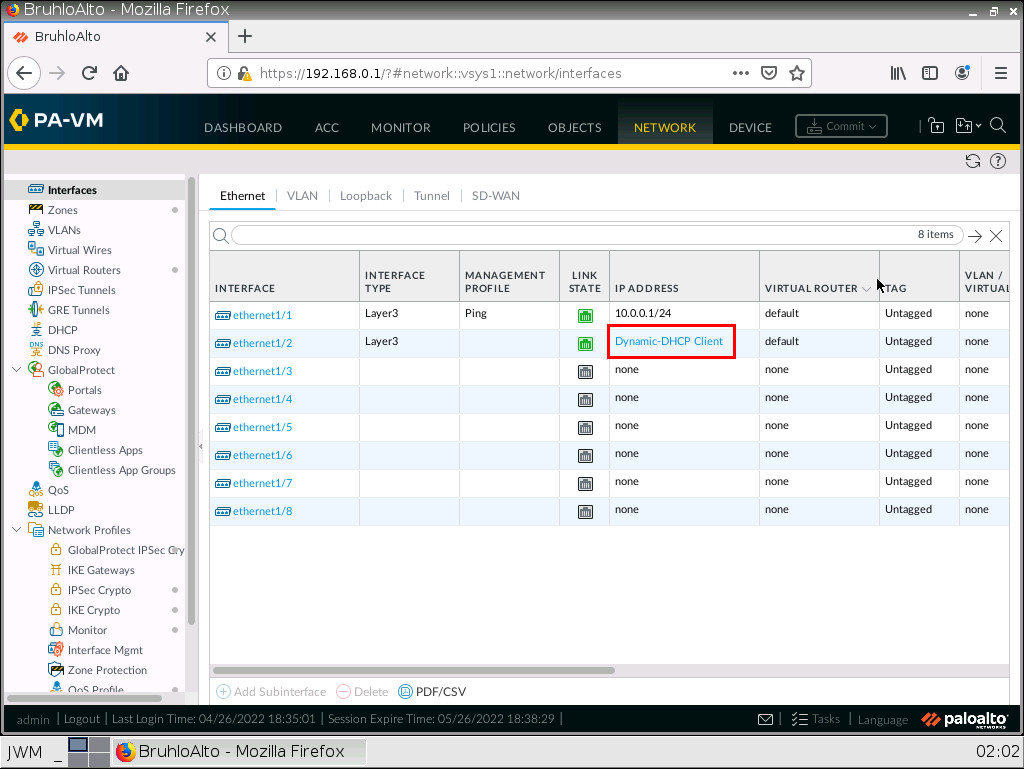
Here is an example of that:

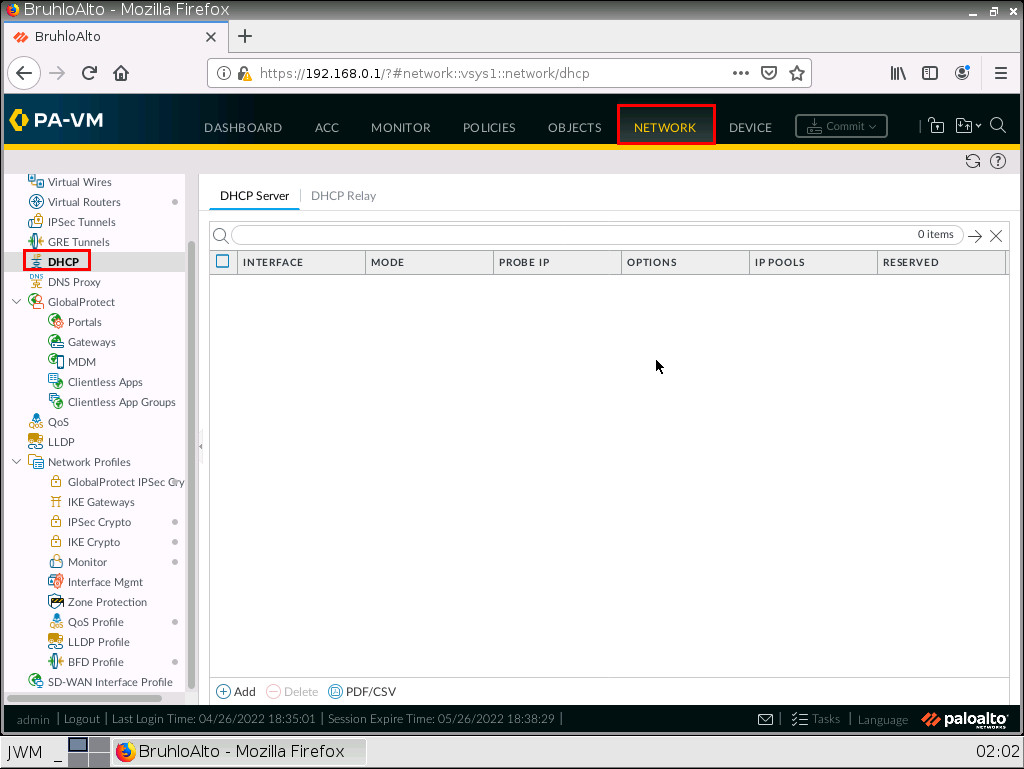
Set Up a DHCP Server in Palo Alto
In the network tab, click on DHCP, then click Add.
First, we need to define the interface, I set that to ethernet1/1 because it is our LAN. Then, I press Add and define a range that fits the network subnet.
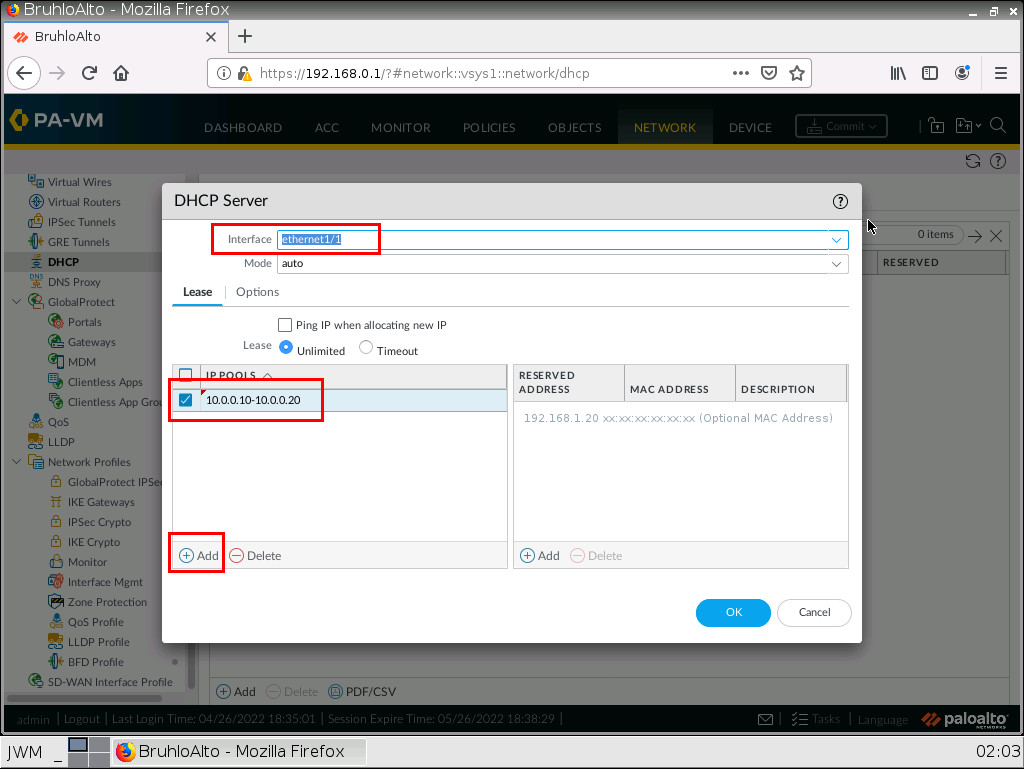
After that, we need to configure some DHCP options under the options tab. Here we need to define the gateway, (which is usually the interface IP address) subnet mask (which is usually 255.255.255.0), and a DNS server. I just use Google’s DNS server as an example.

Again, remember to commit your changes!
Ping Palo Alto from a LAN Device
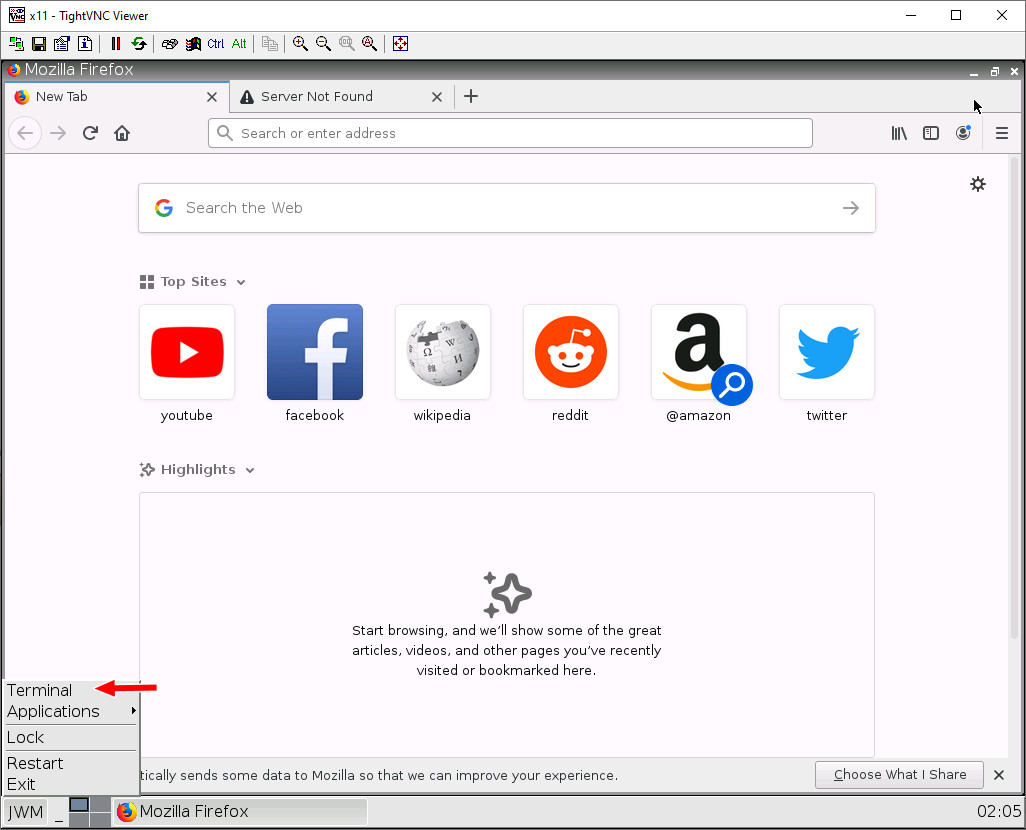
When opening up your webterm for “Client”, click the bottom left button, then click terminal.
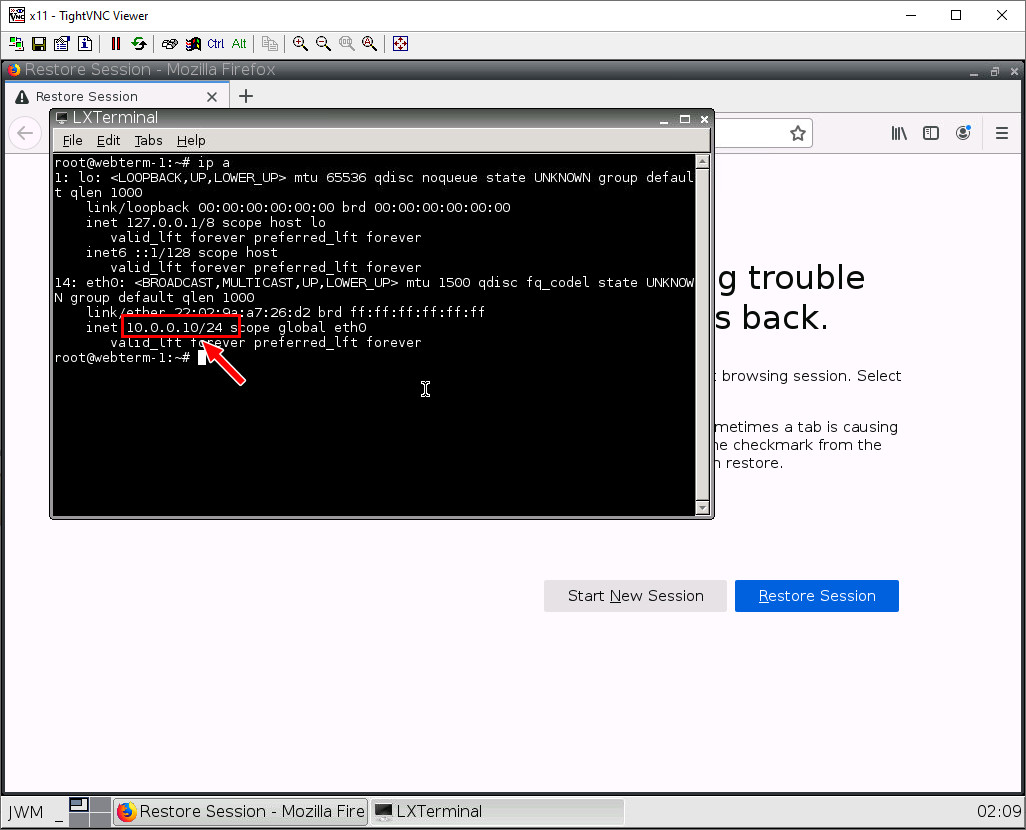
Type in ip a or ifconfig on the terminal. If you see an IP address under eth0, the DHCP Server worked!
Now, let’s ping our Palo Alto device. Type in ping 10.0.0.1. If all works out, you should see this:
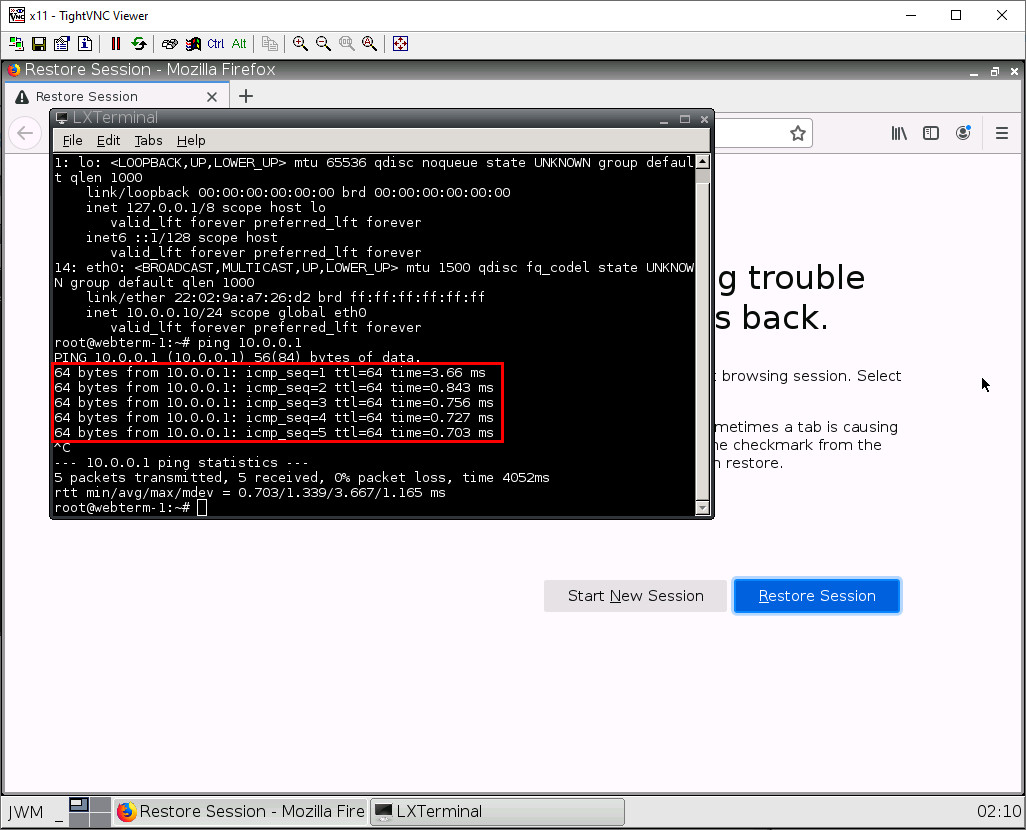
This means that everything so far worked! Press Ctrl+C to stop pinging the Palo Alto device.
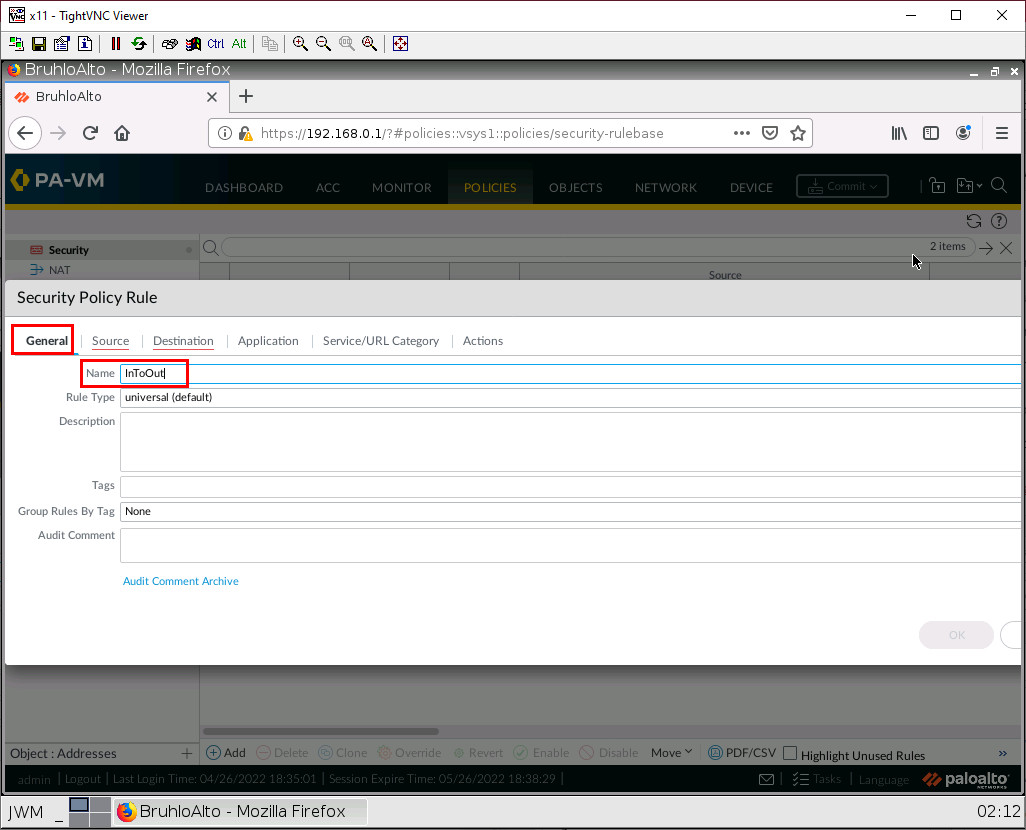
Security Profile Basics
In the policies tab, we want to create a new policy. Click on new in the bottom left of the Palo Alto web interface.
Under the general tab, we just want to give it a name. We will only be working with universal rules.
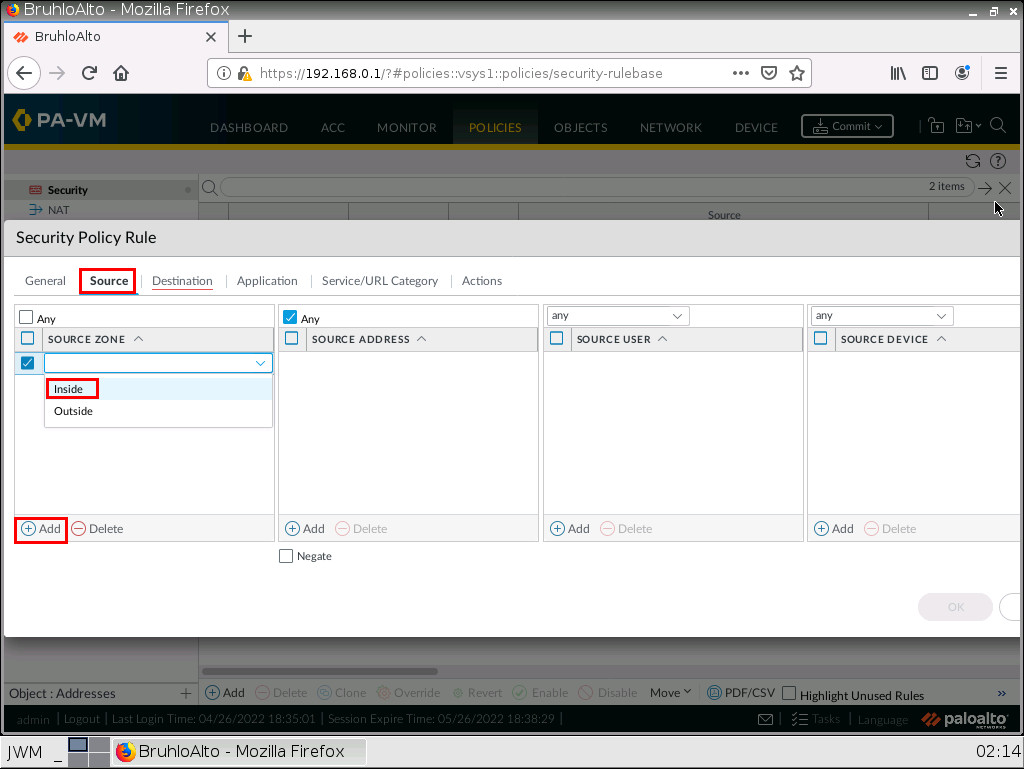
Under the source tab, we specify the inside zone (from). In this case, it will be the “Inside” zone.
Under the outside tab (to). Specify the outside zone.
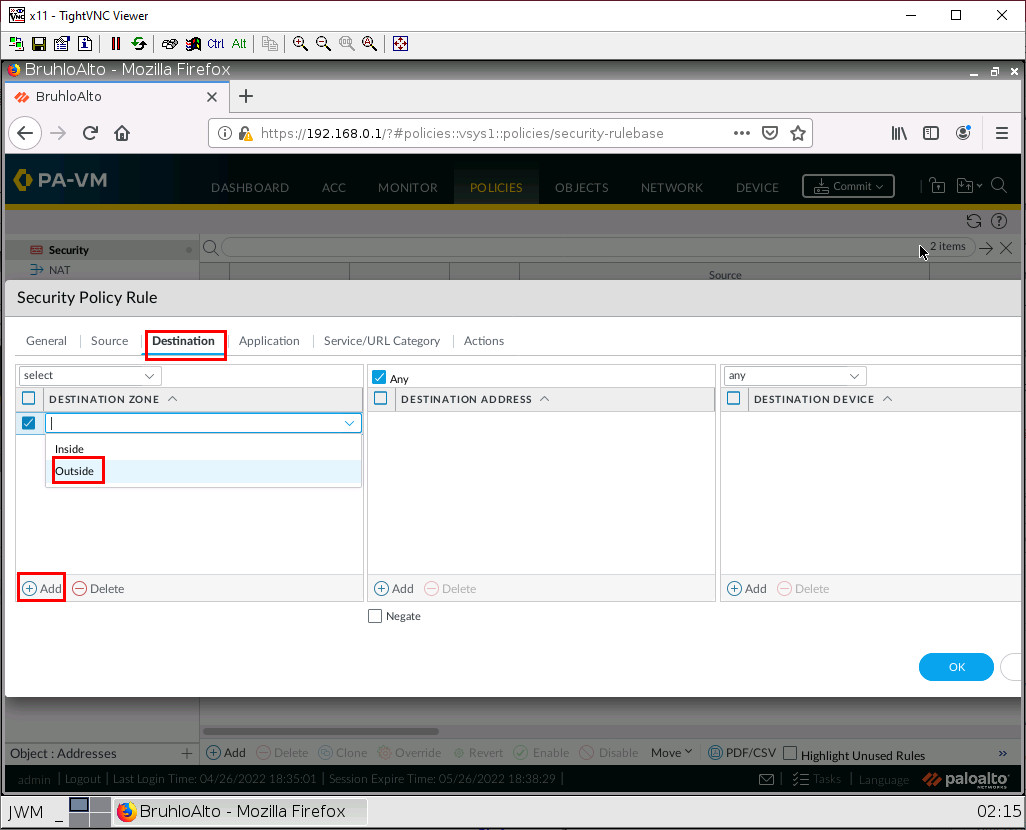
After that, press OK to confirm.
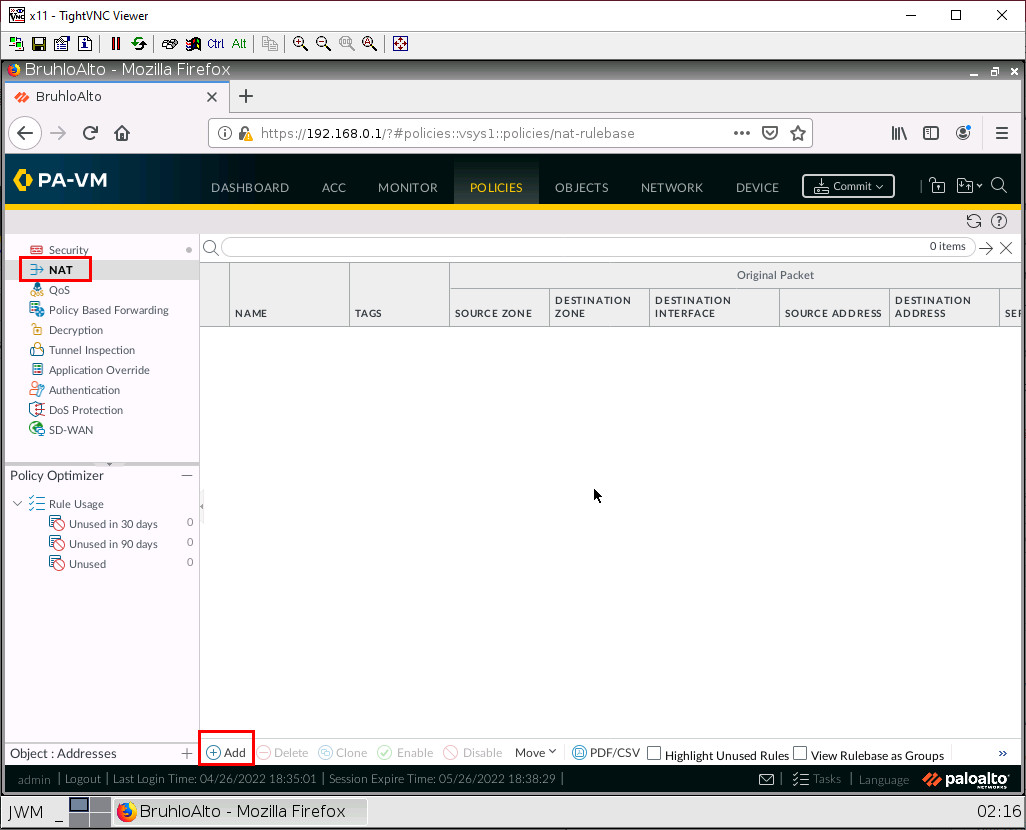
SNAT (Source NAT: Access the Internet in Palo Alto)
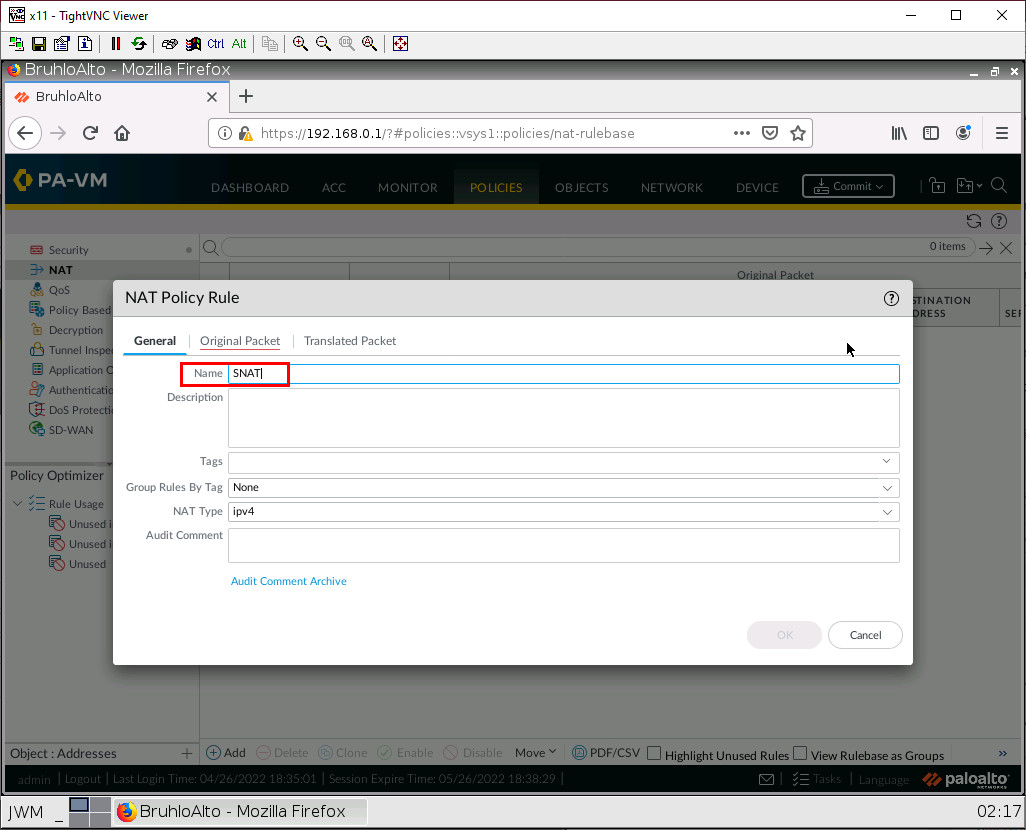
Under the policies tab, go to NAT, then click Add.
In this case, we want to translate packets originating from the Inside to go to the outside zone using the interface address of ethernet1/2. This would be Port Address Translation Overload. Under the general tab, just change the name.
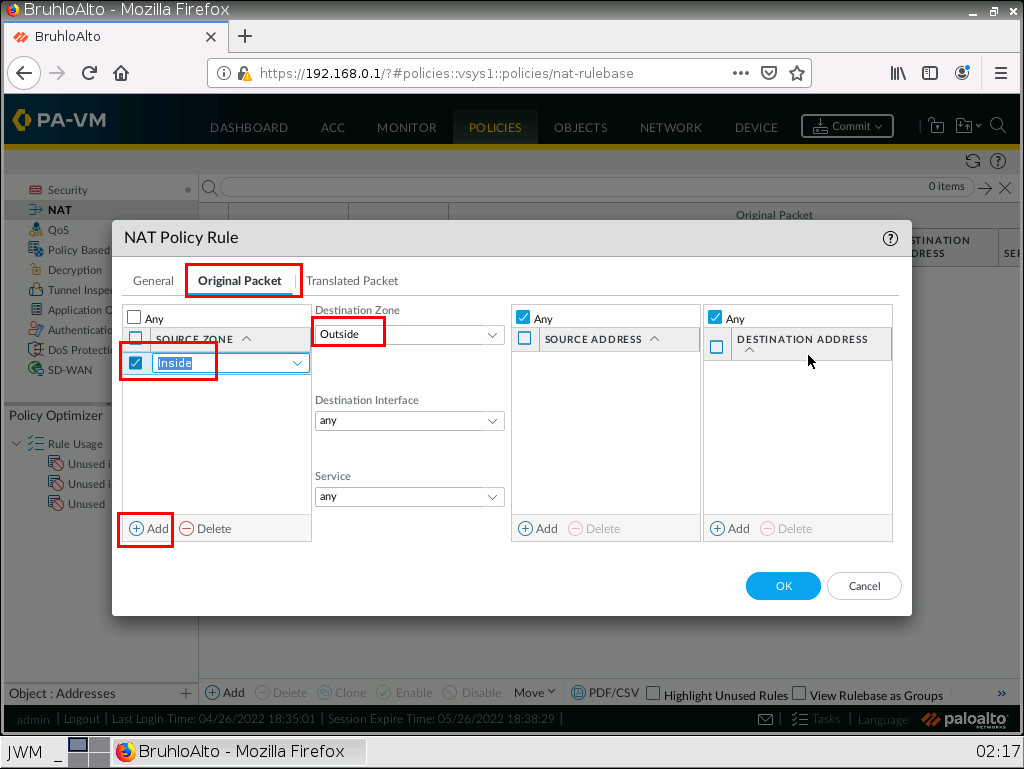
Under the original packet tab, click Add then make the source zone inside. As for the destination zone, make it outside.
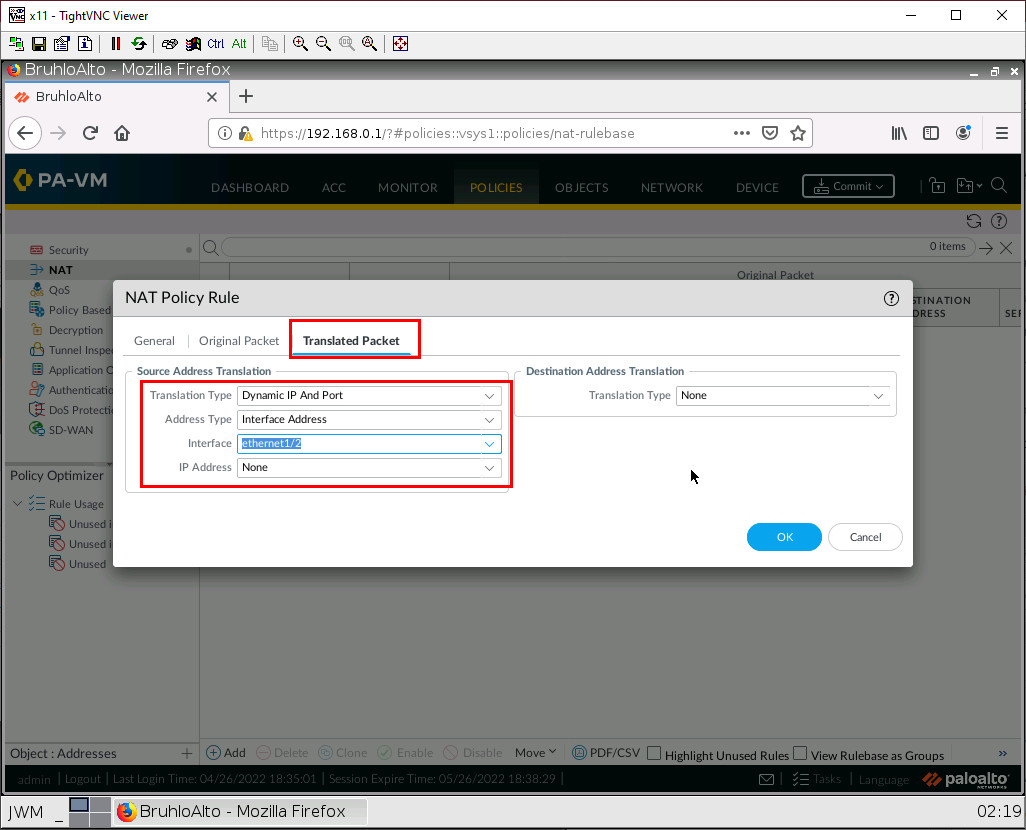
Under translated packet on source address translation. Specify the translation type as Dynamic IP and port, the address type as interface address, and the interface as ethernet1/2(The interface in the outside zone) After that, click OK.
Don’t forget to commit!
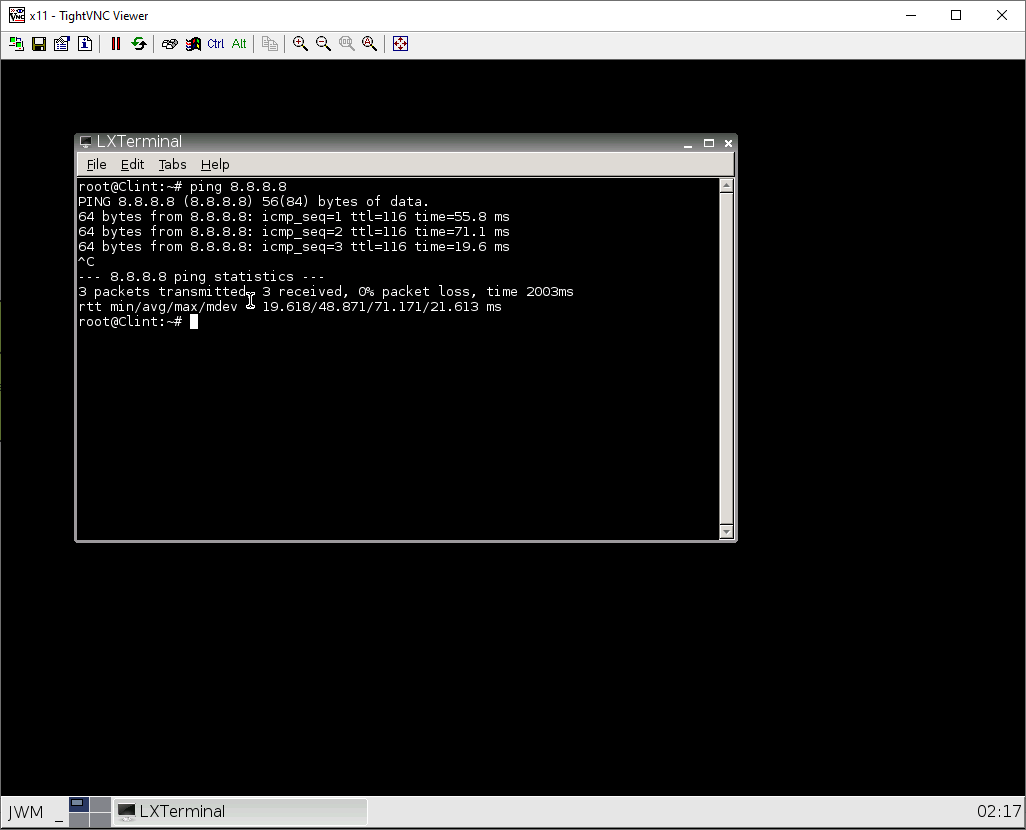
Check Internet Connectivity on Webterm
In webterm, you could test pinging 8.8.8.8 like so:
Or you can try navigating to a website for example https://something.com.
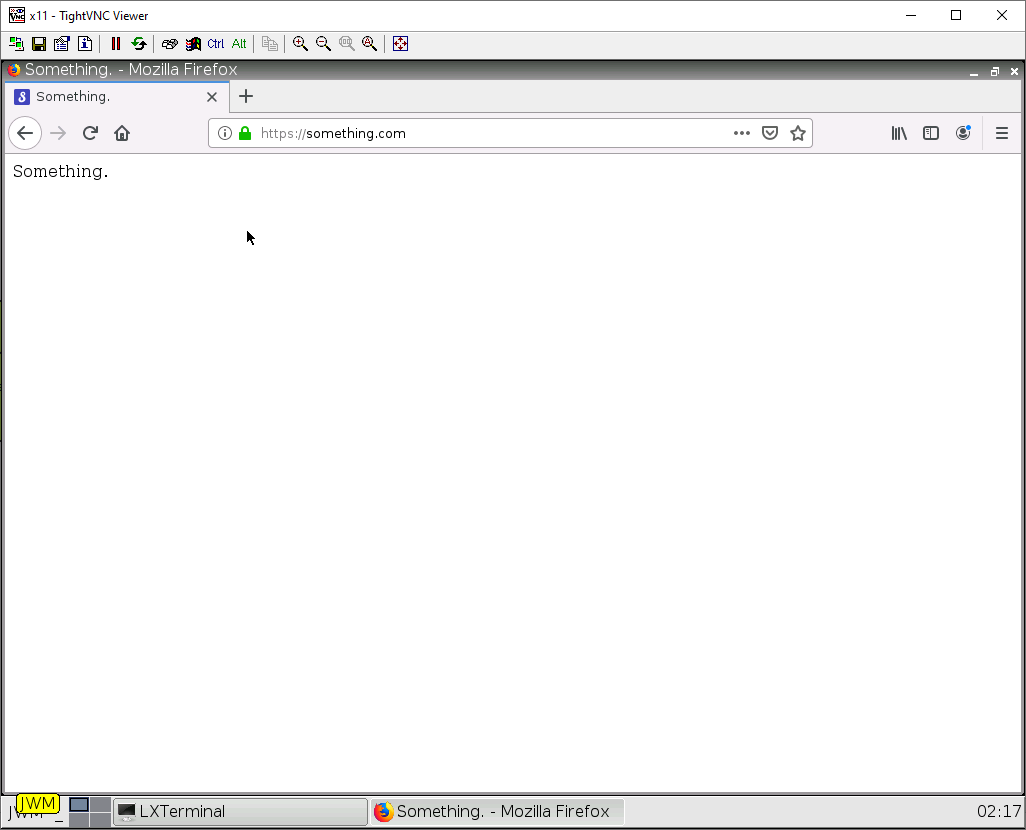
If both of these work. You have successfully configured DHCP and SNAT properly!
