Chapter 3. Advanced Networking
3.2 Remote Access VPN
Learning Objectives
- Configure a tunnel interface
- Configure a remote access VPN
Prerequisites:
- Setup Zones
- Some interface configuration
- Create a new user
- Create an auth policy
- Policy that allows VPN to Inside
- Policy that allows Outside to VPN
- Knowledge of previous labs
Scenario: VPNs aren’t just about changing your location like many advertisements say they’re for. What it’s really used for is to securely access a remote location’s resources like your workplace, or even your own home. That is what this lab will focus on. We are going to install GlobalProtect Agent on Kali and then we’ll try to reach the Internal through VPN connection.
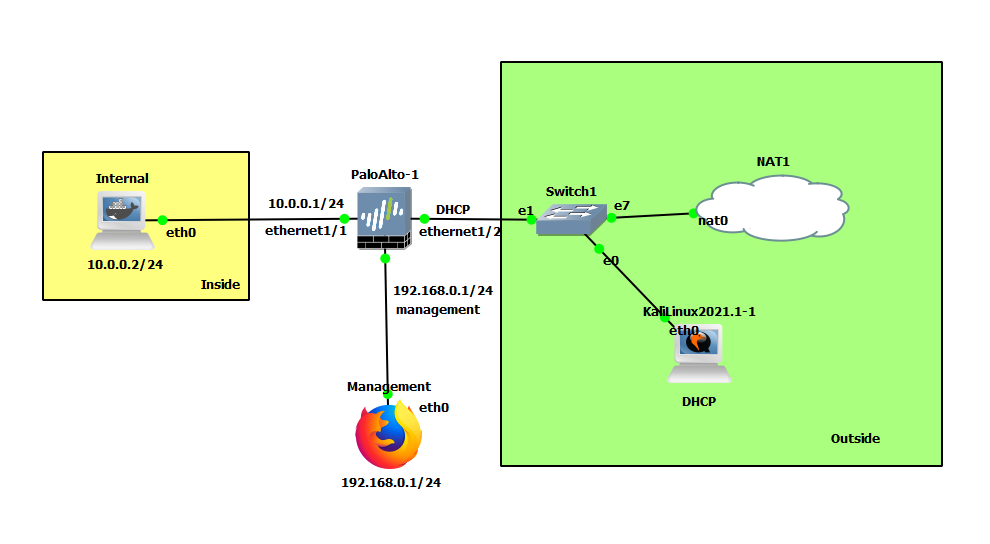
| Device | Configuration |
|---|---|
| PaloAlto-1 | management: 192.168.0.1/24 Ethernet1/1: 10.0.0.1/24 Ethernet1/2: DHCP |
| Internal (WordPress) | eth0: 10.0.0.2/24 GW: 10.0.0.1 |
| KaliLinux2019.3-1 | eth0: DHCP |
| Management | eth0: 192.168.0.2/24 |
| Zone | Interface |
|---|---|
| Inside | Ethernet1/1 |
| Outside | Ethernet1/2 |
| VPN | Tunnel.1 |
Create a Tunnel Interface
Under Network > Interfaces in the Tunnel tab, click Add.
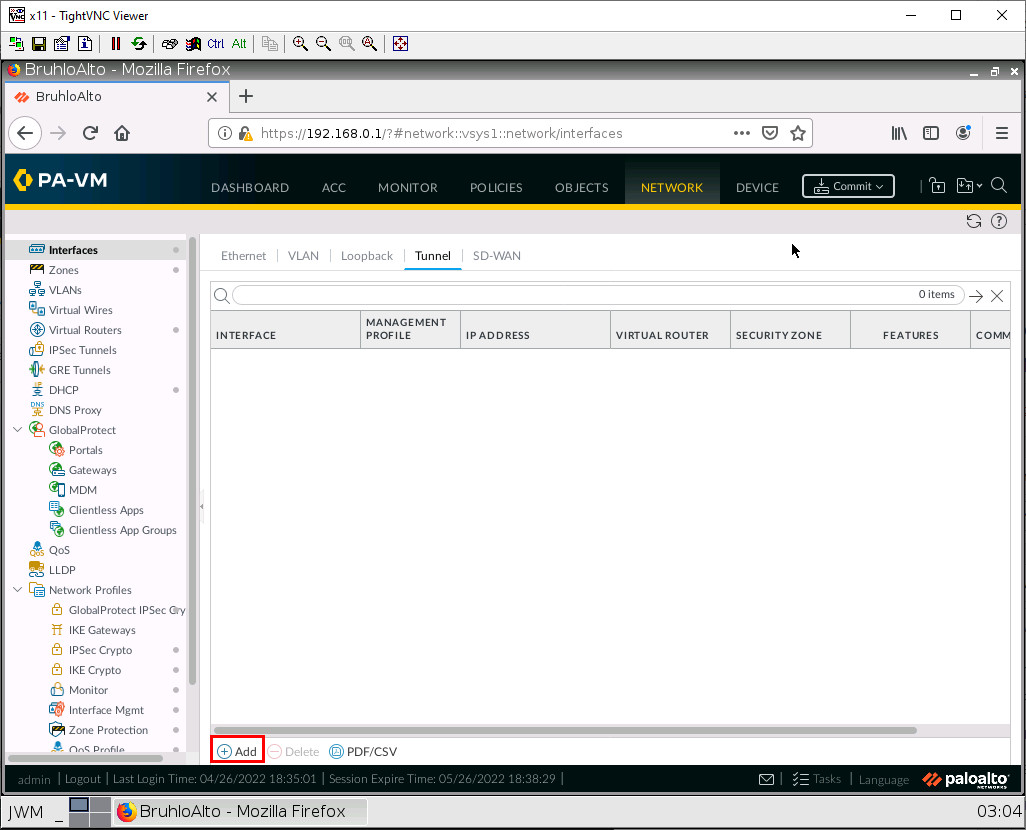
In the new window, change the virtual router to default, and the security zone to the VPN zone.
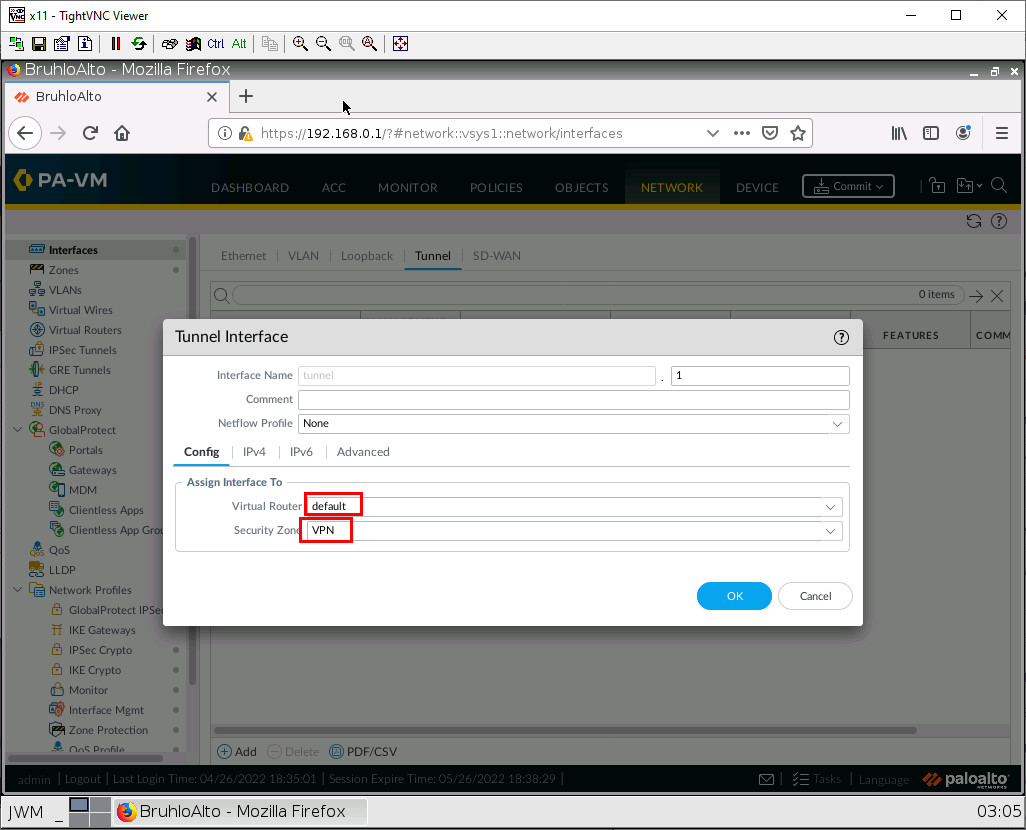
Then click OK.
Enable User ACL for a Zone
Under Network > Zone, click the VPN zone.
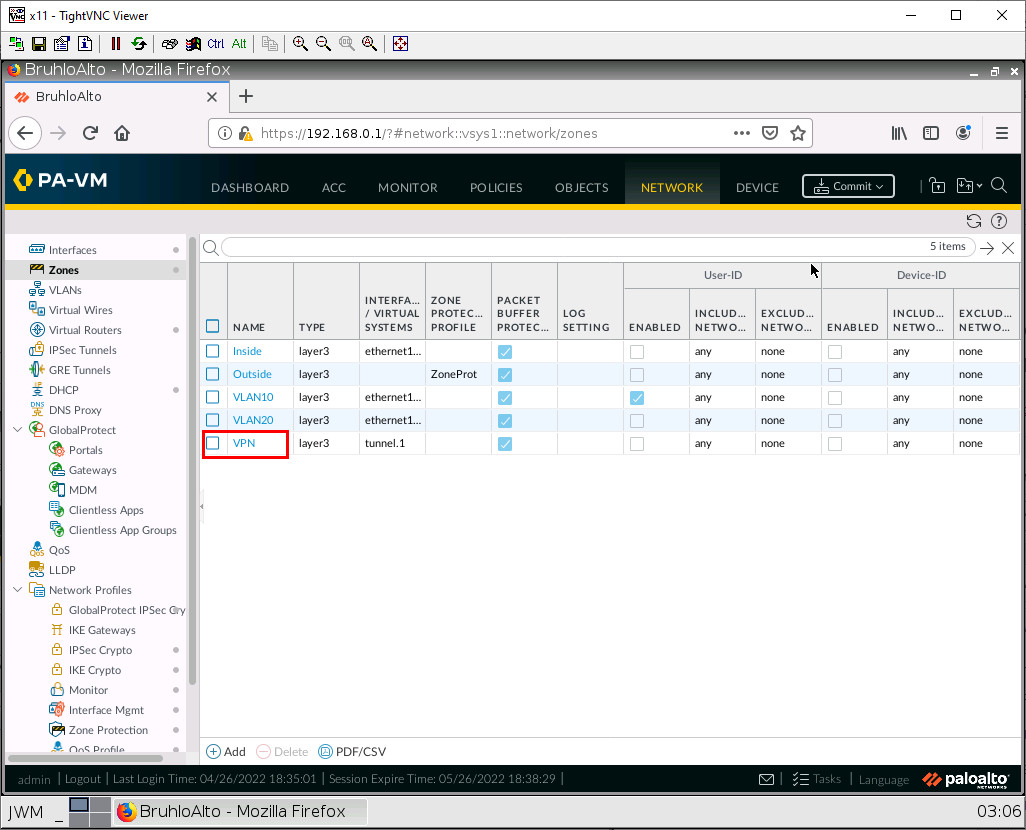
Tick the Enable user identification box.
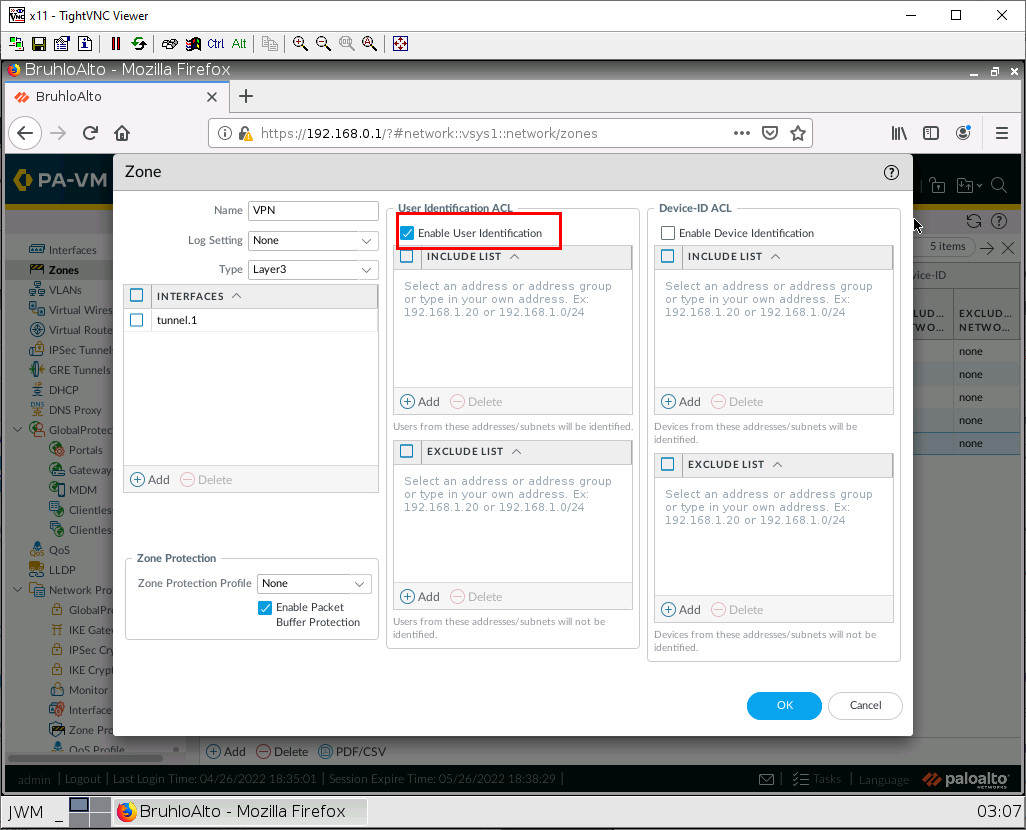
Then press OK.
Generate Certs
Under Device > Certificate Management > Certificates, click on Generate.
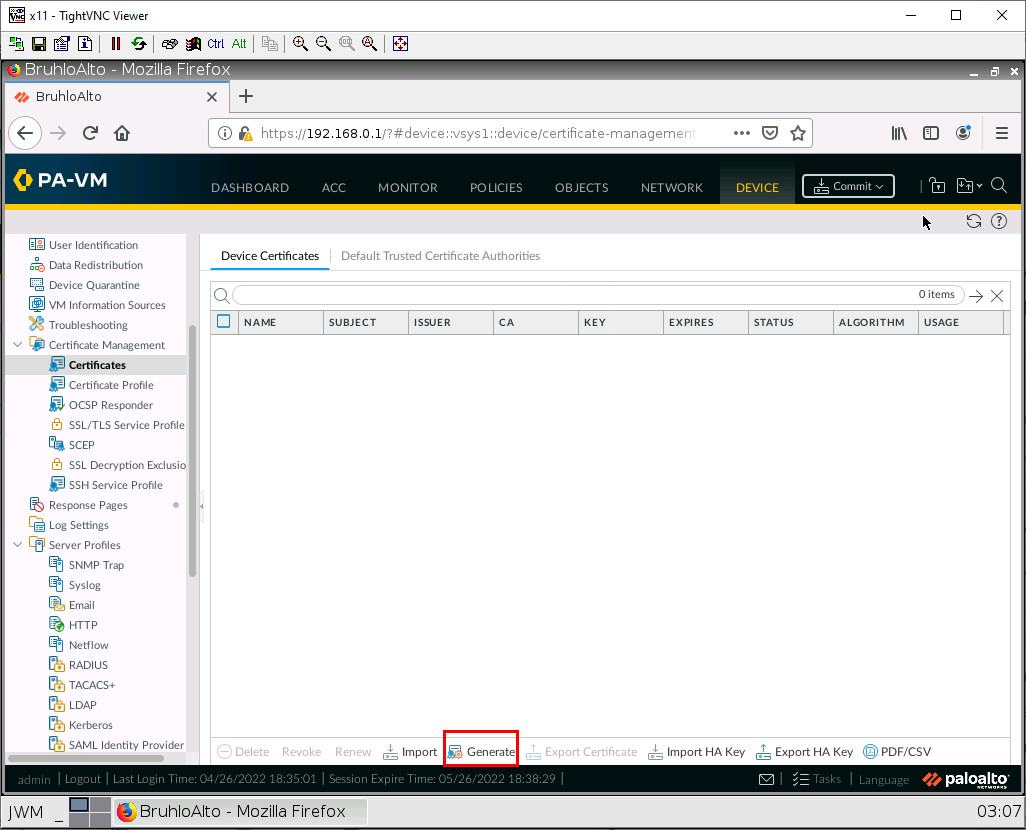
Configure these settings in the new window:
| Parameters | Value |
|---|---|
| Certificate Name | Cert Name Here |
| Common Name | The DHCP IP of Ethernet1/2 |
| Certificate Authority | Tick this box |

Then click Generate.
Create an SSL/TLS Service Profile
Under Device > Certificate Management > SSL/TLS Service Profile, click Add.
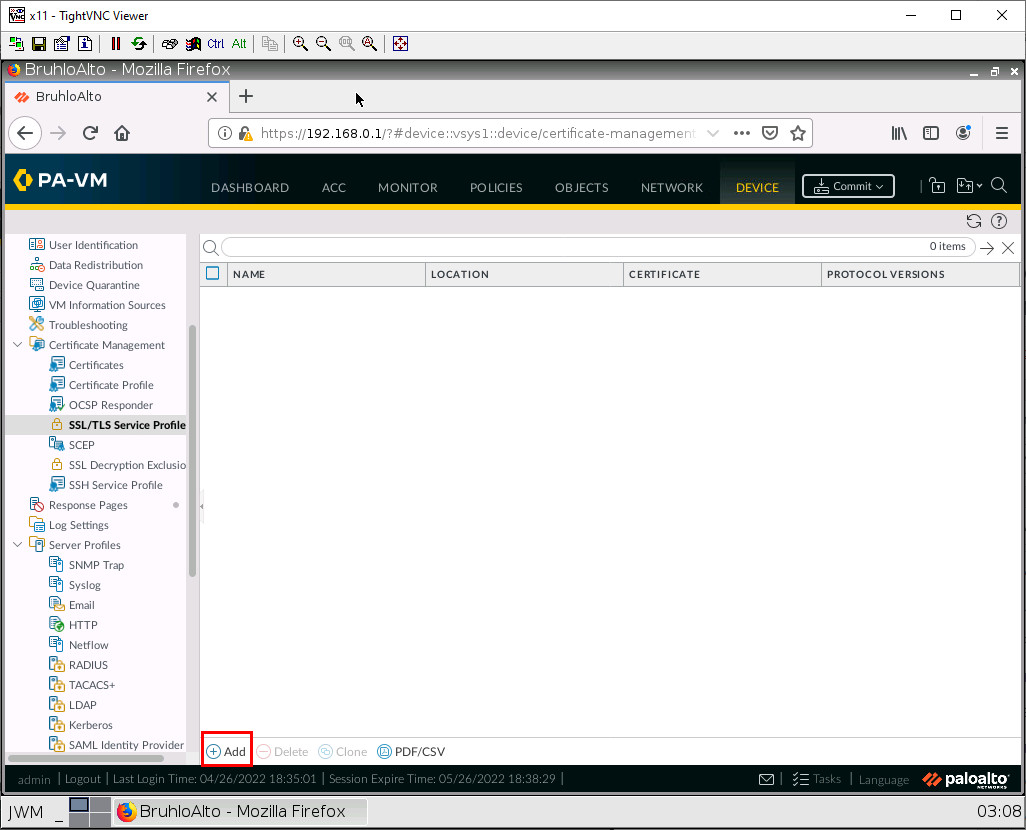
In the new window, add the certificate you generated.
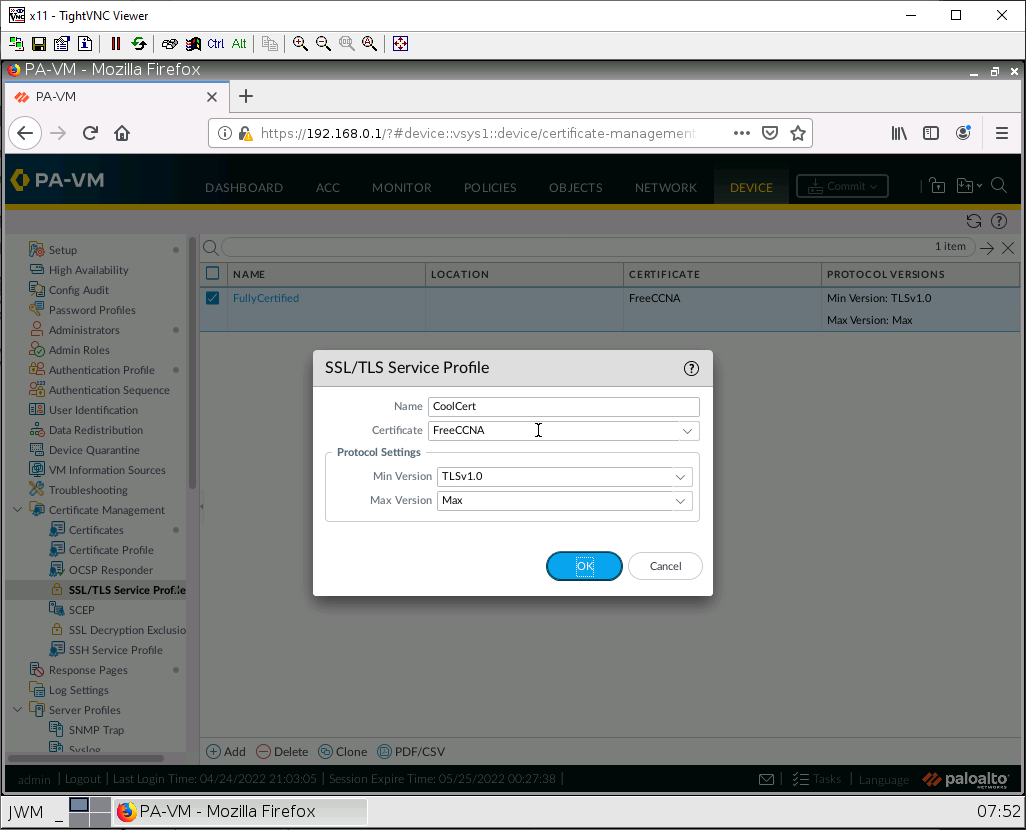
Then click OK.
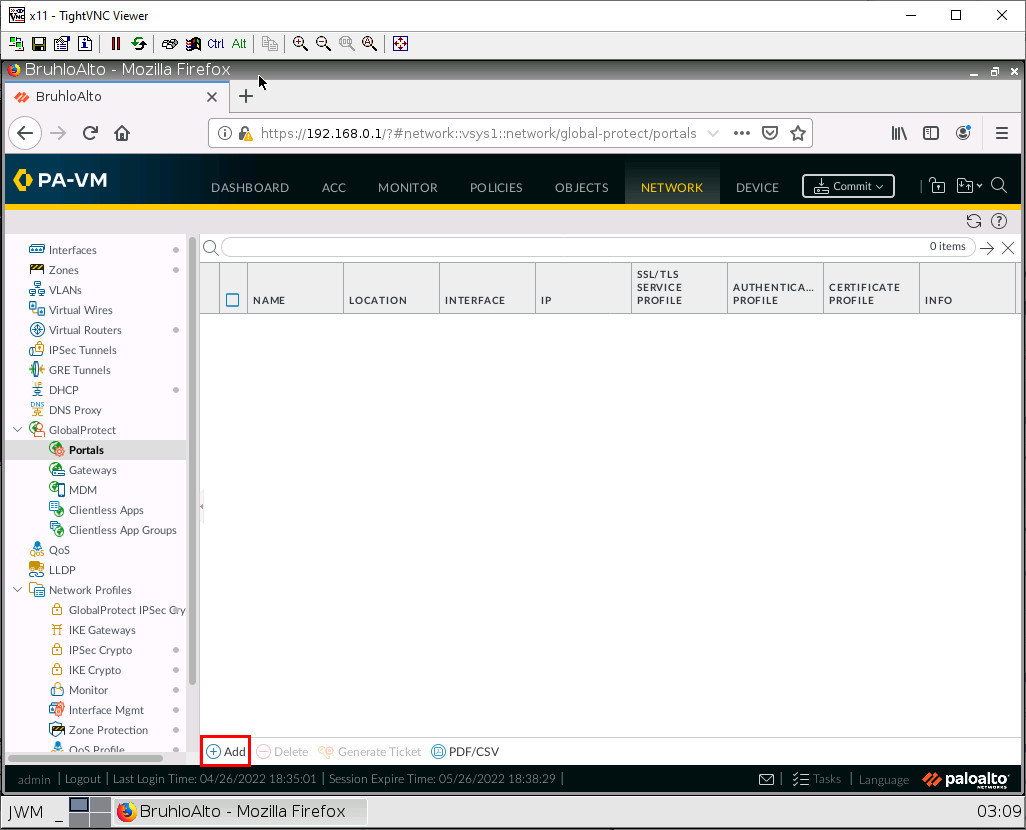
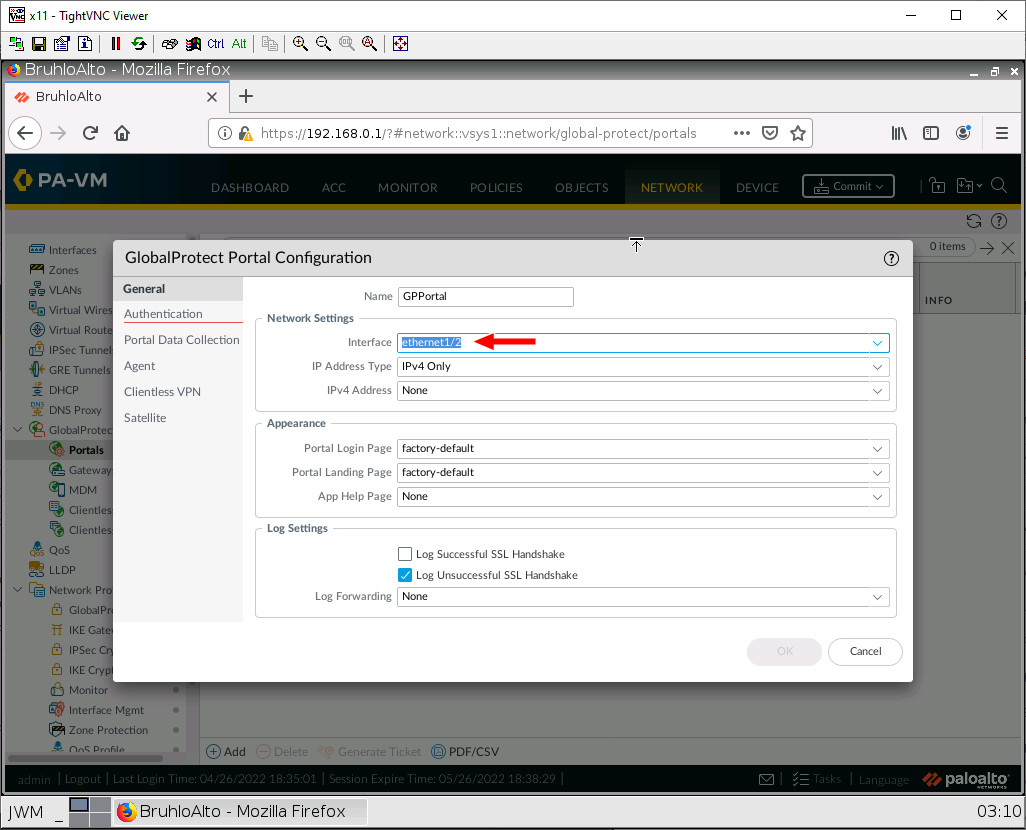
Create a GlobalProtect Portal
Under Network > GlobalProtect > Portals, then click Add.
In the general tab, set the interface to Ethernet1/2.
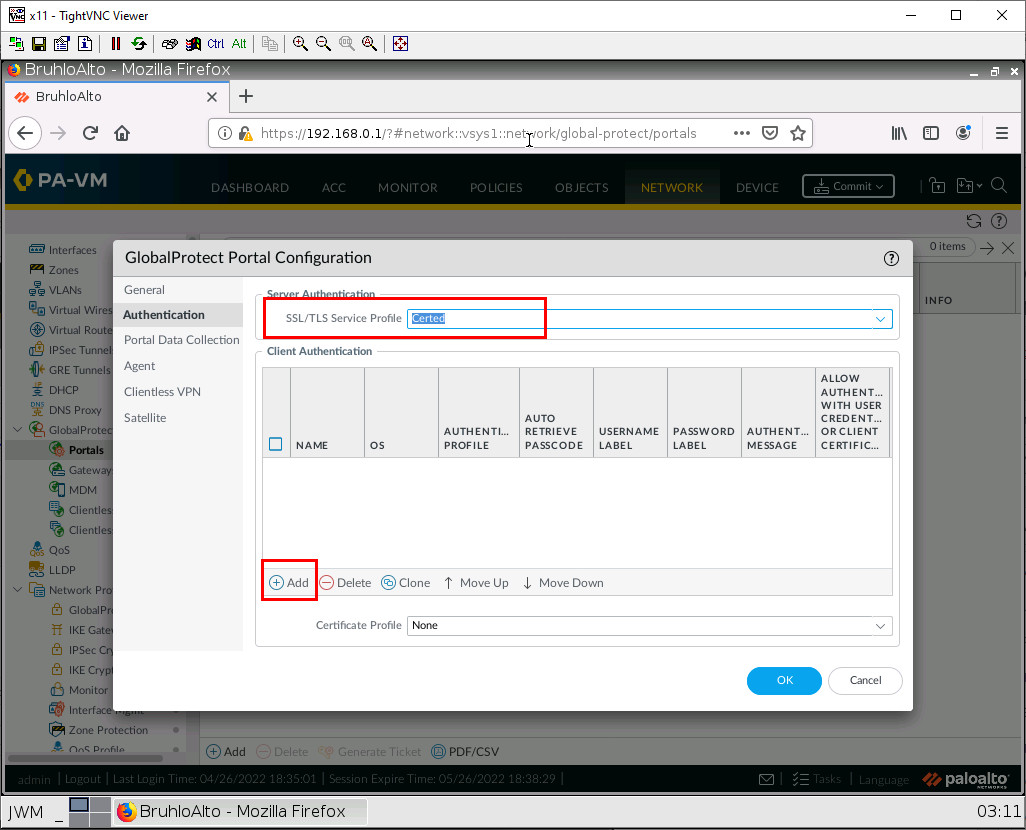
In the authentication tab, select SSL/TLS profile you created in the previous step, then click Add.
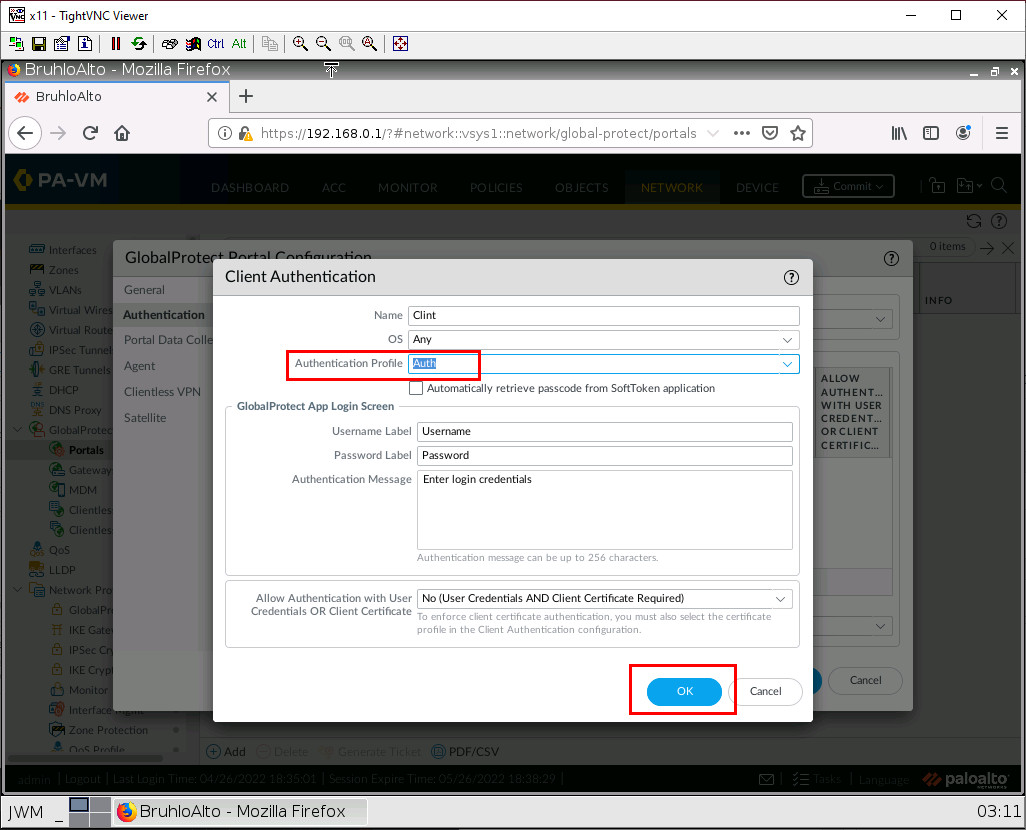
In the new window, change the authentication profile, then press OK.
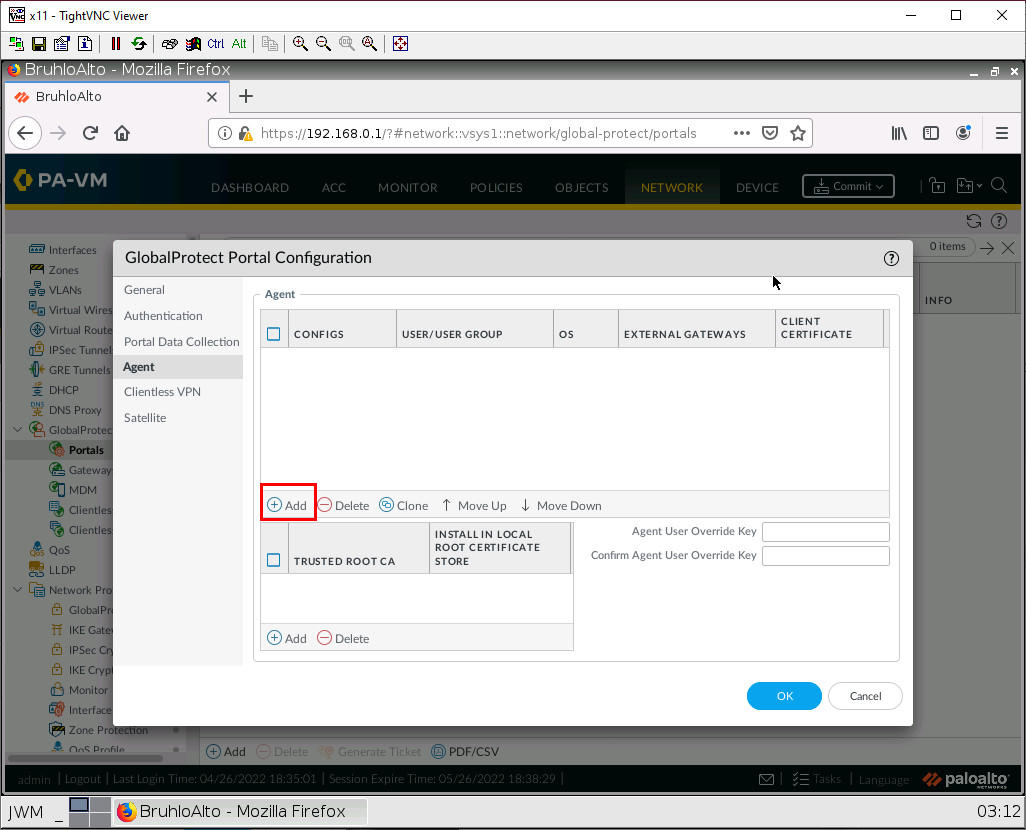
In the agent tab, in the agent section, click Add.
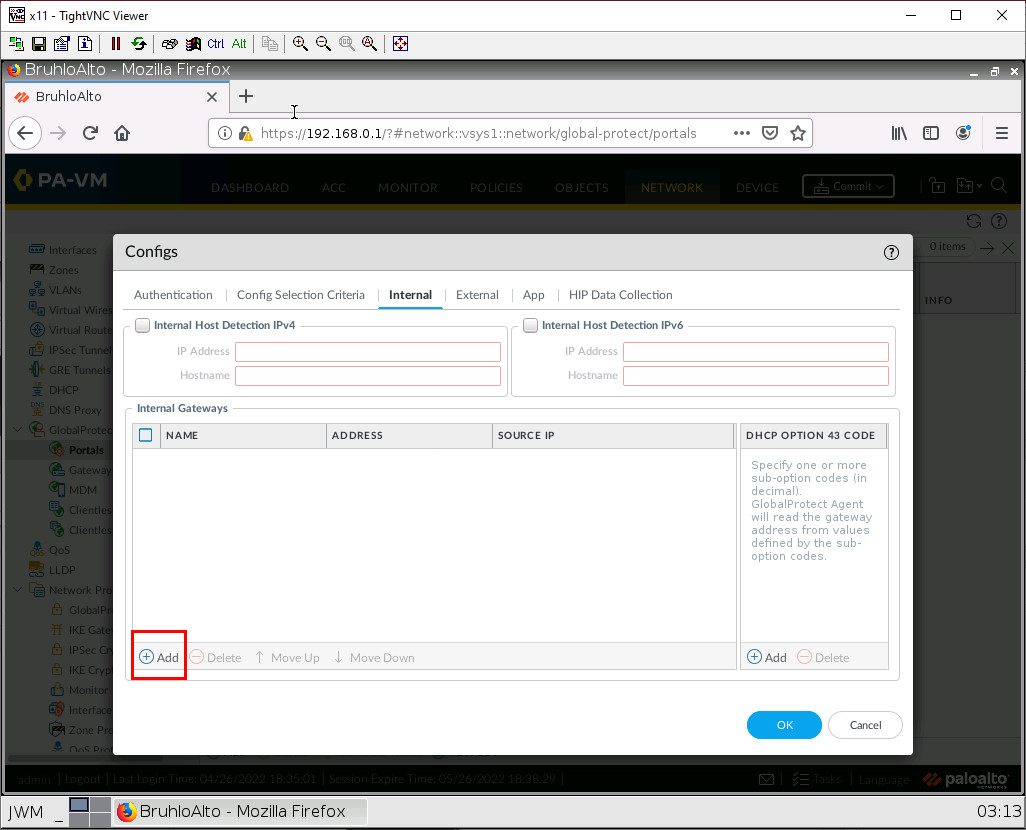
In the internal tab in the Internal gateway, click Add.
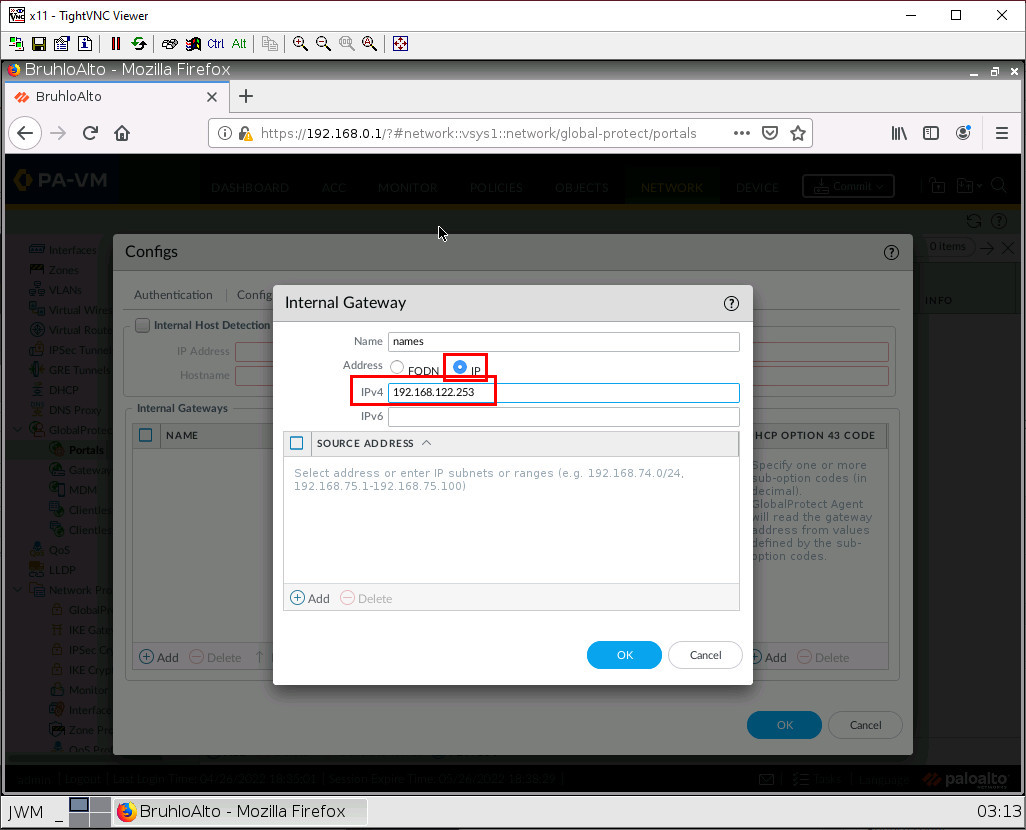
In this window, change the Address to select IP, and in the IPv4 box, type in the IP of Ethernet1/2.
Press OK twice to get back to the agent tab. Then in the trusted root ca section, add your generated cert, and tick the box to install in local root certificate store.
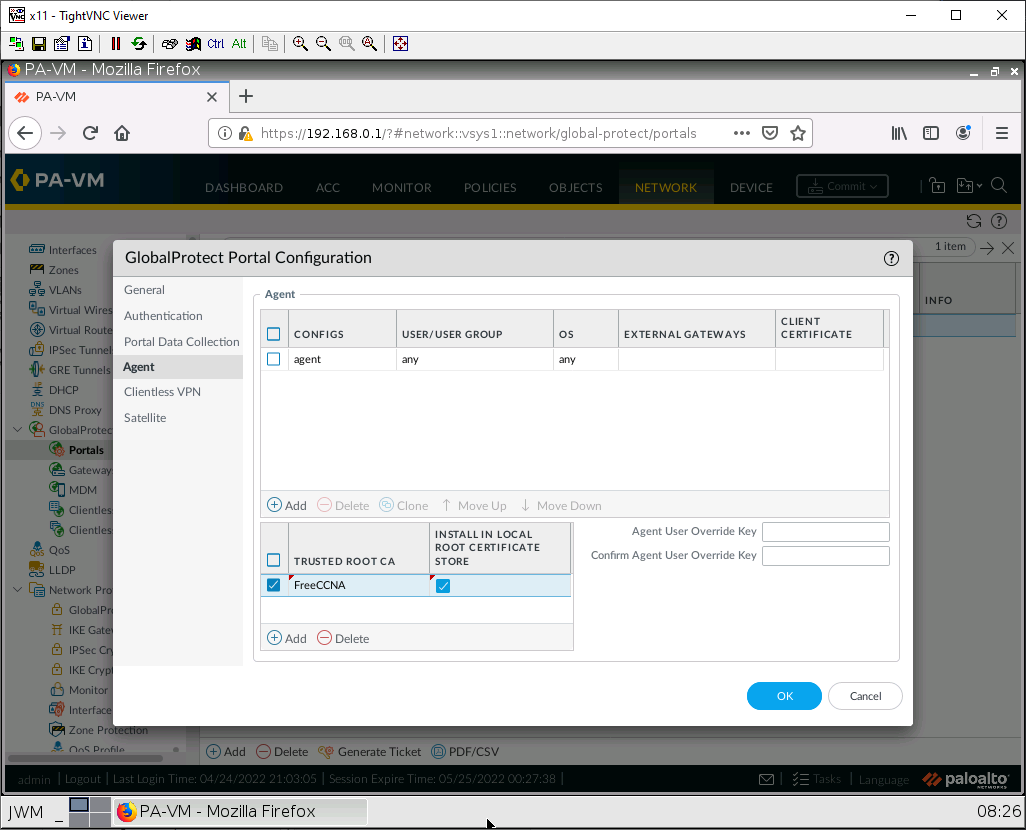
Then press OK.
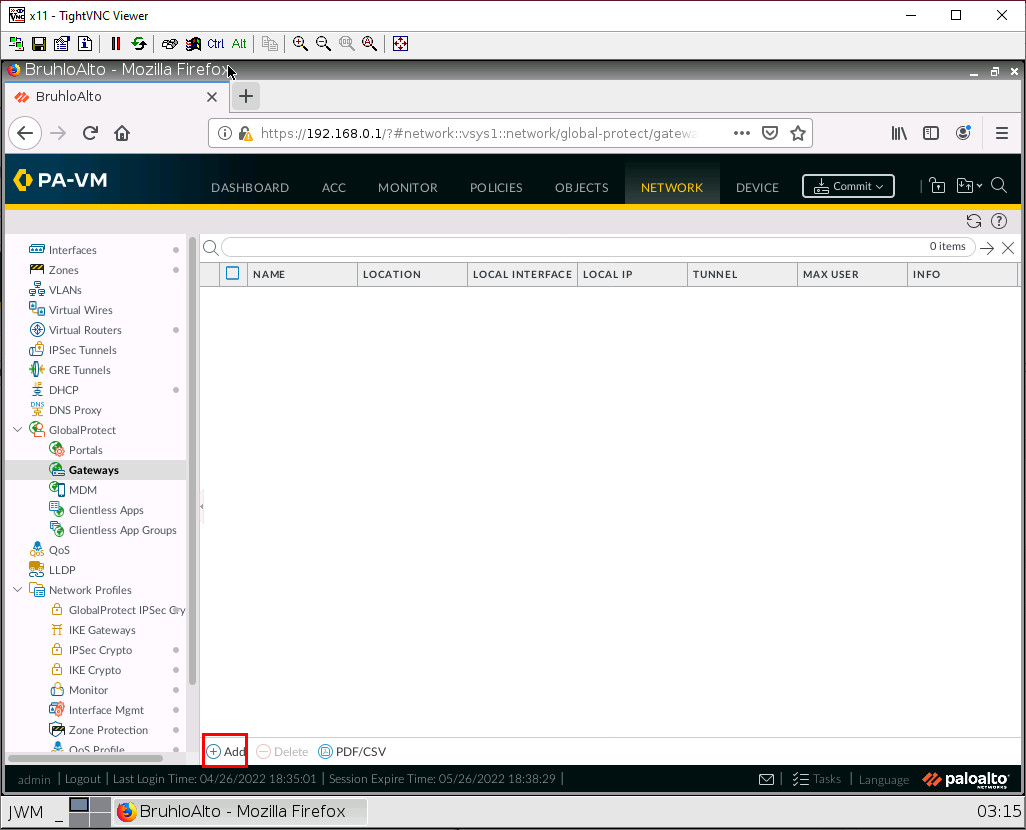
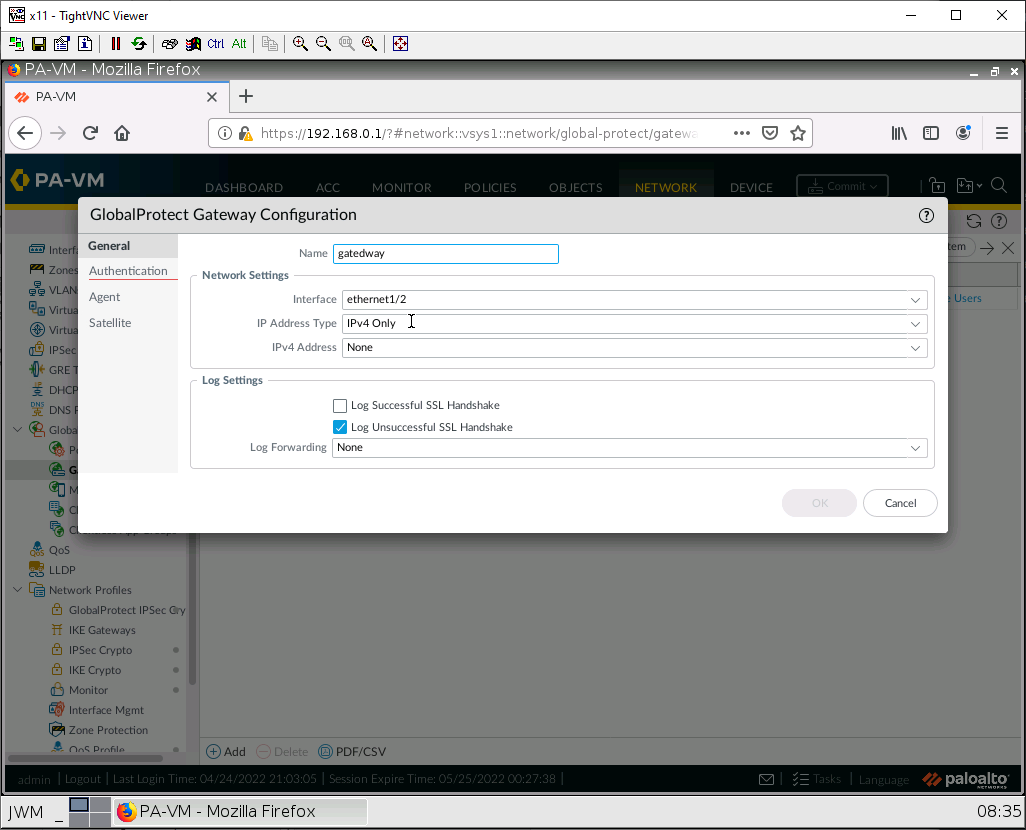
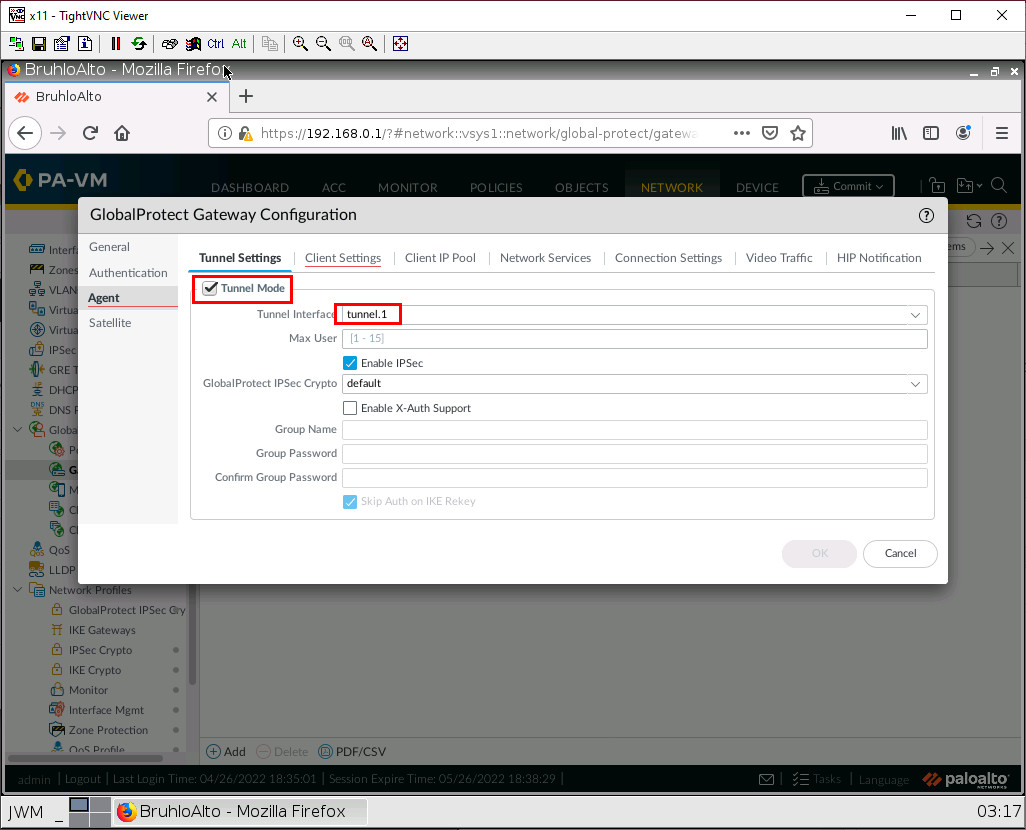
Create a GlobalProtect Gateway
Under Network > GlobalProtect > Gateways, click Add.
In the general tab, set the interface to Ethernet1/2.
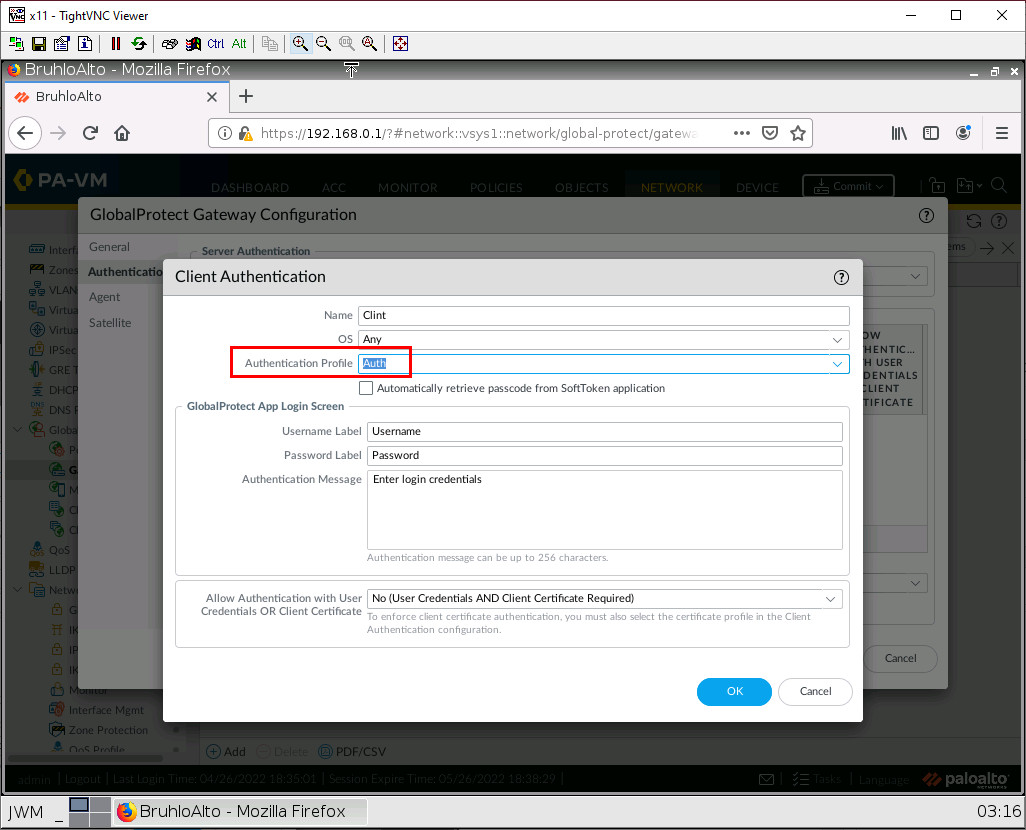
In the Authentication tab, add your SSL/TLS profile, then click Add.
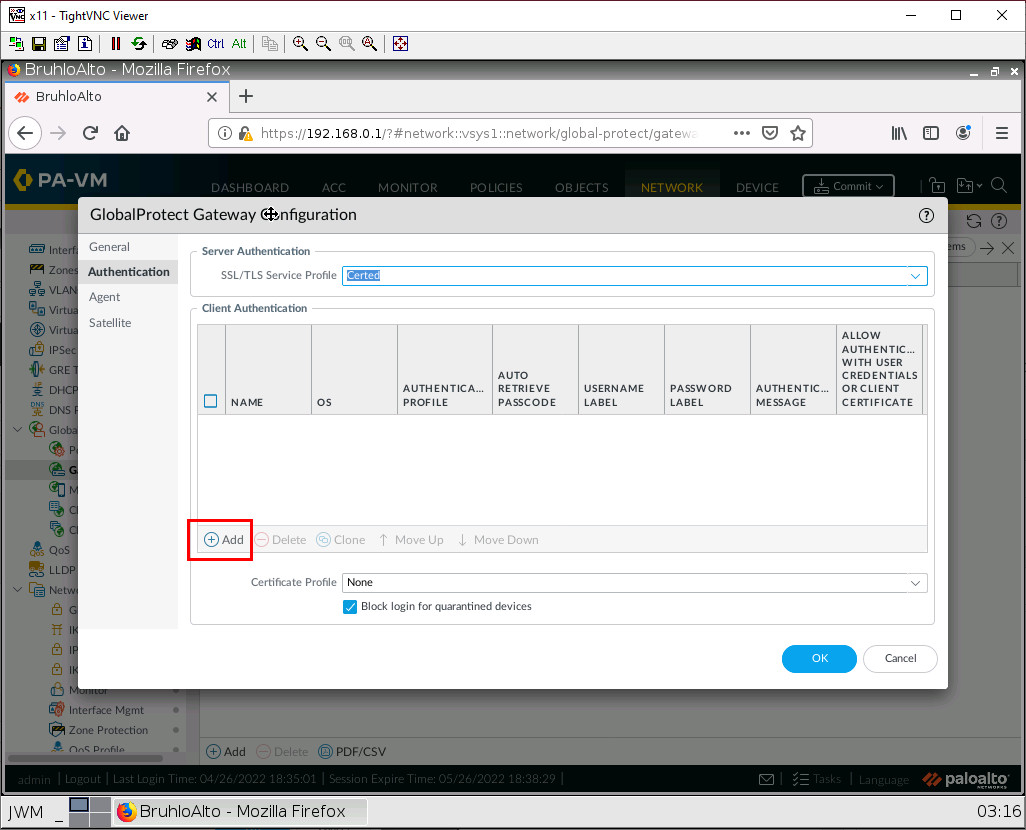
In the new window, select your authentication profile, then click OK.
Under the agent tab, in tunnel settings, tick the tunnel mode checkbox and select the tunnel you made.
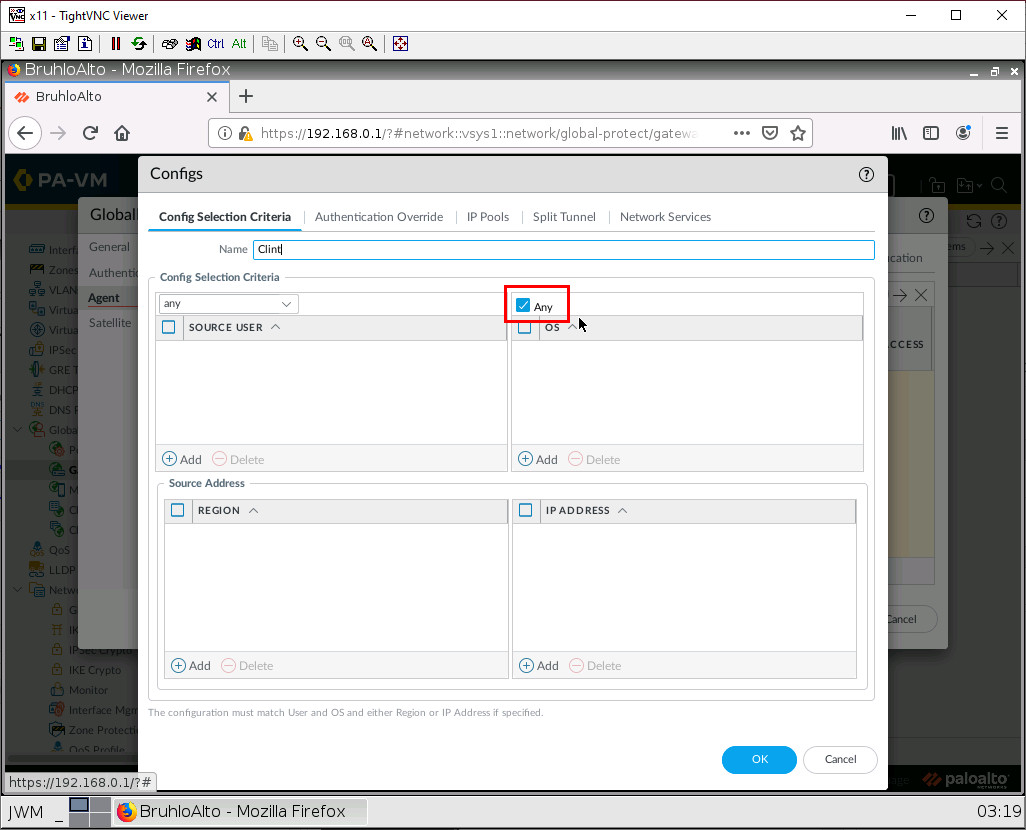
In client settings, click Add.

Make sure the Any checkbox is ticked on top of the OS category, then press OK.
In client IP pool settings, add an IP pool range of this:
172.16.10.1-172.16.10.10
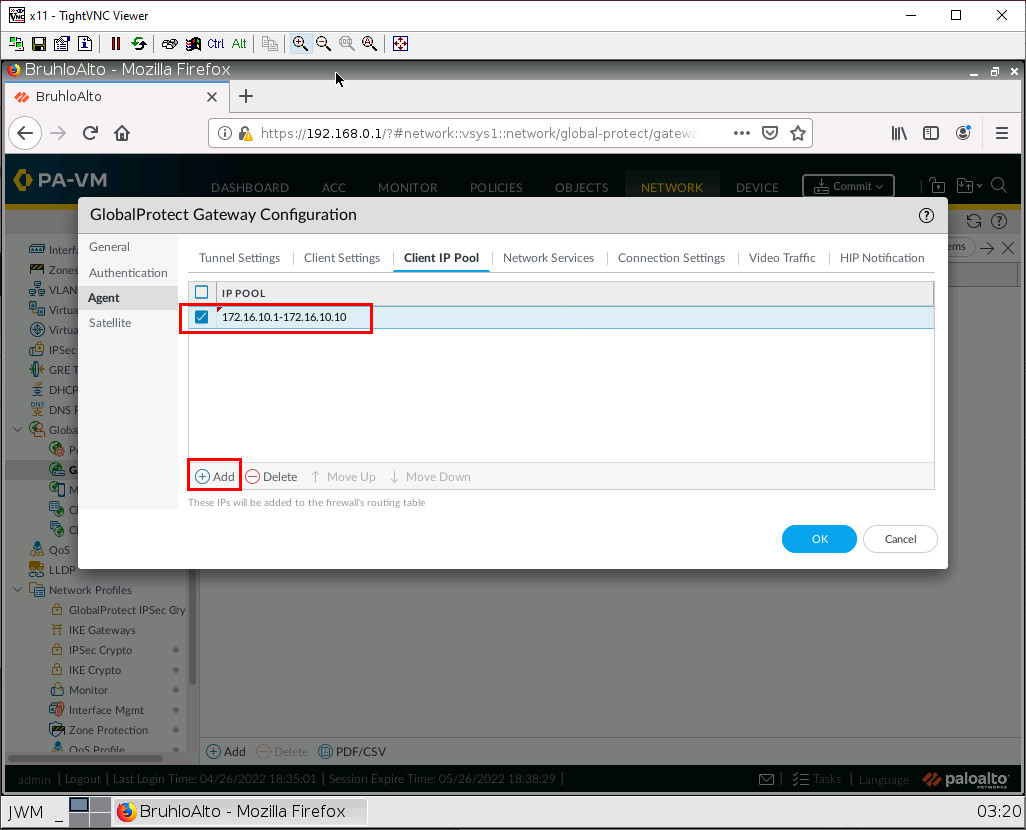
Then press OK. Don’t forget to commit the configuration!
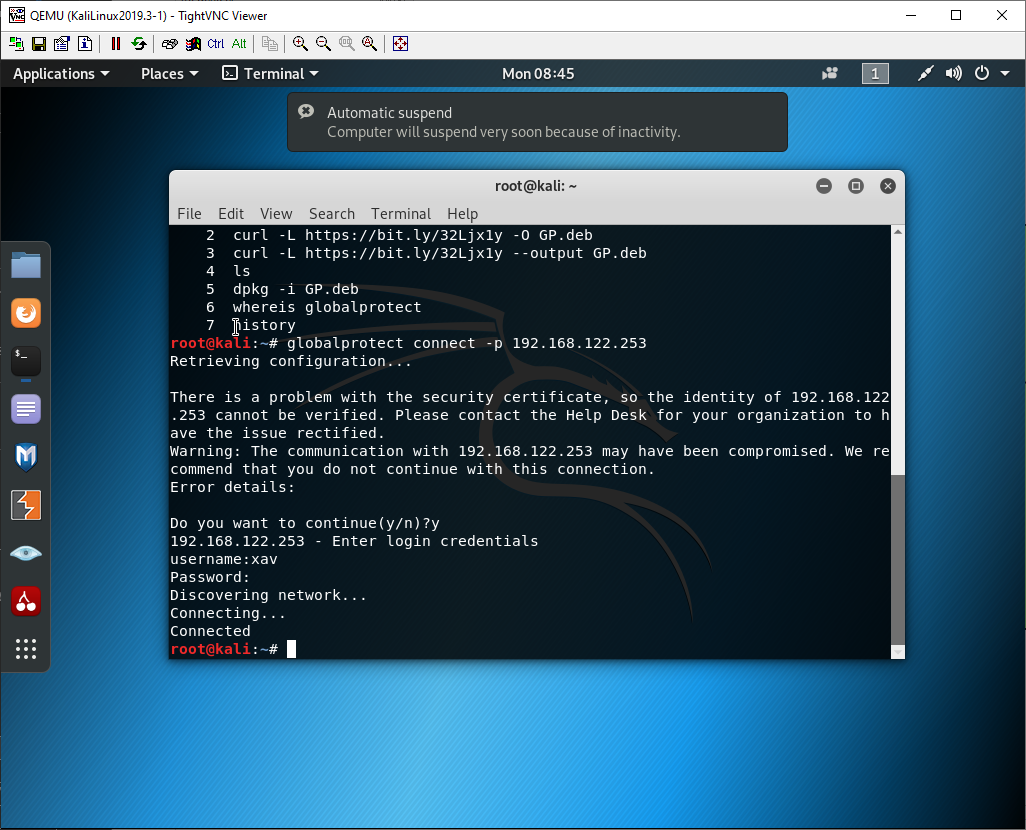
Install the GlobalProtect Client on Kali
Open up a terminal window and run the following commands:
#curl -L https://drive.google.com/file/d/1dPZNoRPkFop3HdmNOCMqtJqQIA_7W9Fh/view?usp=drive_link --output GP.deb#sudo dpkg -i GP.deb#globalprotect connect -p [IP of Palo Alto Ethernet1/2 Here]When connecting, it will show an error about validation. Type in y then press enter.
It will also ask for your username and password. Enter the one you created prior.
Test Remote Access VPN
On Kali, after connecting to GlobalProtect, navigate to the IP of the WordPress Server (Internal).
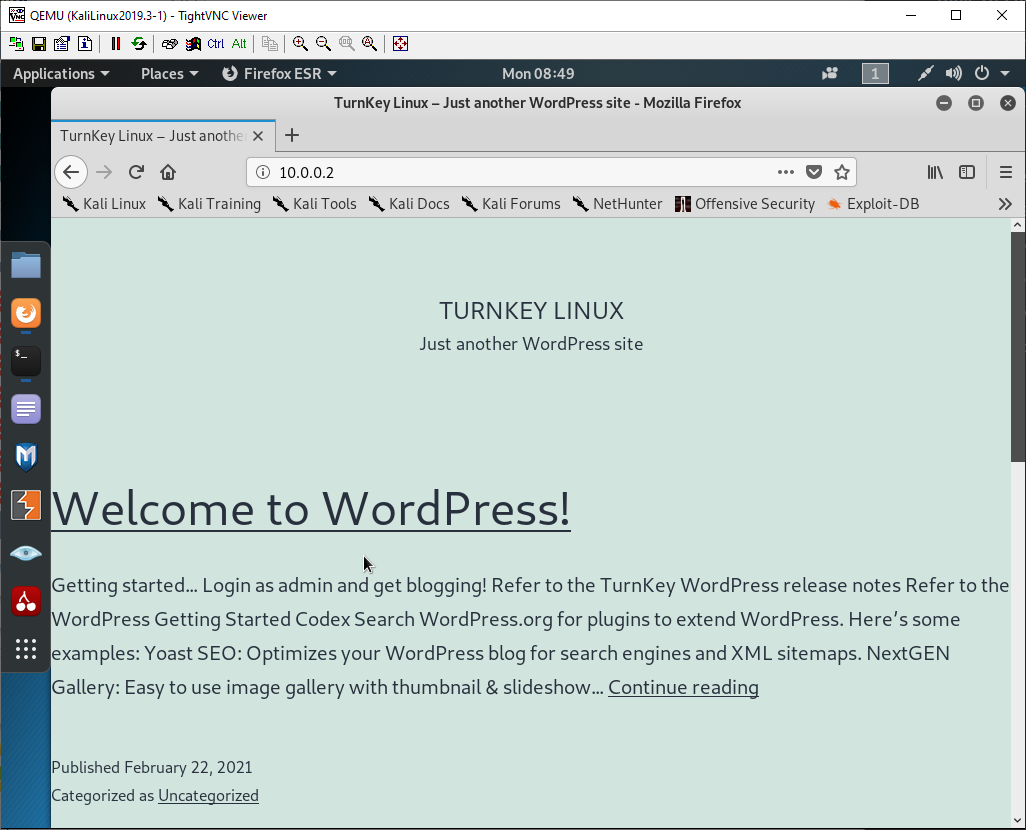
If everything was correct, it should display the WordPress site!
