Using MyMedia
What is MyMedia?
MyMedia is where recordings are stored and delivered and is available to all UNBC faculty and students. MyMedia is a powerful file manager that enables you to manage files on your device. You can play the files, manage them and export them to your computer.
Important
You must allow Third-Party Cookies in your browser for your MyMedia to work properly. See this guide for setting your browser third-party cookie settings.
If you do not have your Third-Party Cookies settings correct in your browser you will see the following message in your MyMedia area

Uploading to MyMedia
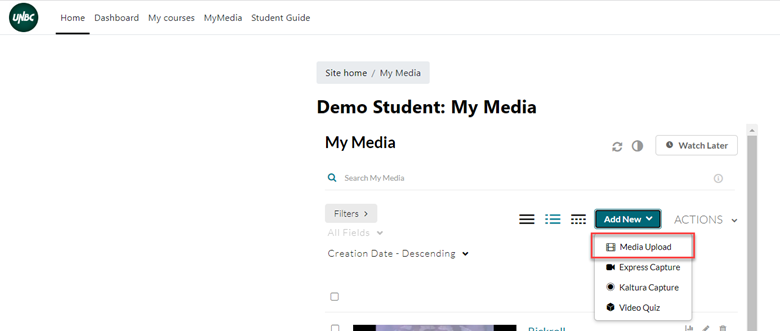
1. Go to MyMedia in the course navigation menu.

2. Click on Add New. Then select Media Upload.
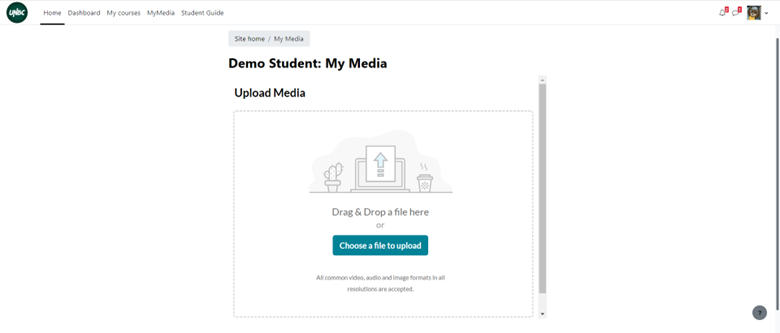
3. Drag & drop or Choose a file to upload (It is recommended that files are to be no larger than 2GB in size, otherwise you may experience long uploading times or internet interruptions depending on your internet speed and bandwidth).
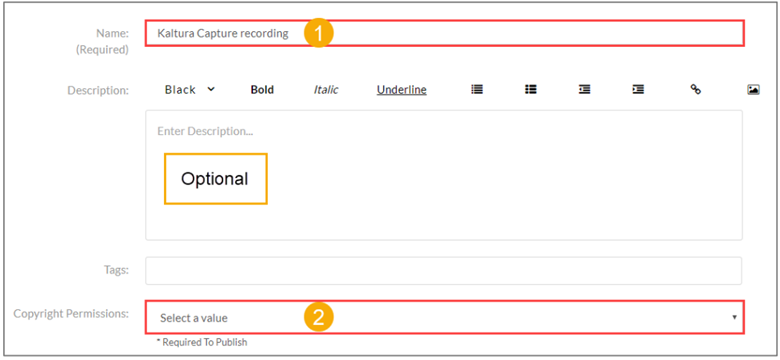
4. Fill out the form:
-Name (Required)
-Select a Copyright Permissions (Required)
-Description (highly recommended!)
5. Click Save at the bottom of the page when you are done then go to Media Gallery.
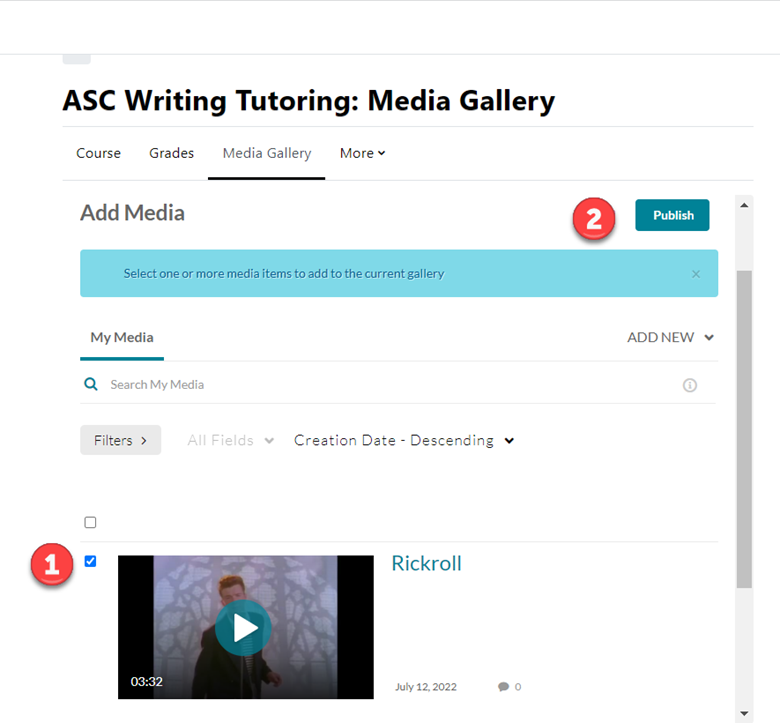
6. Go to the course in which you need to embed (upload) your video or recording. In the Media Gallery, click Add Media.
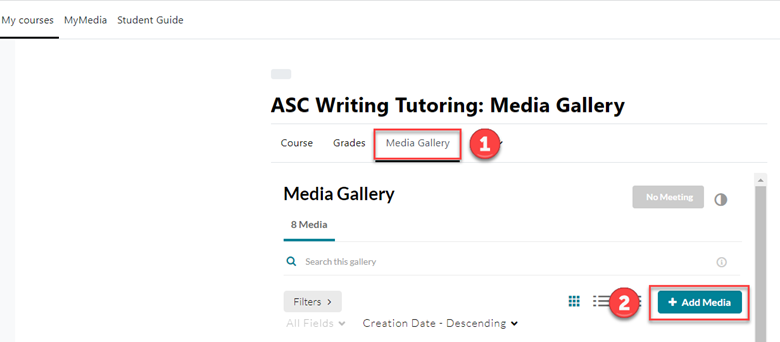
7. Select the ‘Checkbox’ beside the media upload and press Publish.
Using Kaltura Capture to Create a Video
Kaltura is a media platform where you and your instructors can create, store, and share multimedia content in Moodle. Features in Kaltura include the ability to record, upload, publish, search, and embed media. Kaltura also enables the owner of the uploaded media to edit and create shorter clips from existing media.
1. Go to MyMedia in the course navigation menu.
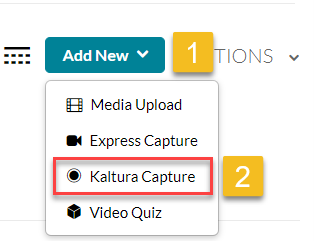
2. Click on Add New. Then click on Kaltura Capture
3. If you have never used Kaltura Capture before, you will be prompted to install it on your computer.
Once you have done this, Kaltura Capture should start up. If not, go back to your Media Gallery and click on Add New > Kaltura Capture and it should start up.
4. You will be prompted to open Kaltura Capture. Kaltura Capture can record the screen, video and audio. You can choose which you want recorded by using the tools in the tool bar below. Have your PowerPoint presentation open & in presentation mode, and video camera/microphone on (if using).
Click on the Red Circle to start recording.

4. Once you are finished recording, click the square icon to stop recording and press Yes, Stop it.
5. Click Save & Upload.
6. Once processed, click on the URL beside the recording. You will be redirected to the recording
on Moodle.

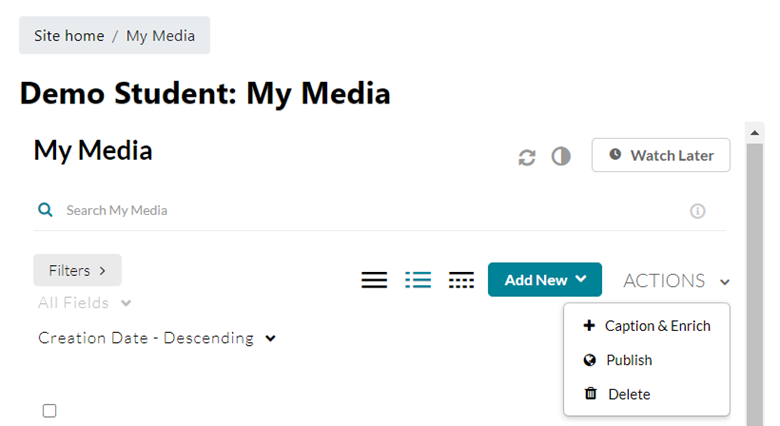
7. On the Moodle page, click Actions and select +Caption & Enrich.
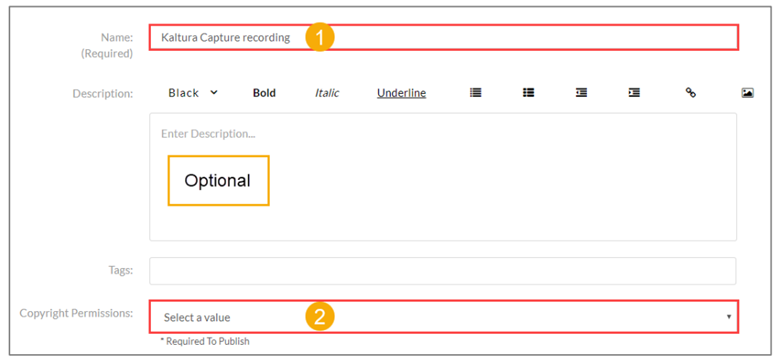
8. Complete the following fields:
-Name (Required)
-Select a Copyright Permission (Required)
-Description (highly recommended!)
9. Click Save at the bottom of the page when you are done then go to Media Gallery.
10. In the Media Gallery, click Add Media.
11. Select the checkbox beside the media upload and press Publish.
