Moodle Essentials: Structuring, Sharing, and Supporting Learning
How to Create Groups
Manually Creating Groups of Students in Moodle
If you have already decided on group membership in your face-to-face class, you can replicate those groups in Moodle so students will be able to submit group assignments and receive grades as a group.
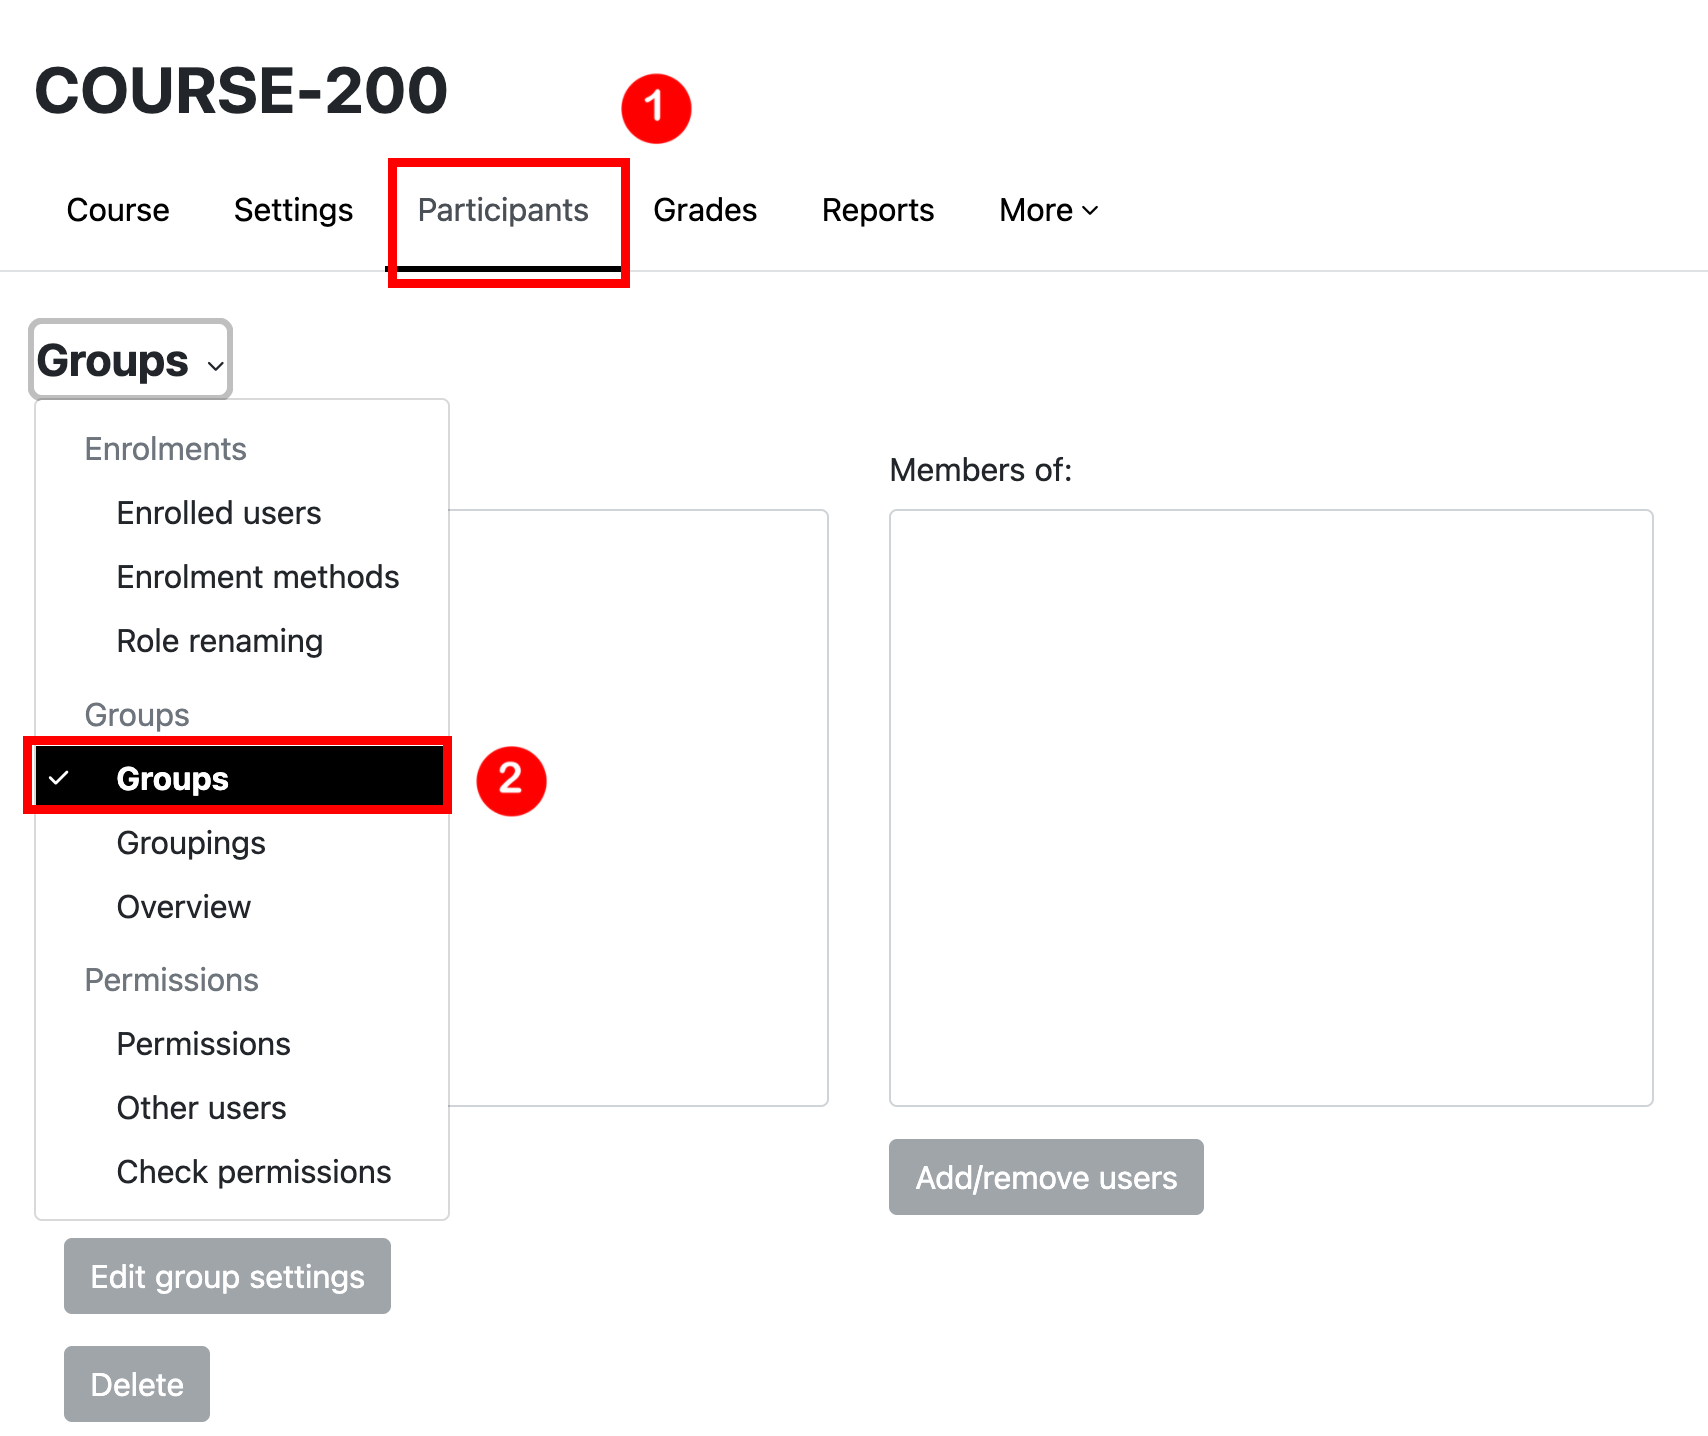
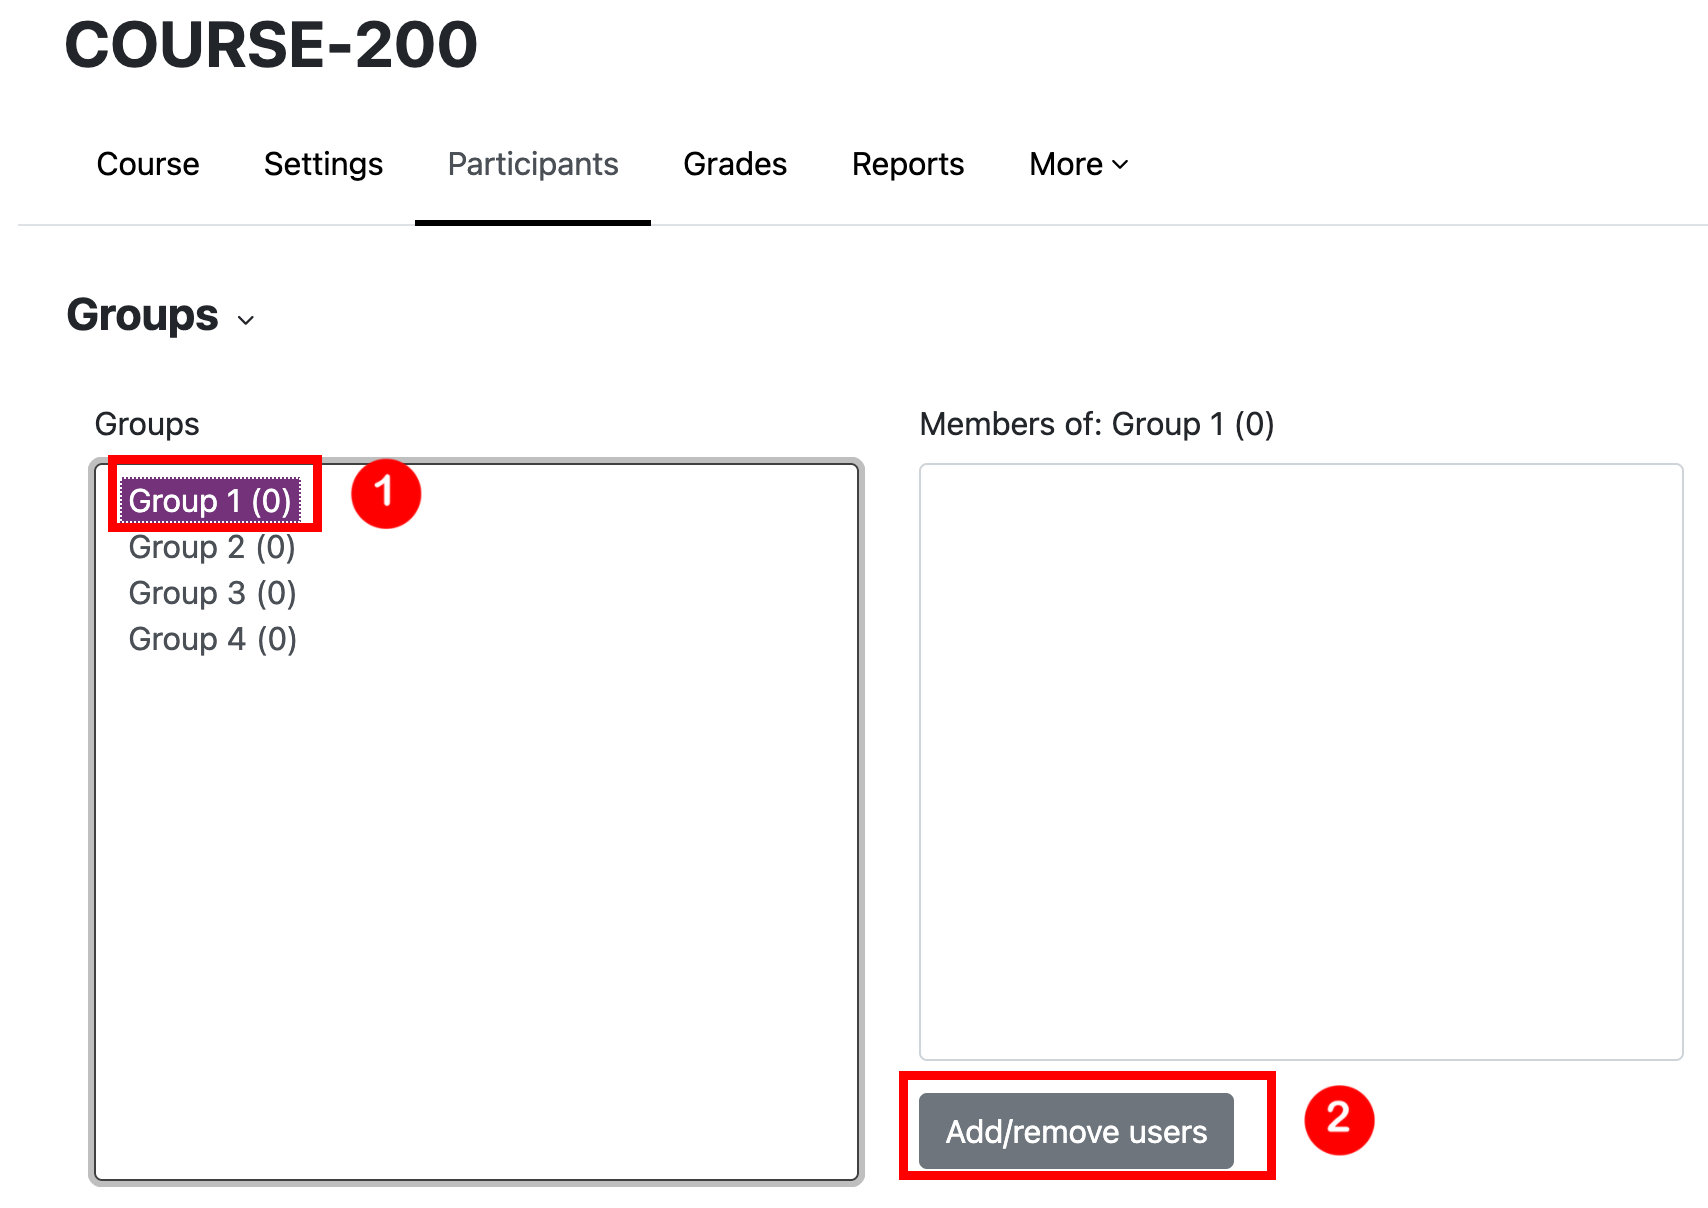
Navigate to the Participants tab, and in the drop down menu on the left, select “Groups”.
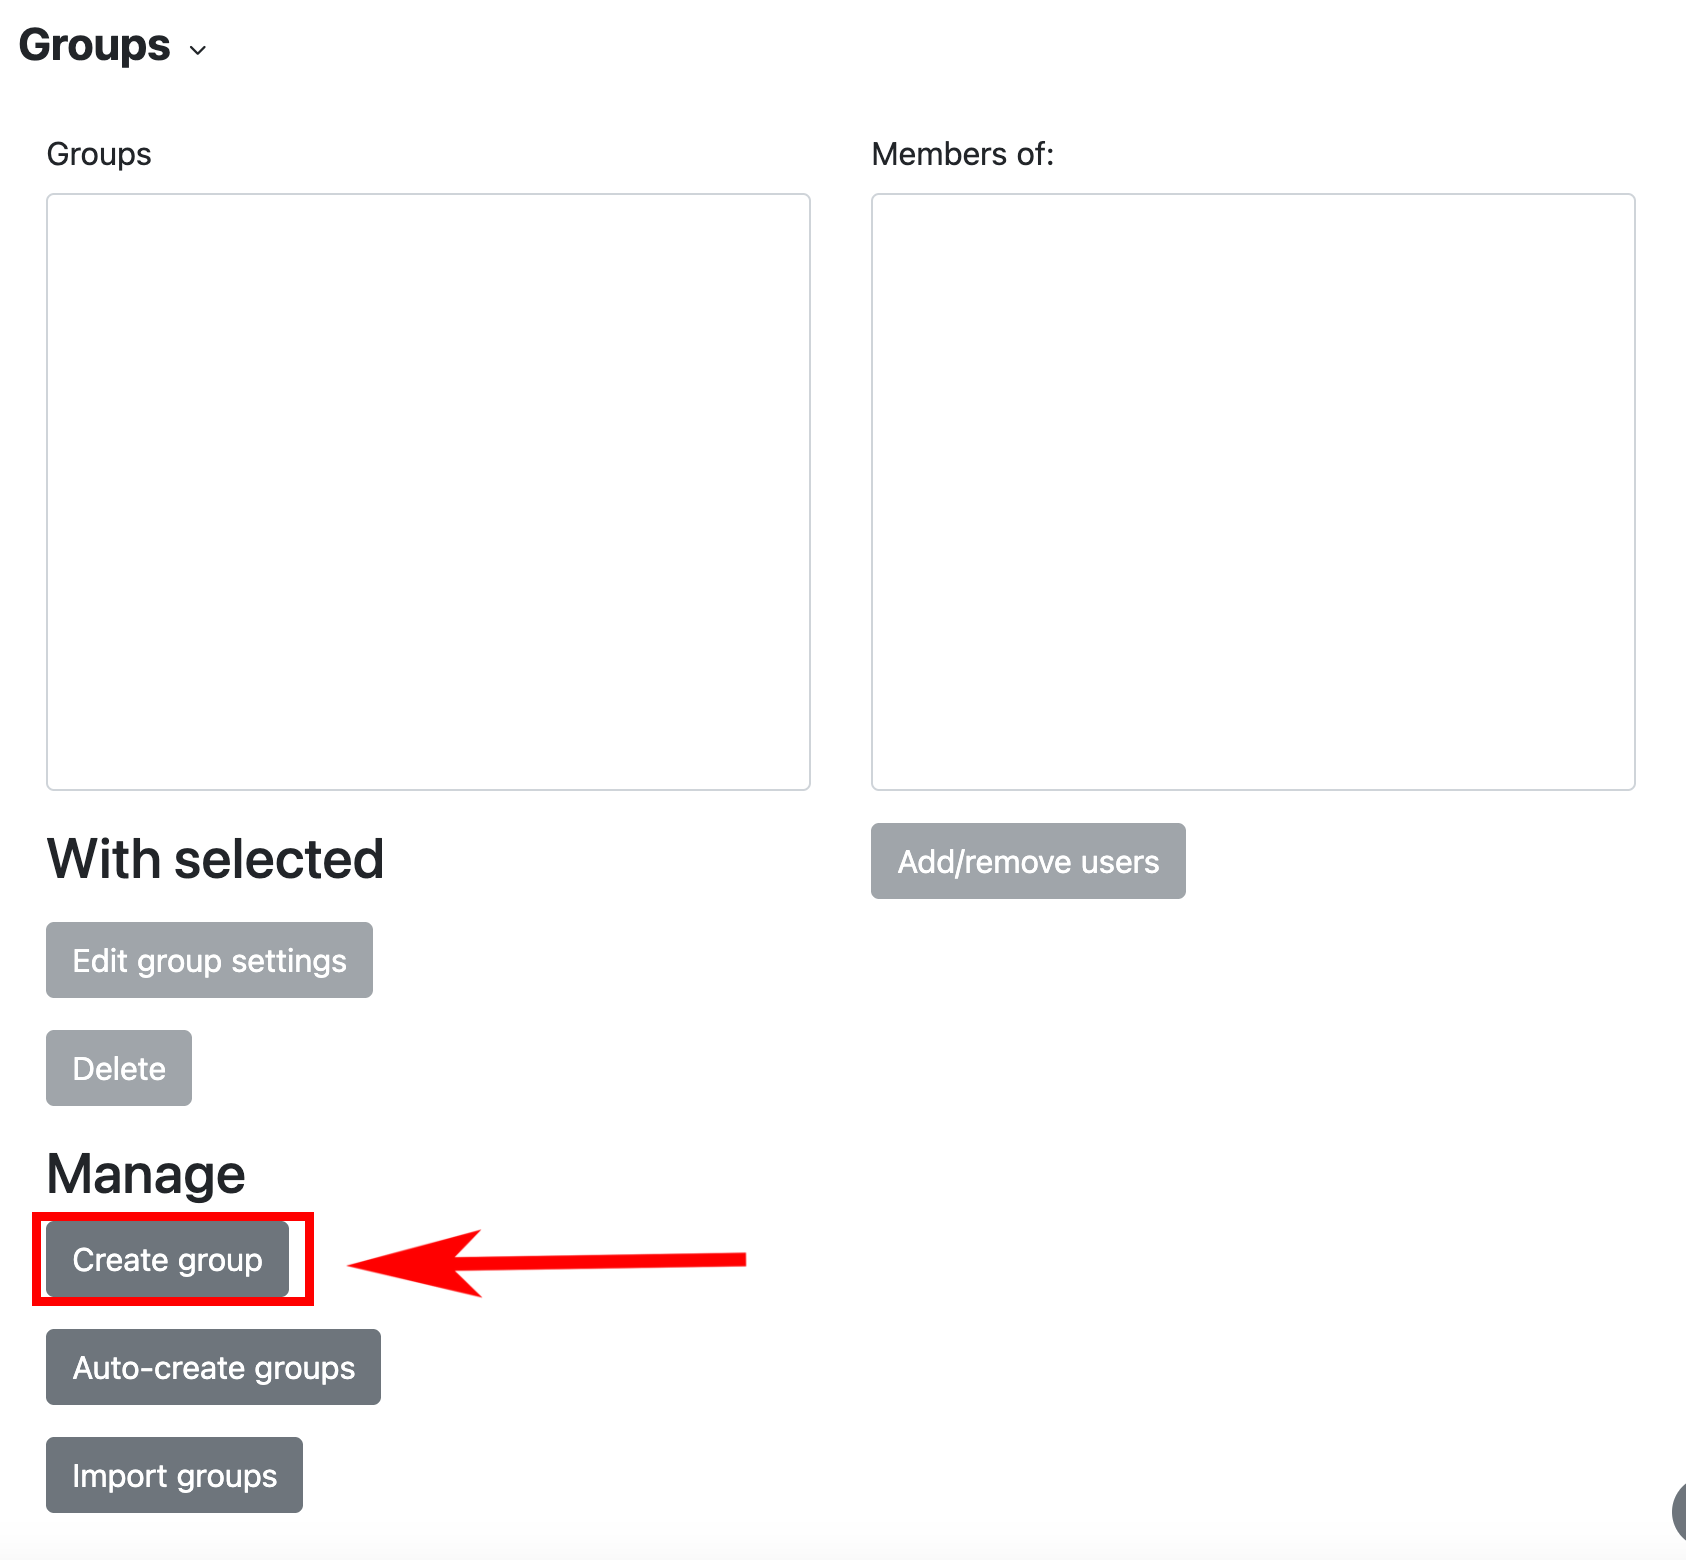
From here, click on the “Create Group” button.
Now you will create each of the groups before you can add students to them.
Type in the group name – (example ‘Group 1’ or the topic of the group’s project).
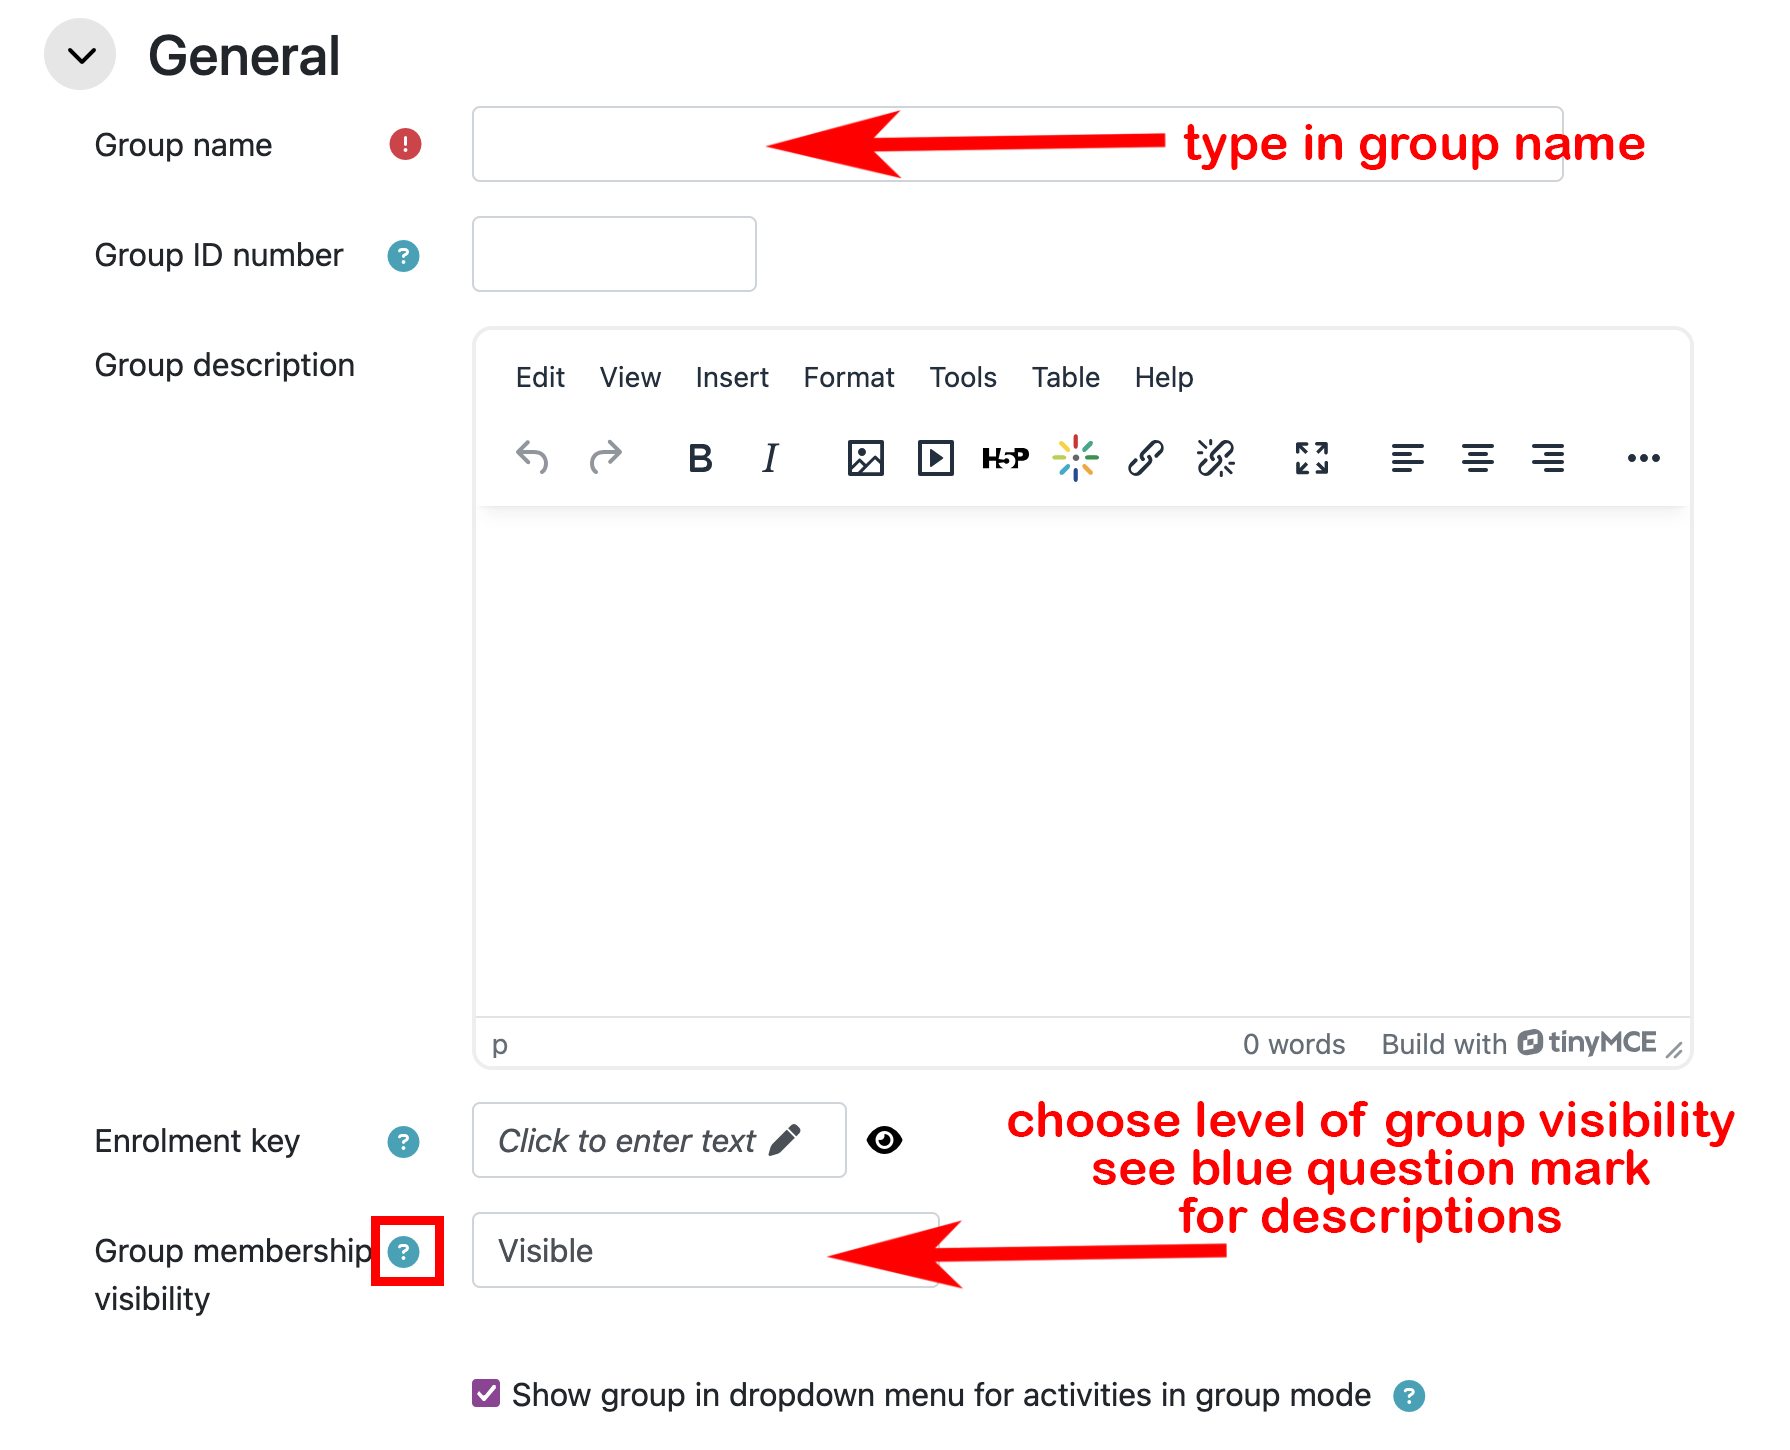
Choose the level of visibility you wish to have. Click on the blue question mark to see a description of each level.
Click on the “Save Changes” button to save the group.
Repeat to create all of the groups you want to have. (‘Group 1’, ‘Group 2’, ‘Group 3’).
Next, we will add students to each group.
- Select the group you wish to add students to.
2. Then click on the “Add/Remove users” button.
Select students to add to the group by clicking on their names. You can select multiple students at once by holding down the Control (Windows) or Command (Mac) key + clicking on the student’s names to highlight them.
Then click on the “Add” button to add them to the group.
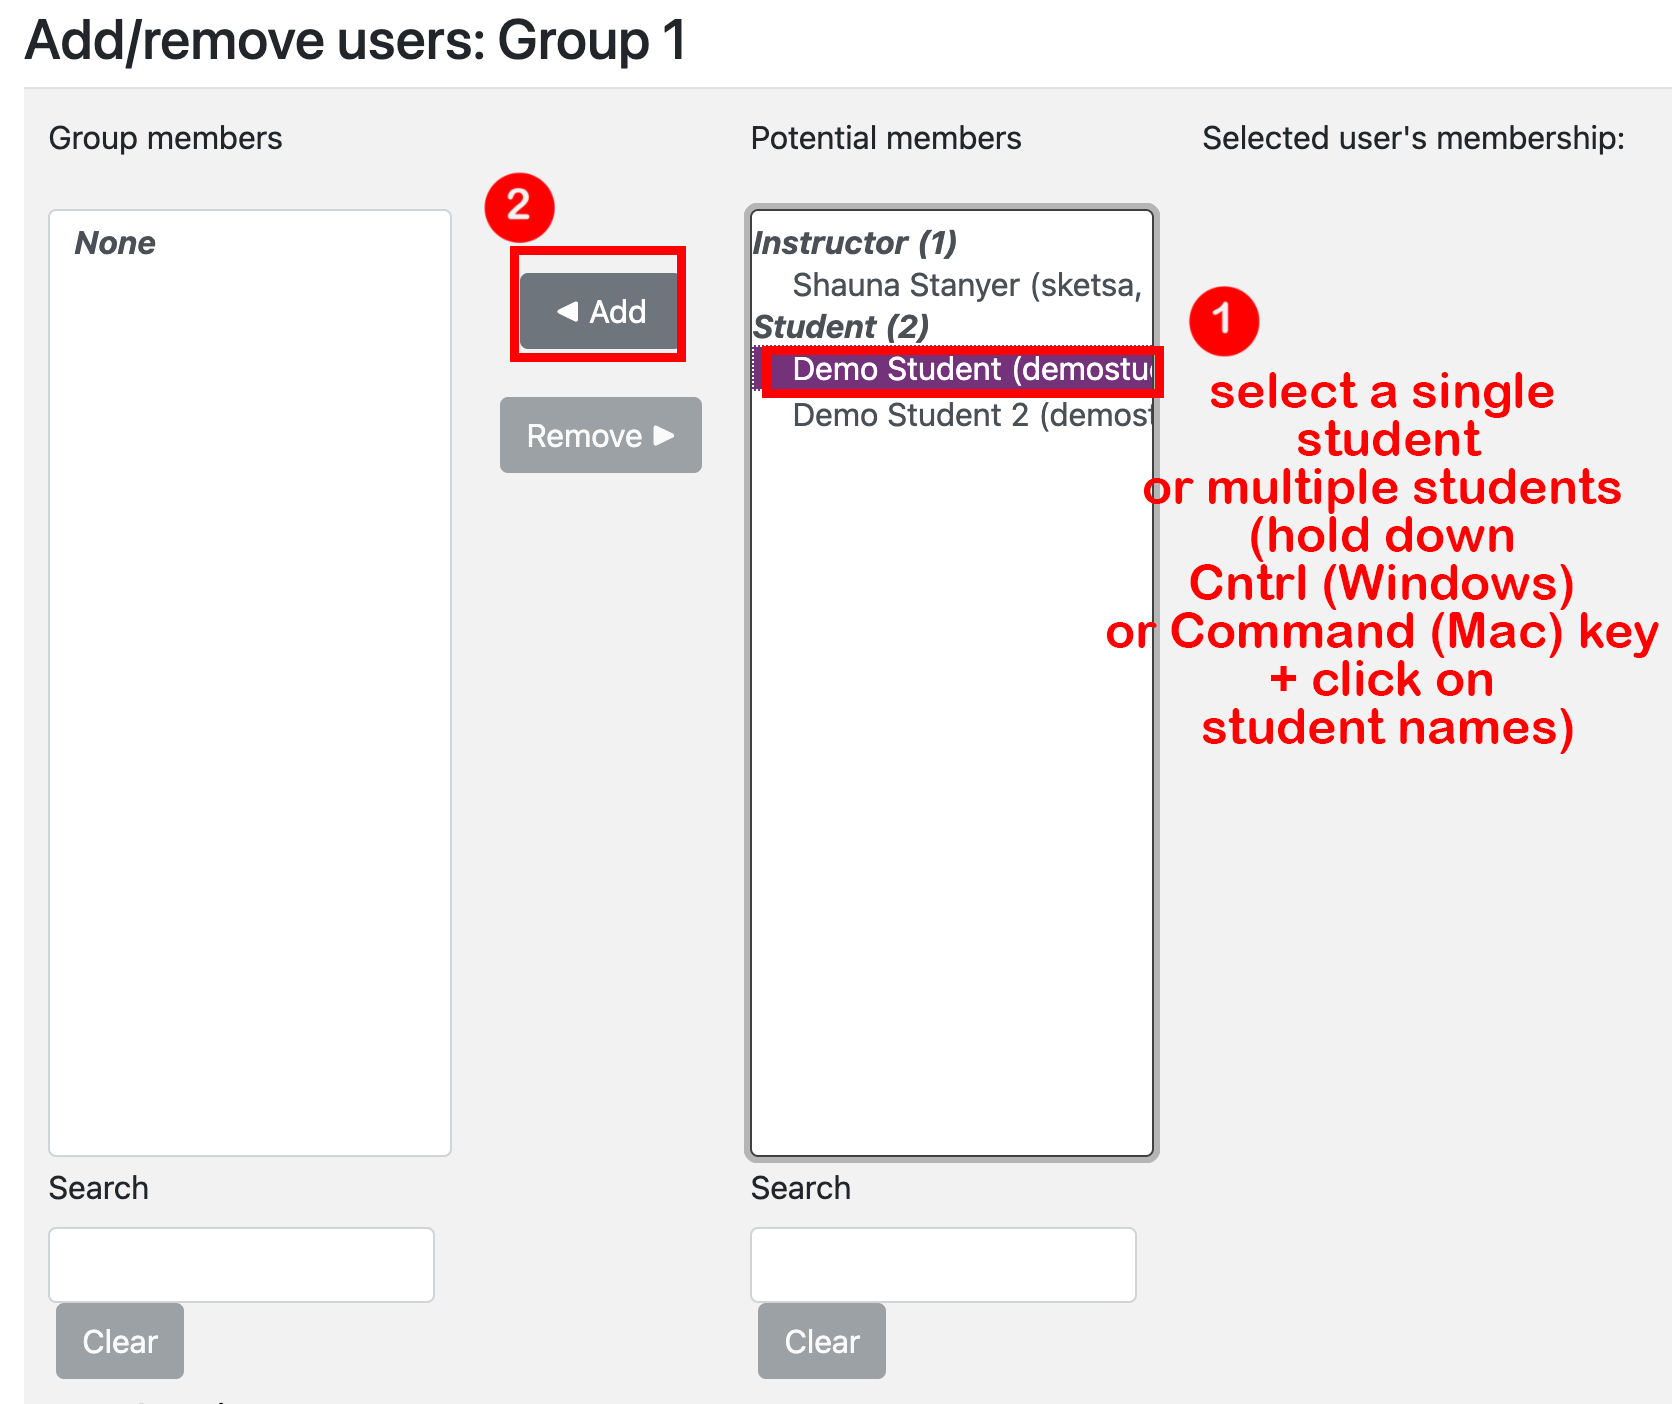
This will move the student names to the left hand box.
Click on “Back to Groups” button to return to the Groups list.
![]()
Click on the next group and add students to it the same way as above until all the groups have members.
Auto-Create Groups
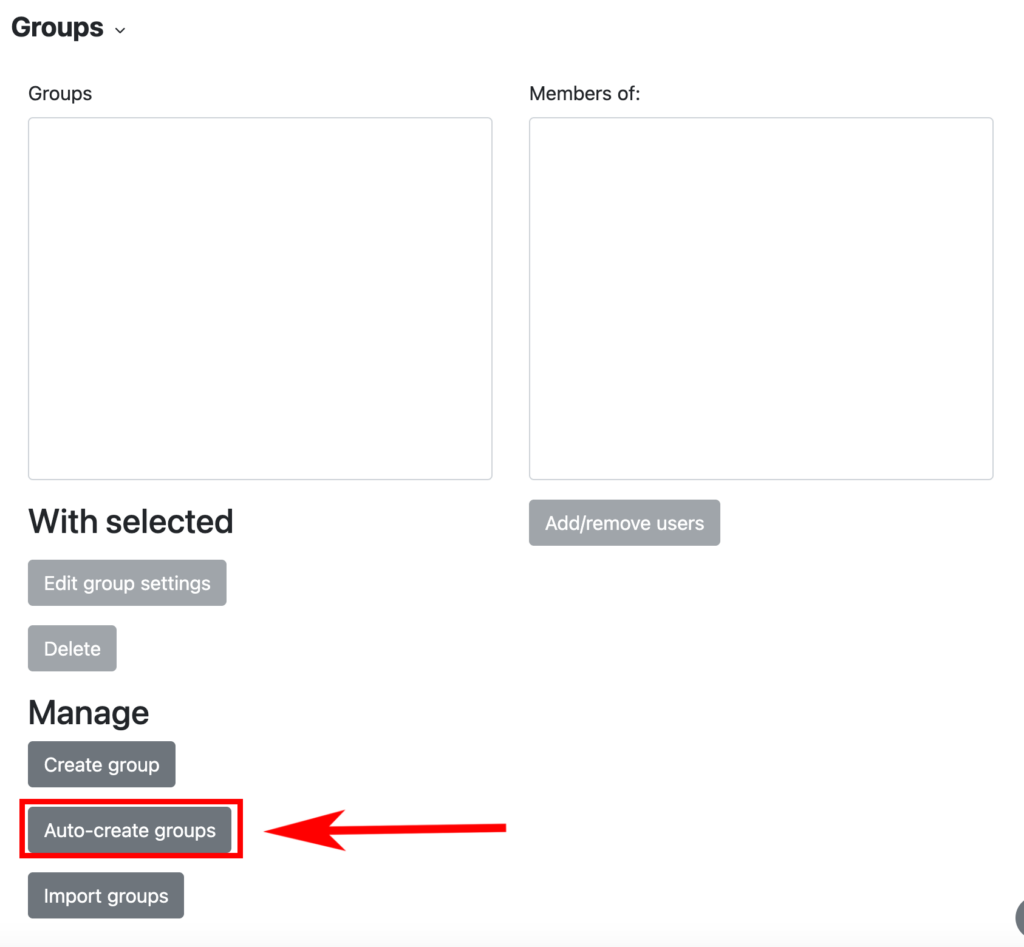
Go to the Participants section of the course tabs, and choose “Groups” from the drop down menu.
If you would like to automatically create randomized groups of students, you can do this by clicking on the Auto-Create Groups button:
Fill in the group name, select how the groups should be created (by number of groups or by number of students in each group).

Prevent Last Small Group: When selecting Members Per Group, depending on the number of users in the course, the last group can end up with significantly fewer members than expected. You can select Prevent Last Small Group to avoid the situation. If the last group would be smaller than 70% of the expected size, it will not be created and Moodle will automatically allocate additional members to existing groups rather than create a new group with few members.
Enabling Group Assignment Submissions
If using groups for assignment submissions, please contact your CTLT Instructional Designer and we can assist with the set up. This should be done before there are any submissions to the Assignment dropbox occur because Moodle will not allow changes to the Assignment group settings once there are student submissions.
Moving a students from one group to another (Participant list method)
You can quickly add and remove students from existing groups using the Participants list section of the course. Under the Groups column, you will see any groups that a student belongs to.
This is a great way to quickly tell if any recently-registered students are not in a group yet and to add them to one.
Click on the Participants tab, and then click on the tiny pencil to edit the student’s group status.
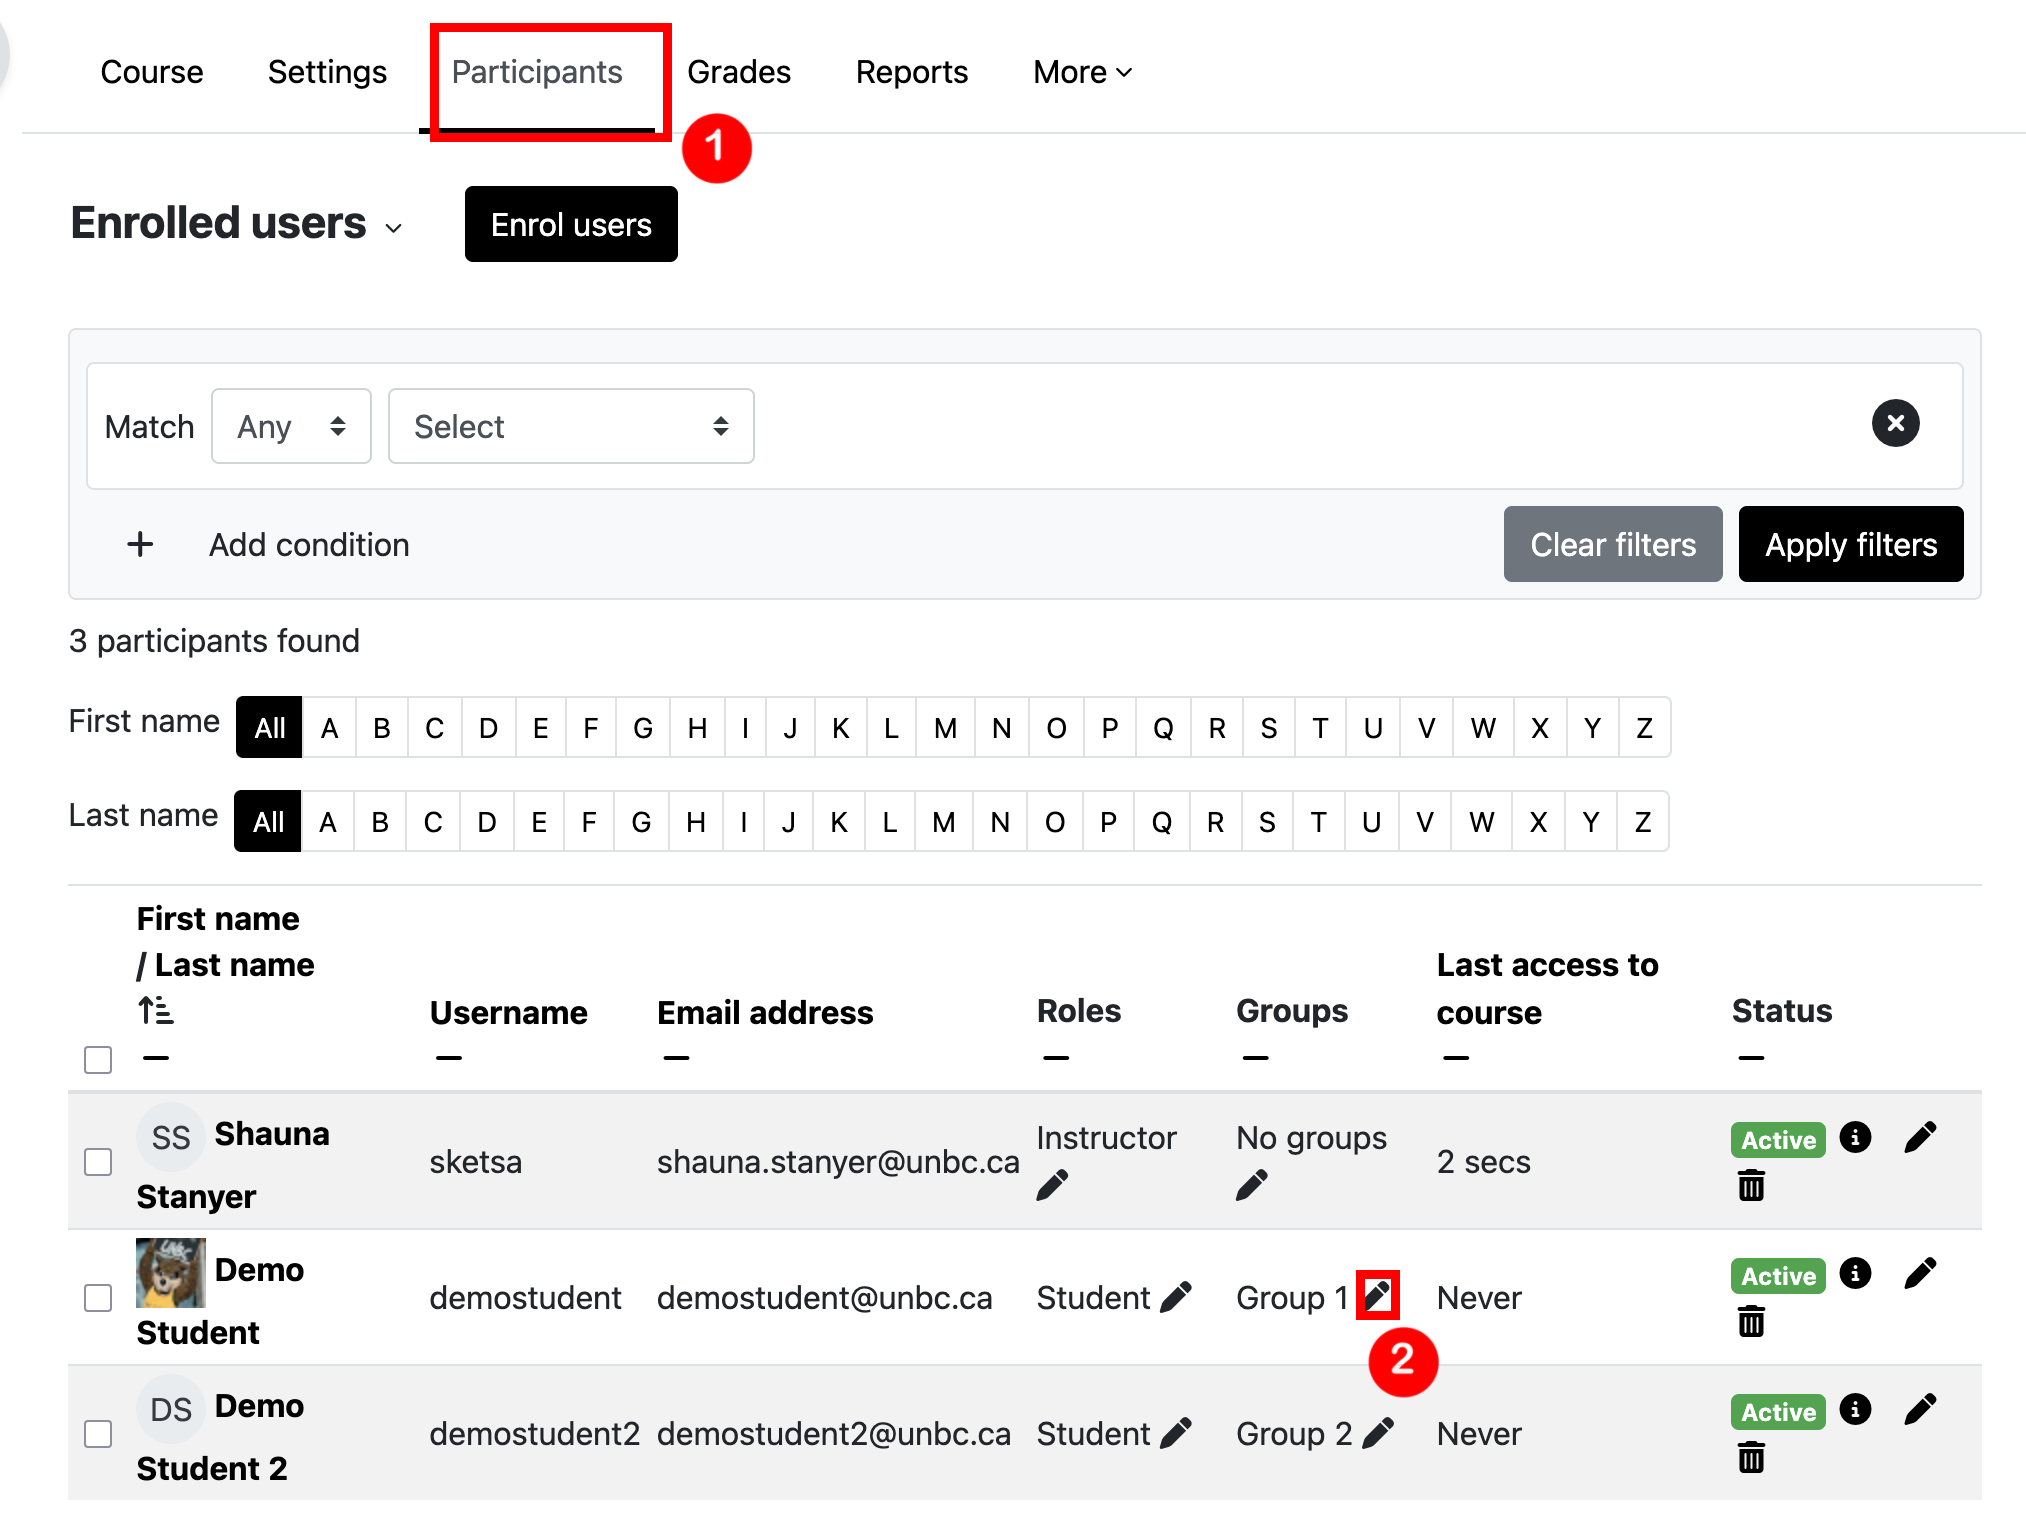
Click on the X to remove a student from a group. Then use the drop down menu to select the new group you want to add them to.
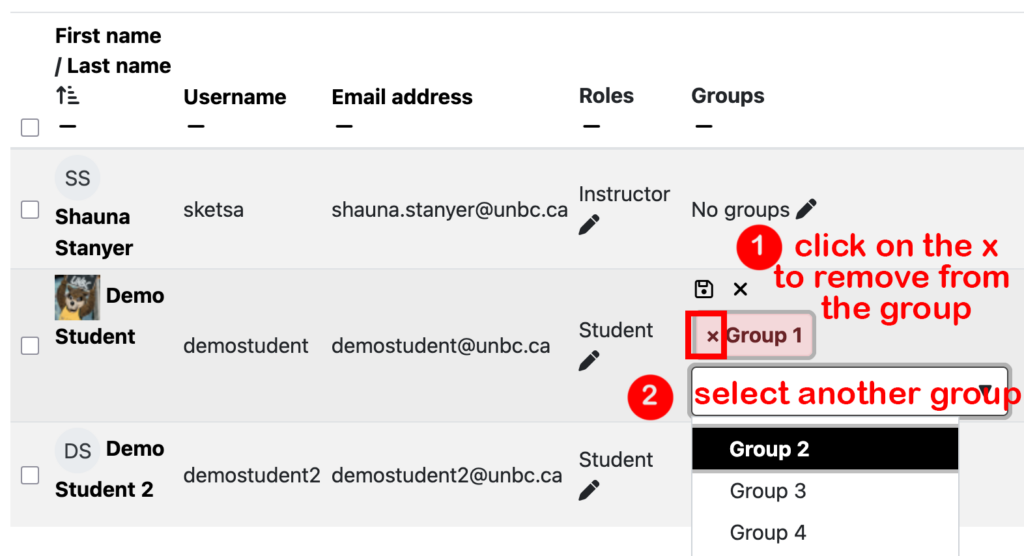
Click the save button to save changes.

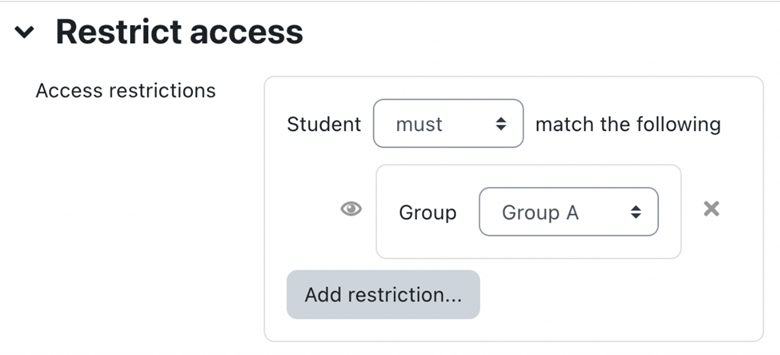
Restricting an Activity, Resource or Course Topic to a Particular Group
To be able to restrict an activity, resource or course topic to a group, Restrict Access must be enabled. This will result in a Restrict Access section in the Activity, Resource or topic settings and a Group Restriction can then be added.