Moodle Essentials: Structuring, Sharing, and Supporting Learning
Quizzes and Quiz Settings
What is the Quiz activity?

- The Quiz is a very powerful activity that can meet many teaching needs, from simple, multiple-choice knowledge tests to complex, self-assessment tasks with detailed feedback.
- Questions are created and stored separately in a Question bank and can be reused in different quizzes.
- When creating a Quiz you can either make the questions first and add them to the Quiz, or add a Quiz activity (as below) and create the questions as you go along.
You can use quizzes in Moodle to evaluate student understanding of material. Moodle quizzes consist of a Quiz activity that contain one or more questions from your course’s Question bank. The Quiz activity allows you to administer a wide range of questions within a specific layout and order and the quiz activity allows you to provide different kinds of feedback based on how a student performs on the quiz. We invite you to think creatively about using the quiz activity as it is a very powerful activity that can meet many teaching needs, from simple, multiple-choice knowledge tests to complex, self-assessment tasks with detailed feedback. Let’s take a look at a demo quiz that has many question types added to it.
- In a course, with the editing turned on, choose Quiz from the Add an activity or resource chooser.
- Give it a name and, if required, a description.
- Expand the other sections to select the settings you want. With the default settings, students can repeat the quiz, moving freely between questions, each on a different page. There is no time limit and scores and feedback display once they have completed the quiz.
- To change any of these defaults, and for more information on configuring your quiz go to Settings. Select your exam settings.
- Click Save and display.
- Click Edit quiz
- Click Add and then click ‘+ a new question’ (If you already made questions in the question bank, then click ‘+ from question bank‘ or if you wish to add a question randomly picked from a category of questions, click ‘+ a random question’.)
- Choose the type of question you want to add and then click ‘Add’ at the bottom:
- Add your question. For help, see the documentation Question types.
- Cick Save changes and repeat the steps for as many questions as you need.
- Click ‘Save changes’ when you have made your question.
Question Types
There are an array of question types in https://moodle.unb
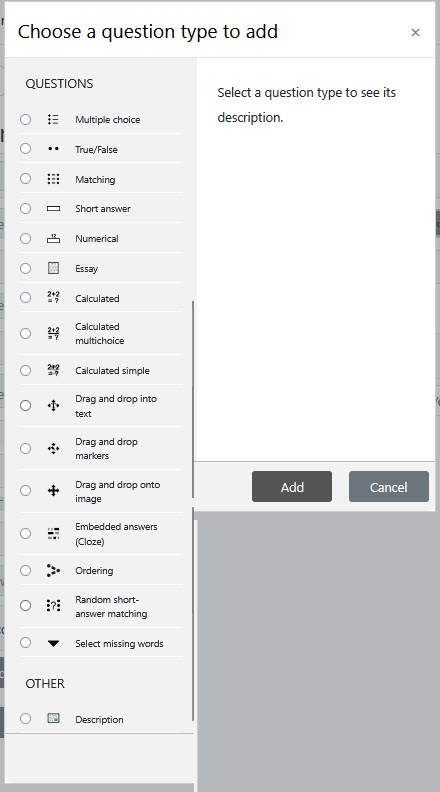
c.ca. You are presented with this list when you create a new question. Descriptions of these questions types are outlined below.
Calculated
Calculated questions offer a way to create individual numerical questions by the use of wildcards that are substituted with individual values when the quiz is taken. More on the Calculated question type
Calculated multi-choice
Calculated multichoice questions are like multichoice questions with the additional property that the elements to select can include formula results from numeric values that are selected randomly from a set when the quiz is taken. They use the same wildcards than Calculated questions and their wildcards can be shared with other Calculated multichoice or regular Calculated questions.
The main difference is that the formula is included in the answer choice as {=…} i.e. if you calculate the surface of a rectangle {={l}*{w}}.
More on the Calculated Multi-Choice question type.
Calculated simple
Simple calculated questions offer a way to create individual numerical questions whose response is the result of a numerical formula which contain variable numerical values by the use of wildcards (i.e. {x} , {y}) that are substituted with random values when the quiz is taken.
The simple calculated questions offers the most used features of the calculated question with a much simpler creation interface. More on the Simple Calculated question type.
Drag and drop into text
Students select missing words or phrases and add them to text by dragging boxes to the correct location. Items may be grouped and used more than once. More on the Drag and drop into text question type.
Drag and drop markers
Students drop markers onto a selected area on a background image.Unlike the Drag and drop onto image question type, there are no predefined areas on the underlying image that are visible to the student. More on the Drag and drop marker question type.
Drag and drop onto image
Students make selections by dragging text, images or both to predefined boxes on a background image. Items may be grouped. More on the Drag and drop onto image question type.
Description
This question type is not actually a question. It just prints some text (and possibly graphics) without requiring an answer. This can be used to provide some information to be used by a subsequent group of questions, for example. More on the Description question type
Essay
This allows students to write at length on a particular subject and must be manually graded.
It is possible for a teacher to create a template to scaffold the student’s answer in order to give them extra support. The template is then reproduced in the text editor when the student starts to answer the question. See YouTube video Essay scaffold with the Moodle quiz It is also possible to include grading information for teachers marking the essay to refer to as they assess the essays,
|
Response template and grader info set up |
What the student sees |
What the teacher sees |


Matching
A list of sub-questions is provided, along with a list of answers. The respondent must “match” the correct answers with each question. More on the Matching question type
Embedded Answers (Cloze Test / Gap Fill)
These very flexible questions consist of a passage of text (in Moodle format) that has various answers embedded within it, including multiple choice, short answers and numerical answers. More on the Embedded Answers question type
Multiple choice
With the Multiple Choice question type you can create single-answer and multiple-answer questions, include pictures, sound or other media in the question and/or answer options (by inserting HTML) and weight individual answers.
Short Answer
In response to a question (that may include an image), the respondent types a word or phrase. There may several possible correct answers, with different grades. Answers may or may not be sensitive to case. More on the Short Answer question type
Numerical
From the student perspective, a numerical question looks just like a short-answer question. The difference is that numerical answers are allowed to have an accepted error. This allows a continuous range of answers to be set. More on the Numerical question type
Random short-answer matching
From the student perspective, this looks just like a Matching question. The difference is that the sub-questions are drawn randomly from Short Answer questions in the current category. More on the Random Short-Answer Matching question type
Select missing words
Students select a missing word or phrase from a dropdown menu. Items may be grouped and used more than once. More on the Select missing words question type
True/False
In response to a question (that may include an image), the respondent selects from two options: True or False. More on the True/False question type
Ordering: More on Ordering Questions
Timing
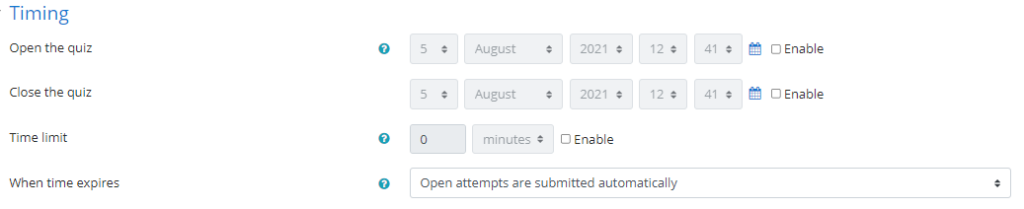
Open the quiz and Close the quiz: Specify starting and ending dates/times for the Quiz. To use these settings, select the Enable checkbox next to each setting. The date settings will become editable. By default the open date and close date are not set and the quiz will be available immediately and indefinitely.
Time limit: Enable this option to limit how long each student will have to complete the Quiz once they begin an attempt. By default students have an unlimited time in which to complete a Quiz attempt. If a time limit is set, when a student starts an attempt a timer appears in the Quiz navigation block and begins counting down.
When time expires: If you have set a time limit there are three options as to what will happen when the time limit is up. Choose the one you need from the drop-down menu:
- Open attempts are submitted automatically (This is the default).
- There is a grace period when open attempts can be submitted, but no more questions answered.
- Attempts must be submitted before time expires, or they are not counted.Note
Note:
We recommend the default setting “Open attempts are submitted automatically” . If there is a power outage, issues with the internet, or the student forgets to click the Submit button the quiz will submit itself and the students attempt will not be lost. Please see User overrides to allow extra time for students with accommodation requests.
Grade
Grade category: If you are organizing your gradebook with Categories, select the category for the quiz. (Categories must first be added in the gradebook.)
Attempts allowed: Specify how many attempts an individual student can make on the quiz. By default, only one attempt is allowed.
Grading method: If multiple attempts are allowed, specify how students will be graded: Highest grade, Average, First attempt, or Last attempt.
Note:
Setting the maximum grade is done on the Edit quiz page.
Layout

New page: For longer quizzes it makes sense to stretch the quiz over several pages by limiting the number of questions per page. When adding questions to the quiz, page breaks will automatically be inserted according to the setting you choose here. However, you will also be able to move page breaks around by hand later on the editing page. We do not recommend the option Never, all questions on one page as the quiz saves when the students click the Next button. Note
Note
Changing this setting has no effect on questions you have already added to the quiz. The setting will only apply to questions you add subsequently. To change the page breaks in an existing quiz, you need to go to the quiz editing screen, tick the ‘Show page breaks’ checkbox, then use the repaginate control.
Navigation method (available by clicking Show More): Choose Sequential instead of Free, if you want to force the student to progress through the questions in order and not go back to a previous question or skip to a later one.
Important
Please inform your students and remind them often if you choose sequential navigation. This is not user friendly and generally throws students off when they are not informed ahead of time.
Question Behaviour
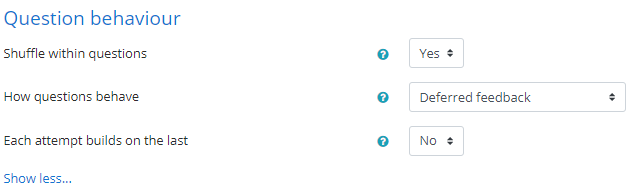
Shuffle within questions: This setting applies to questions that have multiple parts. For example, in a multiple choice question, this setting will randomly shuffle the answers for choices A, B, C, D, etc, so that the correct answer will be in a different location for each attempt.
Note
If you have options such as All of the above or Both A and B this setting must be set to No. Students will be faced with answer sets that do not make sense, for example, All of the above may appear as option A.
How questions behave: Students can interact with the questions in the quiz in various different ways. For example, you may wish the students to enter an answer to each question and then submit the entire quiz, before anything is graded or they get any feedback. That would be ‘Deferred feedback’ mode (most commonly used). Alternatively, you may wish for students to submit each question as they go along to get immediate feedback, and if they do not get it right immediately, have another try for fewer marks. That would be ‘Interactive with multiple tries’ mode.
Each attempt builds on the last: If multiple attempts are allowed and this setting is enabled, each new quiz attempt will contain the results of the previous attempt. This allows a quiz to be completed over several attempts.
Review Options
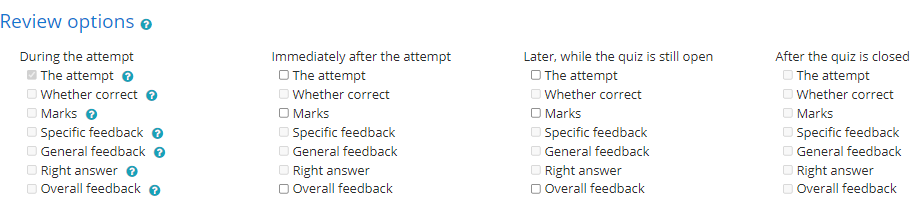
During the Attempt: options are only available when How questions behave (above) has been set to a mode that provides immediate feedback, in which case a checkbox will appear below each answer allowing the student to submit that response and then receive immediate feedback.
Immediately after the attempt: allows students to see feedback within 2 minutes of submitting the quiz.
Later, while the quiz is still open: allows students to see feedback after 2 minutes, but only until the closing date for the Quiz. If the Quiz does not have a close date, this phase never ends.
After the quiz is closed: Students will see feedback only after the quiz is closed (requires a date to be set for the close of the quiz).
Under each column heading, select the feedback you want students to receive:
The attempt: Shows what the student entered in response to each question.
Whether correct: Displays whether or not the student’s response to each question is correct.
Marks: Shows the numerical marks the student received for each question and the overall score on the attempt.
Specific Feedback: Shows feedback specific to the student’s response. This text must be added by the instructor in the individual question settings.
General feedback: Shows feedback for the question, not dependent on how the student answered the question. The same general feedback text is shown to all students. It can include links to resources for further study. This text must be added by the instructor in the individual question settings.
Right answer: Shows an automatically generated summary of the correct response. This can be limited, so you may wish to consider explaining the correct solution in the general feedback for the question, and turning this option off.
Overall feedback: Shows the overall feedback for the entire attempt, i.e. for the whole Quiz. This is configured further below.
Appearance
Show the user’s picture: If enabled, the student’s name and picture will be shown on-screen during the attempt, and on the review screen. This option is not enabled in UNBC’s Moodle.
Decimal places in grades: This setting specifies the number of digits shown after the decimal point when displaying grades. It only affects the display of grades, not the grades stored in the database, nor the internal calculations, which are carried out to full accuracy.
Decimal places in question grades: This setting specifies the number of digits shown after the decimal point when displaying the grades for individual questions.
Extra Restrictions on Attempts
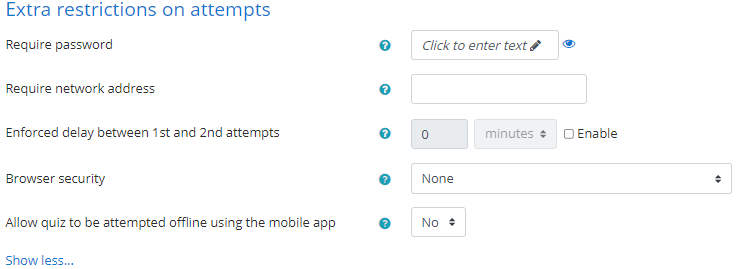
Require password: If you specify a password students must enter that password to attempt the quiz. Type the password to utilize this feature. To see the password, check the Unmask “eye”.
Require network address enables instructors to restrict access to the quiz to certain locations using IP addresses. To restrict access to the quiz, specify a comma-separated list of IP addresses.
Note
Requiring network address is not recommended for take home or in class exams as you will not know the IP address of each students device.
Enforced delay between 1st and 2nd attempts. If 2 attempts are enabled, a student must wait for the specified time to elapse before being able to attempt the quiz a second time.
Enforced delay between later attempts. If more than 2 attempts are enabled, a student must wait for the specified time to elapse before attempting the quiz a third time and any subsequent times.
Overall Feedback

This is uniform feedback that is shown to students after a quiz has been attempted, based on their grade boundary.
Grade boundary boxes define the boundary for a certain feedback. To specify a boundary, enter a percentage value (including the % sign).
Feedback boxes define the feedback for each grade boundary. To specify the feedback, enter your text.
For example, if you entered:
Grade boundary: 100%
Feedback: “Well done”
Grade boundary: 40%
Feedback: “Please study this week’s work again”
Grade boundary: 0%
Then students who score between 100% and 40% will see the “Well done” message, and those who score between 39.99% and 0% will see “Please study this week’s work again”. That is, the grade boundaries define ranges of grades, and each feedback string is displayed to scores within the appropriate range.
Common Module Settings
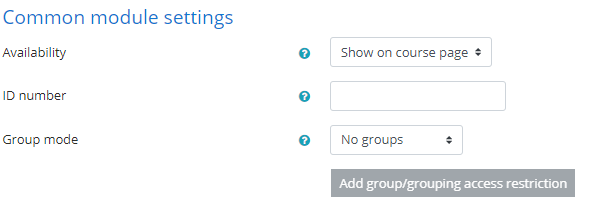
Visible: Set whether or not an assignment is visible to students. By default, new assignments are set to Show. (This is comparable to using the Hide/show icon for the activity on your course page.)
Group mode, Grouping, Students are not able to take “group” quizzes. If you set the group mode to separate groups or visible groups you will be able to filter the quiz attempts by group.
Restrict Access
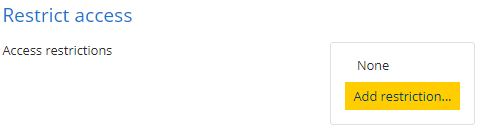
To add restrictions on accessing the activity, click Add restriction. The Add restriction window will open, containing the following options:
- Date prevents access until (or from) a specified date and time.
- Grade requires students to achieve a specified grade on a different grade item in order to access this quiz.
- User profile controls access based on fields within the student’s profile.
- Restriction set allows you to add a set of nested restrictions to apply complex logic.
Frequently Asked Questions
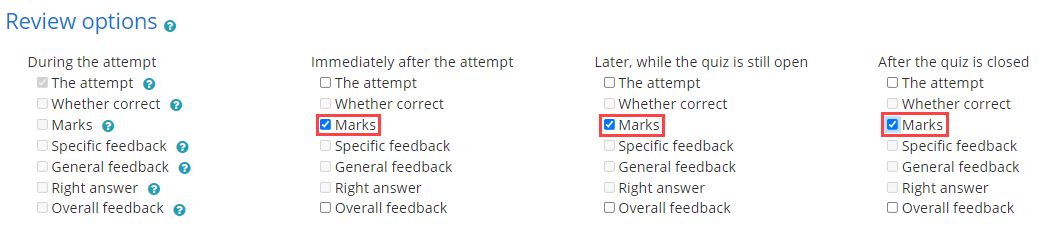
Why can’t students see their marks?
Check the quiz Review options settings.
To do this, click on the quiz, then the blue cog in the right corner and select Edit settings. Next, under the Review options heading look at the sub sections (During the attempt, Immediately after the attempt, Later while the quiz is still open or After the quiz is closed) and check off the box next to “Marks” where you would like your students to be able view their marks in relation to this quiz. Most often the quiz has closed and “marks” is not checked in the After the quiz closed column!
Can Students Preview A Quiz?
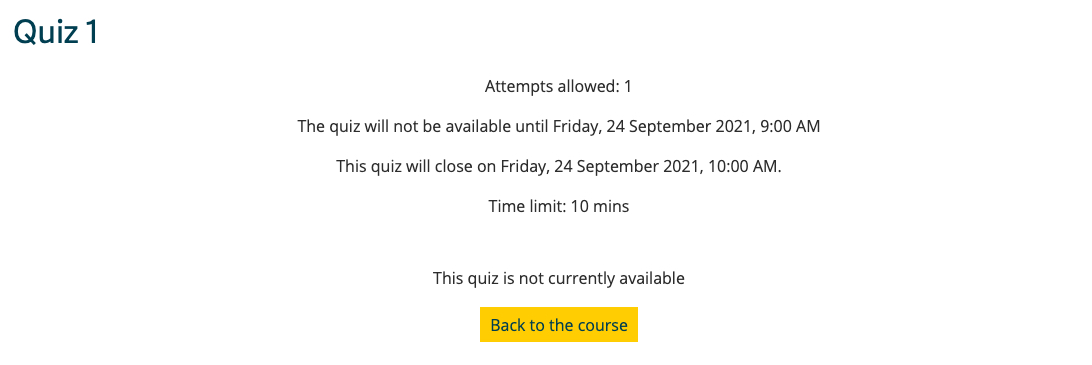
No, students cannot preview a quiz. The Preview quiz now button is only displayed to users enrolled as a teacher. When students click on a quiz to open it they are presented with text that tells them that the quiz is not available to them. Moodle provides valuable information regarding when the quiz will be available to them and for how long. Students are presented with a Back to course button that automatically changes to Start attempt when the quiz opens.
