Media, webconferencing, and lecture recording
Kaltura Meetings: Upload and Share Files
Upload Files To Share
Upload files to your Kaltura Live Room classroom then share them with your session participants.
Which formats can be uploaded?
- Presentations — PPT, PPTX
- Video — MP4, MOV, AVI, WMV
- Image — PDF, PNG, JPG
- Document — DOC, DOCX
- Spreadsheet — XLS, XLSX
- Audio — MP3
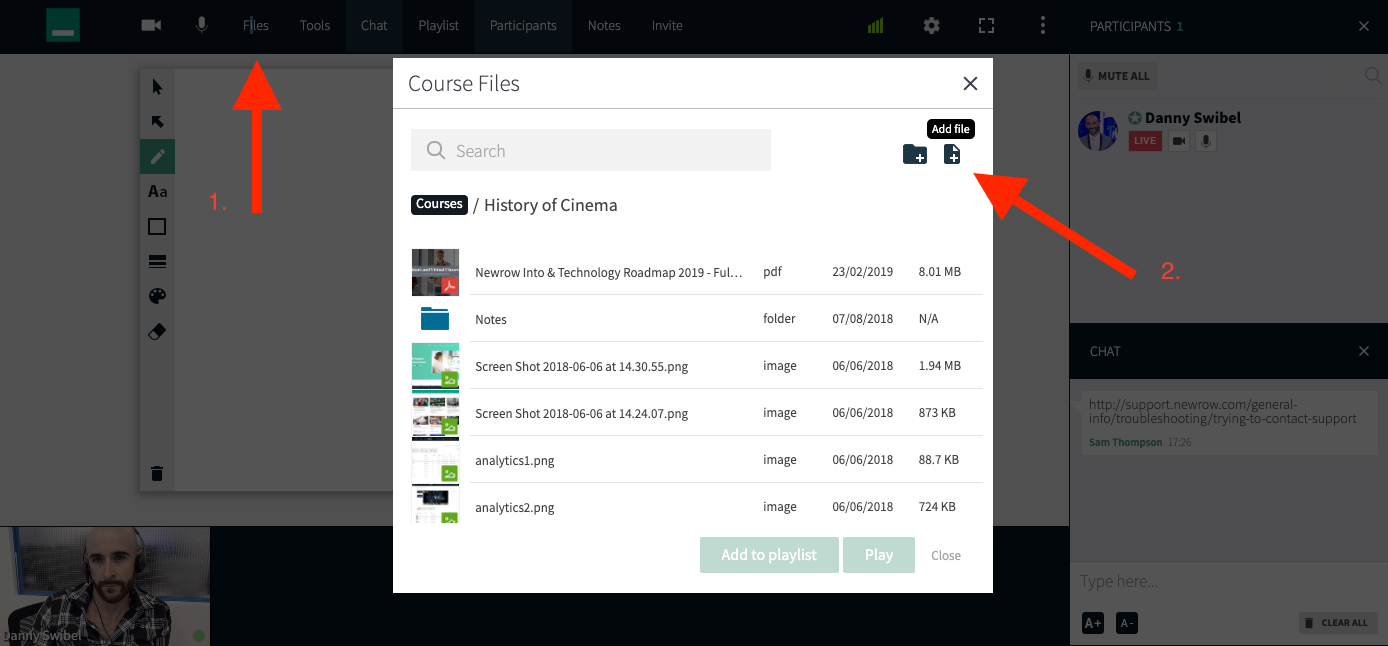
Adding Files/Content
- Click Files in the upper bar.
- Click the Add File button to launch your local file browser.
- Select the file/s you want to upload.
- Click the confirmation button (Ok/Open/etc…).
The files are uploaded directly to the current folder you are in.
💡Utilize shift+click or command+click to select multiple files to upload at one time.
Drag-and-Drop Files/Content
Drag-and-drop files directly from your desktop to upload files.
- Click and drag file from your desktop.
- Drop the file in the dashed line box to upload it to the current folder.
💡To upload a file to a specific folder, drag the file to the folder. When the folder is highlighted in blue drop the file. You are redirected to the folder and the file is uploaded there.
Play or Share Your Uploaded Files
Play A File From Files
- Click Files.
- Navigate your cloud storage and select a file you want to share.
- Click Play.
💡By default, all microphones are disabled while a video is being played in the room. This is to prevent echoes caused by participants’ speakers being streamed back into the room. Microphones are re-enabled automatically when the video is paused or stopped.
The microphone settings may be configured both through the room settings menu or at the company level by Kaltura’s backend.
💡The file you launch, whether a video, PowerPoint presentation or any other file, will be viewed by everyone simultaneously in the live session.

Play A File From Your Playlist
-
Navigate to the playlist.
-
Select the file you want to play to display it on stage.
Prepare Your Playlist
Save time finding files during your session by using playlist to organize your files ahead of time. You can add up to 50 items to your playlist at a time.
Add Uploaded Files To Your Playlist
- Click Files.
- Click the Add File button and/or select the file/s you want to share in the live session.
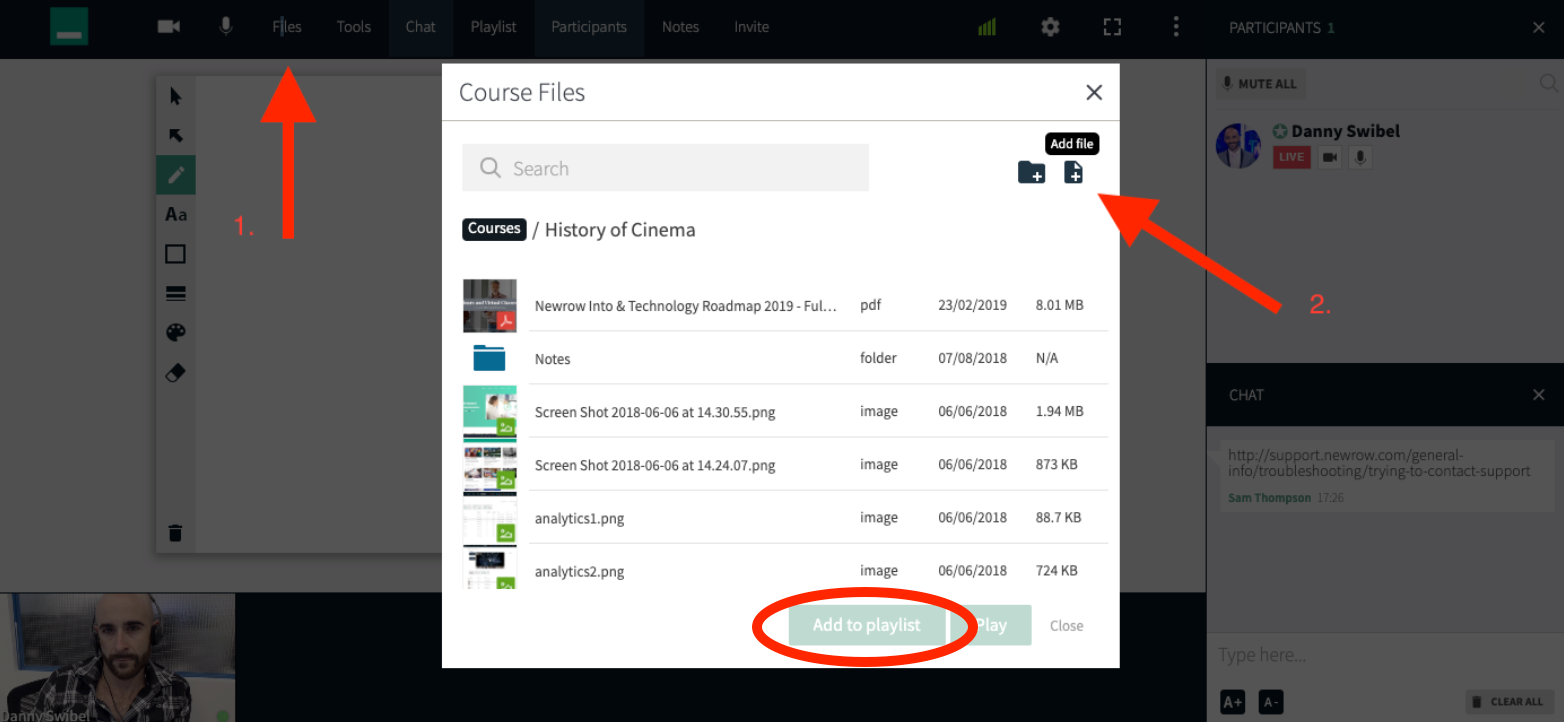
- Click the Add To Playlist button.
💡You are limited to 50 items on the playlist at once. The Add to playlist button will be grayed out or not clickable if you are already at 50. Remove items from the playlist to free up space.
💡Use “Control + Click”, “Command + Click”, or “Shift + Click” to select multiple files at one time.
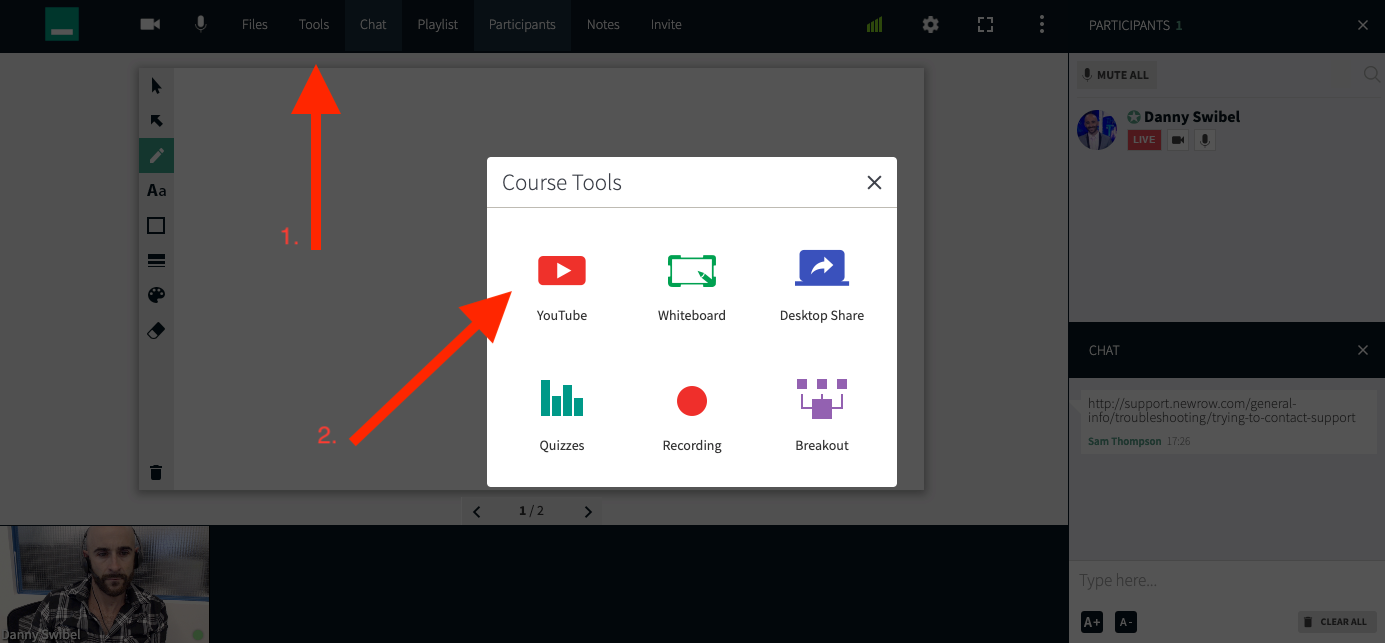
Add YouTube Videos To Your Playlist
- Click Tools.
- Select YouTube.
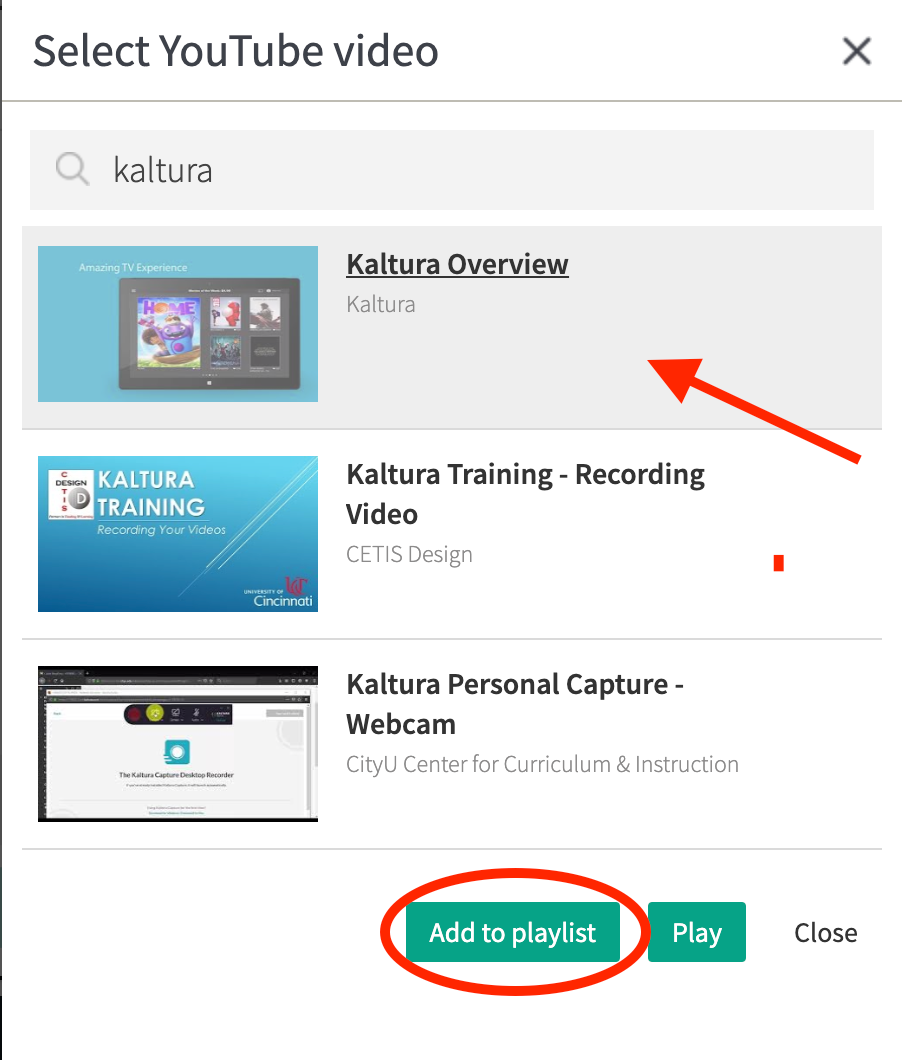
- Search for and select the YouTube videos you want to share.
- Click the Add To Playlist button.
Tip: Use “Control + Click”, “Command + Click”, or “Shift + Click” to select multiple files at one time.
Add My Media/Gallery Videos To Your Playlist
- Click Tools.
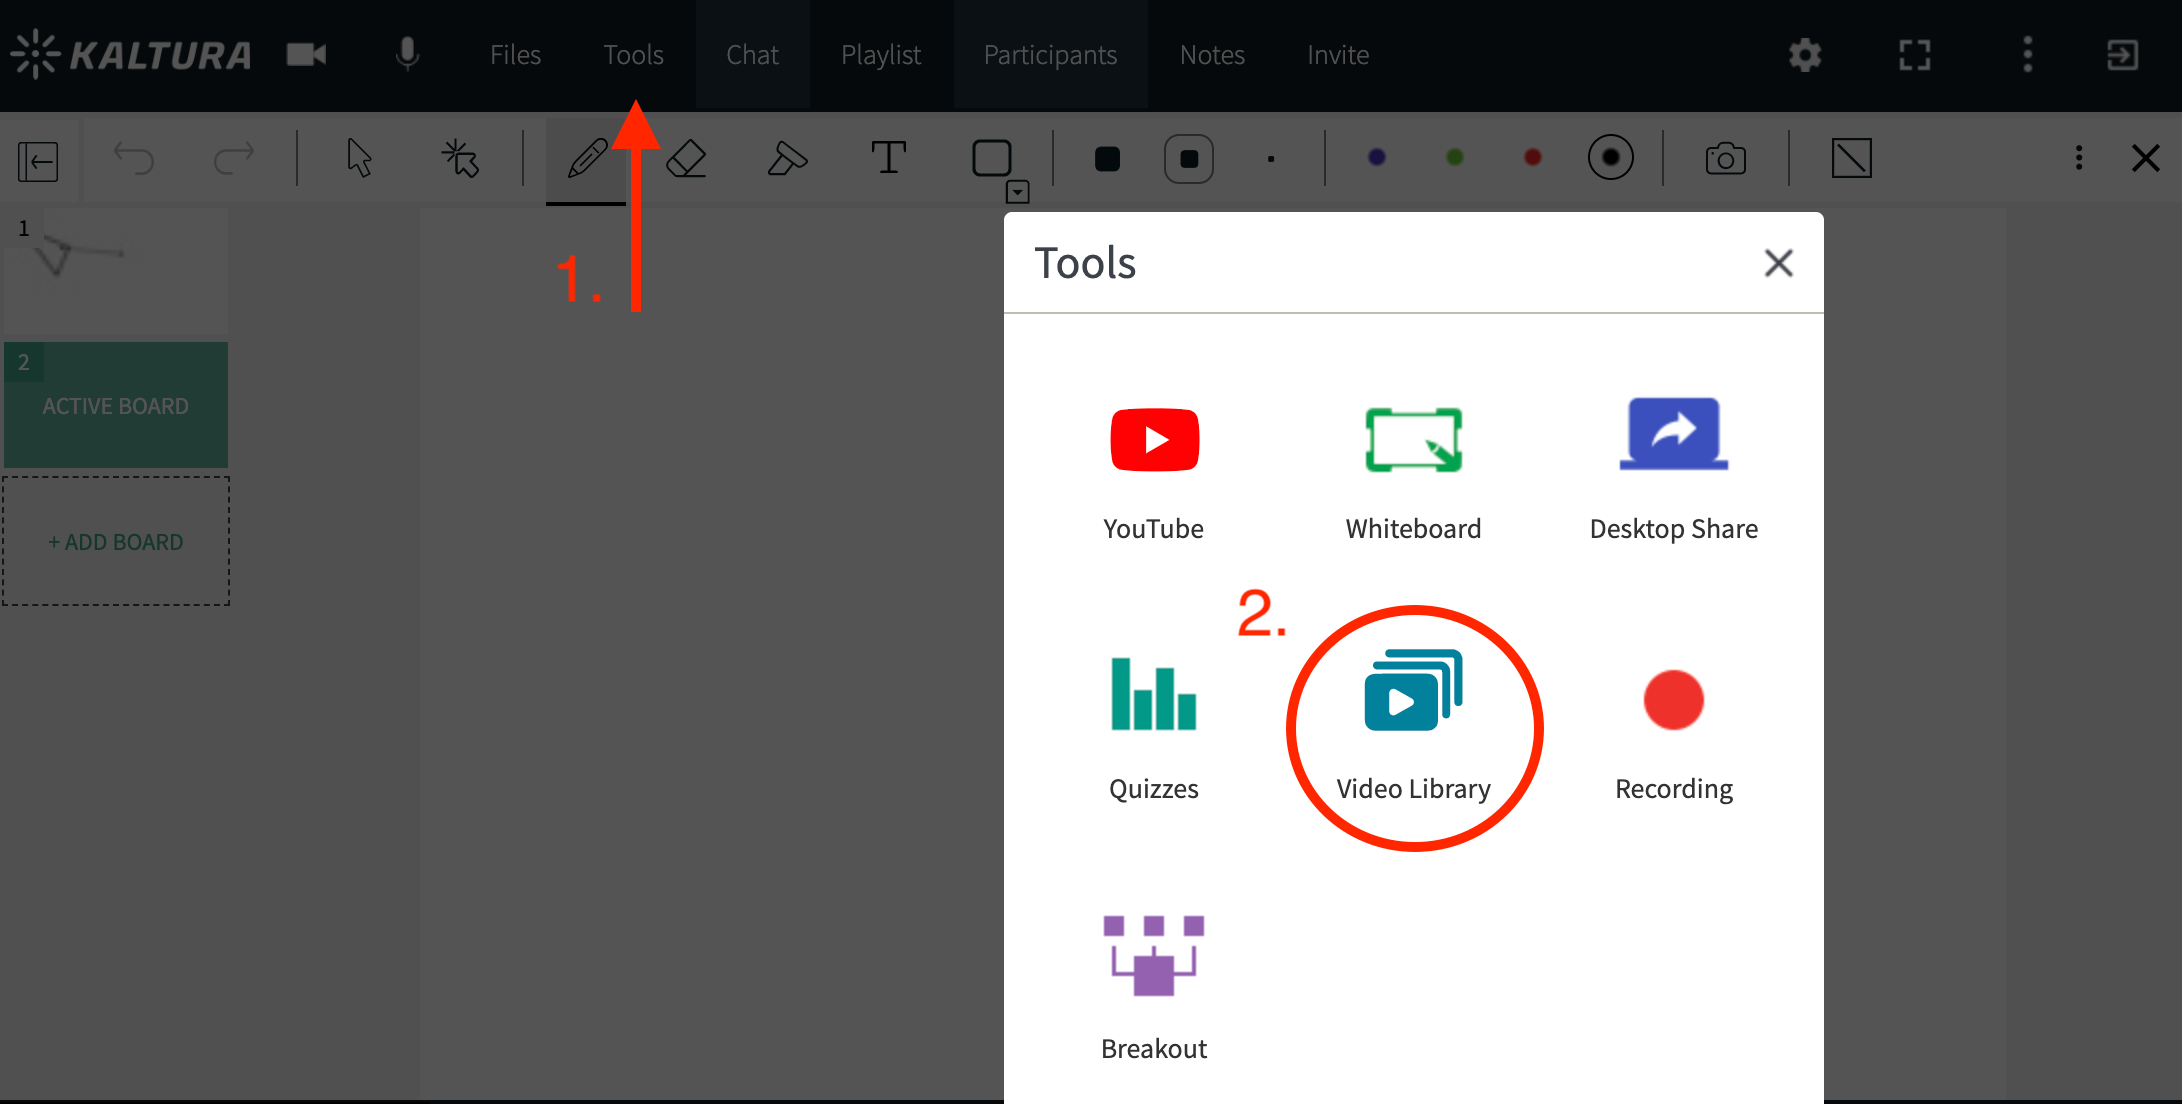
- Select Video Library.
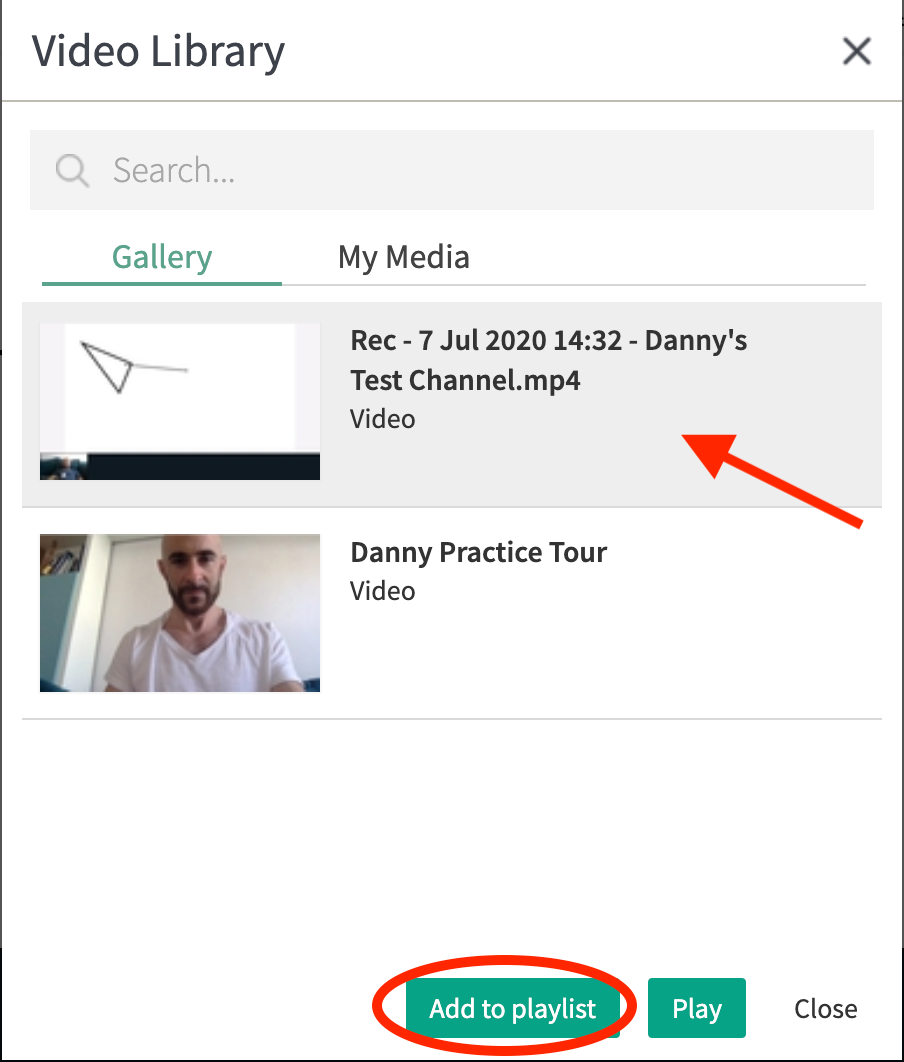 |
| - Search for and select the videos you want to share in Gallery or My Media.
- Click the Add To Playlist button.
View Your Playlist
The playlist is only visible to instructors and moderators.
- If the Playlist is hidden, then click Playlist to display the Playlist.
- If the Playlist is displayed, then click Playlist to hide the Playlist.

Organize Your Playlist Content
You can reorder items in your playlist by dragging and dropping items within the playlist.
- Select the item you want to reorder.
- Click and drag to the position you want the item to be in.
- Release the item.
Play Items In Your Playlist
Remove Items From Your Playlist
- Hover your cursor over the item you want to remove.
- Click the x.
💡You can only add 50 items to the playlist at a time, so you will have to remove items before adding others.
