Going Live: Best Practices for Online Classes with Microsoft Teams
Recording your Teams Meeting
To record your Microsoft Teams Meeting
When initially scheduling your Teams meeting, you can check the setting that says “enable auto-recording”. This setting will turn on recording as soon as you start up the Teams meeting room and end when everyone has left the room.
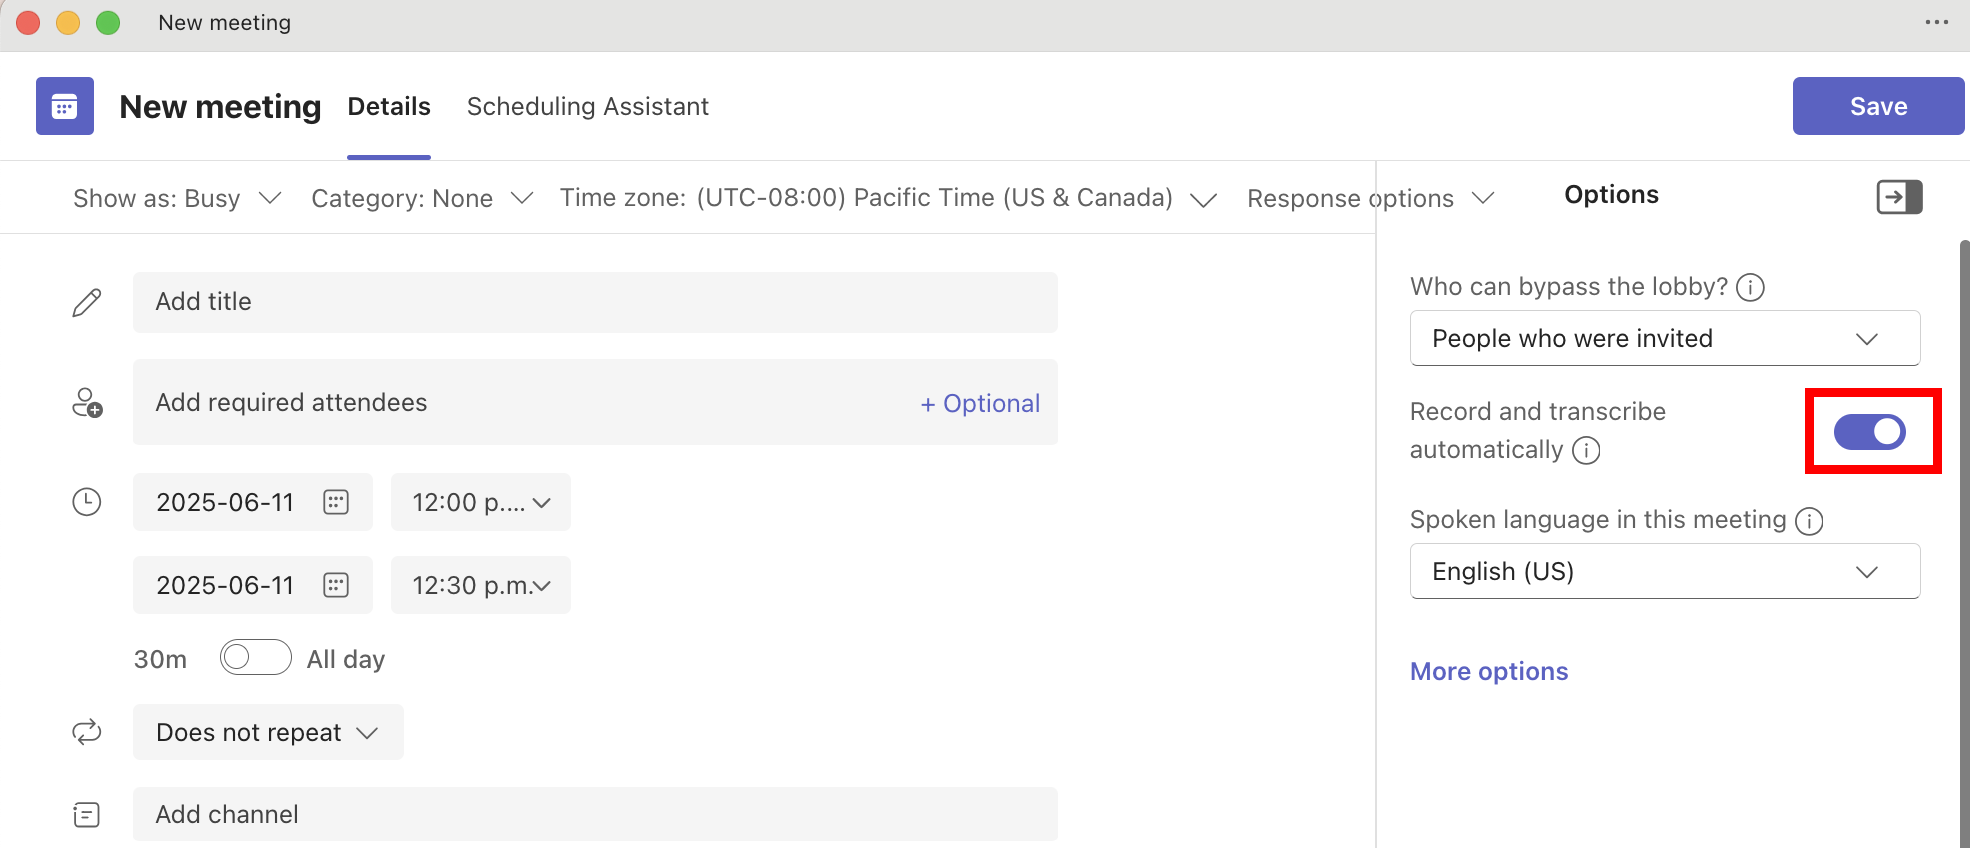
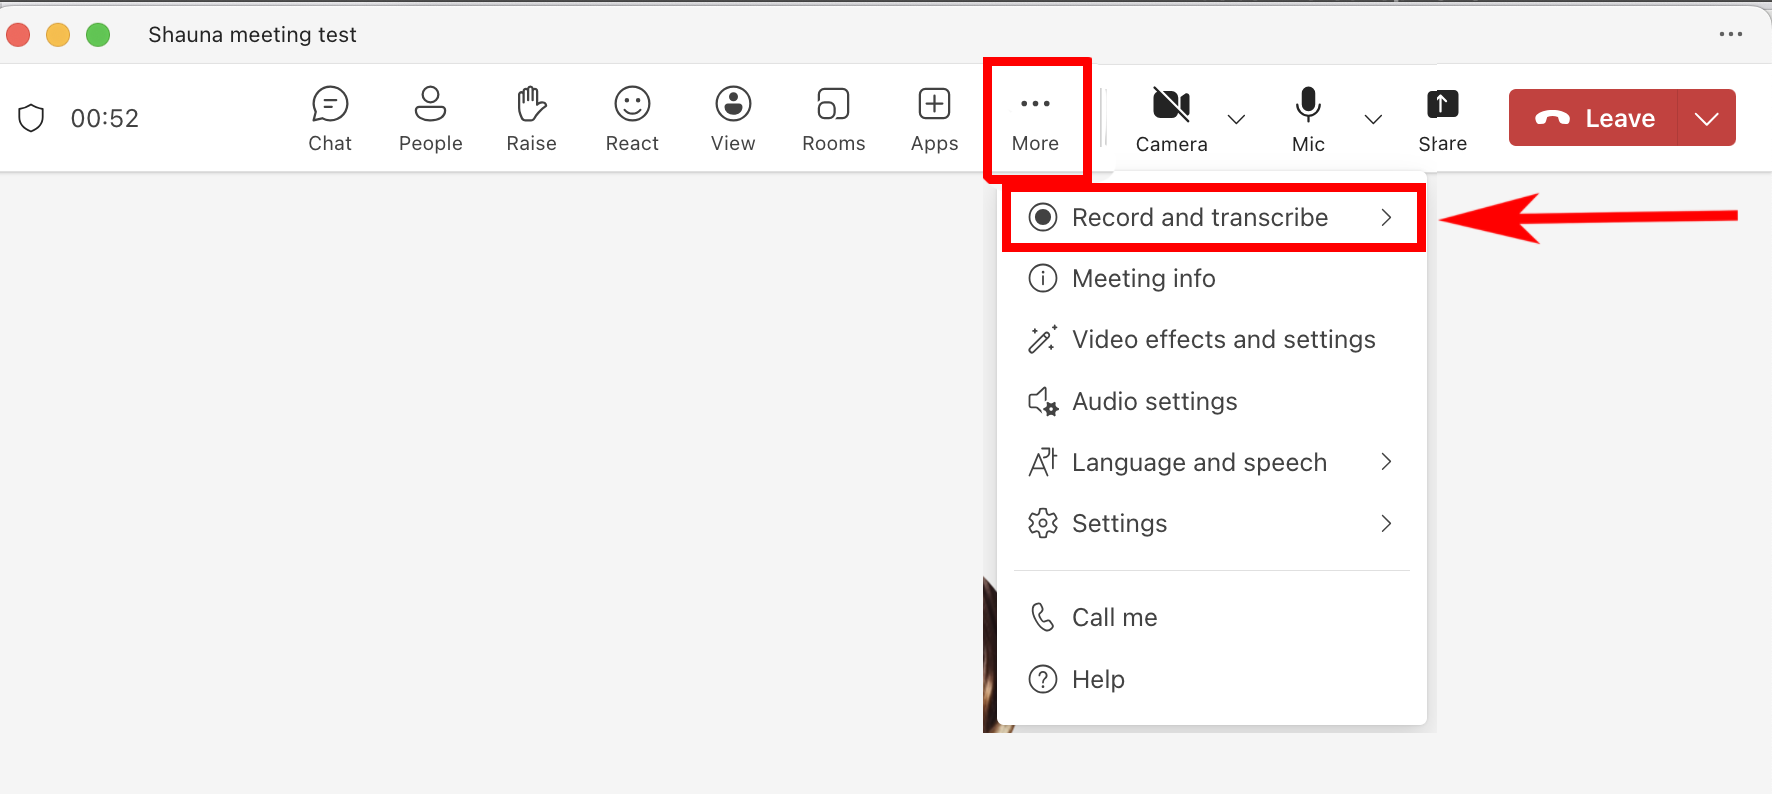
Alternatively, you can simply press the record button within your Teams meeting room when ready. It can be found here under the three dots labelled “More”, and select “Record & Transcribe” from the menu:
Finding your Teams Recording
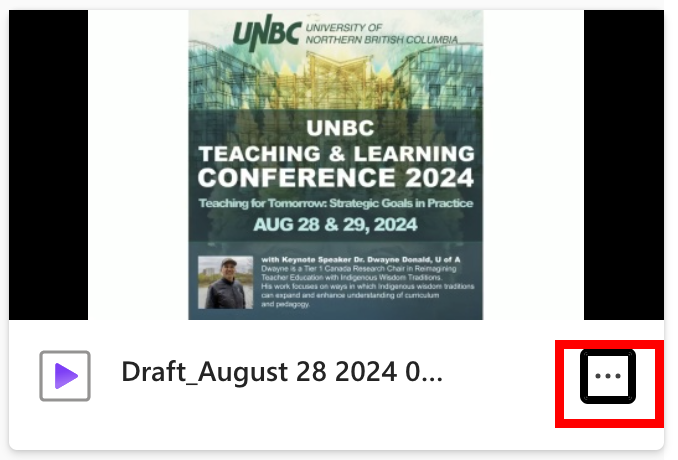
To find the resulting recordings, go to https://m365.cloud.microsoft/launch/Stream/ and sign in with your UNBC login credentials.
Sharing your Teams Recording
Go to https://m365.cloud.microsoft/launch/Stream/ and sign in with your UNBC login credentials.
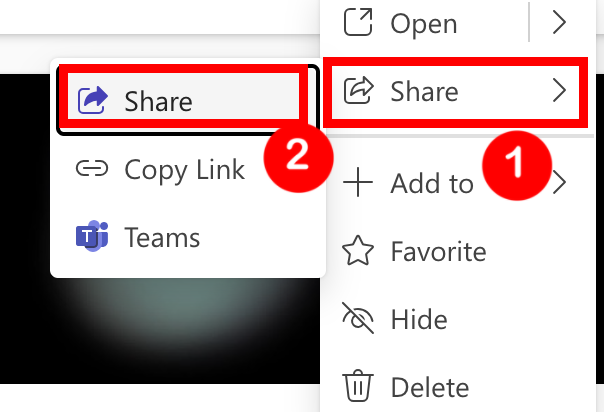
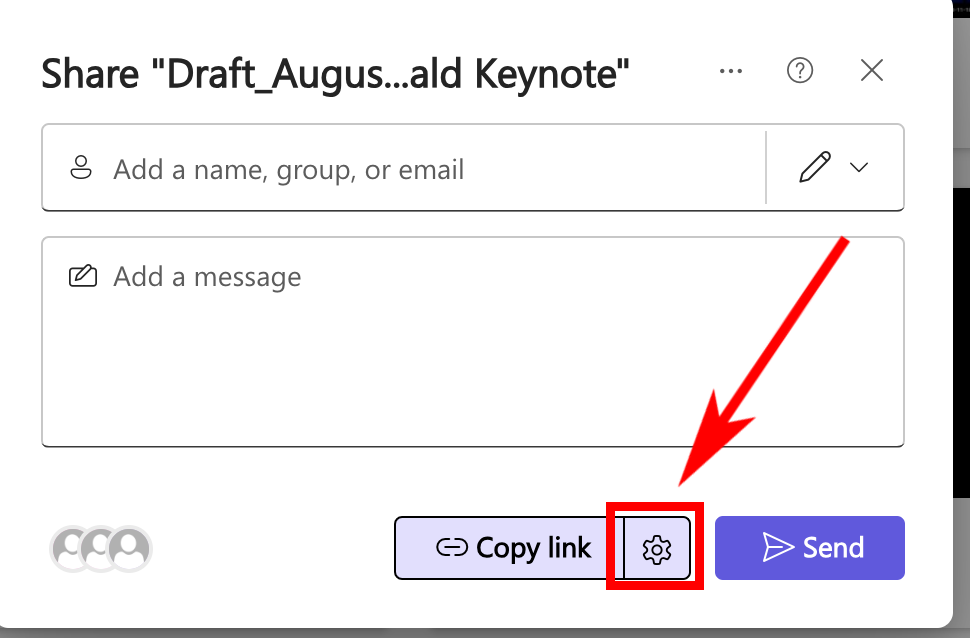
Scroll down to find your video and click on the three dots beside it’s name > select “Share” > Select “Share” again.
Click on the gear icon to edit Link Settings.
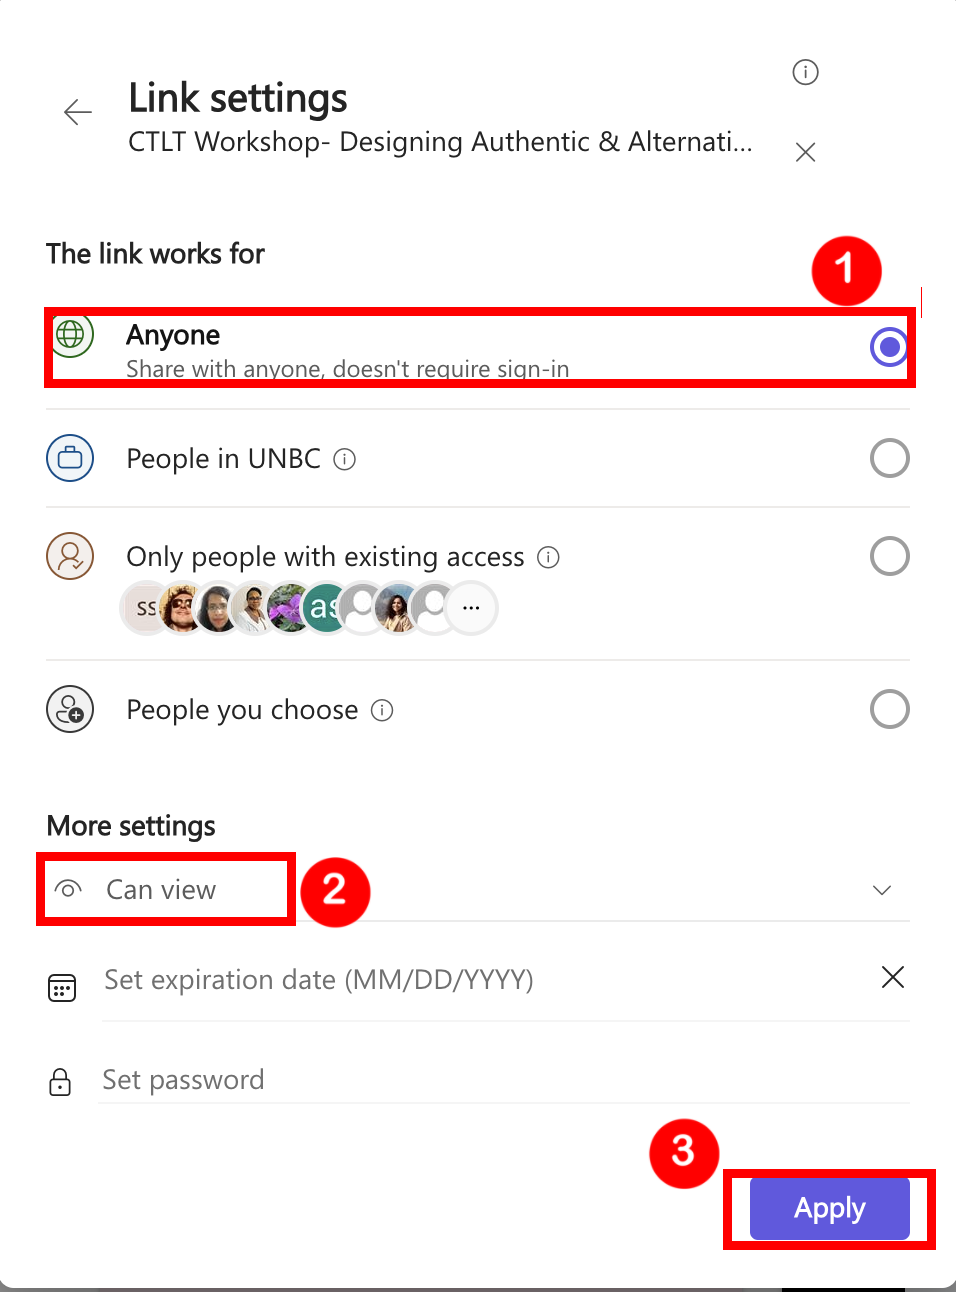
Choosing “Anyone” will allow anyone with the link to view the recording. Choosing “People in UNBC” will only allow people from UNBC who can sign in and access your recording – they will have to be signed in with their UNBC id to view it.
You can choose if you wish people to just “View” the recording, “Edit” the file, or “Download” the file.
Click “Apply” when done to save changes.
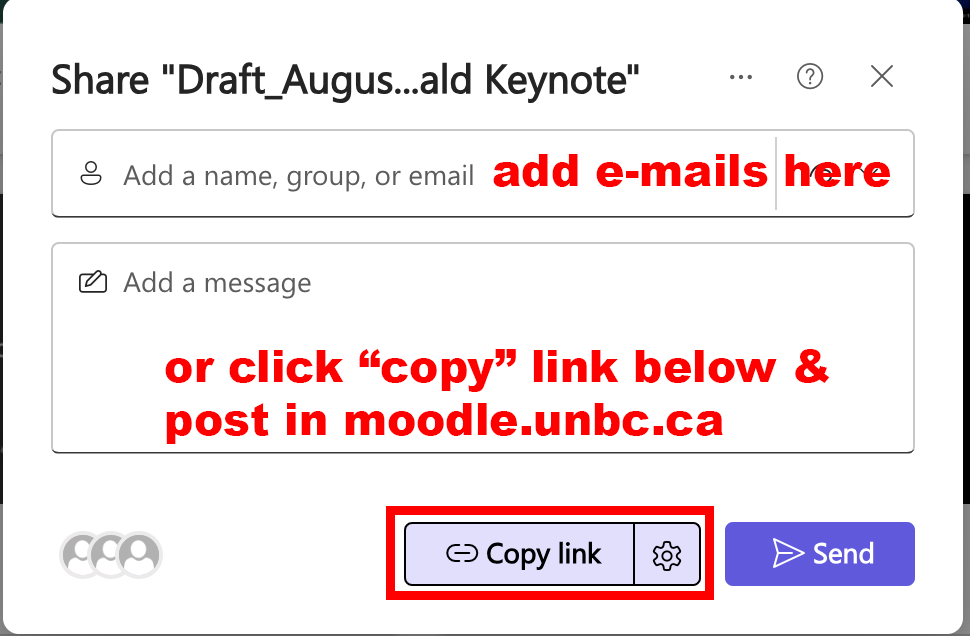
You can enter the e-mail addresses of people you wish to share with (UNBC people), or you can click on “Copy Link” and it will copy a link you can post in your Moodle.unbc.ca course or paste in an e-mail.
What is recorded by Microsoft Teams?
In Microsoft Teams, recordings of meetings, including those that involve Breakout Rooms, follow specific rules. Here’s a detailed breakdown of what is and isn’t recorded:
What is Recorded:
- Each breakout room must have its own recording started manually by someone inside that room. Breakout room recordings do not start automatically with the main meeting.
- Screen Sharing and Slide Content shared with Powerpoint Live: Animations/Transitions are not shown in the recording when sharing a PowerPoint presentation through PowerPoint Live, the recording will typically show the full slide content at once, rather than animating individual elements.
What is not recorded:
- Laser pointer, Pen Tool
- Breakout Rooms unless someone in the breakout room presses record.
