Going Live: Best Practices for Online Classes with Microsoft Teams
Managing The Teams Session
Starting and Ending a Meeting
Open the Meeting
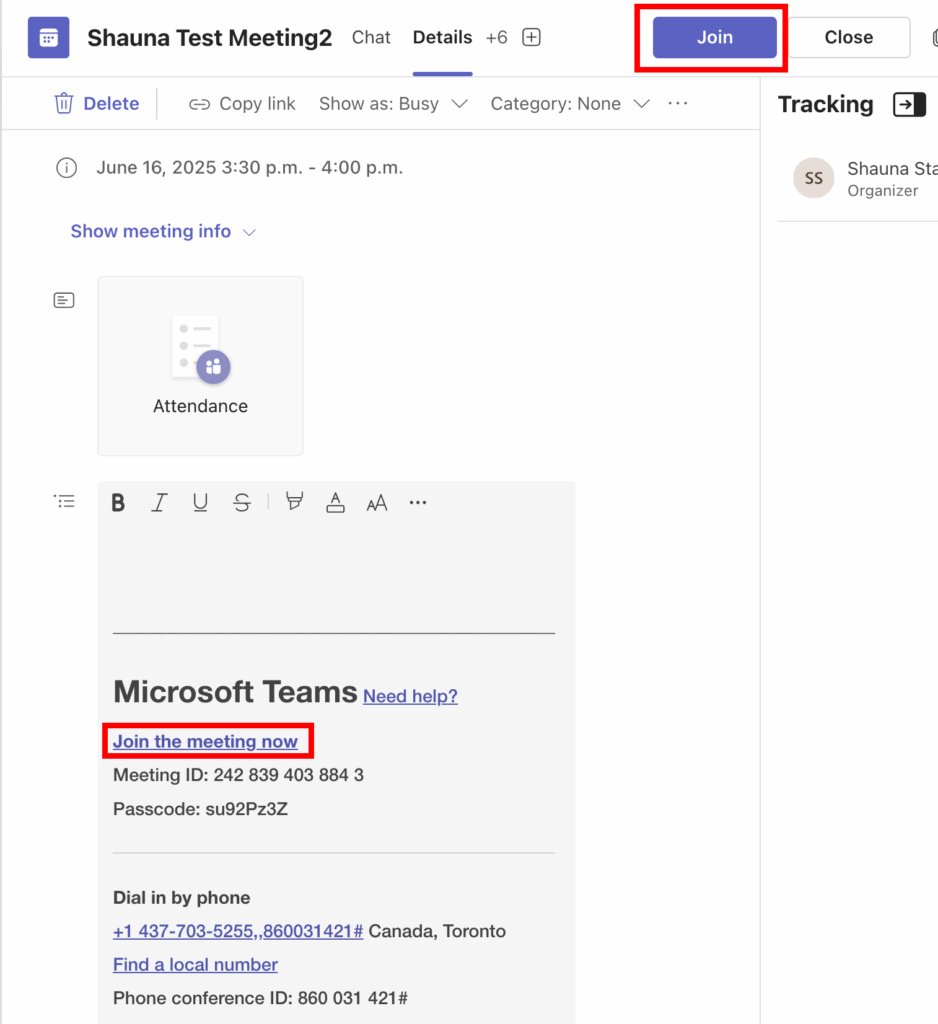
You can start your scheduled meeting from:
-
In the Teams Calendar: Click on the meeting on the day it appears in the Calendar > click on Join
-
The Outlook Calendar: Click the link or Join Teams Meeting
-
A shared link via e-mail or posted in Moodle: Click the meeting link to launch Teams
- If you have Teams installed on your computer, it will launch the app. If not, it will take you to the web browser version of Teams.
Tip: Join 5–10 minutes early to prepare your content, test audio/video, and admit students from the lobby.
| Task | Why It Matters |
|---|---|
| Turn on camera and mic | Builds connection; be ready to greet students |
| Share screen or slides in advance | Avoids delays; signals class is about to begin |
| Open chat and people panel | Monitor raised hands, messages, and questions |
| Admit participants from the lobby | Students may need manual approval to enter depending on your settings |
| Greet students as they arrive | Creates a welcoming environment |
Ending the Meeting
A. Wrap-Up Steps
| Task | Recommendation |
|---|---|
| Summarize key points | Helps reinforce learning |
| Ask for final questions | Supports clarity and student comfort |
| Remind students of next steps | E.g., readings, assignments, or next class |
| Stop recording | Click More (⋯) > Stop Recording |
| Thank students for participating | Ends on a positive, professional note |
B. Leave vs. End Meeting for All
-
Leave: You exit, but students can remain (e.g., in group work sessions)
-
End Meeting for All: Ends the meeting completely for everyone
-
Click the drop-down arrow beside “Leave” > End meeting
-

Use “End for All” if you’re finished and don’t want students lingering in the session.
Pre-loading content
Pre-loading your teaching materials helps ensure a smooth start to your class and minimizes technical disruptions. Whether you’re presenting slides, sharing resources, or preparing polls, Teams allows you to load content in advance.
Upload Slides or Files to the Meeting before the meeting
Option A: Upload to the Calendar Meeting item
-
Go to the Teams Calendar
-
Open your scheduled meeting
-
Click “Chat” in top toolbar

4. Use the plus sign icon to upload handouts, slides (PPT, PDF), or readings
-
-
Students can access them before, during, or after the meeting
-
Why it’s helpful:
Materials are available before class, reducing file-sharing delays mid-session.
Sharing Content: Screen, Window, PowerPoint Live
Use PowerPoint Live for Slide Sharing Presentations during the meeting
Benefits:
-
Students can navigate slides back and forth on their own screen (optional)
-
Presenter can view notes and upcoming slides (students will only see the slides)
-
Supports better accessibility and pacing
How to Pre-load:
1.Upload your Powerpoint to your Microsoft OneDrive & sign in with your UNBC credentials (user name and password)
2. During the Teams meeting, click the Share button in the top toolbar > scroll down to see the list of PowerPoint Live presentations
3. Choose the Powerpoint file you wish to share from that list on your OneDrive or upload from your computer (Uploading happens once; reuse for recurring meetings)
Tip: Upload slides before class starts while students are in the lobby or waiting room.
Using Whiteboard and Collaborative Apps
Prepare Whiteboards in Advance
Note: Whiteboards are stored in Microsoft Whiteboard (web) and can be edited outside of Teams as well.
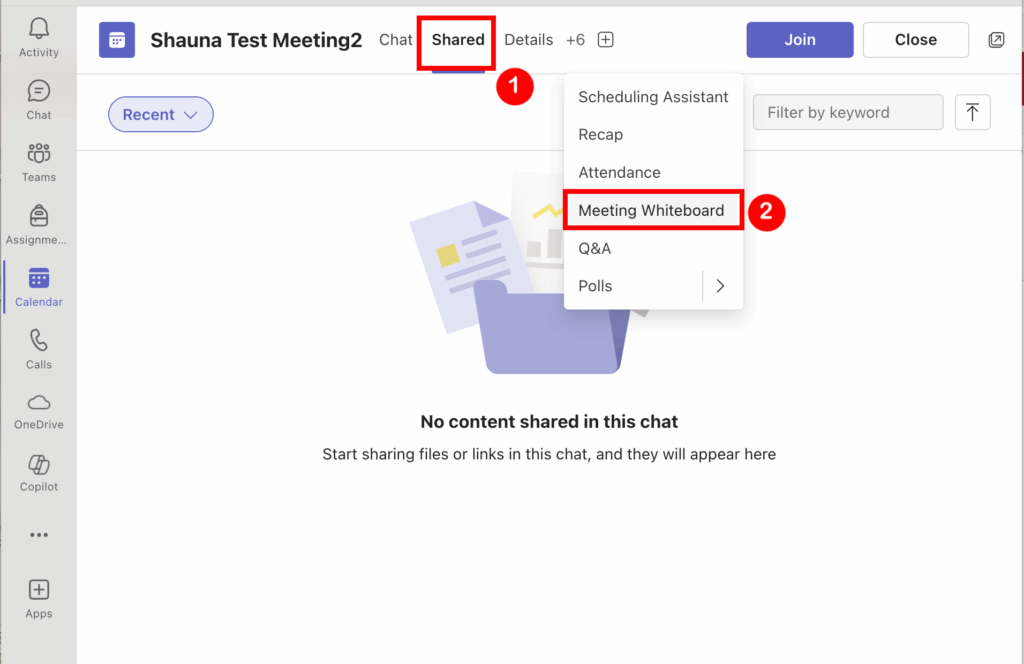
To create/view the Whiteboard,
-
Go to the Teams Calendar item for the meeting you wish to use the whiteboard for
-
Open your scheduled meeting
-
Click “Shared” in top toolbar and select “Meeting Whiteboard” from the menu
Teams allows whiteboards to persist in a meeting series:
-
In a recurring meeting, launch the whiteboard once
-
Draw or add content ahead of time
-
Reopen the same whiteboard in future sessions
[[[VIDEO}}}
Chat, Reactions, Raise Hand, and Polls
Pre-load Links, Prompts, or Instructions in Chat
Before class:
-
Open the meeting’s chat space
-
Post reminders, group discussion prompts, or helpful links using the text box in the Chat screen
Students joining later will still see these messages when they enter the meeting.
Reactions
Reactions are visual emoji-based icons that participants can use during a meeting. They appear temporarily on the participant’s video tile and in the meeting view.
| Common Reactions | Purpose |
|---|---|
| 👍 Thumbs up | Agreement or understanding |
| 👏 Applause | Acknowledgement or praise |
| ❤️ Heart | Empathy, appreciation |
| 😂 Laugh | Light-hearted responses |
| 😲 Surprise | Express astonishment or interest |
| ✋ Raise Hand (persistent) | Request to speak or ask a question |
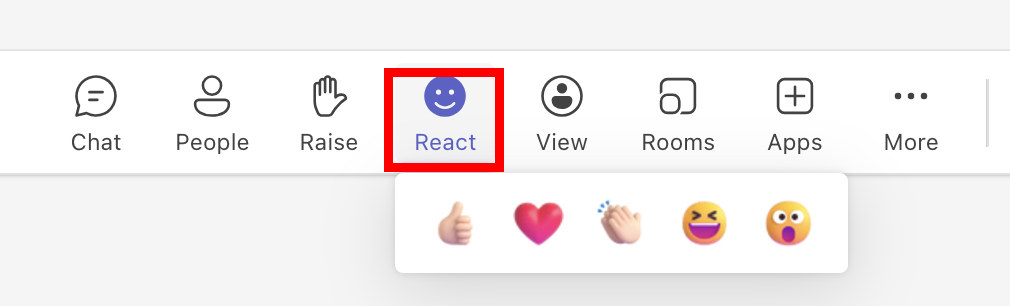
During a meeting:
-
Click the “Reactions” icon in the top tool bar (a smiley face with a hand)
-
Select a reaction to display it on-screen
-
Use “Raise Hand” for structured participation (next to the React button on the top toolbar)
Note: The Raise Hand feature remains visible until the user or instructor lowers it.
Schedule and Pre-load Polls (Using Microsoft Forms)
Steps:
1. Open the Teams Calendar meeting
2. Click on “Shared” in the top tool bar and select “Polls”

3. Click “New Poll” button

4. Create your questions (multiple choice, rating, etc.)
5. Choose “Save as draft”
6. Launch the poll live during class when ready
Use Cases:
-
Icebreakers
-
Quick knowledge checks
-
Feedback or attendance confirmation
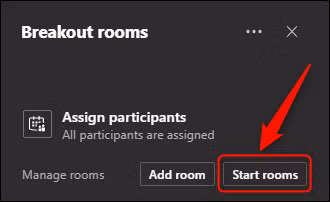
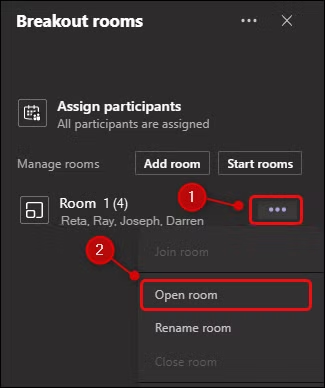
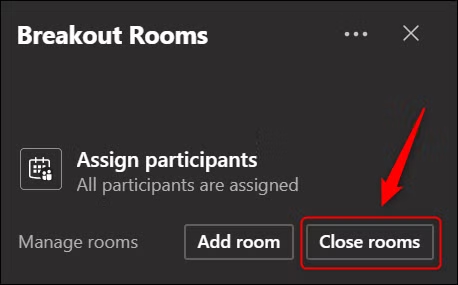
Breakout Rooms: Setup and Use
Automatic creation and assignment
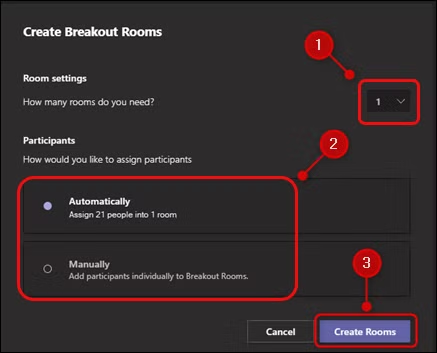
To create breakout rooms, start a video call, then click the breakout rooms button in the toolbar of the meeting.
![]()
In the “Create Breakout Rooms” panel that opens, select the number of breakout rooms you want (up to a maximum of 50), choose whether attendees will be assigned automatically or manually, and click “Create Rooms.”
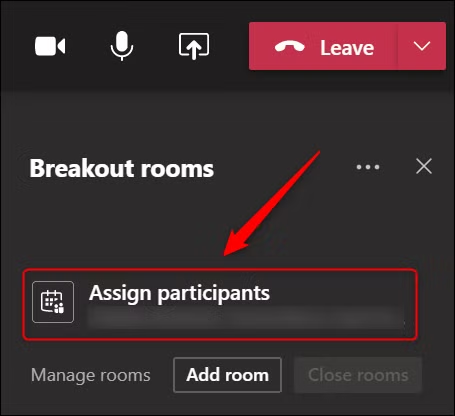
Manual creation and assignment
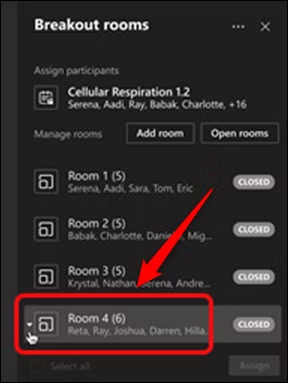
If you chose to assign attendees manually when you created your breakout rooms, click “Assign Participants” in the panel that appears on the right-hand side.
Use the checkboxes to select a group of attendees you want to put into a breakout room, then click “Assign.”
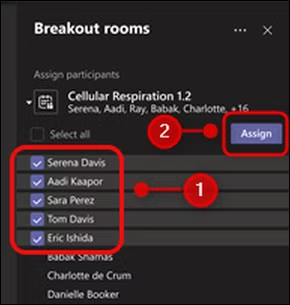
Click on the room you want to assign the group to.