Additional Accessibility Guides
WordPress and Pressbooks
![]() WordPress is one of the most common content management systems in use. Pressbooks is built on the WordPress platform, so many functions are the same. Langara’s iWeb and CourseWeb use WordPress and this resource is a Pressbook.
WordPress is one of the most common content management systems in use. Pressbooks is built on the WordPress platform, so many functions are the same. Langara’s iWeb and CourseWeb use WordPress and this resource is a Pressbook.
On this page:
Themes
WordPress has thousands of themes. Some are free and many are paid. Regardless of what theme you use, it is easier to start with something accessible than fix an inaccessible theme.
You can filter WordPress themes for “Accessibility Ready.”
- Click the Feature Filter button
- Check Accessibility Ready checkbox
- Click the Apply Filters button
This reduces the list of themes significantly, but using an “Accessibility Ready” is not a guarantee of accessibility.
Best Practices
Make content easy to read and navigate, by using:
Plain language. Learn more about plain language.
Structured content such as headings, lists, and tables.
Consider font accessibility, including:
- Standard font size is 16px, but use em and rem units in CSS for font size.
- Avoid excessively decorative fonts; choose simple serifs or sans serif fonts.
Font must have a contrast ratio of at least 4.5:1. Read more about contrast in the Accessible Colour chapter of this book.
Avoid:
- Leetspeak, calculator spelling (i.e., 80t5 for bots), text emoticons (i.e., >:( ), ASCII art (i.e., (^._.^)~)
- All capitals
- Excessive use of italics
- Justified alignment
Headings
Headings provide structure for your page and the information it presents. Headings allow all users to skim and find what they need. Navigating a page by headings is essential for screen reader users to navigate the web.
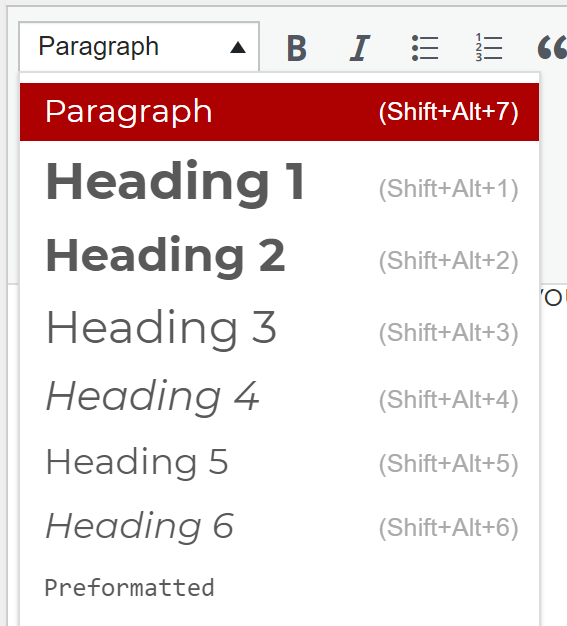
To designate text as a heading, highlight your text and select the Paragraph dropdown to select your desired heading level.
For more information, consult the headings quick guide in this book.
Alt Text
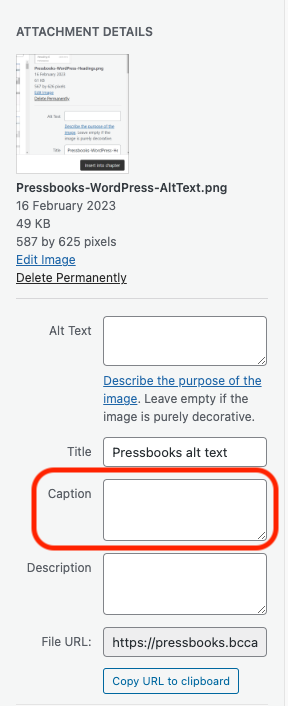 WordPress/Pressbooks supports adding figure captions via the Media Library. When adding or editing an image add information to the caption field. If an image has a descriptive figure caption, the alt text field can be left blank.
 If an informative image does not have a descriptive caption, enter an image description in the Alt Text field when uploading a new image.
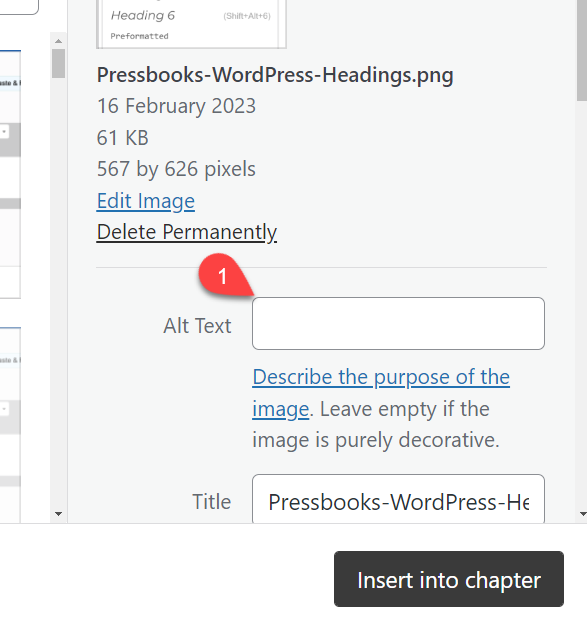
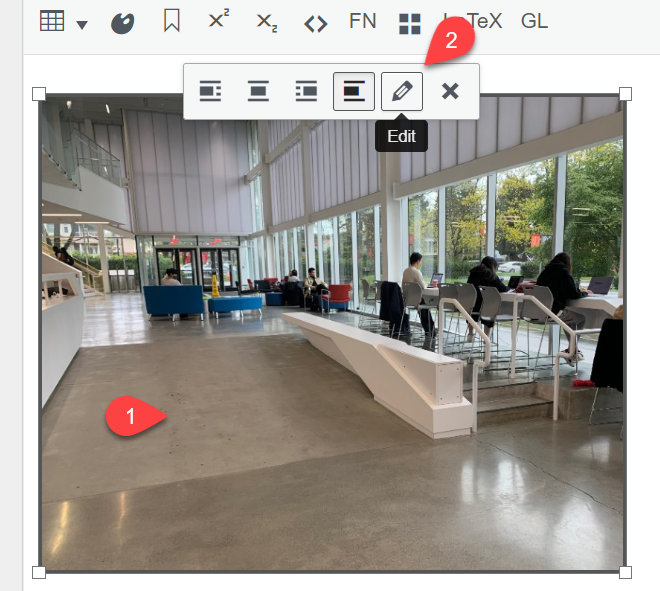 Or, edit an existing image to add alt text by selecting the image and choosing Edit and typing a description of the visual information in the alt text field.
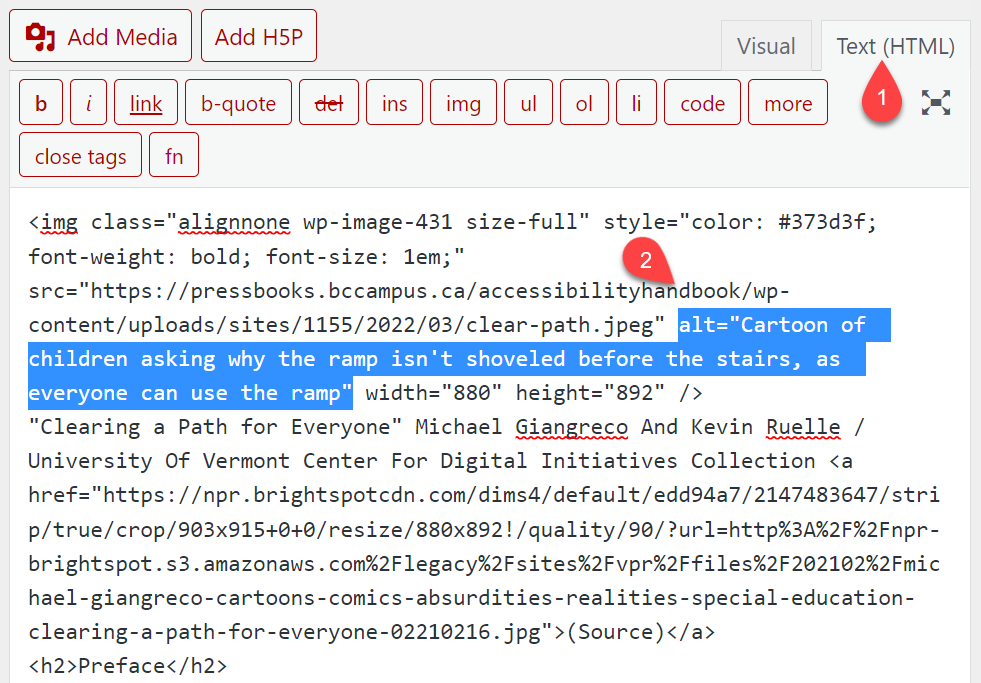
Or, manually change the alt attribute in the Text/HTML editor:
Include the alt attribute for all images. If there is no alt attribute, assistive technology will read the src attribute (the file URL) aloud. Mark decorative images with alt=”” or leave alt text field blank in Media Library.
Refer to the Alternative Text chapter in this book for more information.
If including multimedia, ensure videos are captioned and audio have transcripts available.
Links
To add a link, highlight text and use the Insert/edit link button or press Control/Command (on macOS) and K to insert a link.
Good hyperlink text should:
- Be descriptive, unique, and meaningful
- Describe what a link is and why a reader would click on it
- Avoid using “click here” “read more” “download” etc.
- Maintain meaning when removed from surrounding text
Avoid using URLs as hyperlink text. If you must provide the URL, include useful hyperlink text as outlined above and then include the URL as non-linked, regular text.
For more information read the accessible links chapter earlier in this book.
Tables
Insert tables using the Table tool on the editor toolbar.
- Change table appearance via Table > Table Properties
- Set cell type and scope via Table > Cell Properties
- Of particular importance is setting header cells
- Set header row via Tables > Row> Table Row Properties
Avoid merged and split cells. You may use them, but additional work is required to set scope.
Check function of table by placing cursor in call A1 and pressing Tab. Ensure a logical reading order is followed.
Do not use tables for alignment or layout.
Review table best practices for more information.
Exporting Pressbooks
HTML is a more accessible format than PDF. If you need to share a page as a PDF, make it accessible using Adobe Acrobat and the chapter on PDFs in this book. EPUB or other XML formats are more inherently accessible formats.
Pressbooks offers many export options. To export your Pressbook:
- Navigate to the Dashboard
- Select Export from the sidebar
- Check the relevant formats
- PDF (for digital distribution) will be the best place to start in creating an accessible PDF copy
- EPUB 3 is one of the most accessible and customizable formats, but requires software for users to read
- PDF (for print) should only be used explicitly for printing purposes as it will retain none of the coded structure in you Pressbook
- There are other formats you find useful:
- XML and XHTML
- Common Cartridge for importing your Pressbook into a Brightspace course
- OpenDocument
Learn more about Accessibility in WordPress.
Read about how to make your Pressbook accessible.
Language that is easily understood by the intended audience. Write for the audience using clear, simple language with focus on important information. Organize and group content.
The use of code (HTML attributes, PDF tags, XML, etc.) to distinguish content by meaning, not appearance. For example, a <h1> heading tag creates both a visual and coded navigation waypoint whereas increasing the font size and bolding simply makes regular text appear larger.
Headings are text used to organize a document. Headings are section and subsection titles used to logically separate content, build and show relationships between ideas, and explain the development of concepts. Headings must be hierarchical, not skip a level, and be semantically programmed, not merely cosmetic.
Alternative text is a text equivalent of graphics in a document or webpage. Alternative text is coded to be hidden visually, but read to a screen reader user.
Linked text to another document or part of document that the user can follow by selecting. Effective hyperlink text should make sense independent of the content around it.
Information presented in a grid format of rows and columns, generally to show a relationship between sets of data
The order in which a screen reader reads content on a page. This should match visual order. Reading order also refers to how a PDF will reflow when zoomed.
