PowerPoint Accessibility
Sharing and Exporting
On this page:
Best practice is to share material in advance of a meeting, presentation, or class.
- Sharing allows users to check for barriers beforehand and customize their experience.
- All users can take additional, in-depth notes and understand terminology and names with greater comprehension.
Avoid preset slide timings that advance slides automatically so that viewers can choose how much time to spend on material.
Read-Only and Restrict Editing
Read-Only and Marked as Final
You may wish to share your document as Read-Only or Final.
To do so:
- Navigate to File > Info
- Open the Protect Presentation menu
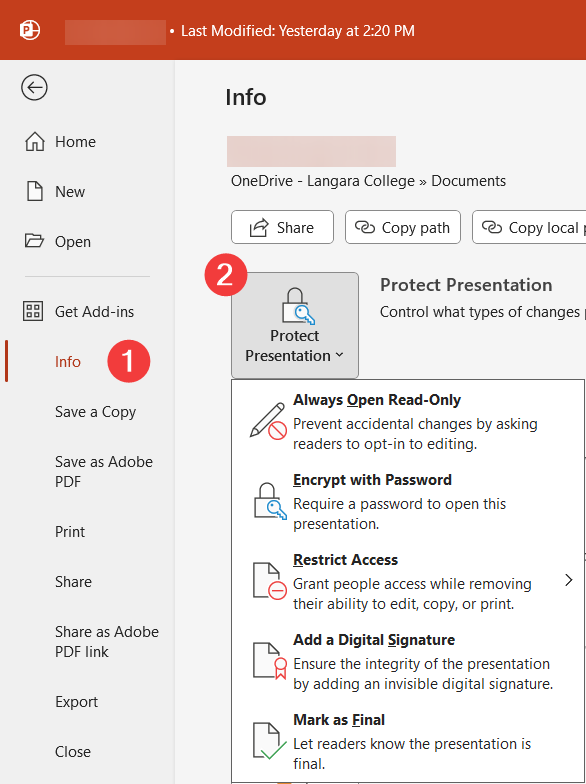
- Select Always Open Read-Only to prompt users to opt-in to editing or Mark as Final to display a message reminding users the presentation is not to be edited.
Restrict Editing
If you are concerned about the content of your PowerPoint being changed, you can restrict editing so other users can only access the file as read-only.
- Select File > Save As and click Browse
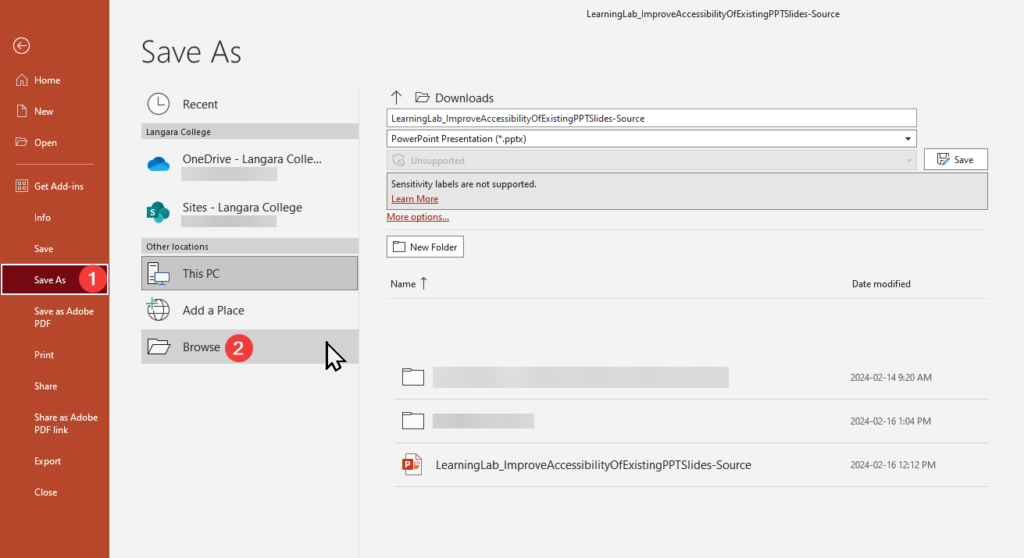
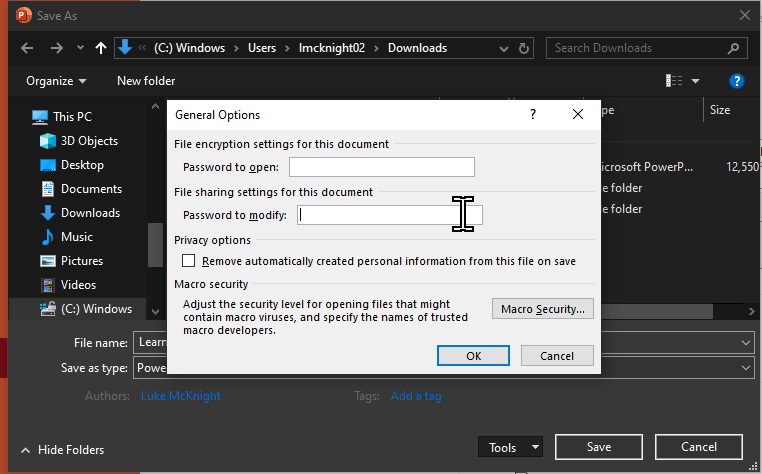
- Choose a local save location and open the Tools menu and open General Tools…
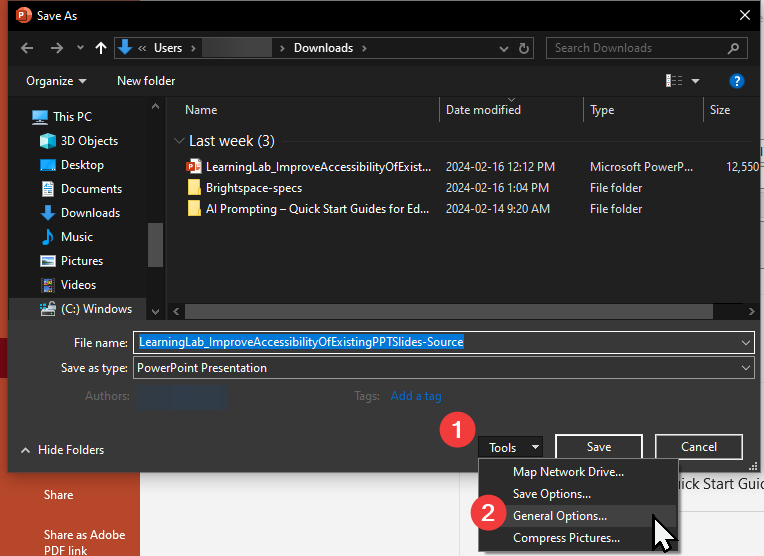
- Set a password in the Password to modify: field, click OK and confirm the password.
- Click Save.
- Distribute your PowerPoint. Users will be notified that they can only open a read-only version of the file.
Remove Speaker Notes
Windows
To remove your speaker notes before distribution, first make a copy of your PowerPoint for distribution, then:
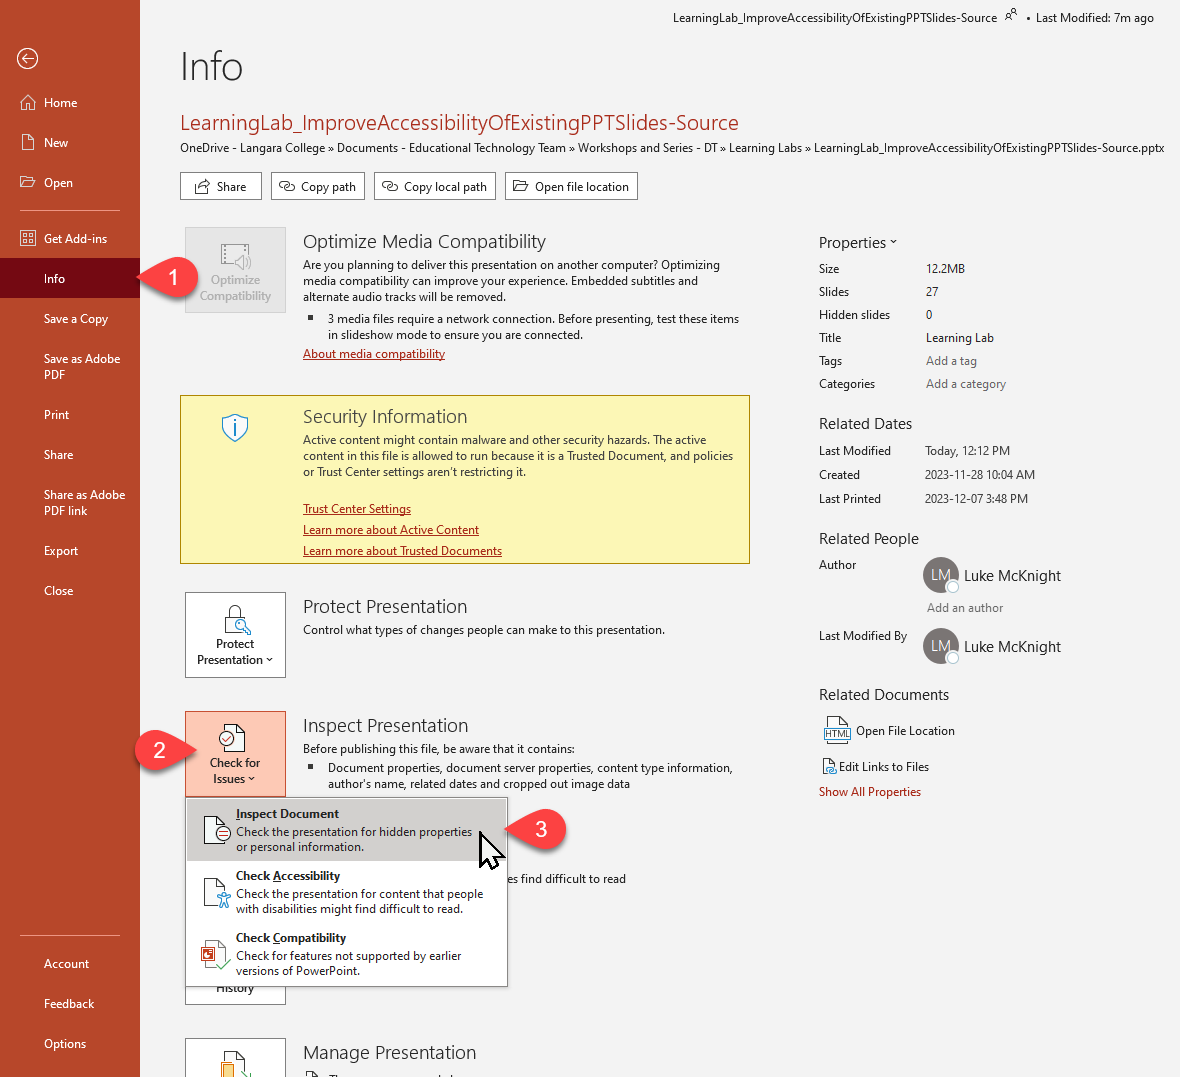
- Select File > Info.
- Click Check for Issues button beside Inspect Presentation
- Select Inspect Document
- Click Inspect in the new window.
- Once the operation is complete, click Remove All beside Presentation Notes.
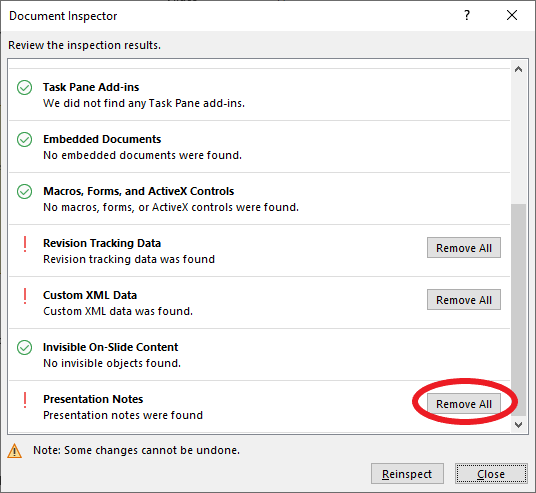
- Click Close when done.
- Save and distribute this note-free copy.
macOS
To remove your speaker notes before distribution, first make a copy of your PowerPoint for distribution, then:
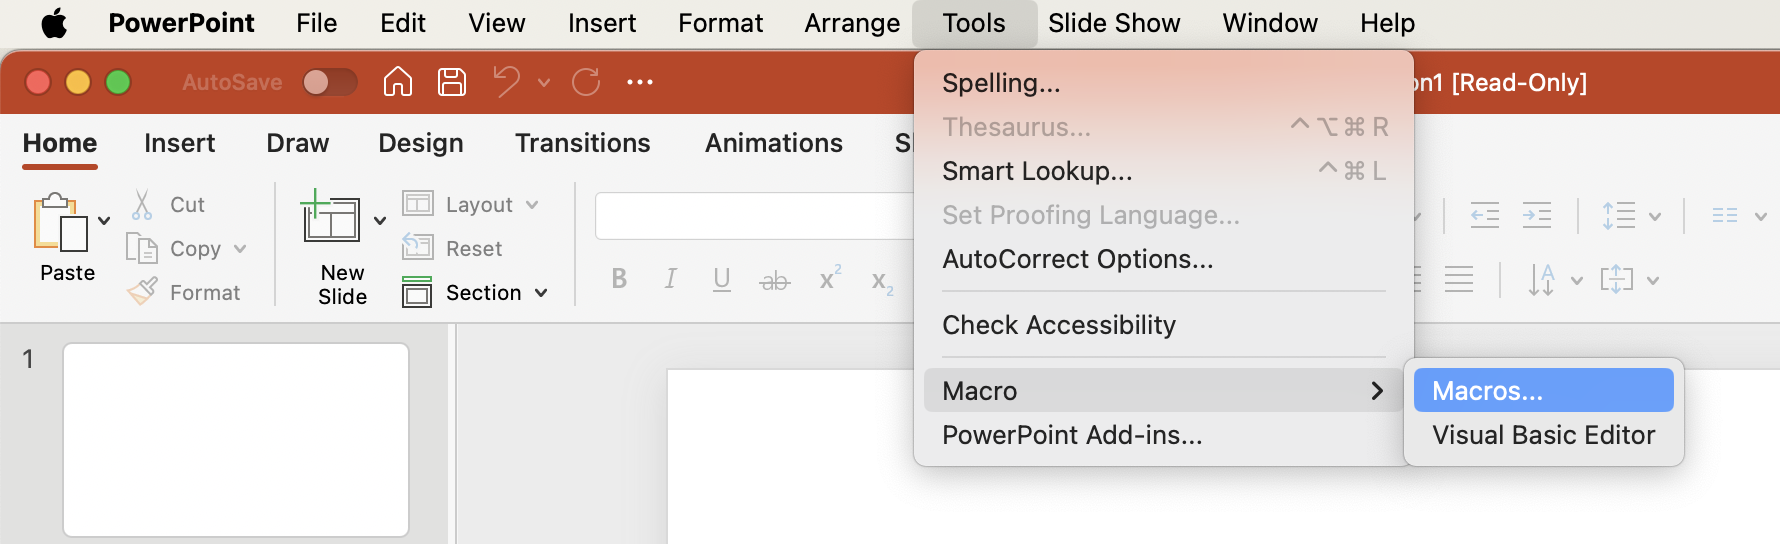
- Open the Tools menu.
- Select Macros and then Visual Basic Editor.
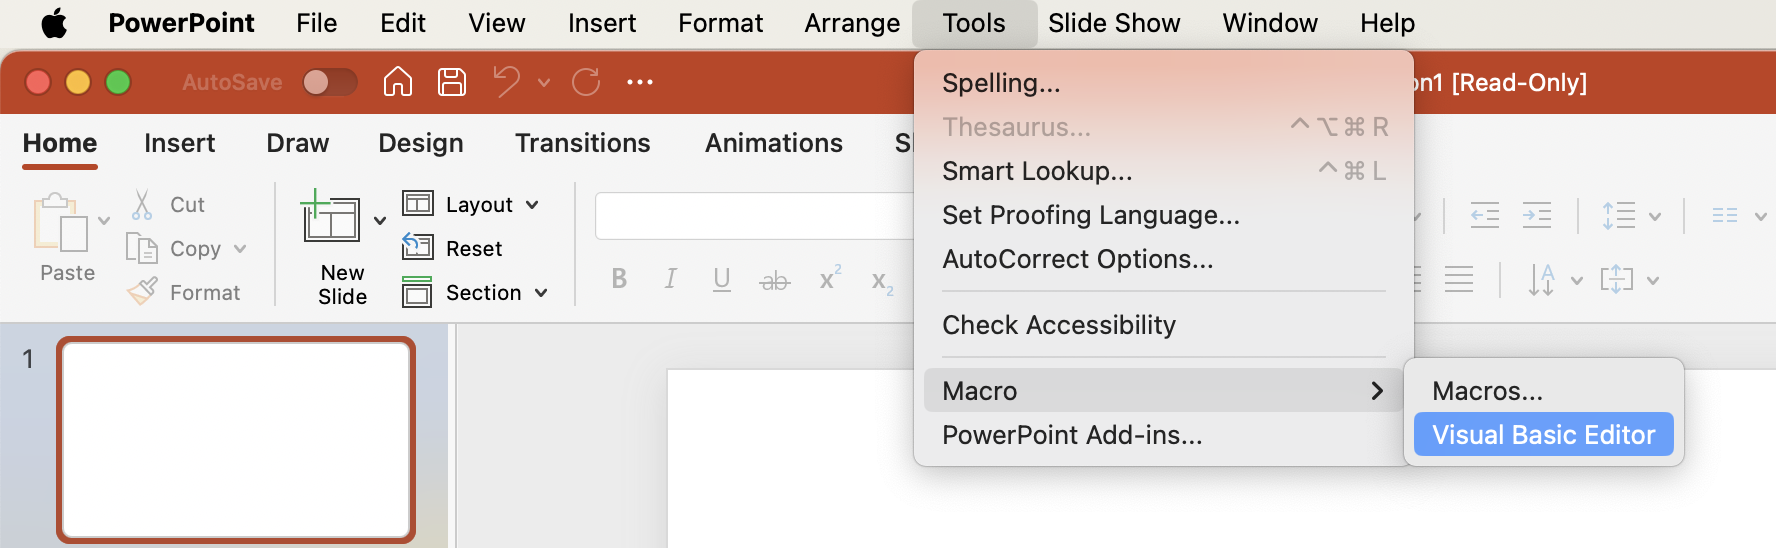
- Select Insert Module.
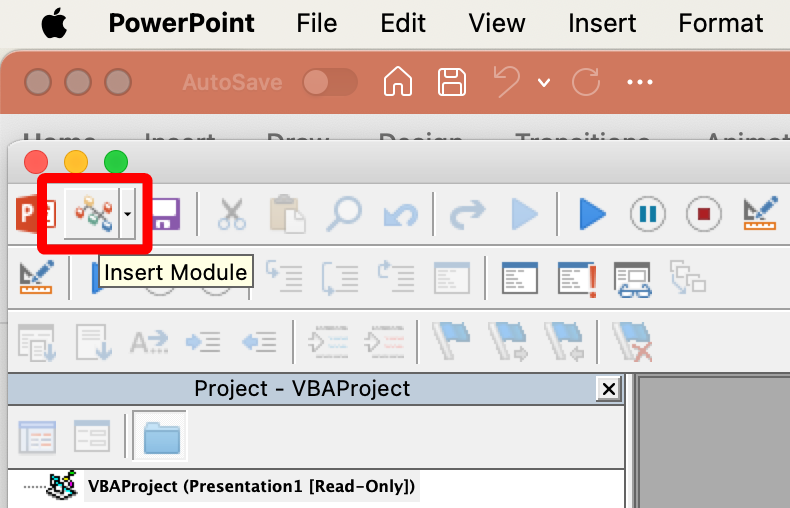
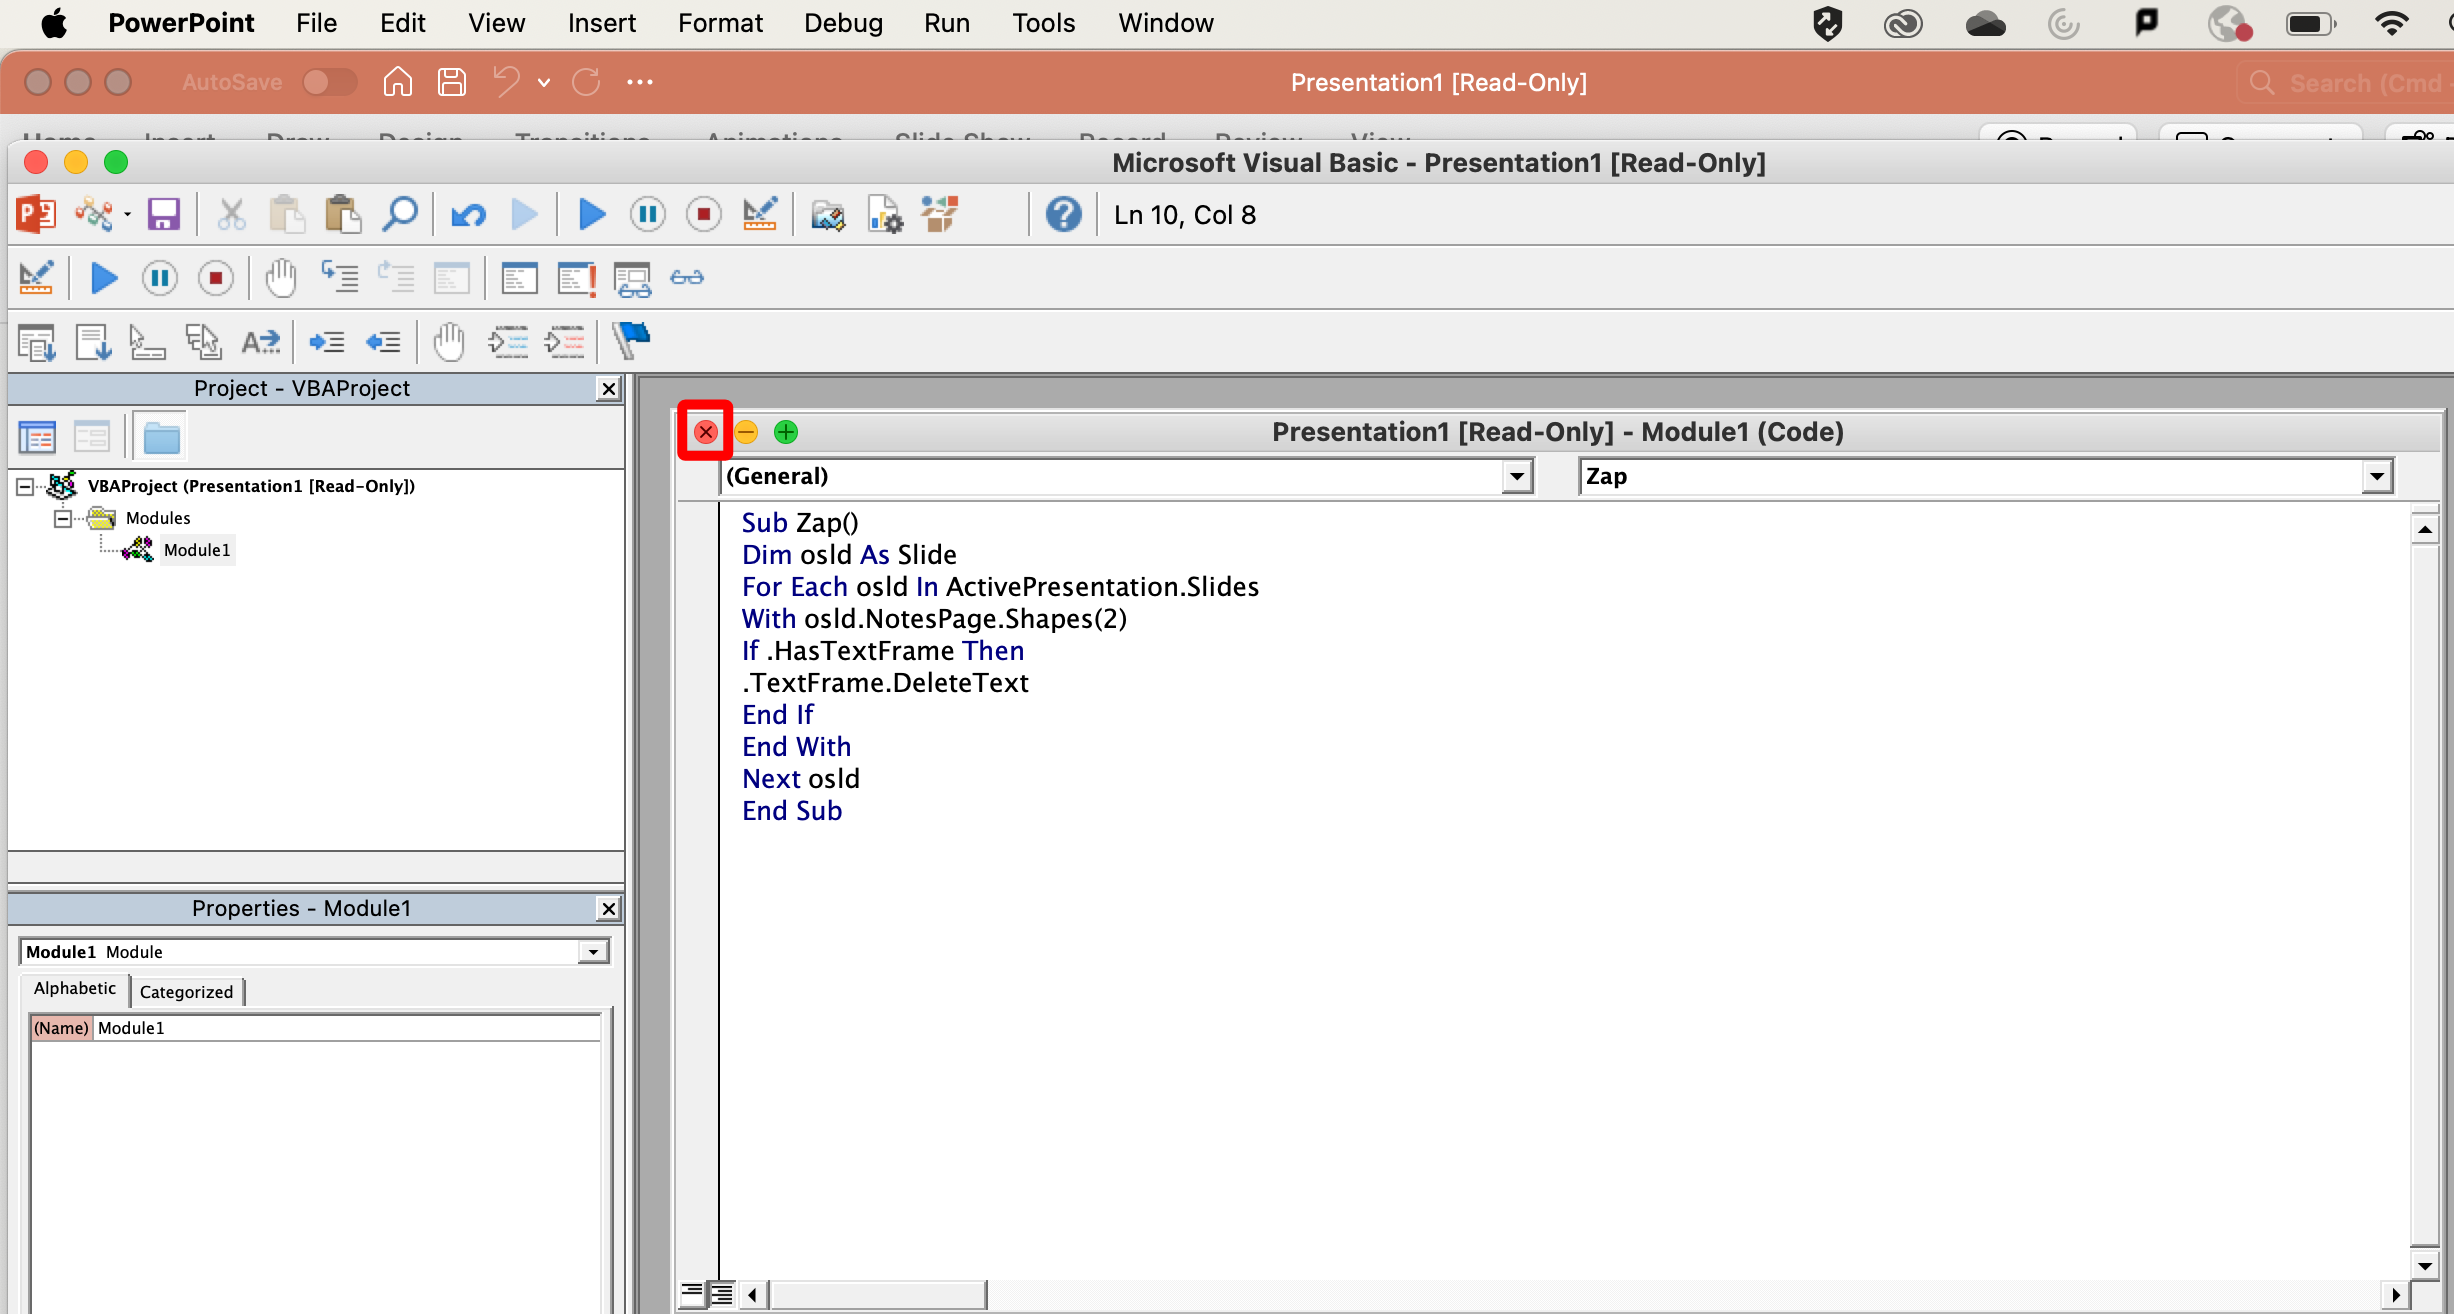
- In the new window that appears, paste:
Sub Zap()

Dim osld As Slide

For Each osld In ActivePresentation.Slides

With osld.NotesPage.Shapes(2)

If .HasTextFrame Then

.TextFrame.DeleteText

End If

End With

Next osld

End Sub
Then click the red X to close the window.
- Close the Microsoft Visual Basic window.
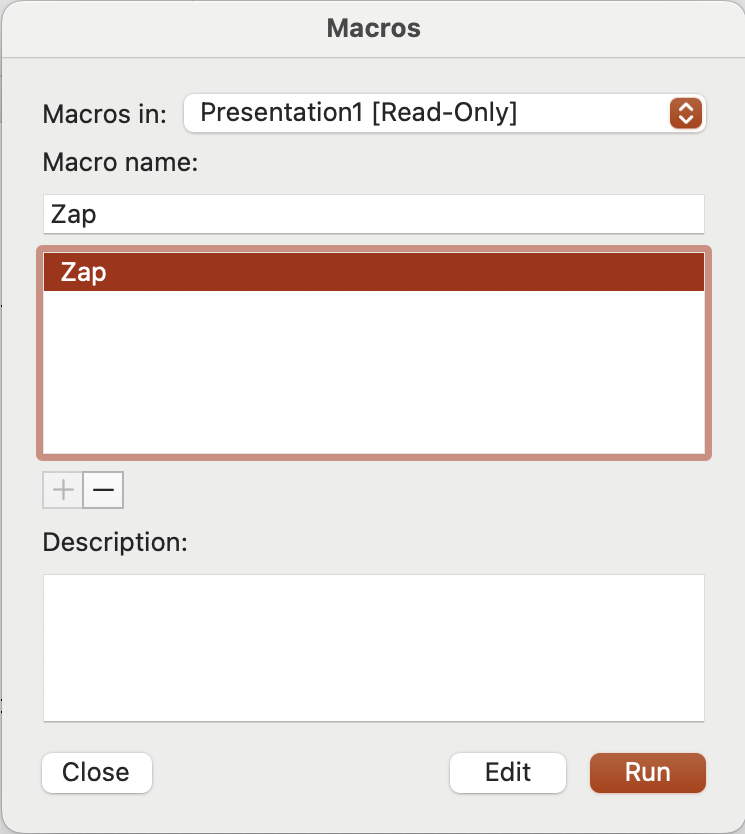
- Open the Tools menu.
- Choose Macro and then Macros…
- In the new window, choose Zap and click Run.
Any content in the Notes field will be removed. This process cannot be undone, except if restoring from a previous save.
Export as a Video
One often overlooked method to share a PowerPoint is as a video. One common educational use case is adding an audio recording over slides (e.g., lecture material). This can be done 1 of 2 ways:
Record Audio
Another method is to record or insert audio for specific slides. To record audio for a slide:
- Navigate to the slide.
- Move to the Record tab and select Audio.

- Record your audio, click stop, and then Ok to add the audio to the slide.
Alternatively, you can insert an existing audio recording to a slide:
- Navigate to the slide.
- Move to the Insert tab and select Audio.

- Choose Audio on my PC and select the appropriate file (.MP3, .M4A, .WAV)
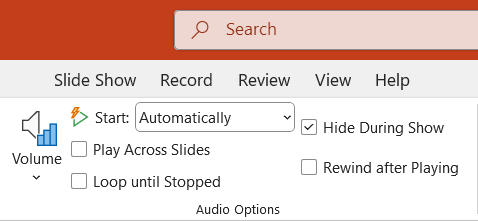
Recording or adding an audio file to a PowerPoint slide adds a speaker icon to the slide which contains the audio player controls. Select the speaker icon and move to the Playback tab. For video export purposes, ensure Start is set to Automatically and check Hide During Show to hide the icon on the slide.
To export to video, open the File menu:
- Choose Export.
- Choose Create a Video.
- Click the Create Video button.
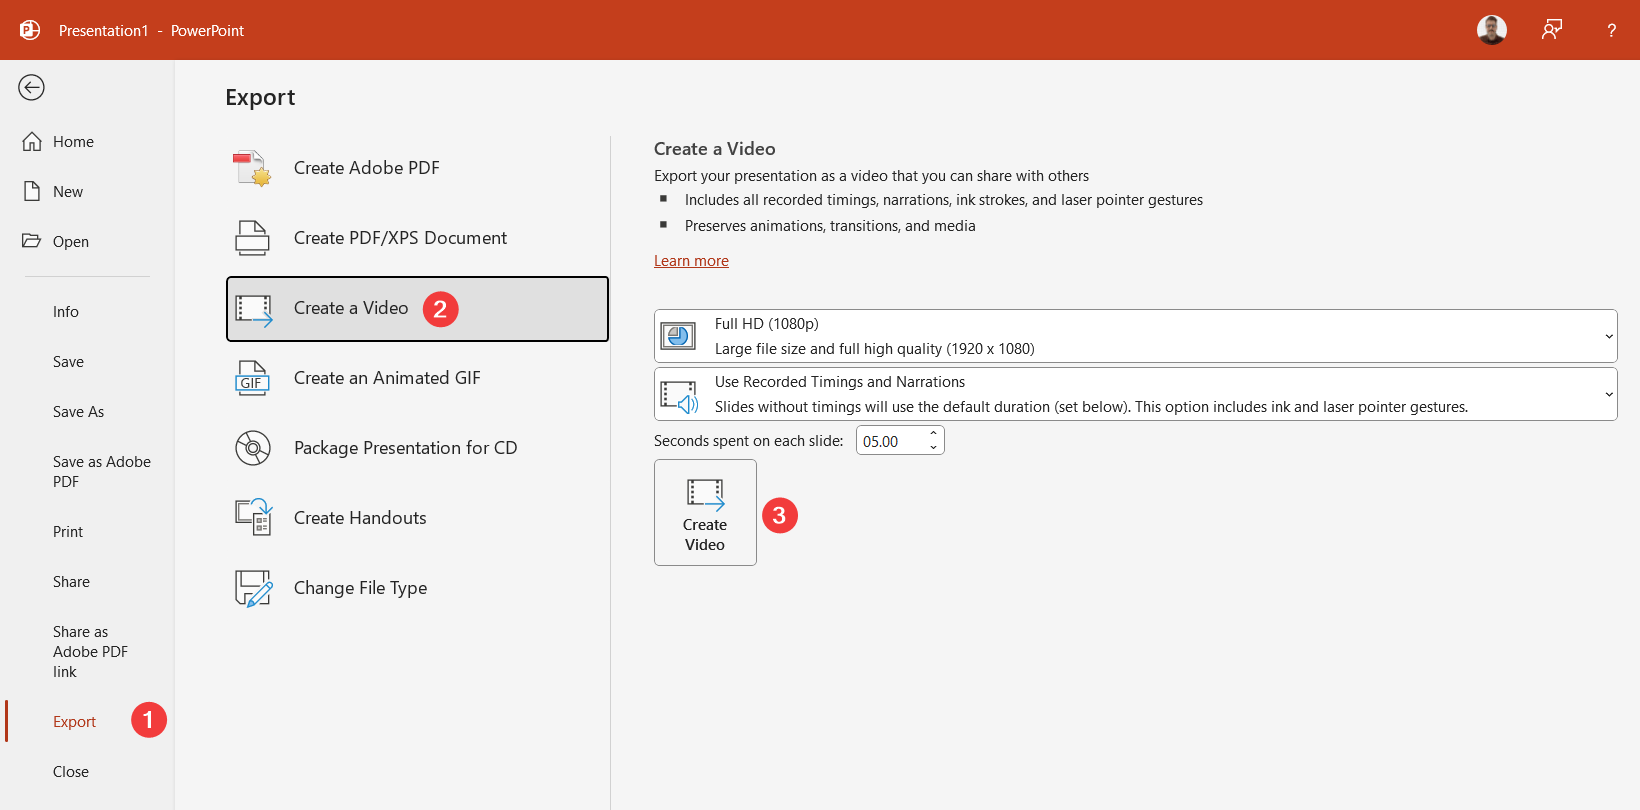
- Choose file location and select Save.
Record Slide Show
To record the entirety of your slide show including animations, transitions, audio, and timing use PowerPoint’s Record feature.
Via the Slide Show tab, choose Record.
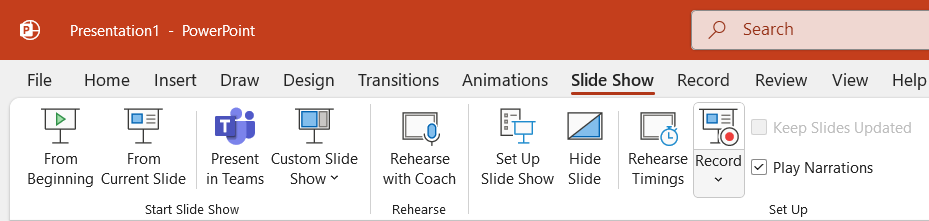
Once setup, click record and when finished recording click stop. Then follow the prompts to export your video.
Video Hosting
Best practice is to host the video online using Kaltura Mediaspace. For more information, refer to the Kaltura Mediaspace/My Media guide.
Export to PDF
The best way to use PDFs is sparingly.
The knowledge and time needed to make accessible PDFS rarely justifies the use of PDFs. PDFs require significant coding to make accessible, do not reflow content to fit different size monitors, and should be used only when necessary.
Do not use File > Print > Save as PDF as that method does not retain any document structure and requires significant time and expertise to make an accessible file.
If you absolutely must create a PDF and have Acrobat installed:
- Open File > Save as Adobe PDF
- In the save dialogue, select Options and eEnsure the following are checked:
- Enable Accessibility and Reflow with tagged Adobe PDF
- Create Bookmarks
- Convert Word Headings to Bookmarks
- Click Ok and then Save.
Without Acrobat installed:
- Open File > Save as or Export.
- Enter file name and select save location.
- (Windows) Select PDF in Save as type list.
- Choose Options and select Document structure tags for accessibility check box.
- Select Ok.
- (MacOS) Select PDF from File format drop down.
- Select Best for electronic distribution and accessibility (uses Microsoft online service) radio button.
- Select Save.
- (Windows) Select PDF in Save as type list.
For more information about PDFs, read The People v. PDF.
