Module 2: Getting Started
Learning Outcomes
When you have completed this module, you will be able to:
- Describe a drawing, a drawing template, drawing names, and drawing file extensions.
- Apply the NEW, QSAVE, OPEN, SAVEAS, and CLOSE commands to start a new drawing, name and save the current drawing into a specified folder, open a filed drawing, save the current drawing with a different name, and close the current drawing.
- Describe AutoCAD commands, option prompts, and defaults.
- Describe how to execute, repeat, and abort commands.
- Describe how the Space, Enter, and Esc keyboard keys are used in AutoCAD.
An AutoCAD Drawing
An AutoCAD drawing is a database file containing graphical and non-graphical data. The file must have the extension .dwg. To be able to draw anything in AutoCAD, you must have an open drawing. Multiple drawings can be opened at the same time and you can switch between them, as required. Only one drawing can be current at a time. The current drawing is the drawing currently being affected by the commands you are entering. It is also called the active drawing.
Drawing Templates
A drawing template is a drawing file that may contain layouts, defaults, blocks, and standards set by the creator of the template. A template file must be used to start every new drawing. A template drawing is simply an AutoCAD drawing saved as a template file and must have the extension .dwt. Creating template files is taught in the AutoCAD 2D Advanced book.
Drawing Templates for the AutoCAD 2D book
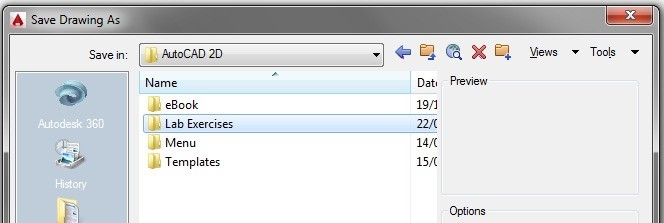
There are four drawing template files that are an important part of the AutoCAD 2D book. One of these templates must be used to start all new drawings for all workalongs and lab exercise throughout the book. These templates are supplied to each user of the AutoCAD 2D book and should be saved in the Templates folder as shown in Figure 2-1.
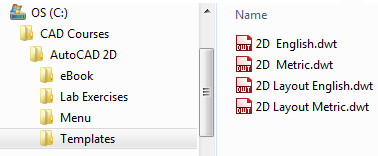
AutoCAD 2D book Templates
AutoCAD File Extensions
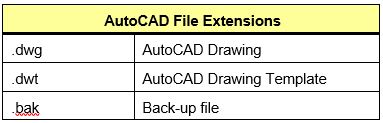
AutoCAD uses many different file extension names. The file extensions used in the AutoCAD 2D book are .dwg, .dwt, and .bak. See Figure 2-2. Many other AutoCAD file extensions are taught in the AutoCAD 2D Advanced book.
AutoCAD creates a .bak file when a previously saved drawing is saved. When the current drawing is saved, AutoCAD changes the extension of the existing drawing from .dwg to .bak and then creates a new file with the extension .dwg. If a drawing file ever gets lost or corrupted, the extension name of the .bak file can be changed to .dwg and opened in AutoCAD.
The Drawing Name
Each drawing should be assigned a unique name. It is important for you to name a new drawing as soon as possible after you start it. Getting into a habit of doing this will save you many hours of searching the disk drive looking for existing drawings or redrawing lost drawings.
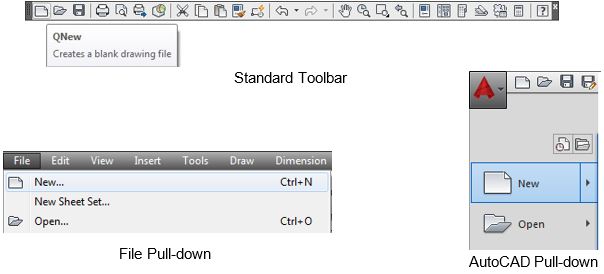
AutoCAD Command: NEW
The NEW command is used to start a new drawing. Shortcut: CNTL+N
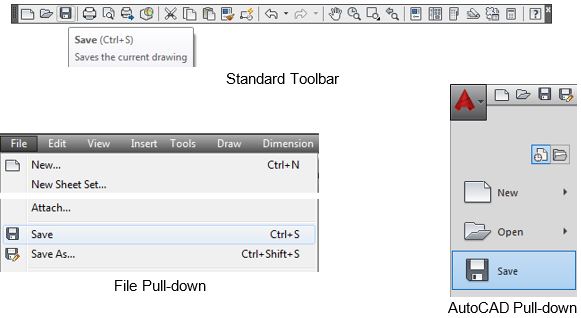
AutoCAD Command: QSAVE
The QSAVE command is used to save the current drawing. Shortcut: CTRL+S
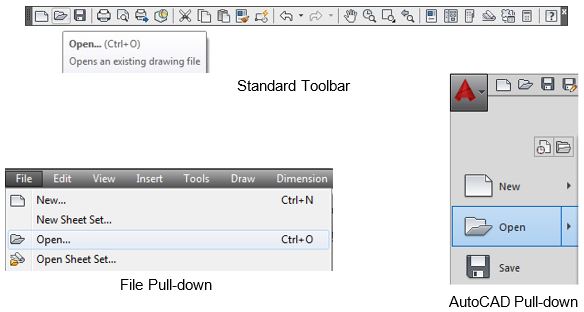
AutoCAD Command: OPEN
The OPEN command is used to open a saved drawing. Shortcut: CTRL+O
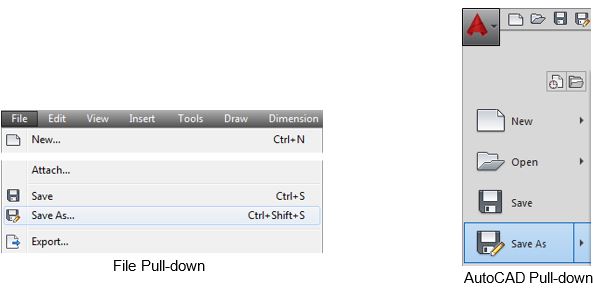
AutoCAD Command: SAVEAS
The SAVEAS command is used to save the current drawing with a new name. Shortcut: CTRL+SHIFT+S
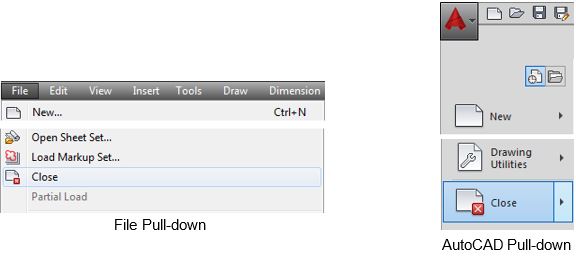
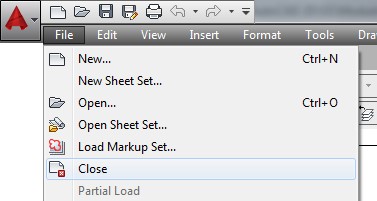
AutoCAD Command: CLOSE
The CLOSE command is used to close the current drawing. Shortcut: none
WORKALONG: Creating, Naming, Saving, Opening, and Closing Drawings
Step 1
Launch AutoCAD.
Step 2
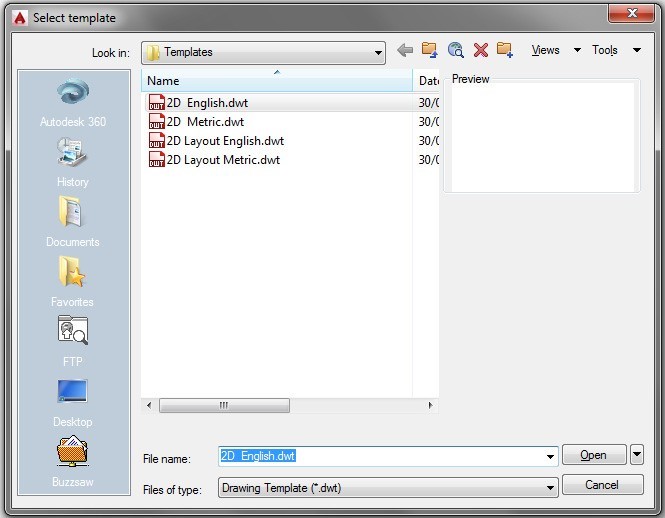
Click the New icon. This will open the Select template dialogue box. Select the template: 2D English and then click Open (Figure Step 2)
Step 3
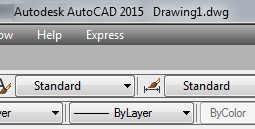
Note the drawing name: Drawing1.dwg displays on the top bar of the Graphic window. (Figure Step 3)
Step 4
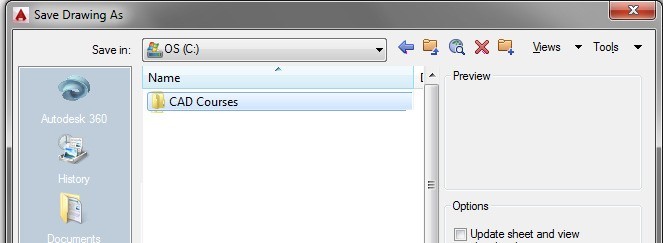
Enter the QSAVE command to open the Save Drawing As dialogue box. Find and select the folder: CAD Courses. Under it, select the folder: AutoCAD 2D and under that, the folder: Lab Exercise. (Figure Step 4A, 4B, and 4C)

Step 5
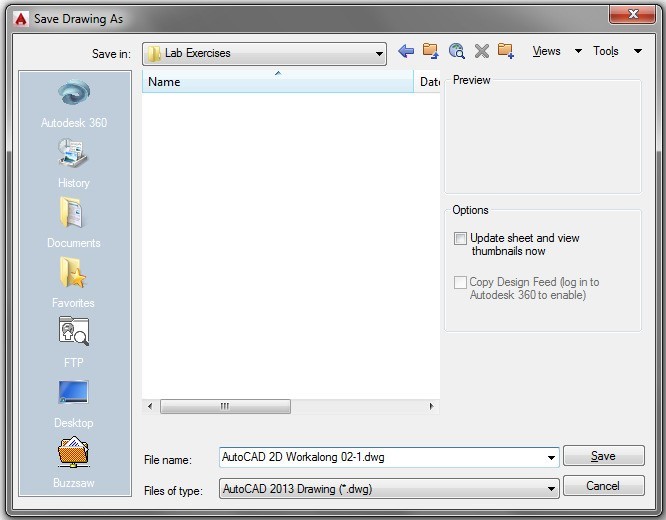
With Lab Exercises in the Save in box, enter the name: AutoCAD 2D Workalong 02-1 in the File name: box. (Figure Step 5)
Step 6
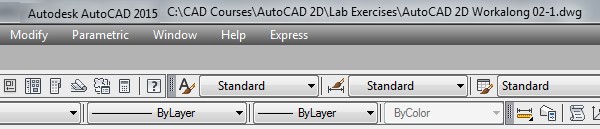
Note that the folder location and the drawing name:
C:\CAD Courses\AutoCAD 2D\Lab Exercises\AutoCAD 2D Workalong 02-1.dwg displays on the top bar of the Graphic window. (Figure Step 6)
Step 7
Check to ensure that the Model tab is enabled. If not, enable it by clicking it with the left mouse button. (Figure Step 7)

Step 8
Disable all features on the Status bar by clicking any that are enabled. Your Status bar should match the figure. (Figure Step 8)

Step 9
Ensure that ByLayer is enabled in the first 3 boxes on the Properties toolbar or the Properties tab in the Ribbon menu. (Figure Step 9)


Step 10
Enter the CLOSE command to close the current drawing. If you are asked if you want to save the drawing, answer Yes.
Step 11
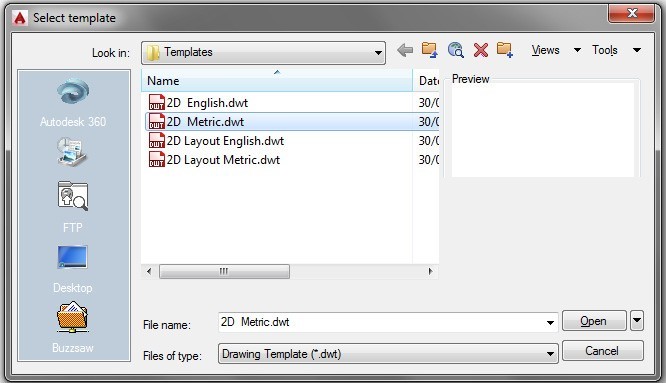
Using what you learned in the first part of the workalong, start a new drawing using the template: 2D Metric. (Figure Step 11)
Step 12
Save and name the drawing: AutoCAD 2D Workalong 02-2 in the folder: C:\CAD Courses\AutoCAD 2D\Lab Exercises. (Figure Step 12)
Step 13
Enter the CLOSE command to close the current drawing. If you are asked if you want to save the drawing, answer Yes.
Step 14
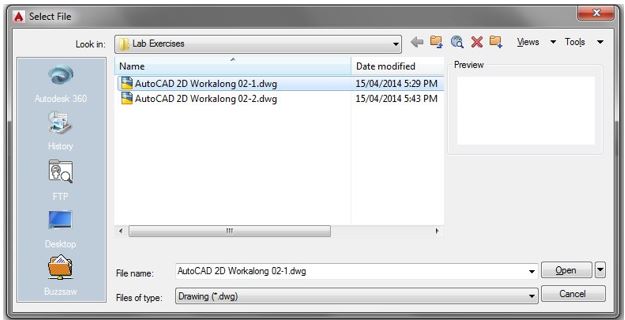
Enter the OPEN command to open the Select File dialogue box. In it, locate the folder: C:\CAD Courses\AutoCAD 2D\Lab Exercises. (Figure Step 14)

Step 15
With Lab Exercise in the Look in box, select the drawing: AutoCAD 2D Workalong 02-1. (Figure Step 15)
USER TIP: If the Select File dialogue box does not open when you enter the NEW command, enter the FILEDIA command and set the value to 1 as shown below:
Command: FILEDIA
Enter new value for FILEDIA <0>: 1
Command:
Step 16
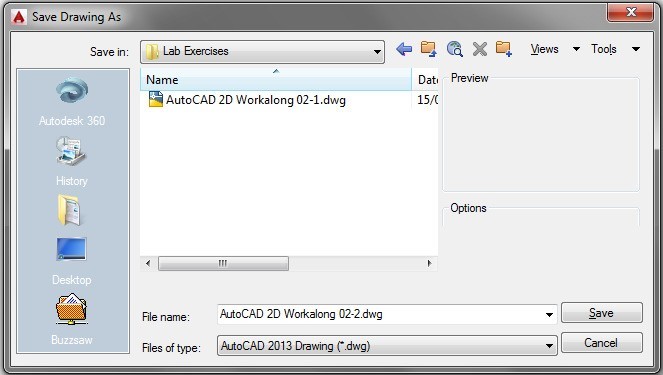
Enter the SAVEAS command. It will open the Save Drawing As dialogue box. In the File name: box, enter the name: AutoCAD 2D Workalong 02-3. (Figure Step 16)

Step 17
Enter the CLOSE command to close the current drawing. If you are asked if you want to save the drawing, answer Yes.
Step 18
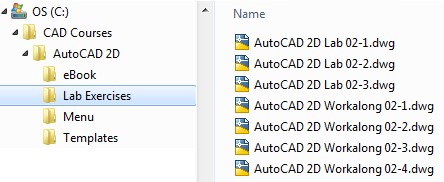
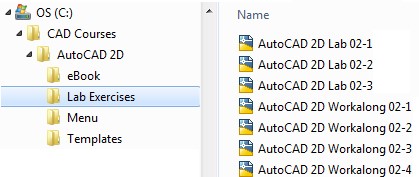
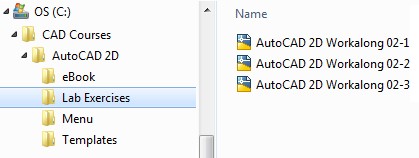
Minimize AutoCAD and open File Explorer. Find the folder:
C:\CAD Courses\AutoCAD 2D\Lab Exercises. You should see three drawing files either with or without the .dwg extension as shown in the figures. (Figure Step 18A and 18B)

AutoCAD Commands
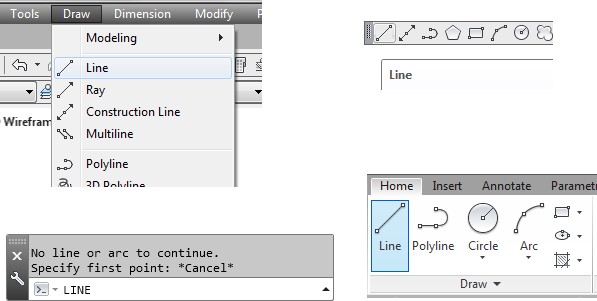
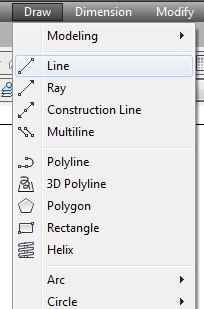
Most work in AutoCAD consists of you issuing instructions to AutoCAD. Those instructions are called commands. Commands are usually entered using the Command Line window, a Pull-down menu, a Toolbar menu, or a Ribbon menu. Figure 2-3 shows the LINE command being entered using all four methods.
Regardless of the way you enter a command, AutoCAD does not know or care where the command was initiated. To AutoCAD, all commands look alike, therefore you can choose which method you want to use. There is no right or wrong method to enter a command. Throughout the AutoCAD 2D book, the different methods of entering commands is shown and the you can decided which method to use.
Executing Commands
Some menu items execute commands automatically but most of the time it is up to you to execute the command. Executing a command is your way of telling AutoCAD that you are finished and AutoCAD should do what was commanded. A command can be executed by either pressing the Enter key or the Space Bar.
Repeating the Last Command
AutoCAD can be very repetitive. To work faster, the last command that was executed can be repeated by pressing the Enter key, the Space bar, or by right clicking the mouse.
Option Prompts
After most commands are executed, AutoCAD will respond with an option prompt. An option prompt is AutoCAD asking you a question in response to a command or requesting some user input. Figure 2-4 shows three commands and the option prompts returned by each one. Your input is shown in bold. In the LINE command, AutoCAD’s option prompt is
‘ Specify first point ‘ and you respond 2,2. AutoCAD then prompts ‘ Specify next point or [Undo]: ‘. It is important for you to watch the Command Line window to see what AutoCAD is asking from you next.

Defaults
AutoCAD sets defaults for almost everything. A default is the value AutoCAD uses, if you do not supply one. Defaults are enclosed inside angle brackets ‘ < > ‘. If you want to use the default value, simply respond by pressing the Enter key or the Space bar. See Figure 2-5.
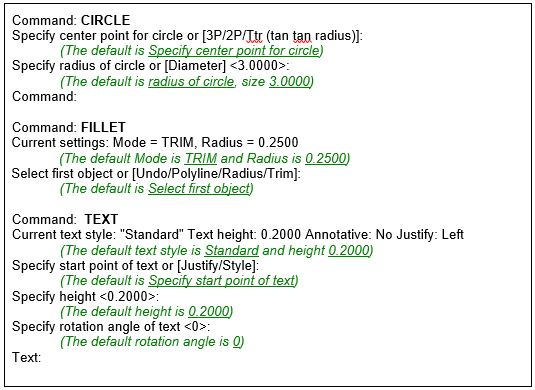
Command Options
Command options are selections that you can choose from to change the default. Command options are enclosed inside ‘ [ ] ‘ as shown in Figure 2-5. An example of the defaults and options for the CIRCLE command are as follows:
Specify center point for circle or [3P/2P/Ttr (tan tan radius)]:
Specify center point for circle – is the default.
[3P/2P/Ttr (tan tan radius)] – are the options.
Cancelling or Aborting a Command
Commands can be cancelled or aborted by pressing the Esc key on the keyboard. Sometimes it must be pressed twice to completely abort the command and return to the Command: prompt.
USER TIP: AutoCAD’s option prompts are a combination of upper and lower case letters. To help you work faster, only enter the uppercase character(s) when entering an option. For example:
Command: LENGTHEN
Select an object or [Delta/Percent/Total/DYnamic]:
(For Delta, enter D, for Percent enter P, for Total enter T, and for DYnamic enter DY.)
WORKALONG: Entering, Executing, and Aborting Commands
Step 1
Using what you learned earlier in this module, start a new drawing using template: 2D English.
Step 2
Save the drawing with the name: AutoCAD 2D Workalong 02-4 in the Lab Exercises folder.
Step 3
Check to ensure that the Model tab is enabled. If it is not, enable it by clicking it with the left mouse button. (Figure Step 3)

Step 4
Disable all features on the Status bar by clicking any that are enabled. Your Status bar should match the figure. (Figure Step 4)

Step 5
Ensure that ByLayer is enabled in the first 3 boxes on the Properties toolbar or the Properties tab in the Ribbon menu. (Figure Step 5)


Step 6
Look in the Command Line window. Note that when there is no active command, AutoCAD displays ‘ Type a command ‘ prompt. The prompt is AutoCAD asking you to enter a command. (Figure Step 6)

Step 7
Enter the LINE command by selecting Draw on the Pull-down menu. In the Draw Pull- down, select Line. (Figure Step 7)
Step 8
Note in the Command Line window AutoCAD is now prompting ‘ Specify first point: ‘. (Figure Step 8)

Step 9
Press Esc to abort (cancel) the command. (Figure Step 9)

Step 10
At the Command: prompt, enter the CIRCLE command by typing it on the keyboard. (Figure Step 10)

Step 11
Press Enter to execute the command. Note how AutoCAD prompts ‘ Specify center point for circle or [3P/2P/Ttr (tan tan radius)]: ‘ (Figure Step 11)

Step 12
Enter a T and press Enter. Take note of the new prompt ‘ Specify point on object for first tangent of circle: ‘. (Figure Step 12)

Step 13
Press Esc to abort the command. (Figure Step 13)

Step 14
Enter the ARC command by typing it in on the keyboard. Press the Space bar to execute command. Press Esc to abort the command. (Figure Step 14)

Step 15
Press Enter without entering a command. Note how AutoCAD will repeat the last command. (Figure Step 15)

Step 16
Press Esc to abort the command to return to the Command prompt. (Figure Step 16)

Step 17
Enter the QSAVE command by either typing it on the keyboard. (Figure Step 17)

Step 18
Enter the CLOSE command to close the drawing. (Figure Step 18)
MUST KNOW: Command options are selections that you can choose from to change the command default. Command options are enclosed inside square brackets ‘ [ ] ‘.Select first object [Polyline/Radius/Trim] – Enter either a P, R or T to change the default.
Key Principles
Key Principles in Module 2
1. An AutoCAD drawing is a database file containing graphical and non-graphical data and must have the extension .dwg.
2. A drawing template is a drawing file that may contain layouts, defaults, blocks, and standards set by the creator of the template and must be used to start a new drawing.
3. The AutoCAD file extensions taught in the AutoCAD 2D book are .dwg, .dwt, and .bak. .dwg is a drawing file. .dwt is a template file. .bak is a backup file.
4. Regardless of the way commands are entered, AutoCAD doesn’t really know or care where the command was initiated.
5. A default is the value AutoCAD uses, if you do not supply one. Defaults are enclosed inside angle brackets ‘ < > ‘. If you want to use the default value, simply respond by pressing the Enter key or the Space bar.
6. In an AutoCAD command prompt, the options are enclosed inside square brackets ‘ [ ] ‘.
7. The Enter key or the Space bar are used to execute a command. If there is no active command and either the Enter key or Space bar are pressed, the last command will repeat. The same thing can be achieved by right clicking the mouse.
8. The Esc key will cancel or abort any AutoCAD command or process.
Lab Exercise 2-1
Time allowed: 30 minutes.
Step 1
Start a new drawing using the template: 2D English.
Step 2 IMPORTANT STEP
Unless otherwise instructed, each time you start a workalong or a lab exercise in the AutoCAD 2D book, the Model tab should be enabled. (Figure Step 2)

Step 3 IMPORTANT STEP
Unless otherwise instructed, each time you start a workalong or a lab exercise in the AutoCAD 2D book, all features on the Status bar should be disabled as shown in the figure. (Figure Step 3)

Step 4
If any icons in the Status bar are enabled as shown in Figure Step 4, click them until they are disabled as shown in Figure Step 3. (Figure Step 4)

Step 5 IMPORTANT STEP
Unless otherwise instructed, each time you start a workalong or a lab exercise in the AutoCAD 2D book, the first three box of the Properties toolbar or the Properties tab in Ribbon menu should be set ByLayer . (Figure Step 5)


Step 6
Save and name the drawing with the name: AutoCAD 2D Lab 02-1. Save the drawing in the folder: C:\CAD Courses/AutoCAD 2D/Lab Exercises. Using the CLOSE command, close the drawing.
Step 7
Complete the following:
- A Using the NEW command, start a new drawing using the template: 2D Metric
- B Save and name the drawing with the name: AutoCAD 2D Lab 02-2
- C Save the drawing in the folder:
C:\CAD Courses/AutoCAD 2D/Lab Exercises
- D Using the CLOSE command, close the
Step 8
Complete the following:
- A Using the OPEN command, open the drawing: AutoCAD 2D Lab 02-2
- B Using the SAVEAS command, save and name the drawing: AutoCAD 2D Lab 02-3
- D Using the CLOSE command, close the drawing.
Step 9
Minimize AutoCAD and open File Explorer. Locate the folder:
C:\CAD Courses/AutoCAD 2D/Lab Exercises. It should contain 7 drawing files, with or without the extension .dwg, as shown in the figure. (Figure Step 9A and 9B)