Module 29: Polylines
Learning Outcomes
When you have completed this module, you will be able to:
- Describe a polyline, a 2D polyline, an open polyline, and a closed polyline.
- Explain how to create, close, and edit a polyline.
- Describe a donut.
- Apply the PLINE, PEDIT, DONUT, FILL, EXPLODE, and BOUNDARY commands.
- Explain how to work in feet and inches.
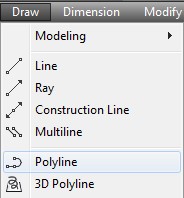
Polylines
A polyline is a series of line and/or arc segments connected to create a single drawing object. Polylines are created using the PLINE or the PEDIT command from existing straight line segments, arc segments, or a combination of the two. A polyline, usually called a pline, can be edited with the PEDIT command or the Properties window. A polyline can be given a width or can be converted back to the individual drawing object segments by exploding it with the EXPLODE command.
2D or Lightweight Polyline
Since the release of AutoCAD 14, polylines have been created as lightweight polylines. Sometimes called a 2D polyline, a lightweight polyline is greatly improved over the older heavyweight or 3D polyline which was used before AutoCAD 14. Using 2D polylines allows AutoCAD to regenerate the drawing faster, which in turn allows you to work faster.
In this module, only 2D polylines are taught. 3D polylines are taught in the AutoCAD 3D book. In the AutoCAD 2D book, the terms pline or polyline refers to a 2D polyline. A 3D polyline is called a 3D polyline.
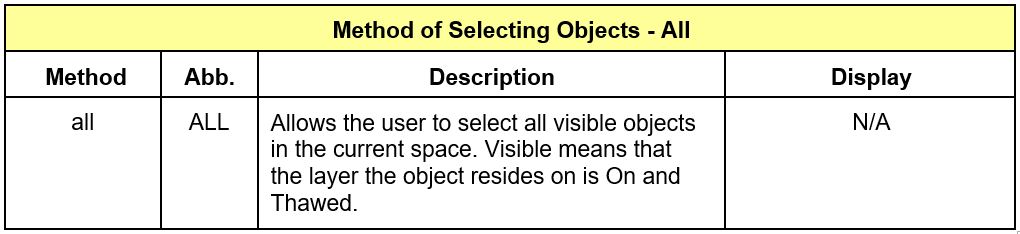
Selecting Objects – All
An Open Verses a Closed Polyline
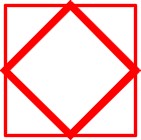
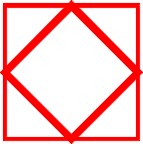
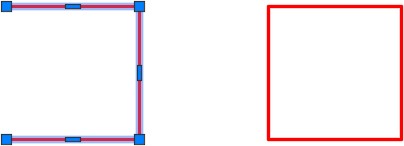
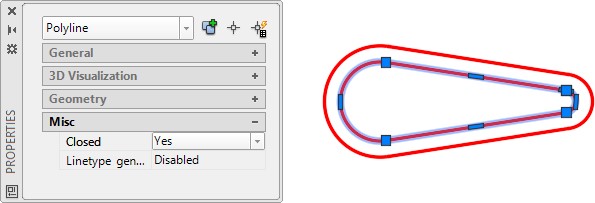
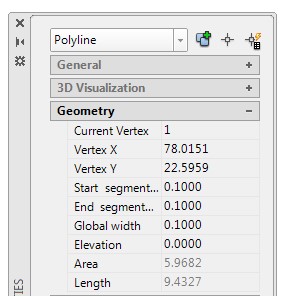
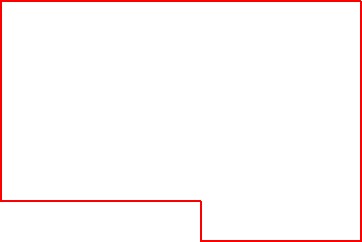
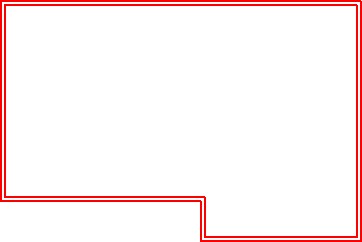
A closed polyline creates a polygon. A closed polyline or a polygon has many different uses in an AutoCAD drawing but may appear exactly the same as an open polyline. It is important for you to be able to verify if a polyline is opened or closed. Polygons are assigned a Closed property. To check or change the Closed polyline property, use the Properties window. Figure 29-2 shows the selected polyline as open. On the other hand, Figure 29-3 shows how the polyline property has been changed to close the polyline.
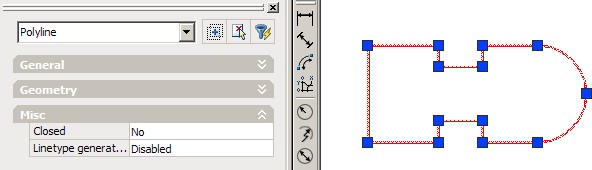
An Open Polyline
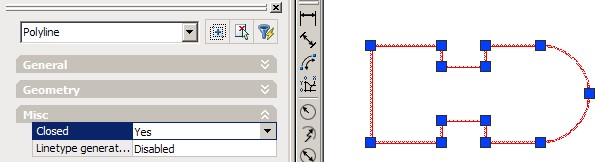
A Closed Polyline
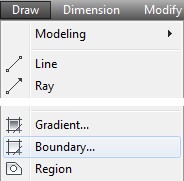
Creating Polylines from Existing Objects
Polylines can be drawn from scratch, using the PLINE command, or they can be created from existing objects using the PEDIT or the BOUNDARY command. The PEDIT command is used to convert existing lines and arcs into polylines and the BOUNDARY command will create a closed polyline object using enclosed areas of existing lines, arcs, and/or polylines.
Editing Polylines
To edit a polyline, use the PEDIT command or the Properties window. The AutoCAD 2D book does not cover all of the editing features of PEDIT as they are every extensive. The AutoCAD 3D book covers some of the more advanced options.
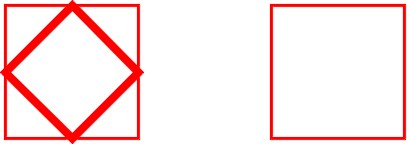
A Vertex
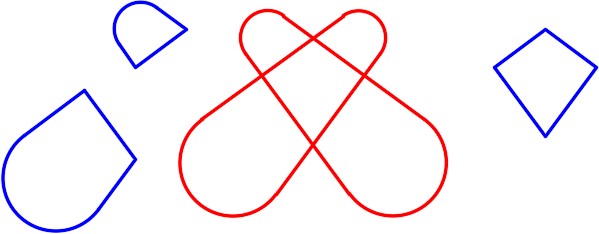
Each endpoint of a line or an arc segment in a polyline is called a vertex. A polyline changes direction at each vertex. See Figure 29-4.
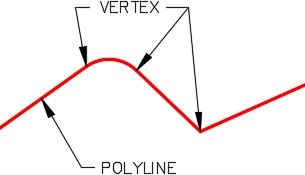
A Vertex
AutoCAD Command: PLINE
The PLINE command is used to create a connected sequence of line and/or arc segments to form a single object. A closed polyline is a polygon.
Shortcut: PL

AutoCAD Command: PEDIT
The PEDIT command is used to edit existing polylines or create new polylines.
Shortcut: PE
WORKALONG: Using the PLINE and PEDIT Commands
Step 1
Start a new drawing using the template: 2D Layout English.
Step 2
Save and name the drawing: AutoCAD 2D Workalong 29-1.
Step 3
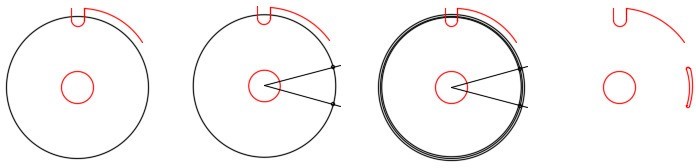
On layer: Object, enter the PLINE command, as shown below, to draw a square 2 inches by 2 inches with a closed 2D polyline. (Figure Step 3)
Command: PLINE
Specify start point 1,8
Current line-width is 0.0000
(The width should be 0.)
Specify next point or [Arc/Halfwidth/Length/Undo/Width]: @2,0
Specify next point or [Arc/Close/Halfwidth/Length/Undo/Width]: @0,2
Specify next point or [Arc/Close/Halfwidth/Length/Undo/Width]: @-2,0
Specify next point or [Arc/Close/Halfwidth/Length/Undo/Width]: C
(Closing the pline.)
Command:
Step 4
Without entering a command, select the polyline you drew in Step 3. Note how it is one drawing object. (Figure Step 4)
Step 5
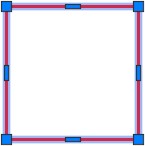
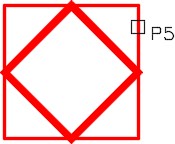
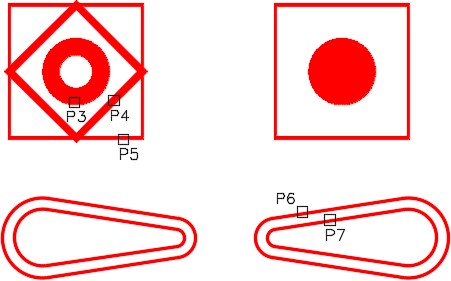
Press Esc to unselect the pline. Enter the PLINE command, as shown below, to draw another polyline inside the first one. In this command, you will be assigning a width of 0.1 to the pline. (Figure Step 5A and 5B)
Command: PLINE
Specify start point: (mid) P1
Current line-width is 0.0000
Specify next point or [Arc/Halfwidth/Length/Undo/Width]: W
Specify starting width <0.000>: 0.1
(Setting the width of the polyline to 0.1.)
Specify ending width <0.1000>:
(Press enter to set both ends of the pline to the same width.)
Specify next point or [Arc/Halfwidth/Length/Undo/Width]: (mid) P2
Specify next point or [Arc/Close/Halfwidth/Length/Undo/Width]: (mid) P3
Specify next point or [Arc/Close/Halfwidth/Length/Undo/Width]: (mid) P4
Specify next point or [Arc/Close/Halfwidth/Length/Undo/Width]: C
Command:
Step 6
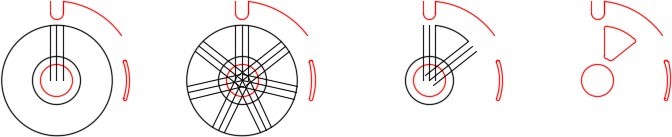
Enter the PEDIT command, as shown below, to change the width of an existing pline. (Figure Step 6A and 6B)
Command: PEDIT
Select polyline or [Multiple]: P5
Enter an option [Open/Join/Width/Edit vertex/Fit/Spline/Decurve/Ltype gen/Undo]: W
(Select the Width option.)
Specify new width for all segments: 0.05
(Set the width to 0.05 units.)
Enter an option [Open/Join/Width/Edit vertex/Fit/Spline/Decurve/Ltype gen/Undo]:
Command:
Step 7
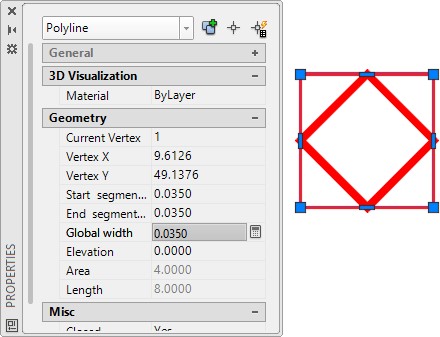
Open the Properties window. Without entering a command, select the outside polyline. In the Properties window, change the Global width property to 0.035. (Figure Step 7)
Step 8
Enter the PLINE and PEDIT commands, as shown below, to create an open polyline and then close it. (Figure Step 8A and 8B)
Command: PLINE
Specify start point: 5,8 Current line-width is 0.04
(Set the width to 0.04)
Specify next point or [Arc/Halfwidth/Length/Undo/Width]: @2,0
Specify next point or [Arc/Close/Halfwidth/Length/Undo/Width]: @0,2
Specify next point or [Arc/Close/Halfwidth/Length/Undo/Width]: @-2,0
Specify next point or [Arc/Close/Halfwidth/Length/Undo/Width]:
(This is an open pline.)
Command: PEDIT
Select polyline or [Multiple]: P6
Enter an option [Close/Join/Width/Edit vertex/Fit/Spline/Decurve/Ltype gen/Undo]: C
(Closing the polyline. Note how the last section has been added by this command.)
Enter an option [Open/Join/Width/Edit vertex/Fit/Spline/Decurve/Ltype gen/Undo]:
Command:
Step 9
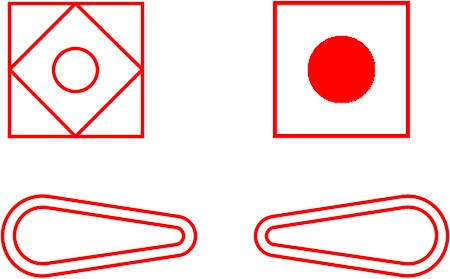
Your drawing should now appears a shown in the figure. (Figure Step 9)
Step 10
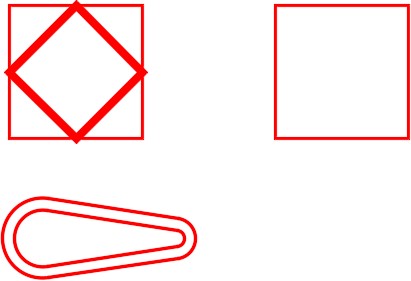
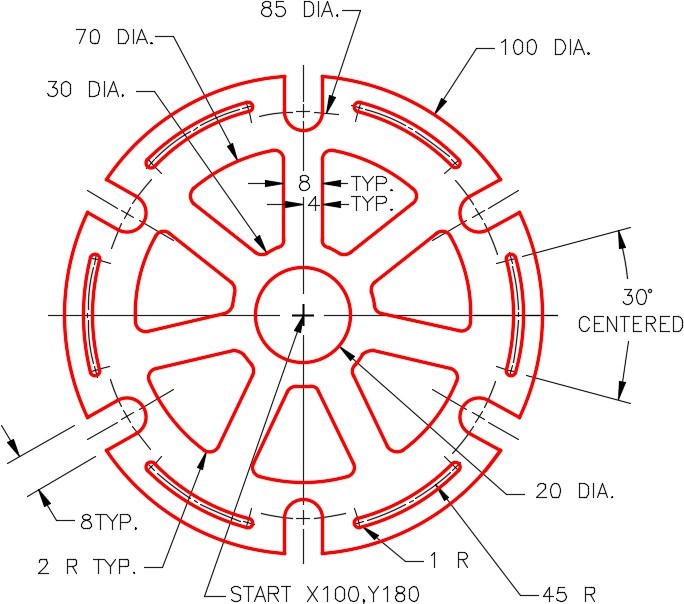
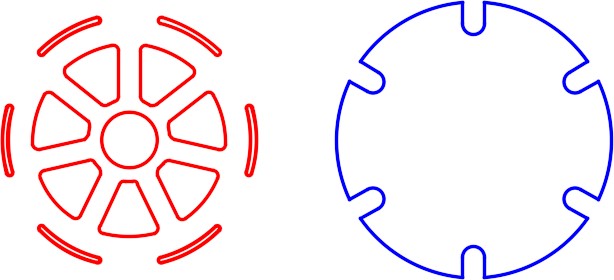
On layer: Object, draw the object shown in the figure. Using what you learned earlier in the book, draw it using lines and circles. Trim the circles to complete it. Your drawing should now appear as shown in the figure. (Figure Step 10A and 10B)

Step 11
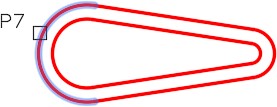
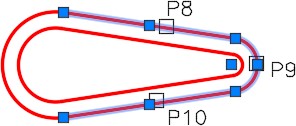
Enter the PEDIT command, as shown below, to create a polyline using existing objects. (Figure Step 11A and 11B)
Command: PEDIT
Select polyline or [Multiple]: P7
(Select one of the objects.)
Object selected is not a polyline
Do you want to turn it into one? <Y> Y
Enter an option [Close/Join/Width/Edit vertex/Fit/Spline/Decurve/Ltype gen/Undo]: J
(Enter the Join option.)
Select objects: P8 1 found
Select objects: P9 1 found, 2 total
Select objects: P10 1 found, 3 total
Select objects:
3 segments added to polyline
(Joining the 4 objects to form one pline.)
Enter an option [Open/Join/Width/Edit vertex/Fit/Spline/Decurve/Ltype gen/Undo]:
Command:
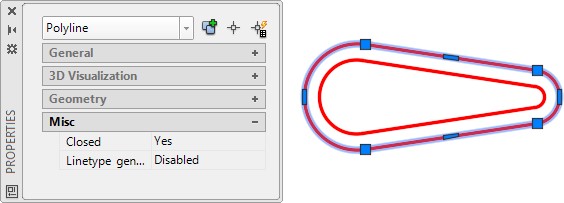
Step 12
Without entering in a command, select the polyline that you created in Step 11. In the Properties window, check to ensure that it is a closed polyline. (Figure Step 12)
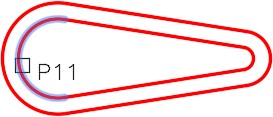
Step 13
Enter the PEDIT command as shown below. Using the ALL object selection method, create a polyline with the joining objects. (Figure Step 13)
Command: PE
Select polyline or [Multiple]: P11
Object selected is not a polyline
Do you want to turn it into one? <Y>
(Press enter to accept Yes.)
Enter an option [Close/Join/Width/Edit vertex/Fit/Spline/Decurve/Ltype gen/Undo]: J
Select objects: ALL
(Selecting all of the visible objects in the drawing.)
Command:
Step 14
Using the Properties window, check to ensure that the polyline you created in Step 13 was created and is closed. Your drawing should appear as shown in the figure. (Figure Step 14)
Step 15
Save and close the drawing.
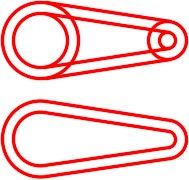
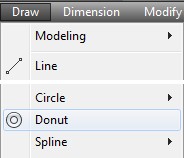
Donuts
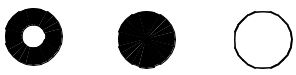
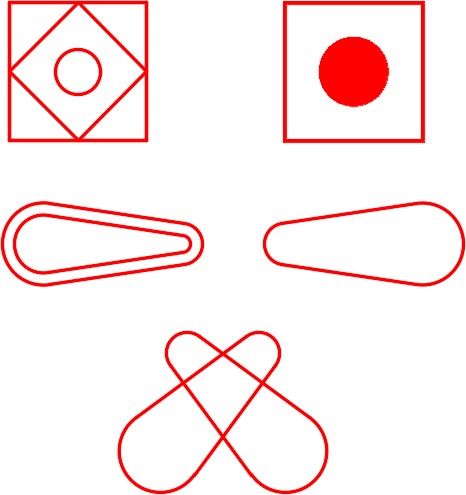
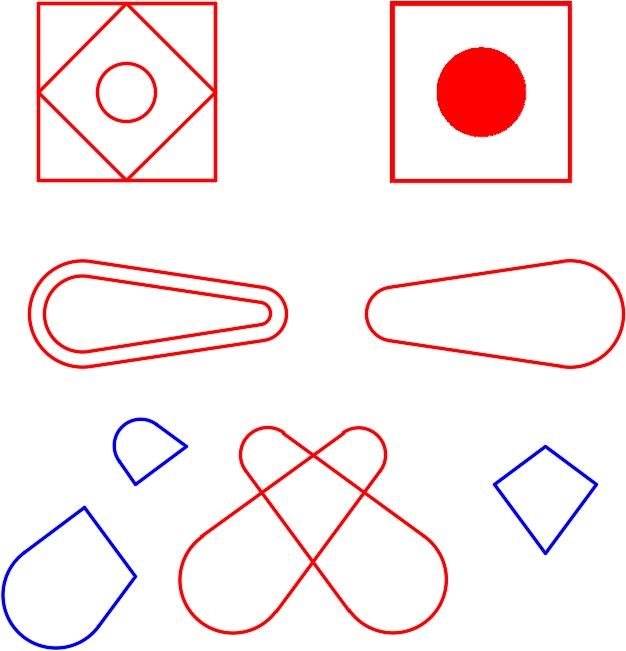
A donut is simply a circular closed polyline, with an assigned width. Donuts are created with the DONUT command. They can be drawn with a width or completely filled in so that they appear as a solid circle. Since a donut is a polyline, it can be edited with the PEDIT command and exploded with the EXPLODE command. See Figure 29-6 for three donut examples.
Donuts
AutoCAD Command: DONUT
The DONUT command is used to create donuts.
Shortcut: DO
AutoCAD Command: BOUNDARY
The BOUNDARY command is used to create a closed polyline using existing objects that form an enclosed area on the drawing.
Shortcut: BO

AutoCAD Command: FILL
The FILL command is used to toggle the solid fill display inside polylines, solid, and hatches.
Shortcut: none
AutoCAD Command: EXPLODE
The EXPLODE command is used to convert polylines plus many other AutoCAD objects back into individual objects.
Shortcut: X

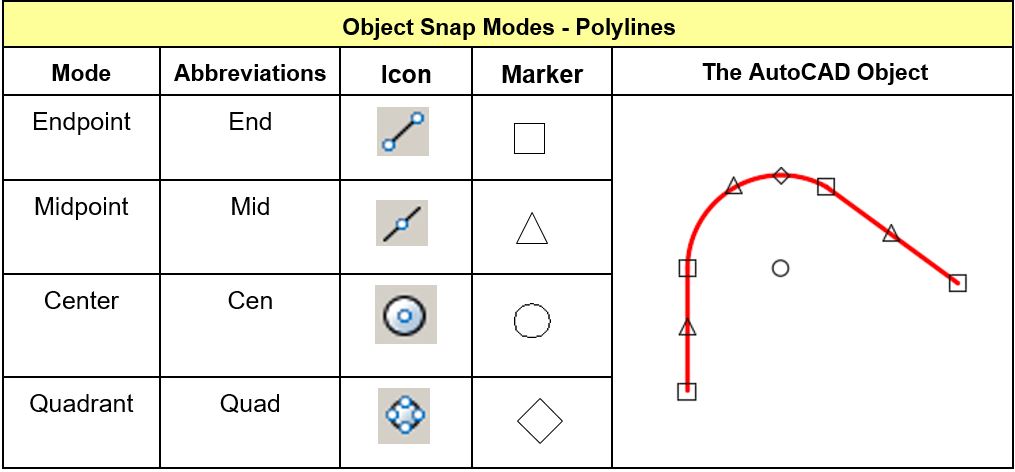
Object Snap Modes for Polylines
WORKALONG: Using the DONUT, FILL, EXPLODE and BOUNDARY Commands
Step 1
Open the drawing: AutoCAD 2D Workalong 29-1. Using the SAVEAS command, save the drawing with the name: AutoCAD 2D Workalong 29-2. (Figure Step 1)
Step 2
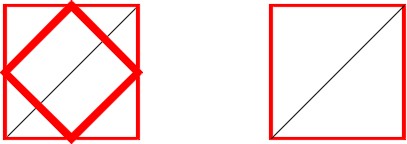
On layer: Construction, draw a construction line diagonally from corner to corner in both squares as shown in the figure. (Figure Step 2)
Step 3
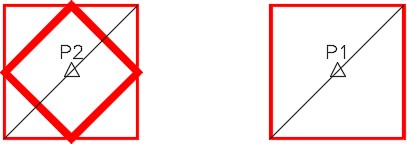
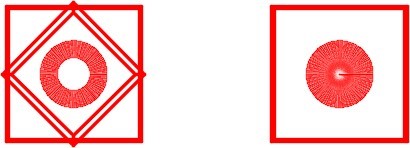
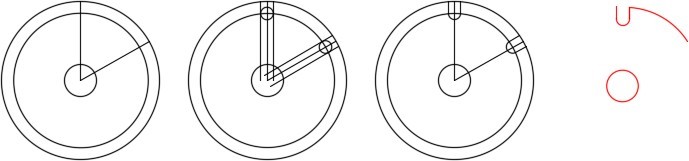
Set layer: Object as the current layer. Enter the DONUT command, as shown below, to draw two donuts with their centers located in the center of the squares. Snap to the midpoint of the construction lines when locating the centers. (Figure step 3A and 3B)
Command: DONUT
Specify inside diameter of donut <0.5000>: 0
(Setting the inside diameter to 0.)
Specify outside diameter of donut <0.8000>: 1
(Setting the outside diameter to 1.)
Specify center of donut or <exit>: (mid) P1
Specify center of donut or <exit>:
Command: DONUT
Specify inside diameter of donut <0.0000>: .5
(Setting the inside diameter to 0.5)
Specify outside diameter of donut <1.0000>:
(Press enter to accept default.)
Specify center of donut or <exit>: (mid) P2
Specify center of donut or <exit>:
Command:

Step 4
Turn layer: Construction off and enter the commands below to see the results of using the FILL command. (Figure Step 4A and 4B
Command: FILL
Enter mode [ON/OFF] <ON>: OFF
(Disabling fill mode.)
Command: REGEN
(Regenerating to display fill mode.)
REGEN Regenerating model. Command: FILL
Enter mode [ON/OFF] <OFF>: ON
(Enabling fill mode.)
Command: REGEN
(Regenerating to display fill mode.)
REGEN Regenerating model.
Command:

Step 5
Using what you learned earlier in the book, mirror the lower object to match the dimensions shown in the figure. (Figure Step 5)
Step 6
Enter the EXPLODE command, as shown below, to explode the 5 plines back to their individual objects. (Figure Step 6A and 6B)
Command: EXPLODE
Select objects: P3 1 found
Select objects: P4 1 found, 2 total
Select objects: P5 1 found, 3 total
Select objects: P6 1 found, 4 total
Select objects: P7 1 found, 5 total
Select objects:
Command
Step 7
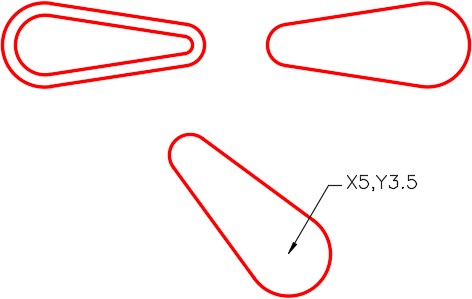
Erase the inside arcs and lines from the object on the right as shown in the figure. (Figure Step 7).

Step 8
Copy the object on the right locating the center of the large radius at X5,Y3.5 and then rotate it -45 degrees as shown in the figure. (Figure Step 8)
Step 9
Mirror and copy the object to match the dimensions as shown in the figure. (Figure Step 9A and 9B)
Step 10
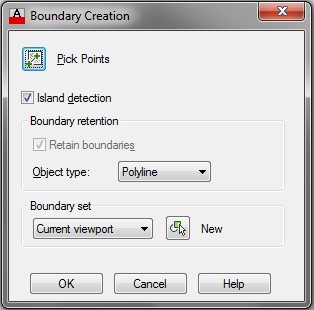
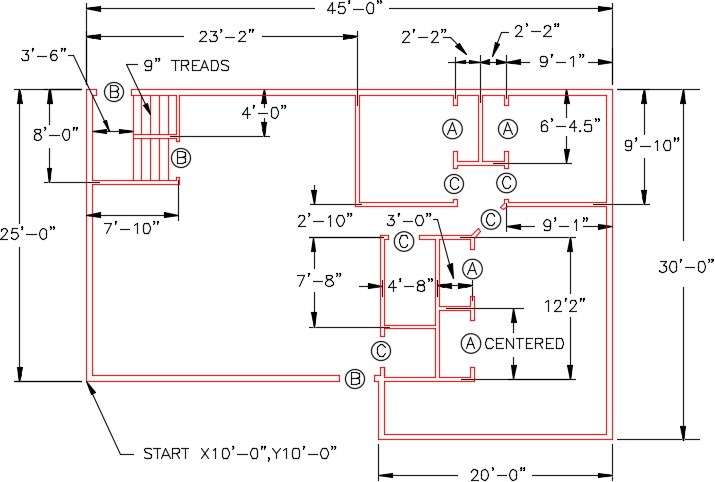
Set layer: Boundary as the current layer. Enter the BOUNDARY command. It will open the Boundary Creation dialogue box. Ensure that the settings in your dialogue box matches the figure. (Figure Step 10)
Step 11
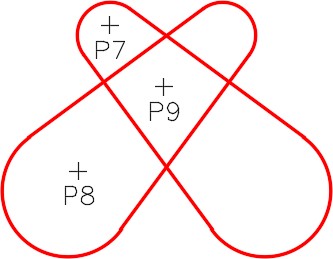
Click the Pick Points icon and select the locations P7, P8 and P9 as shown in the figure. (Figure Step 11)
Command: BOUNDARY
Pick internal point: Selecting everything… Selecting everything visible…
Analyzing the selected data… Analyzing internal islands…
Pick internal point: P7
Analyzing internal islands… Pick internal point: P8
Analyzing internal islands… Pick internal point: P9
BOUNDARY created 3 polylines
Command:
Step 12
Note how the BOUNDARY command creates closed polylines using the boundary of the selected areas. The plines are located on layer: Boundary, colored blue. (Figure Step 12)

Step 13
To prove that you have created polylines, move them away from the object using the MOVE command as shown in the figure. The exact location where you move them is not important. Using the Properties window, confirm that they are closed polylines. (Figure Step 13)
Step 14
Your drawing should appear similar to the figure. (Figure Step 14)
Step 15
Save and close the drawing.
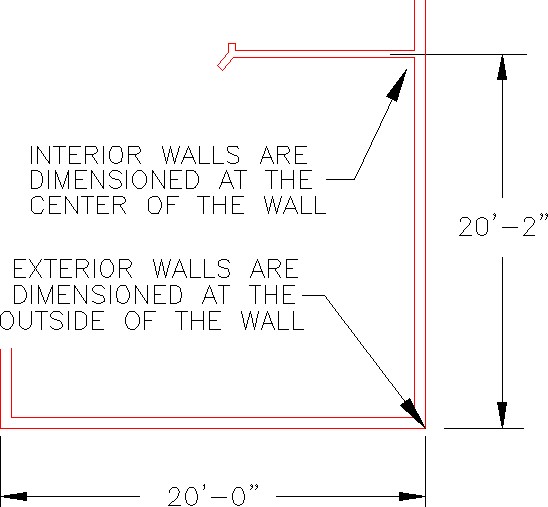
Working in Feet and Inches
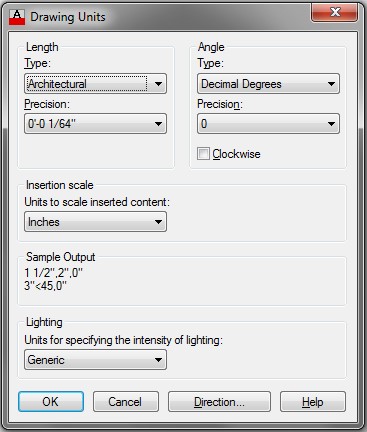
Up to this point in the book, all working units have been inches or millimeters. They both use the Length Type of Decimals. To work in feet and inches, the first thing you have to do is change the Length Type to Architectural. This is done using the UNITS command. In the Drawing Units dialogue box, pull-down the Length Type box and select Architectural as shown in Figure 29-8.
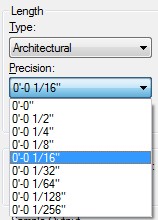
Pull-down the Length Precision box and select 0′-0 1/16″ as shown in Figure Step 29-9. The precision can be changed as required. Even though the length units have been set to Architectural, AutoCAD continues to work in inches. Therefore, when a number is entered and nothing else, AutoCAD will assume the number is inches. i.e.
Drawing Units Dialogue Box
Setting Precision
Command: LINE
Specify first point: 2,2
(AutoCAD interprets this number as 2″,2″)
Specify next point or [Undo]: @4,0
(AutoCAD interprets this as go 4″ in the X direction.)
Specify next point or [Undo]:
Command:
To enter feet and inches, enter a ‘ (single quote) after the number of feet and a ” (double quote) after the number of inches. For example:
Command: LINE
Specify first point: 2’3″,4’6″
(AutoCAD interprets this number as 2 feet 3 inches.,4 feet 6 inches)
Specify next point or [Undo]: @5’2″,0
(AutoCAD interprets this as go 5 feet 2 inches in the X direction.)
Specify next point or [Undo]:
Command:
To work in fractions of an inch, enter the number as follows: 3’2-1/2″ or 3’2.5″
USER TIP: When editing polylines, it is sometimes easier to use the Properties window rather than the PEDIT command. The Properties window cannot do everything the PEDIT command can do. While a polyline cannot be created using the Properties window, it can do the following:
- Change its width.
- Change the vertex locations.
- Open or close the pline.
Key Principles
Key Principles in Module 29
- A polyline is a series of line and/or arc segments connected to create a single object. Polylines can be created using the PLINE command drawing straight line segments, arc segments or a combination of the two. A polyline can be exploded back to its individual objects with the EXPLODE command.
- A closed polyline creates a polygon. A polygon has many different uses in an AutoCAD drawing but will appear exactly the same as an open polyline. Therefore, it is important to be able to verify if a polyline is opened or closed. This is done using the Properties window.
- Polylines can be drawn from scratch, using the PLINE command, but it is easier to create them using the PEDIT or BOUNDARY commands from existing objects.
- AutoCAD always works in inches. If you want to enter numbers in feet and inches, you must change the Length Type settings to Architectural in the Drawing Units dialogue box.
Lab Exercise 29-1
Time allowed: 40 minutes.
| Drawing Name | Template | Units |
|---|---|---|
| AutoCAD 2D Lab 29-1 | 2D Layout Metric | Millimeters |
Step 1
On layer: Object, draw the object shown in the figures. (Figure Step 1A and 1B)
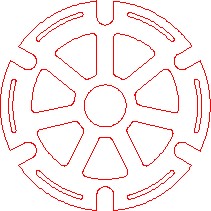
Completed Drawing
Hint 1
Create the objects to be arrayed in 3 steps as shown in the following figures. Once they have all be created, you will only have to use the ARRAY command twice to complete the drawing. (Figure Hint 1A, 1B, and 1C)
Lab Exercise 29-2
Time allowed: 40 minutes.
| Drawing Name | Template | Units |
|---|---|---|
| AutoCAD 2D Lab 29-2 | N/A | Millimeters |
Step 1
Open drawing: AutoCAD 2D Lab 29-1. Using the SAVEAS command, save and name the drawing: AutoCAD 2D Lab 29-2. (Figure Step 1)

Step 2
Using the PEDIT command and the All method of selecting, create a closed pline from the objects that form the perimeter of the object. Change the pline to layer: Pline. Using the MOVE command, move the pline 125 millimeters in the positive X direction. (Figure Step 2)
Step 3
Using the PEDIT command, 6 times, and the pick method of selecting the objects, create 6 closed plines of the slots. Copy the 6 plines 125 millimeters in the positive X direction. Change the layer of the copied plines to layer Pline. (Figure Step 3)

Step 4
Set layer: Pline as the current layer. Using the BOUNDARY command, 7 times, create a pline around and inner shapes to create 7 closed plines. Move the 7 plines 125 millimeters in the positive X direction. (Figure Step 4)

Step 5
Save and close the drawing.
Lab Exercise 29-3
Time allowed: 90 minutes.
| Drawing Name | Template | Units |
|---|---|---|
| AutoCAD 2D Lab 29-3 | 2D Layout English | Feet/Inches |
Step 1
Start a new drawing using the template shown above.
Step 2
Using the UNITS command, change the linear units to Architectural with a precision of 1/16″.
Step 3
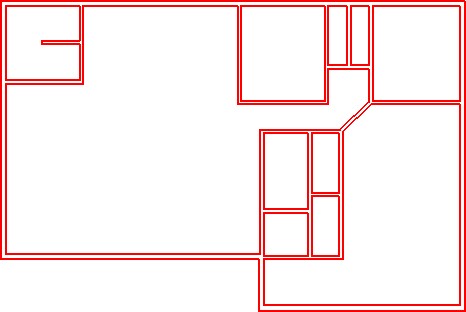
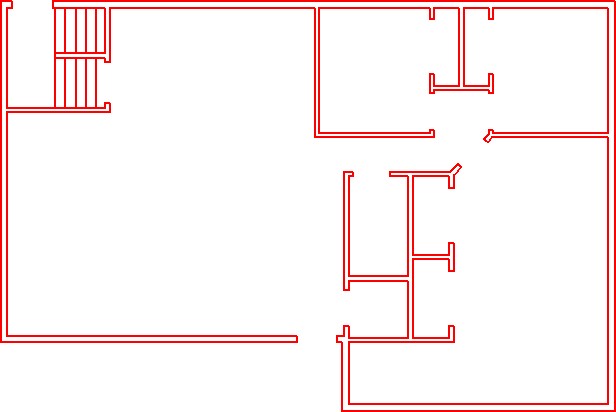
Using Steps 4 to 9, draw the floor plan of the house shown the figure. Use the LINE command to draw it. Use feet and inches as input units. (Figure Step 3)
Step 4
On layer: Floor Plan, draw lines around the outside boundary of the house. (Figure Step 4)
Step 5
Offset the outside boundary 6 inches toward the inside of the house. Trim or extend the lines to clean up the corners. (Figure Step 5)
Step 6
On layer: Construction, draw lines in the center location of the inside walls. Use Figure Step 6B to help you. (Figure Step 6A and 6B)


Step 7
Offset the center lines 2 inches on each side the centerline to create 4 inch walls. (Figure step 7A and 7B)
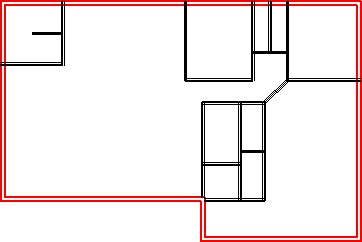
Step 8
Turn layer: Construction off. Using the TRIM and EXTEND commands, clean up the corners of all walls and change layer of all wall lines to layer: Floor Plan. Figure step 8A and 8B)
Step 9
Using Figure 9A, 9B and 9C, cut the door openings in the walls. (Figure step 9A, 9B, 9C, and 9D)
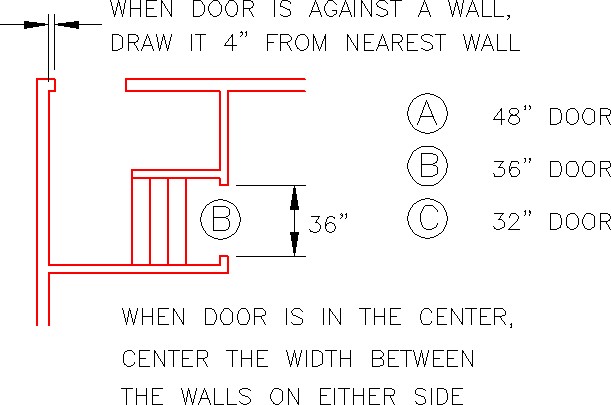
To draw a door, where the walls are horizontal or vertical , draw a line from the midpoint of the door opening with ortho mode enabled. Offset the line one-half the door width on each side and trim. (Figure Step 9B)
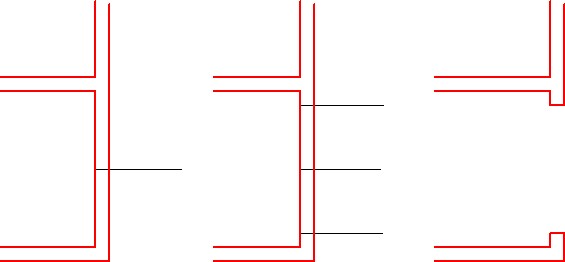
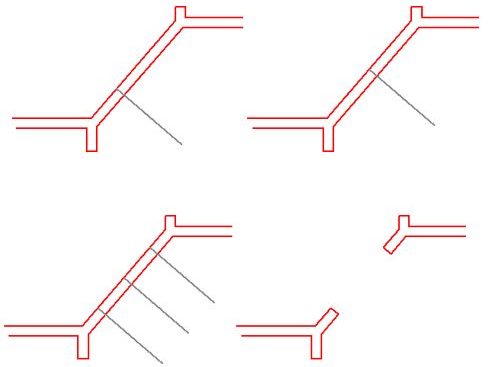
When the walls are inclined, draw a line from a point in space, perpendicular to the line. Move the line by snapping its endpoint to the midpoint of the line. Offset the line by one-half of the door width on each side and trim. (Figure Step 9C and 9D)
Step 10
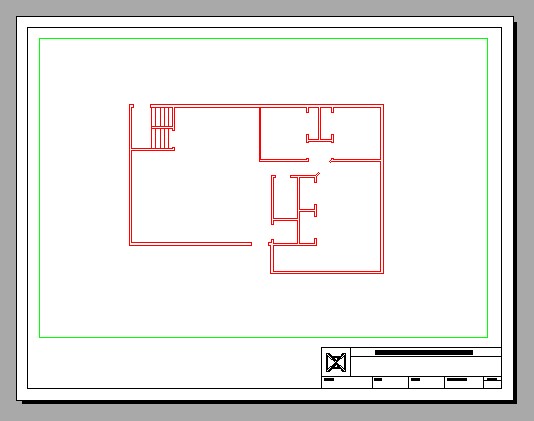
Enable layout: Module Layout C. On layer: Viewport, create a viewport and set the scale to 1/4″=1′-0″. Lock the display. (Figure Step 10)
Step 11
Save and close the drawing.
