Appendices: Introduction to Histology for first-time learners
Histology – Interpreting 2D Sections of 3D Structures
Willie Wu and Athena Li
Learning Objectives
By the end of this section, you should be able to:
- Identify the three major anatomical planes of section (transverse, sagittal, and coronal) and predict how a hollow structure would appear in each.
- Define the “apical” and “basal” surfaces of epithelial tissue using the lumen and basement membrane as consistent landmarks, regardless of image orientation.
- Use the presence of a lumen to correctly orient yourself in a micrograph of a tubular structure.
Introduction: The Perspective Problem
Just as the word “MOM” can look like “WOW” depending on your viewpoint, a histological structure can look dramatically different based on how it is sliced. This chapter addresses a fundamental skill in histology: learning to interpret two-dimensional (2D) sections on a microscope slide while mentally reconstructing their three-dimensional (3D) reality.
Planes of Section: How We Slice the Specimens
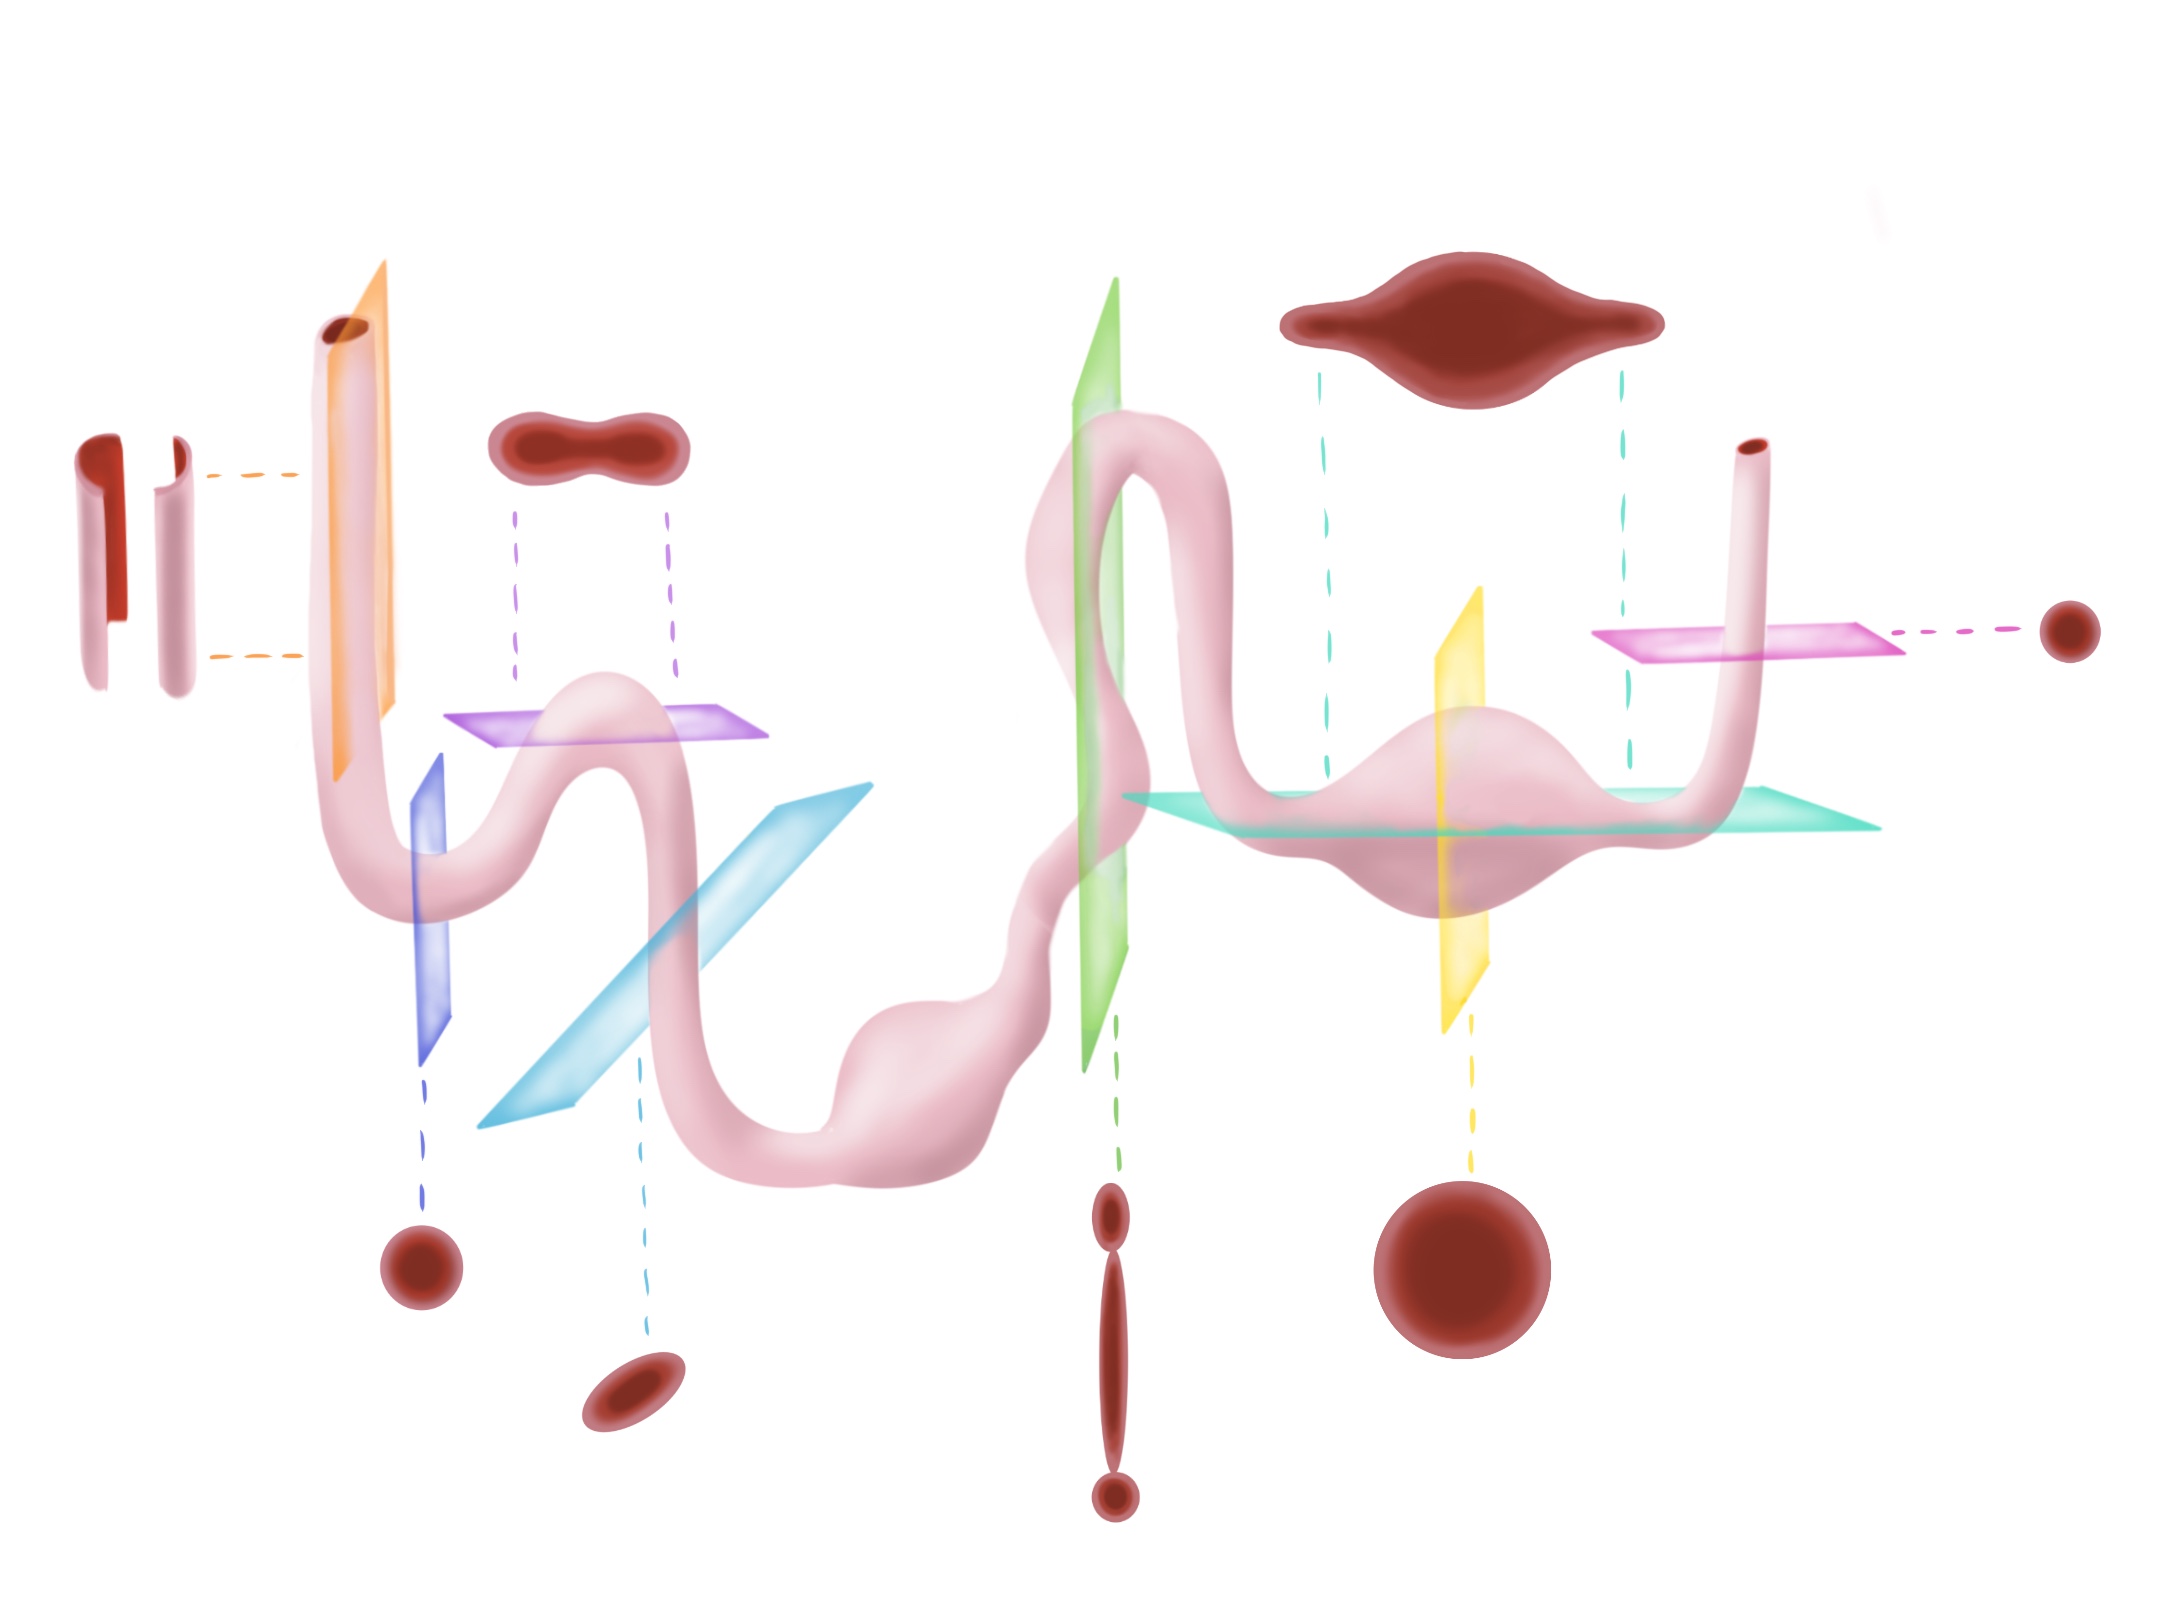
Tissue specimens are processed and sliced into extremely thin sections. The most common planes of section are defined by standard anatomical terminology (the diagram below is an excellent example of the different cross sectional views of the same tube):
- Transverse (Horizontal or Axial) Section: A cut made perpendicular to the long axis of a structure or the body. A cross-section of a tube would appear circular.
- Sagittal (Longitudinal) Section: A cut made parallel to the long axis, dividing a structure into left and right parts. A section through a tube would appear as two parallel lines.
- Coronal (Frontal) Section: A cut made parallel to the long axis, dividing a structure into anterior (front) and posterior (back) parts.
Anatomical Directions vs. Histological Landmarks
It is critical to distinguish between gross anatomical directions and microscopic landmarks.
- When Anatomical Directions Apply: Terms like anterior/posterior (front/back) and superior/inferior (up/down) only make sense in the context of the body’s anatomical position. For example, in a section of the torso, you could identify that the abdominal aorta is anterior to the vertebral body.
- When They Do Not Apply: In an isolated tissue biopsy (e.g., a piece of skin or liver), there is no inherent “up” or “down.” The tissue can be rotated arbitrarily on the slide. Relying on these terms in such contexts will lead to unnecessary confusion.
The Key to Orientation: Apical and Basal Surfaces
For many tissues, especially epithelia, the correct way to orient yourself is by identifying intrinsic structural landmarks, not external directions. All epithelial tissue has polarity, defined by two surfaces:
- The Apical Surface: The “free” surface that faces an external environment or an internal open space (a lumen).
- The Basal Surface: The attached surface that rests on a thin, non-cellular layer called the basement membrane.
The single most reliable rule for orientation is this: find the lumen. The apical surface always faces the lumen.
Practical Application: The “Bucket Analogy”
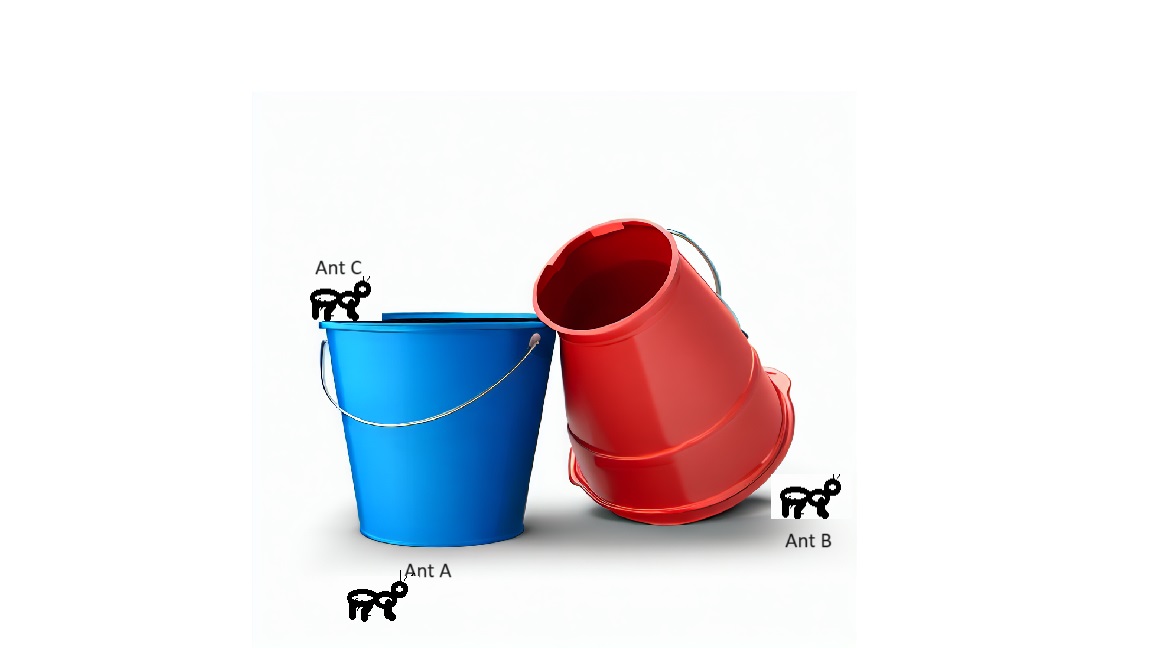
Now, let’s look at the image below and apply the concept of apical and basal surfaces. The ground represents the basement membrane, and both the blue and red buckets are empty, which represent the lumen whereas the ground represents the basement membrane/basal layer.
- From Ant A’s perspective, the apical (lumen) surface would be if it looked ‘up’ from the bottom of the bucket, into the empty bucket. Similarly, the basal surface for Ant A would be the ground under its legs.
- From Ant B’s perspective, the same goes: the apical surface is if Ant B looked up into the empty space of the bucket, even though the bucket bottom encloses Ant B. The basal surface is still the ground under its legs
- From Ant C’s perspective, there is no basal surface. Ant C is perched between two open spaces: the air above and the empty bucket below.
So let’s apply this to the following histology slides!
Key Takeaways
- Histology requires interpreting 2D sections of 3D objects. The plane of section (transverse, sagittal, coronal) determines the shape you see.
- Use gross anatomical directions (anterior, superior, etc.) only when the body’s overall orientation is clear.
- For epithelial tissue, always use intrinsic landmarks: the apical surface faces the lumen, and the basal surface faces the basement membrane.
- Do not assume the top of the image is “up” in the body. Rotate your mental model to align the lumen correctly.
Media Attributions
- Cuts © Sarah Perkins is licensed under a CC BY-NC-ND (Attribution NonCommercial NoDerivatives) license
- ants and buckets © Jennifer Kong is licensed under a CC BY-NC-ND (Attribution NonCommercial NoDerivatives) license
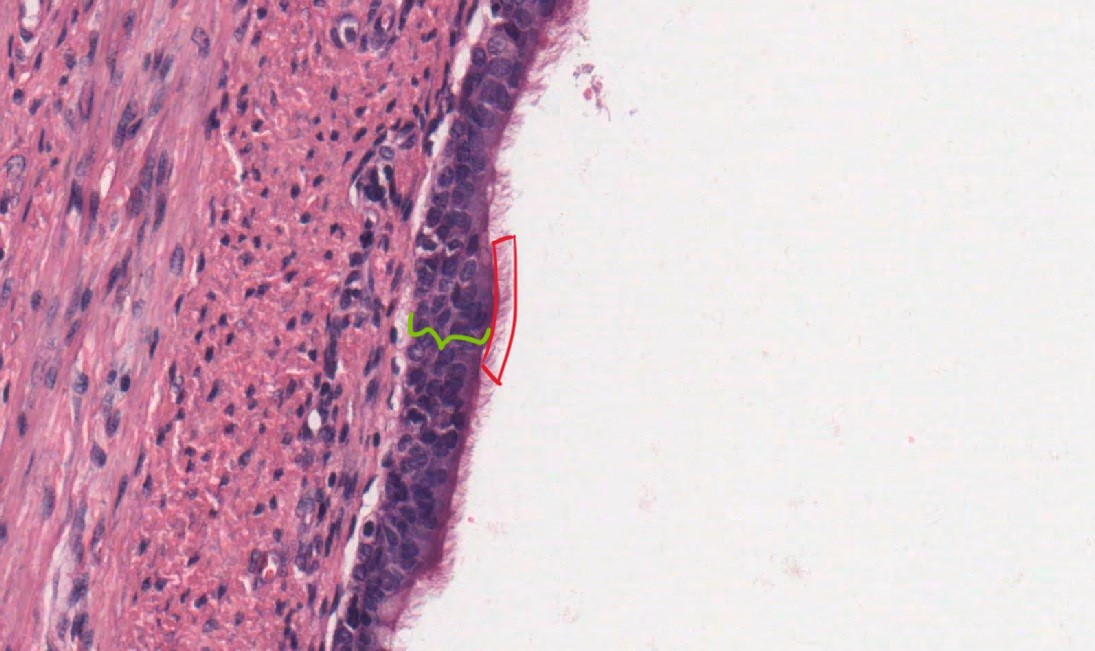
- morphology guide transitional © Athena Li is licensed under a CC BY-NC-ND (Attribution NonCommercial NoDerivatives) license
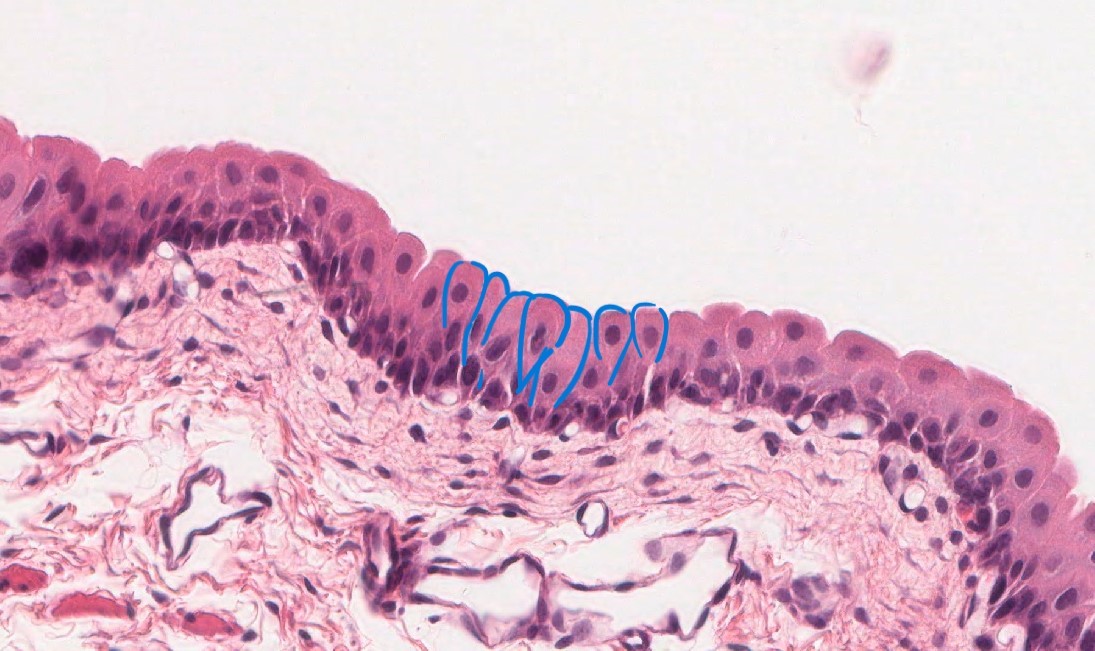
- morphology guide pseudostratified © Athena Li is licensed under a CC BY-NC-ND (Attribution NonCommercial NoDerivatives) license
