Want to create or adapt books like this? Learn more about how Pressbooks supports open publishing practices.
Chapter 7. Parenteral Medication Administration
7.3 Intradermal Injections
Intradermal injections (ID)are injections administered into the dermis, just below the epidermis. The ID injection route has the longest absorption time of all parenteral routes. These types of injections are used for sensitivity tests, such as TB (see Figure 7.14), allergy, and local anesthesia tests. The advantage of these tests is that the body reaction is easy to visualize, and the degree of reaction can be assessed. The most common sites used are the inner surface of the forearm and the upper back, under the scapula. Choose an injection site that is free from lesions, rashes, moles, or scars, which may alter the visual inspection of the test results (Lynn, 2011).
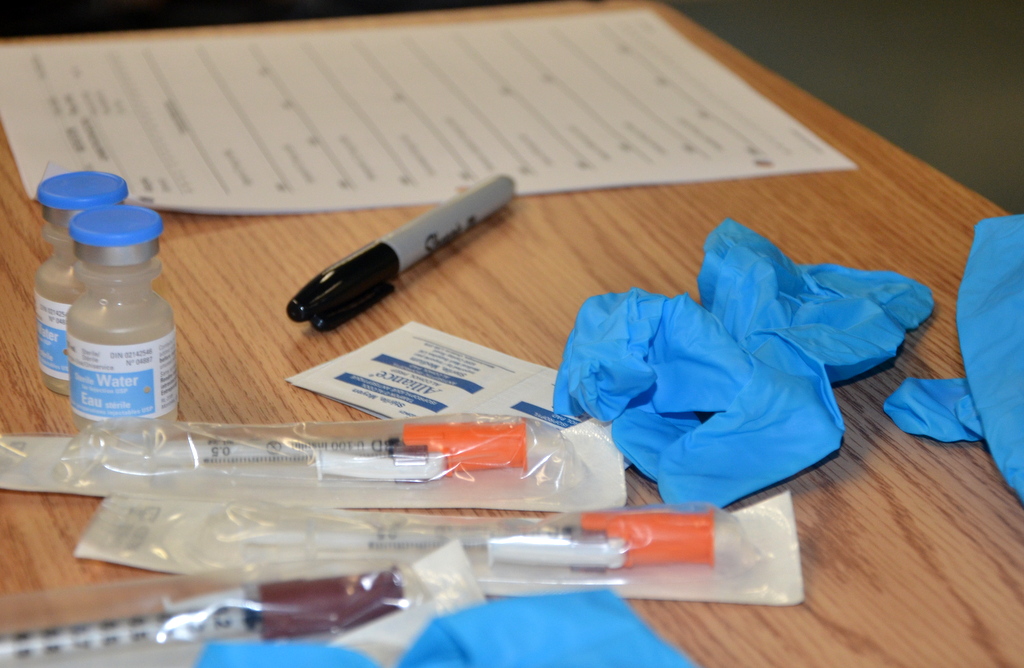
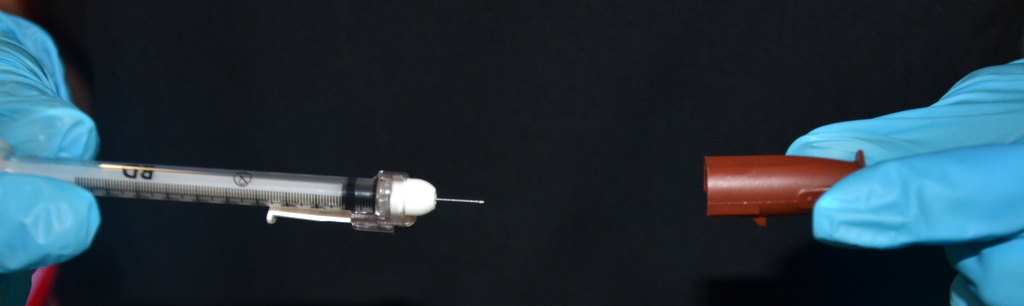
Equipment used for ID injections is a tuberculin syringe calibrated in tenths and hundredths of a millilitre, and a 1/4 to 1/2 in, 26 or 27 gauge needle. The dosage of an ID injection is usually under 0.5 ml. The angle of administration for an ID injection is 5 to 15 degrees. Once the ID injection is completed, a bleb (small blister) should appear under the skin. Checklist 57 outlines the steps to administer an intradermal injection.
Figure 7.14 TB syringe Note: this is a 1 ml syringe
Checklist 57: Administering an Intradermal (ID) Injection
Disclaimer: Always review and follow your agency policy regarding this specific skill.
Safety Considerations:
Use your knowledge about pharmacokinetics and pharmacodynamics to determine the appropriateness of the ordered medication, dose, and route.
Perform a point of care risk assessment for PPE.
Always take steps to eliminate interruptions and distractions during medication preparation.
Never leave medication unsupervised once prepared.
If the patient expresses concerns about the medication or procedure, stop and explore the concerns. Re-verify order with physician if appropriate.
Do not aspirate. It is not necessary to aspirate because the dermis is relatively without vessels.
Whenever possible, choose needleless systems to prepare injectable medication.
NEVER recap needles after giving an injection. Engage the needle’s safety system and dispose in the closest sharps container.
2. Prepare medication or solution as per agency policy. This may include:
Checking physician orders and MAR to validate medication order.
Checking your agency’s Parenteral Drug Therapy Manual (PDTM) about guidelines for administration.
Independent double check by a colleague.
Properly identifying medication decreases risk of inadvertently administering the wrong medication. Preparing medications correctly decreases risks to the patient.
Comparing physician orders and MAR
3. Enter room and introduce yourself, explain procedure and the medication, and allow patient time to ask questions.
Explaining rationale increases the patient’s knowledge and reduces their anxiety.
4. Close the door or pull the bedside curtains.
This provides patient privacy.
5. Identify patient using at least two patient identifiers. Confirm with MAR; confirm allergies; explain procedure and the medication; allow the patient time to ask questions.
This ensures accuracy of the correct medication to the correct patient. Two patient identifiers used most often are patient name and date of birth.
Compare MAR with patient wristband
6. Reassess patient for any contraindications to the medications.
Assessment is a prerequisite for every medication given.
7. Select appropriate site for administration. Assist the patient to the appropriate position as required.
Site should be free from lesions, rashes, and moles. Selecting the correct site allows for accurate reading of the test site at the appropriate time.
Assess site for ID injection
8. Perform hand hygiene and apply non-sterile gloves.
Gloves help prevent exposure to BBF.
Apply non-sterile gloves
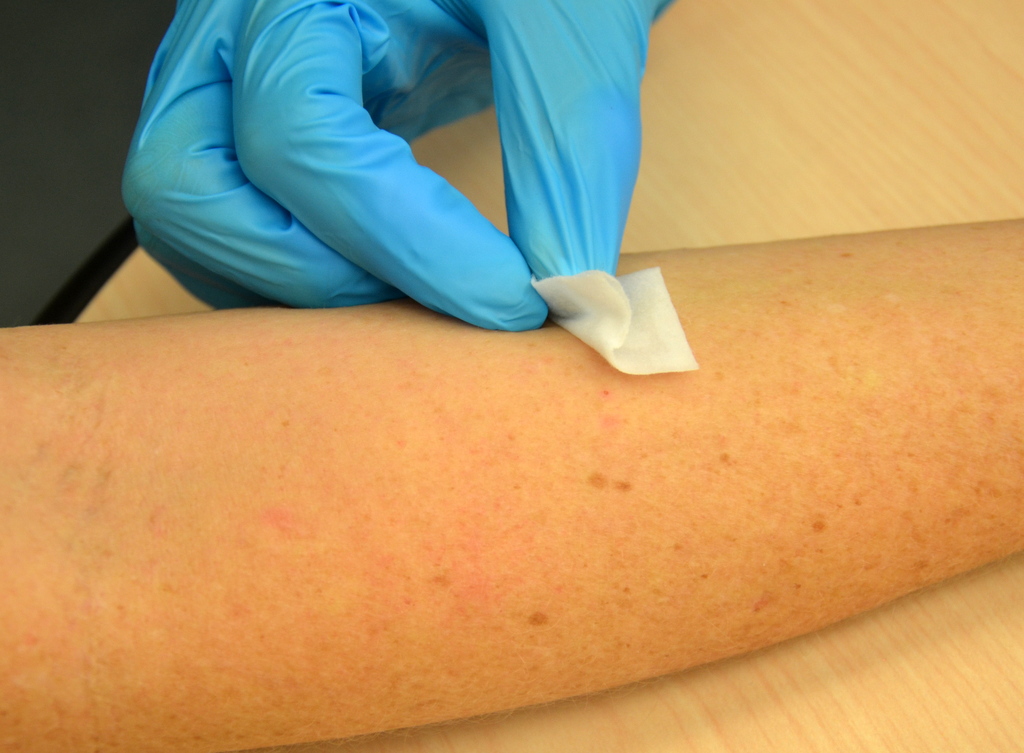
9. Clean the site with an alcohol swab or antiseptic swab. Use a firm, circular motion. Allow the site to dry.
The needle poke opens the skin allowing pathogens to enter. Cleaning the skin reduces pathogens. Allowing the antiseptic to dry renders it effective. In addition, wet alcohol on the skin during injection can be irritating and uncomfortable.
Clean injection site
10. Remove needle from cap by pulling it off in a straight motion.
This decreases risk of accidental needle-stick injury.
Remove needle from cap
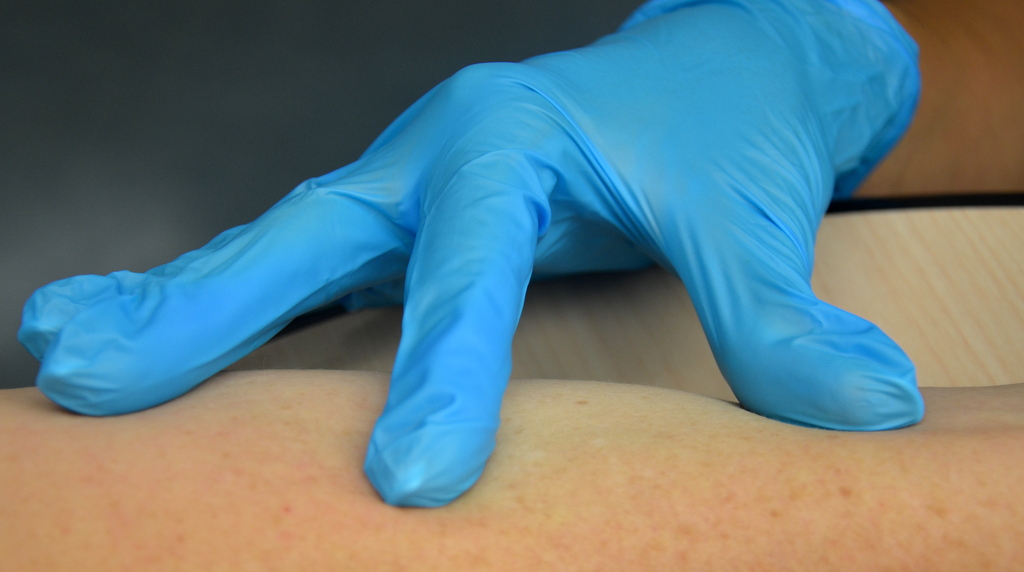
11. Using non-dominant hand, spread the skin taut over the injection site.
Taut skin provides easy entrance for the needle.
Hold skin taut prior to injection
12. Hold the syringe in the dominant hand between the thumb and forefinger, with the bevel of the needle up.
This allows for easy handling of the syringe.
Hold needle with bevel up
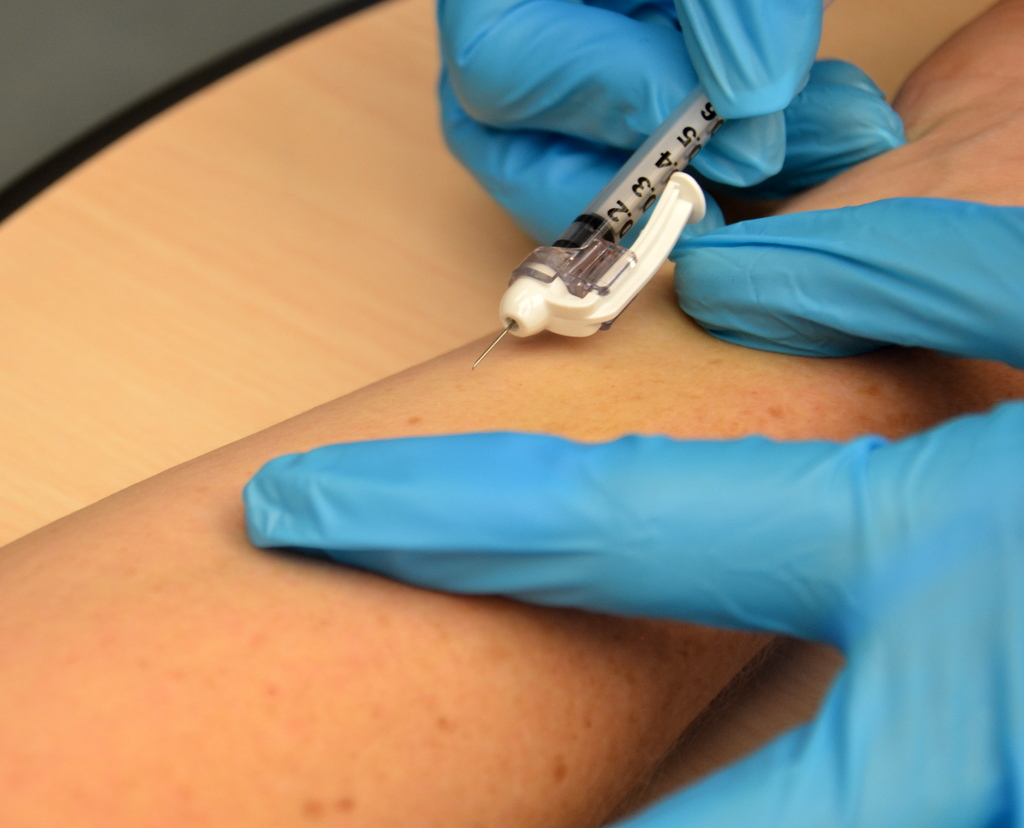
13. Hold syringe at a 5- to 15-degree angle from the site. Place the needle almost flat against the patient’s skin, bevel side up, and insert needle into the skin. Insert the needle only about 1/4 in, with the entire bevel under the skin.
Keeping the bevel side up allows for smooth piercing of the skin and induction of the medication into the dermis.
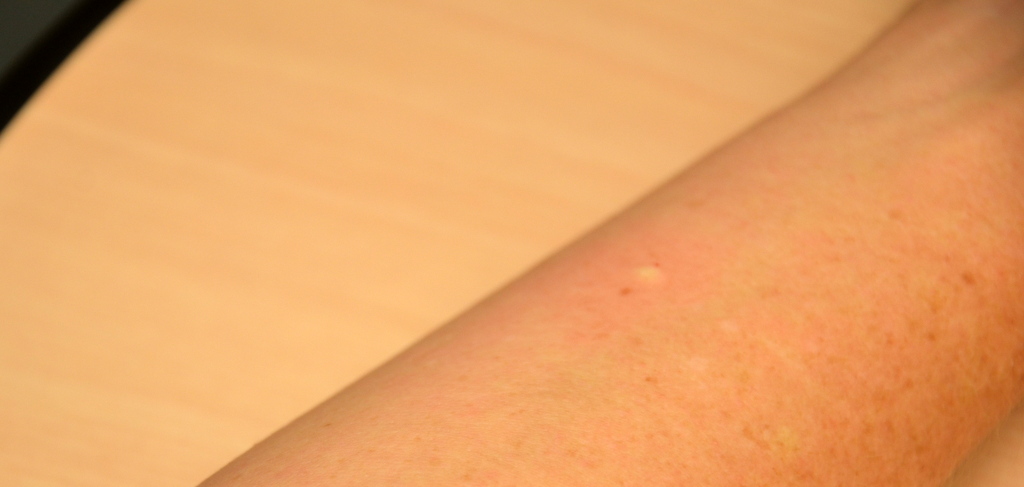
14. Once syringe is in place, slowly inject the solution while watching for a small weal or bleb to appear.
The presence of the weal or bleb indicates that the medication is in the dermis.
Presence of a bleb (white raised circle)
15. Withdraw the needle at the same angle as insertion, engage safety shield or needle guard, and discard in a sharps container. Do not massage area after injection.
Withdrawing at the same angle as insertion minimizes discomfort to the patient and damage to the tissue. Proper needle disposal prevents needle-stick injuries.
Discard syringe in sharps container
Massaging the area may spread the solution to the underlying subcutaneous tissue. Gently pat with sterile gauze if blood is present.
16. If injection is a TB skin test, circle the area around the injection site to allow for easy identification of site in three days.
Draw circle around injection site
17. Discard remaining supplies, remove gloves, and perform hand hygiene.
This prevents the spread of microorganisms.
Hand hygiene with ABHR
18. Document the procedure and findings according to agency policy.
Proper documentation helps ensure patient safety. Document time, date, location, and type of medication injected.
19. Evaluate the patient response to injection within appropriate time frame.
The patient will need to be evaluated for therapeutic and adverse effects of the medication or solution.
Data source: Berman & Snyder, 2016; Brookside Associates, 2015a; Clayton, Stock, & Cooper, 2010; Perry et al., 2018