Chapter 7. Parenteral Medication Administration
7.4 Subcutaneous Injections
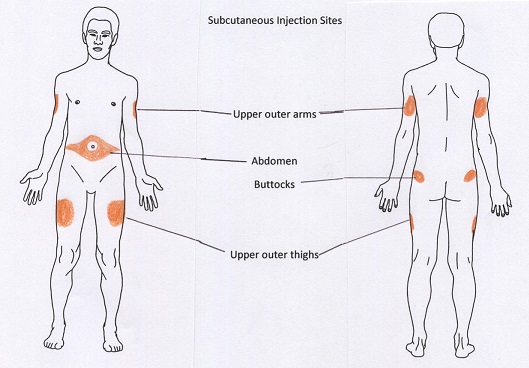
Subcutaneous (SC) injections are administered into the adipose tissue layer just below the epidermis and dermis. This tissue has few blood vessels, so drugs administered by this route have a slow, sustained rate of absorption. Sites for SC injections include the outer aspect of the upper arm, the abdomen (from below the costal margin to the iliac crest) within one inch of the belly button, anteriolateral aspects of the thighs, and upper ventral gluteal area (Lynn, 2011) (see Figure 7.15).
Choose a site that is free of skin lesions and bony prominences. Rotate sites for most SC medications (see note about insulin below) to prevent the formation of lipohypertrophy or lipoatrophy in the skin. Physical exercise or application of hot or cold compresses influences the rate of drug absorption by altering local blood flow to the tissues. Any condition that impairs that blood flow to the subcutaneous tissue contradicts the use of subcutaneous injections. Examples of subcutaneous medications include insulin, opioids, heparin, epinephrine, and allergy medication (Perry et al., 2018).
To administer an SC injection, a 25 to 30 gauge, 3/8 in to 5/8 in needle is used. Some subcutaneous injections come prefilled with the syringe attached. Always confirm that the right-size needle is appropriate for the patient before use. Subcutaneous injections are usually given at a 45- to 90-degree angle. The angle is based on the amount of subcutaneous tissue present. Generally, give shorter needles at a 90-degree angle and longer needles at a 45-degree angle (Lynn, 2011). SC injections do not need to be aspirated, as the likelihood of injecting into a blood vessel is small. Lynne (2011) suggests that no more than 1 ml of medication is given subcutaneously, as larger amounts may cause discomfort to the patient and may not be absorbed appropriately. Other sources suggest up to 1.5 ml can be injected at once (Perry et al, 2018). Given that, the nurse will have to judge each individual situation.
There are varying opinions on whether to pinch the skin during administration. Pinching is advised for thinner patients in order to lift the adipose tissue up and away from the underlying muscle and tissue. If pinching is used, release the pinch when the needle is inserted to avoid injecting into compressed tissue. Note, too, that elevating or pinching the skin has been found to increase the risk of injury, as the needle may pierce the opposite side of the skin fold and enter the skin of the health care worker (Black, 2013). The abdomen is the best location for an SC injection if a patient has little peripheral SC tissue. If patient is obese, use a needle that is long enough to insert through the tissue at the base of the skin fold (Perry et al., 2018).
Insulin SC Injections
Insulin is considered a high-risk medication, and special care must be taken to ensure the correct amount of medication and type of insulin is administered at the correct time. As well, safety checks related to a patient receiving SC insulin should be carried out (Ellis & Parush, 2012). Table 7.4 lists specific guidelines for administering insulin.
Table 7.4 Guidelines for Administering SC Insulin |
|||
Insulin |
Additional Information |
||
| Insulin is considered a high-risk medication. | Special care must be taken to ensure the correct amount of medication and type of insulin is administered, at the correct time. It is highly recommended to always have an independent double check prior to insulin administration. Always follow the standard for medication preparation at your agency. | ||
| There are specific syringes for insulin | Insulin syringes have a needle attached. Insulin is always ordered and administered in units, based on a blood sugar reading and a diabetic insulin protocol (or sliding scale). Some hospitals have preprinted physician orders, and some hospitals have handwritten orders. Insulin syringes can come in 30-, 50-, or 100-unit measurements. Always read the increments (calibration) carefully. | ||
| Insulin can also be administered via other devices |
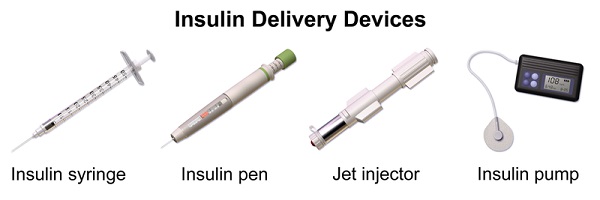 Insulin pens are one method for insulin administration. The pen consists of a syringe (pen), needle, and prefilled cartridge of insulin. It is essential that patients be taught how to use injection pens so they understand the technology. One pen per person to avoid risk of BBF exposure. The needle has to be primed prior to administration. In hospital settings, needles with safety systems must be used. Due to the expense, persons using insulin pens at home can opt for a less expensive needle that doesn’t have the safety system in place. 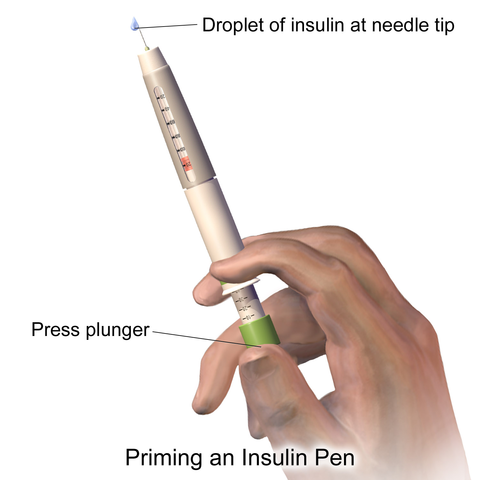 A mini-infusion pump is a battery-operated machine that delivers medications in very small amounts to patients with controlled infusion times. The most common types of mini-infusion sets are insulin pumps or subcutaneous infusion devices. For more information on mini-infusion sets and volume-controlled sets, see Suggested Online Resources in section 7.9. 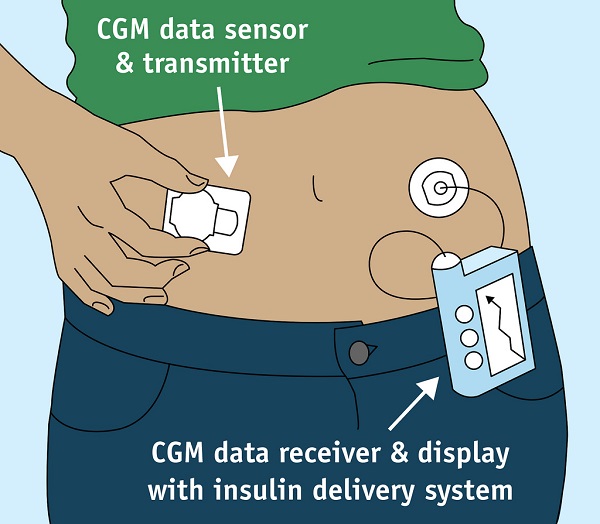 |
||
| There are different types of insulin. | There are rapid-, short-, intermediate-, mixed-, and long-acting insulins. For each type of insulin, it is important to know how the insulin works and the onset, peak, and duration of the insulin. Recognizing and responding to hypoglycemia is essential. | ||
| Administering two different types of Insulin. | If a patient is ordered two types of insulin, some insulins may be mixed together in one syringe. Many insulins MAY NOT be mixed together. Do not mix Lantus (Glargine) or Levemir (Determir). If administering cloudy insulin preparations (Humulin – N), gently roll the vial between the palms of your hands to re-suspend the medication. To get into good habit, always draw up the short acting (clear) insulin before the cloudy insulin. You cannot contaminate either vial. If too much insulin is drawn up from the second vial, discard syringe and start again. Insulin orders may change daily and even throughout the day. Always ensure the most current orders are being followed. |
||
| Know about rotating injection sites. | Injection site rotation is no longer necessary, as newer insulins have a lower risk for hypertrophy of the skin. Typically, a patient will pick one anatomic area (e.g., upper arm) and rotate the injection sites within that region to maintain consistent insulin absorption from day to day. Insulin absorption rates vary from site to site. The abdomen absorbs the fastest, followed by the arms, thighs, and buttocks. | ||
| Know when to administer insulin. | Insulin dosing is often based on blood glucose levels. Knowing the onset, peak, and duration of insulin is critical to helping the patient to maintain normoglycemic levels. If giving insulin, always ensure the patient is not nauseated, is able to eat, and that food is arriving before the insulin starts working.
Typically, short- or rapid-acting insulin is given 10 to 15 minutes before meals. Intermediate- or long-acting insulin may be given twice daily, at breakfast and dinner or breakfast and bedtime. |
||
| Measure blood sugar levels and food intake. | Insulin injections are based on blood sugar values and on when the patient will eat. The timing of an insulin injection is critical to ensure the patient maintains normal blood glucose levels. | ||
| Data source: Canadian Diabetes Association, 2013; Perry et al., 2018 | |||
Special considerations:
- Insulin is stored in the refrigerator. When a vial is in use, it should be at room temperature. Do not administer cold insulin. Check agency policy for how long a vial can be used after being opened. It is usually 30 days.
- Patients who take insulin should monitor their blood sugar (glucose) levels as prescribed by their health care provider.
- Vials of insulin should be inspected prior to use. Any change in appearance may indicate a change in potency.
- Use the type of insulin prescribed. Do not change the type unless ordered by a health care provider.
- Allow patient to choose site for injection. A patient may self-administer insulin if it’s determined to be safe and in the patient’s best interest.
- All health care providers should be aware of the signs and symptoms of hypoglycemia. Signs and symptoms include fruity breath, restlessness, agitation, confusion, slurring of words, clammy skin, inability to concentrate or follow commands, hunger, and nausea. The patient may complain of blurred or double vision. Late signs include unconsciousness. Hypoglycemia is a medical emergency. Always have an emergency diabetic kit available. If a conscious diabetic patient appears to be hypoglycemic or has a blood sugar (glucose) reading of 4 mmol/L or lower, give glucose, such as sucrose tablets, solution, or juice. Follow agency policy regarding hypoglycemic reactions.
Heparin SC Injections
Heparin is an anticoagulant used to reduce the risk of thrombosis formation by suppressing clot formation (Perry et al., 2018). Heparin is also considered a high-alert medication (ISMP, 2014).
Table 7.5 provides specific guidelines to consider before and after administering heparin.
Table 7.5 Guidelines for Administering SC Heparin |
|||
Heparin |
Additional Information |
||
| Heparin is considered a high-risk medication. | Heparin is available in vials and prefilled syringes in a variety of concentrations. Because of the dangerous adverse effects of the medication, it is considered a high-risk medication. Always follow agency policy regarding the preparation and administration of heparin. | ||
| Rotate heparin injection sites. | It is important to rotate heparin sites to avoid bruising in one location. To minimize bruising and pain associated with heparin injections, they can be given in the abdominal area, at least 5 cm away from the belly button. | ||
| Know the risks associated with heparin. | There are many risks associated with the administration of heparin, including bleeding, hematuria, hematemesis, bleeding gums, and melena. | ||
| Review lab values. | Review lab values (PTT and aPTT) before and after heparin administration. | ||
| Use prepackaged heparin syringes. | Many agencies use prepackaged heparin syringes. Always follow the standards for safe medication administration when using prefilled syringes. Low molecular weight heparin (LMWH) is more effective in some patients. | ||
| Assess patient conditions prior to administration. | Some conditions increase the risk for hemorrhage (bleeding), such as recent childbirth, severe diabetes, severe kidney and liver disease, severe traumas, cerebral or aortic aneurysm, cerebral vascular accidents (CVA), blood dyscrasias, and severe hypotension. | ||
| Assess medications prior to administration. | Over-the-counter (OTC) herbal medications, such as garlic, ginger, and horse chestnut, may interact with heparin. Additional medications that may interact include Aspirin, NSAIDS, cephalosporins, anti-thyroid agents, thrombolytics, and probenecids. | ||
| Data source: Clayton et al., 2010; Ogston-Tuck, 2014b; Perry et al., 2018 | |||
Checklist 58 provides the steps to complete a subcutaneous injection.
Checklist 58: Administering a Subcutaneous InjectionDisclaimer: Always review and follow your agency policy regarding this specific skill. |
||
Safety considerations:
|
||
Steps |
Additional Information |
|
| 1. Perform hand hygiene; gather supplies. | Supplies include: medication, syringe, injection needle, blunt fill or blunt fill filter needle, injection needle with safety system attached, alcohol swabs, ampule breaker (if necessary), MAR | |
2. Prepare medication as per agency policy. This may include:
|
 Properly identifying the medication decreases risk of med error. Agency protocols are in place to increase patient safety. Follow principles of asepsis to reduce risk of contaminating medication. |
|
| 3. Check expiry date and check for particulates, discoloration, or loss of integrity (sterility). | Discolored or outdated medication may be harmful. If a medication is discolored or cloudy, always check manufacturer’s specification for the medication. | |
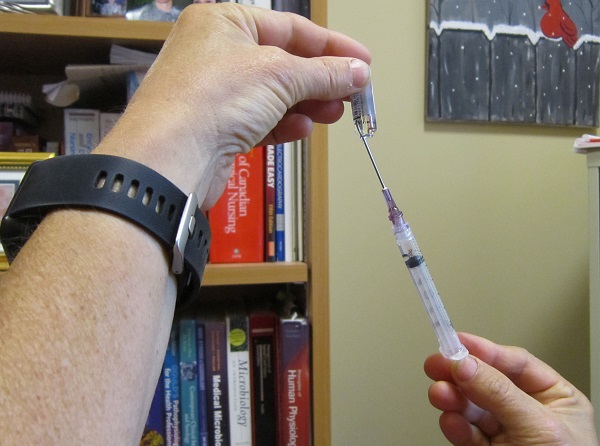
| 4. Prepare the medication from the ampule or vial. | Re-watch the videos: Preparing Medications from a Vial; Preparing Medications from an Ampule developed by Renée Anderson and Wendy McKenzie (2018) of TRU School of Nursing. If you have more than 1.5 ml to administer , give via 2 separate injections. Consider consulting the pharmacy for a different concentration that may allow a smaller volume to be administered in one injection. |
|
| 5. Label the syringe. | Medication prepared away from the bedside must be labelled with two patient identifiers, medication, dose, date and time of preparation, and initials of the nurse to decrease the risk of med error.
 |
|
| 6. Perform hand hygiene.
Enter room and introduce yourself. Identify patient using two acceptable identifiers, explain procedure and the medication, and allow patient time to ask questions. |
Hand hygiene reduces transmission of microorganisms.
Confirming patient identity reduces risk of med error. Explaining rationale increases the patient’s knowledge and may reduce any anxiety. Let the patient know there may be mild temporary burning at the injection site. |
|
| 7. Close the door or pull the bedside curtains. | This provides patient privacy. | |
| 8. Reassess patient for any contraindications for the medications. | Assessment is a prerequisite to the administration of any medication. | |
| 9. Wear non-sterile gloves (if appropriate). | Gloves prevent exposure to BBF. | |
| 10. Select appropriate site for administration. Assist the patient to the appropriate position as required. | Site should be free from lesions, rashes, and moles. Choosing the correct site allows for accurate reading of the test site at the appropriate time. | |
| 11. Clean the site with an alcohol swab or antiseptic swab (according to agency policy). Use a firm, circular motion. Allow the site to dry. |
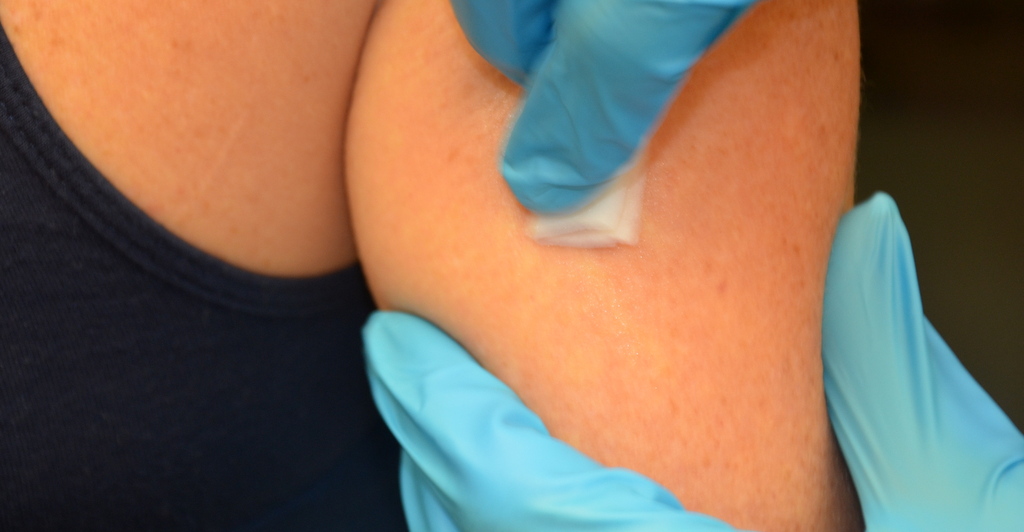 Allowing the site to dry renders the antiseptic effective and prevents stinging during the injection. |
|
| 12. Remove needle cap by pulling it straight off the needle. Hold the syringe between thumb and forefinger on dominant hand, pulling it straight off. | This technique lessens the risk of an accidental needle-stick injury.
 |
|
| 13. Grasp or pinch the area surrounding the injection site to create a skin fold if there is little adipose tissue.
|
The decision to create a skin fold is based on the nurse’s assessment of the patient and the needle length used. Pinching is advised for thinner patients.
 |
|
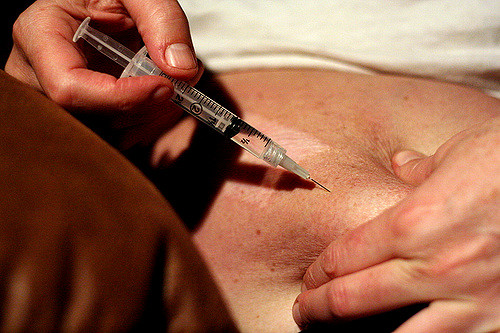
| 14. Hold the syringe in the dominant hand between the thumb and forefinger. Insert the needle quickly at a 45- to 90-degree angle. | Inserting quickly causes less pain to the patient. Subcutaneous tissue is abundant in well-nourished, well-hydrated people. For patients with little subcutaneous tissue, it is best to insert the needle at a 45-degree angle. | |
| 15. After the needle is in place, release the tissue. Move your non-dominant hand to steady and lower the end of the needle. With your dominant hand, inject the medication at a rate of 10 seconds per ml. Avoid moving the syringe. | Keeping the needle steady helps keep the needle in place.
With practice, you will likely be able to manage just using your dominant hand for injecting and holding the needle steady simultaneously. |
|
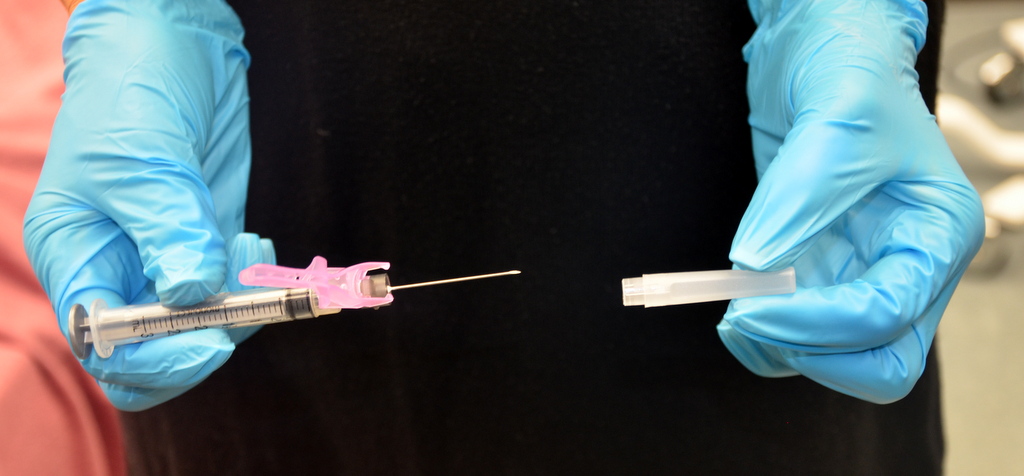
| 16. Withdraw the needle quickly at the same angle at which it was inserted, while supporting the surrounding tissue with your non-dominant hand. Engage the needle’s safety system immediately. | Withdrawing at the same angle prevents tissue damage and increased pain at the injection site. Engaging the safety system immediately reduces risk of needle stick injury and exposure to BBF. | |
| 17. Using an alcohol swab or sterile gauze, apply gentle pressure at the site after the needle is withdrawn. Do not massage the site. |
Massage is not necessary and can damage underlying tissue. Massaging after a heparin injection can contribute to the formation of a hematoma. |
|
| 18. Dispose of supplies; remove gloves and perform hand hygiene. | This reduces the risk of infection and the spread of microorganisms.
 |
|
| 19. Document procedure and findings according to agency policy. | Timely documentation ensures patient safety. | |
| 20. Evaluate patient response to medication. | It is important to evaluate the therapeutic effect of the medication and assess for adverse effects. | |
| Data source: Berman & Snyder, 2016; Brookside Associates, 2015b; Clayton et al., 2010; National Institute of Health Clinical Center, 2015; Ogston-Tuck, 2014b; Perry et al., 2018 | ||
Indwelling Subcutaneous Devices
If a patient requires frequent SC injections, inserting a device that remains in place can significantly reduce the number of needle pokes (thus discomfort for the patient). Likewise a SC infusion of IV fluids and/or medications may require the placement of an indwelling device.
Different brands of indwelling SC devices are on the market. Check your agency for specific directions about insertion, time between changes, and medication administration via an indwelling device.
Some general considerations for SC indwelling devices include:
- They can promote patient comfort by reducing the number of needle pokes.
- They reduce risk of needle sticks / exposure to BBF by the health care professional (Dawkins et al., 2000, as cited in Becton, Dickinson, 2013).
- They are inserted following principles of asepsis, and the sites dressed according to agency protocol. A semi-permeable transparent dressing allows frequent and accurate assessment of the insertion site.
- How long an indwelling SC device remains in situ will depend on many factors including patient characteristics, volume of fluid infused, medication, and integrity of the site.
- Sites should be rotated to prevent tissue damage. This includes:
- every 7 days and as needed for intermittent medication administration. Some sites advise up to 14 days (RCH, 2014). Check your agency protocol.
- every 24 to 48 hours or after 1.5 to 2 litres of solution has infused (Saskatchewan Health Authority, 2018).
- Sites that are red, tender, edematous, bruised, bleeding, burning, leaking, have blood in the tubing and/or have a displaced cannula need to be removed and re-established.
- Each site is designated for one particular purpose (i.e., one medication only per site).
- When used for intermittent medication administration, because there is a small volume associated with the device called the dead space, the initial dose must include a larger volume to account for the volume in the dead space after the first dose is administered. Check your agency protocols to determine this volume (Saskatchewan Health Authority, 2018; RCH, 2014)
- Each site is labelled with the date it was initiated, the medication name and concentration used, and the nurse’s initials
- If necessary, change the end cap to one that can be accessed without needles.
Critical Thinking Exercises
- Name four nursing considerations specific to SC insulin administration.
- Describe two situations where an indwelling subcutaneous device is warranted.
- Name four safety considerations associated with giving meds via an indwelling subcutaneous device.
Attributions
Figure 7.15. Silhouette d’un humain asexué nu, vue de face et de dos by cdang (modified) is in the public domain.
Figure 7.16. Insulin Delivery Devices by BruceBlaus is used under a CC BY-SA 4.0 international license.
Figure 7.17 Priming an insulin pen by BruceBlaus is used under a CC BY 3.0 unported license.
Figure 7.18. Continuous glucose monitor by Michael J. Ermarth is copyright free from the US Food and Drug Administration.
Figure 7.19. Preparing subcutaneous injection from ampule by author is licensed under a Creative Commons Attribution 4.0 International License.
Figure 7.20. Hypodermic Needle Cancer Medication Stomach Injection 3-1-08 8278 by Steve Depolo is used under a CC BY 2.0 generic license.
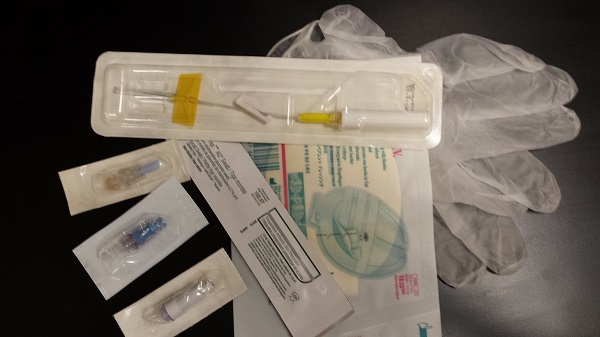
Figure 7.21. Indwelling subcutaneous device supplies by author is licensed under a Creative Commons Attribution 4.0 International License.
