Want to create or adapt books like this? Learn more about how Pressbooks supports open publishing practices.
Chapter 8. Intravenous Therapy
8.10 IV Site Dressing Changes
IV site dressings are intended to stop the introduction of microorganisms at the IV insertion site, which can lead to blood infection, and to help to stabilize IVs to prevent micro-movements, which can lead to phlebitis. Some principles of IV site dressing changes are:
Table 8.12 Principles of IV Site Dressing Changes
Aseptic techniques must be maintained while doing dressing change.
Tape or other securement devices that are used under the dressing must be sterile.
Preventing microorganisms into the client’s vascular system = ↓risk of infection at site / systemic.
Remove old dressing with clean gloves.
Sterile gloves or a non-touch technique to be used when taking off sterile securement strips or device.
Transparent semi-permeable (TSM) dressings.
Changed every time the site is changed and prn.
Semi-permeable allows sites to “breathe.”
Transparency allows clear visualization of insertion site.
Dressings provide protective function to prevent catheter migration via stabilizing and protection from microorganisms.
If the patient’s skin is not intact and/or there is allergy, consult agency guidelines for appropriate IV site dressing.
If gauze is needed under the dressing, change dressing q48 hours.
Excess moisture and gauze act as a reservoir for bacteria.
If excess hair needs to be removed, clip hair with scissors.
Shaving may cause micro-abrasions, and intact skin is the body’s first line of defense against bacterial migration.
When cleaning use multi-directional friction:
Use 2% chlorhexidine / 70% isopropyl alcohol
Clean beyond the size of the dressing
Allow cleaning solution to dry (approx. 30 seconds)
Reduce the microbes at the insertion site.
Drying allows for maximum antiseptic activity.
Packaged swab sticks are not considered sterile, thus don’t put them into your sterile field.
The effectiveness of antimicrobial agents is reliant on completely drying.
Stabilizing devices—sutures, skin closure strips, or a securement device—these devices must be sterile.
Change q7 days.
Do not occlude the insertion site with SteriStrips.
Label the dressing with the date of dressing change.
Prevents the catheter from moving, getting damaged, or occluding.
Prevent microbes from transferring onto the insertion site and skin.
For central lines or midlines, measure external length of the catheter from the insertion site to where the catheter enters or attaches to the connector.
Ensure catheter tip is not migrating
Figure 8.27 Measure external length from the insertion site to the hub. Some PICCs have a visible “O” ring on it…in which case measure from the insertion site to the “O” ring
Topical dressing should be centred over the securement device.
Provides maximum coverage and helps keep the securement device securely in place.
Measure external length.
Data sources: Interior Health, 2012; RNAO, 2005/2008
Review the steps in Checklist 73 for changing an IV site dressing with no additional securement device.
Checklist 73 Changing an IV Site Dressing—No Additional Securement Devices
Disclaimer: Always review and follow your agency policy regarding this specific skill.
Safety considerations:
Always follow the guidelines of the agency when performing this skill
Steps
Additional Information
1. Perform hand hygiene, perform point of care risk assessment, and collect supplies.
You will need a semi-transparent dressing, alcohol swabs, CHG swabs ×3 (2% chlorhexidine / 70% isopropyl alcohol), and clean gloves
2. Identify yourself; identify the patient using two identifiers; explain the procedure to the patient.
Proper identification prevents errors. Explaining the procedure educates the patient and allows patient to ask questions.
3. Sanitize working surface
Reduces microorganisms and risk of transmission.
4. Perform hand hygiene. Open up packages for easy access and place close by. Donne non-sterile gloves.
Preparing packages allows for easy access. Gloves are necessary because of risk of BBF exposure.
5. Remove transparent dressing:
Stabilize the IV cannula.
Loosen one edge of transparent dressing toward the IV site by stretching the dressing in the direction of loosened edge.
Loosen the other edge of the dressing and repeat previous step.
Removing transparent dressing
6. With non-dominant hand stabilizing the catheter, use the dominant hand to hold a CHG swab.
PVAD-short cannulas are rarely secured with a suture.
Using swabs allows no touch technique while cleaning the site and surrounding skin.
If allergy to CHG, consult agency policy.
7. Use multi-directional friction to clean the site including surrounding skin to area beyond the size of the dressing. Allow skin to dry.
Multi-directional friction reduces microorganisms. Cleaning beyond the size of the dressing reduces microorganisms under the dressing thus reducing risk of infection.
The antiseptic must be dry for it to have antiseptic properties and to allow the dressing to adhere to the skin.
8. Apply TSM dressing with insertion site approximately in the centre of the window. Use additional tape to ensure security and include date and time
TSM dressings allow observation of site, skin breathability.
9. Ensure IV remains patent. Assess IV system.
Ongoing assessment ensures proper functioning. During dressing change, position of cannula may have changed and may affect patency.
10. Discard supplies, remove gloves, and perform hand hygiene.
These steps prevent the spread of microorganisms.
11. Document procedure as per agency policy.
Document date, time, condition of IV site, and type of dressing applied.
Note: Some agencies require the cannula size, vein location and external length to be documented.
Data sources: Interior Health, 2012; Perry et al., 2018; Phillips, 2005
Watch the following video PVAD-Short Dressing Change by Renée Anderson and Wendy McKenzie (2018) of Thompson Rivers University School of Nursing.
Checklist 74: Changing an IV Site Dressing Involving a Securement Device
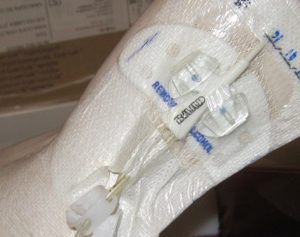
Figure 8.28 PICC dressing with securement device
Disclaimer: Always review and follow your agency policy regarding this specific skill.
Safety considerations:
Always follow the guidelines of the agency when performing this skill
Steps
Additional Information
1. Perform hand hygiene. Perform point of care risk assessment and collect supplies.
You will need a semi-transparent dressing, alcohol swabs, CHG swabs ×3 (2% chlorhexidine / 70% isopropyl alcohol), clean gloves, sterile gloves, dressing kit, securement device, and SteriStrips.
Note: some agency protocols suggest to include changing needleless caps at the same time dressings are changed. Check agency guidelines.
2. Identify yourself; identify the patient using two identifiers; explain the procedure to the patient. Perform point of care risk assessment.
Proper identification prevents errors. Explaining the procedure educates the patient and allows patient to ask questions.
3. Sanitize working surface.
Reduces microorganisms and risk of transmission.
4. Perform hand hygiene. Open the sterile field. Add sterile items into the field.
Items that are remaining under the dressing must be sterile.
If using CGH swabs, know if they are sterile. If not sterile, use a no touch technique to clean the site and surrounding skin.
5. Donne non-sterile gloves. Remove transparent dressing and securement device:
Stabilize the IV cannula.
Loosen one edge of transparent dressing toward the IV site by stretching the dressing in the direction of loosened edge.
Loosen the other edge of the dressing and repeat previous step.
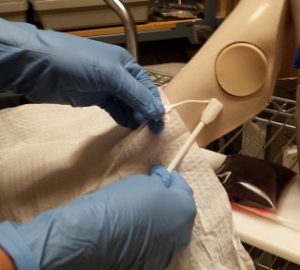
Remove old securement device
Gloves are necessary because of risk of BBF exposure.
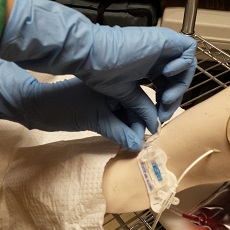
Figure 8.29 Removing securement device with alcohol
6. Place a sterile drape under the CVC ensuring the drape area that comes into contact with the CVC remains sterile.
With non-dominant hand stabilizing the catheter, use the dominant hand to hold a CHG / alcohol swab (assuming swab handles are not sterile).
Draping reduces risk of contaminating CVC with more microorganisms.
Stabilizing helps to prevent catheter migration and micro-movements at insertion site.
Using swabs allows no touch technique while cleaning the site and surrounding skin.
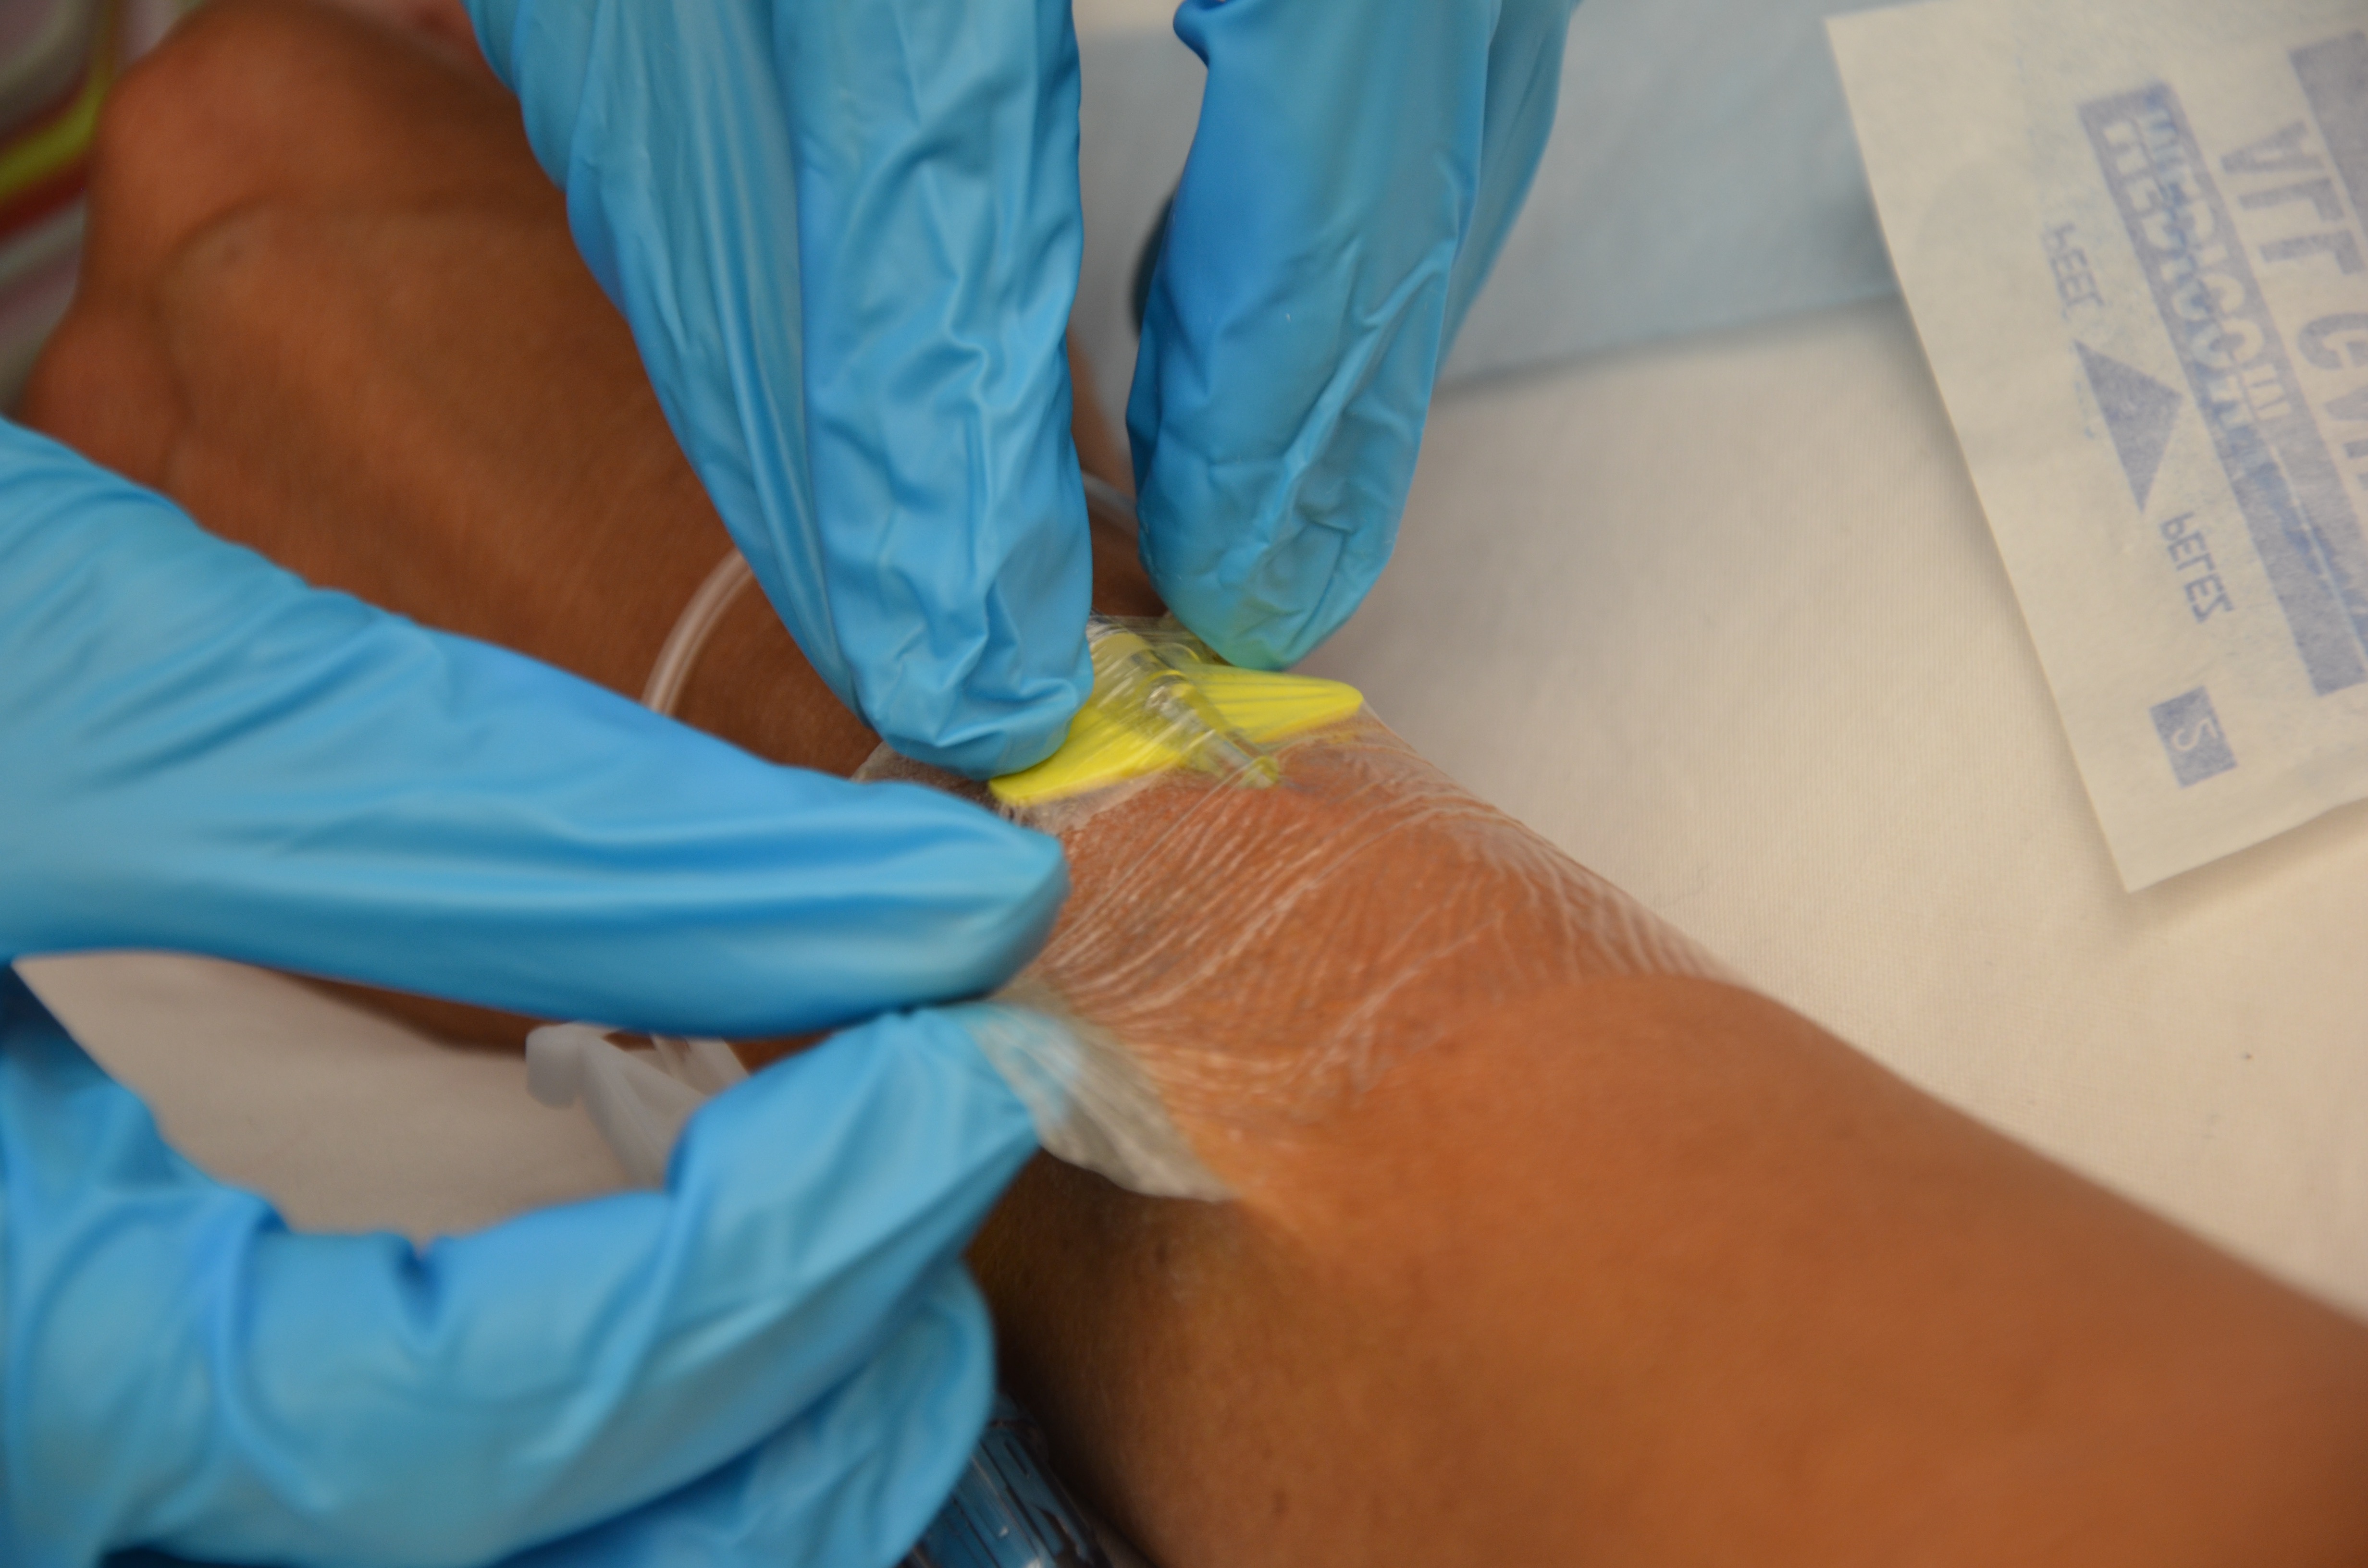
Figure 8.30 Stabilize the catheter. Clean site and surrounding area with multi-directional friction
If allergy to CHG, consult agency policy.
7. Use multi-directional friction to clean the site including surrounding skin to beyond the size of the dressing. Allow skin to dry.
Measure external length.
Multi-directional friction reduces microorganisms. Cleaning beyond the size of the dressing reduces microorganisms under the dressing, thus reducing risk of infection.
Assessing external length determines if catheter migration has happened.
Figure 8.27 Measure external length from the insertion site to the hub.
8. Remove non sterile gloves. Perform hand hygiene. Apply sterile gloves. Situate new securement device in place.
Securement device will remain under the dressing, thus it must be sterile.
9. Apply TSM dressing with insertion site approximately in the centre of the window. Use additional tape to ensure security and include date and time
You might want to remove your gloves for this step. Otherwise, be careful; gloves stick to the dressing.
10. Ensure IV remains patent. Assess IV system.
Ongoing assessment ensures proper functioning. During dressing change, position of cannula may have changed and may affect patency.
11. Discard supplies, remove gloves, and perform hand hygiene.
These steps prevent the spread of microorganisms.
12. Document procedure as per agency policy.
Document date, time, condition of cannula, appearance of IV site, and type of dressing applied.
Data sources: Interior Health, 2012; Perry et al., 2018; Phillips, 2005
Watch the video PICC Dressing Change by Shari Caputo and Wendy McKenzie of Thompson Rivers University School of Nursing (2018).
Critical Thinking Exercises
When are sterile gloves required during a CVC dressing change?
Why does the securement device for a CVC have to be sterile?


![Omläggning av PICC [Conversion of PICC]](https://commons.wikimedia.org/wiki/File:PICC_oml%C3%A4ggning.jpg)