Chapter 7. Parenteral Medication Administration
7.2 Preparing Medications from Ampules and Vials
Parenteral refers to the path by which medication comes in contact with the body. Parenteral medications enter the body by injection through the tissue and circulatory system. Injected medications are absorbed more quickly than oral and are used with patients who are nauseated, vomiting, restricted from taking oral fluids, or unable to swallow. Parenteral medications can be effective and safe when prepared and administered correctly. However, because they are invasive, and absorbed readily and quickly into the body, there are numerous risks associated with administering them (Perry, Potter, & Ostendorf, 2014).
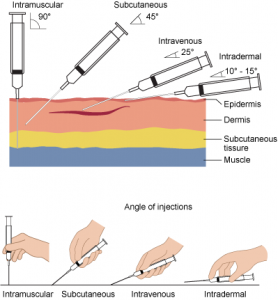
There are four routes for parenteral medications (also see Figure 7.1). Each type of injection requires a specific skill set to ensure the medication is prepared properly and administered into the correct location (Perry et al., 2014). The four types of injections are:
- Subcutaneous (SC): This injection places medication/solution into the loose connective tissue just under the dermis.
- Intradermal (ID): This injection places the medication into the dermis just under the epidermis.
- Intramuscular (IM): This injection places the medication into the body of a muscle.
- Intravenous (IV): This injection places the medication/solution into a vein through an existing IV line or a short venous access device (saline lock). Medications given by the intravenous route can be given as an IV bolus, as an intermittent (piggyback) medication, or in a large volume continuous infusion.
To administer parenteral medications safely, it is imperative to understand how to prevent an infection, prevent medication errors, prevent a needle-stick injury, and prevent discomfort to the patient. Tables 7.1 to 7.4 address specific practices to eliminate safety hazards to patients and health care workers.
Preventing Infection During an Injection
According to Seigel, Rhinehart, Jackson, and Chiarello (2007), research has shown that unsafe injection practices have resulted in patient exposure to infections leading to outbreaks of infectious diseases. These unnecessary exposures were the result of deficient health care practices. Injectable medications must be given in a safe manner to maintain sterility of equipment and prevent the transmission of infectious diseases between patients and health care workers. Table 7.1 summarizes how to prevent an infection during an injection.
Table 7.1 Preventing Infection During an Injection |
|||
Safety consideration:
|
|||
Principle |
Additional Information |
||
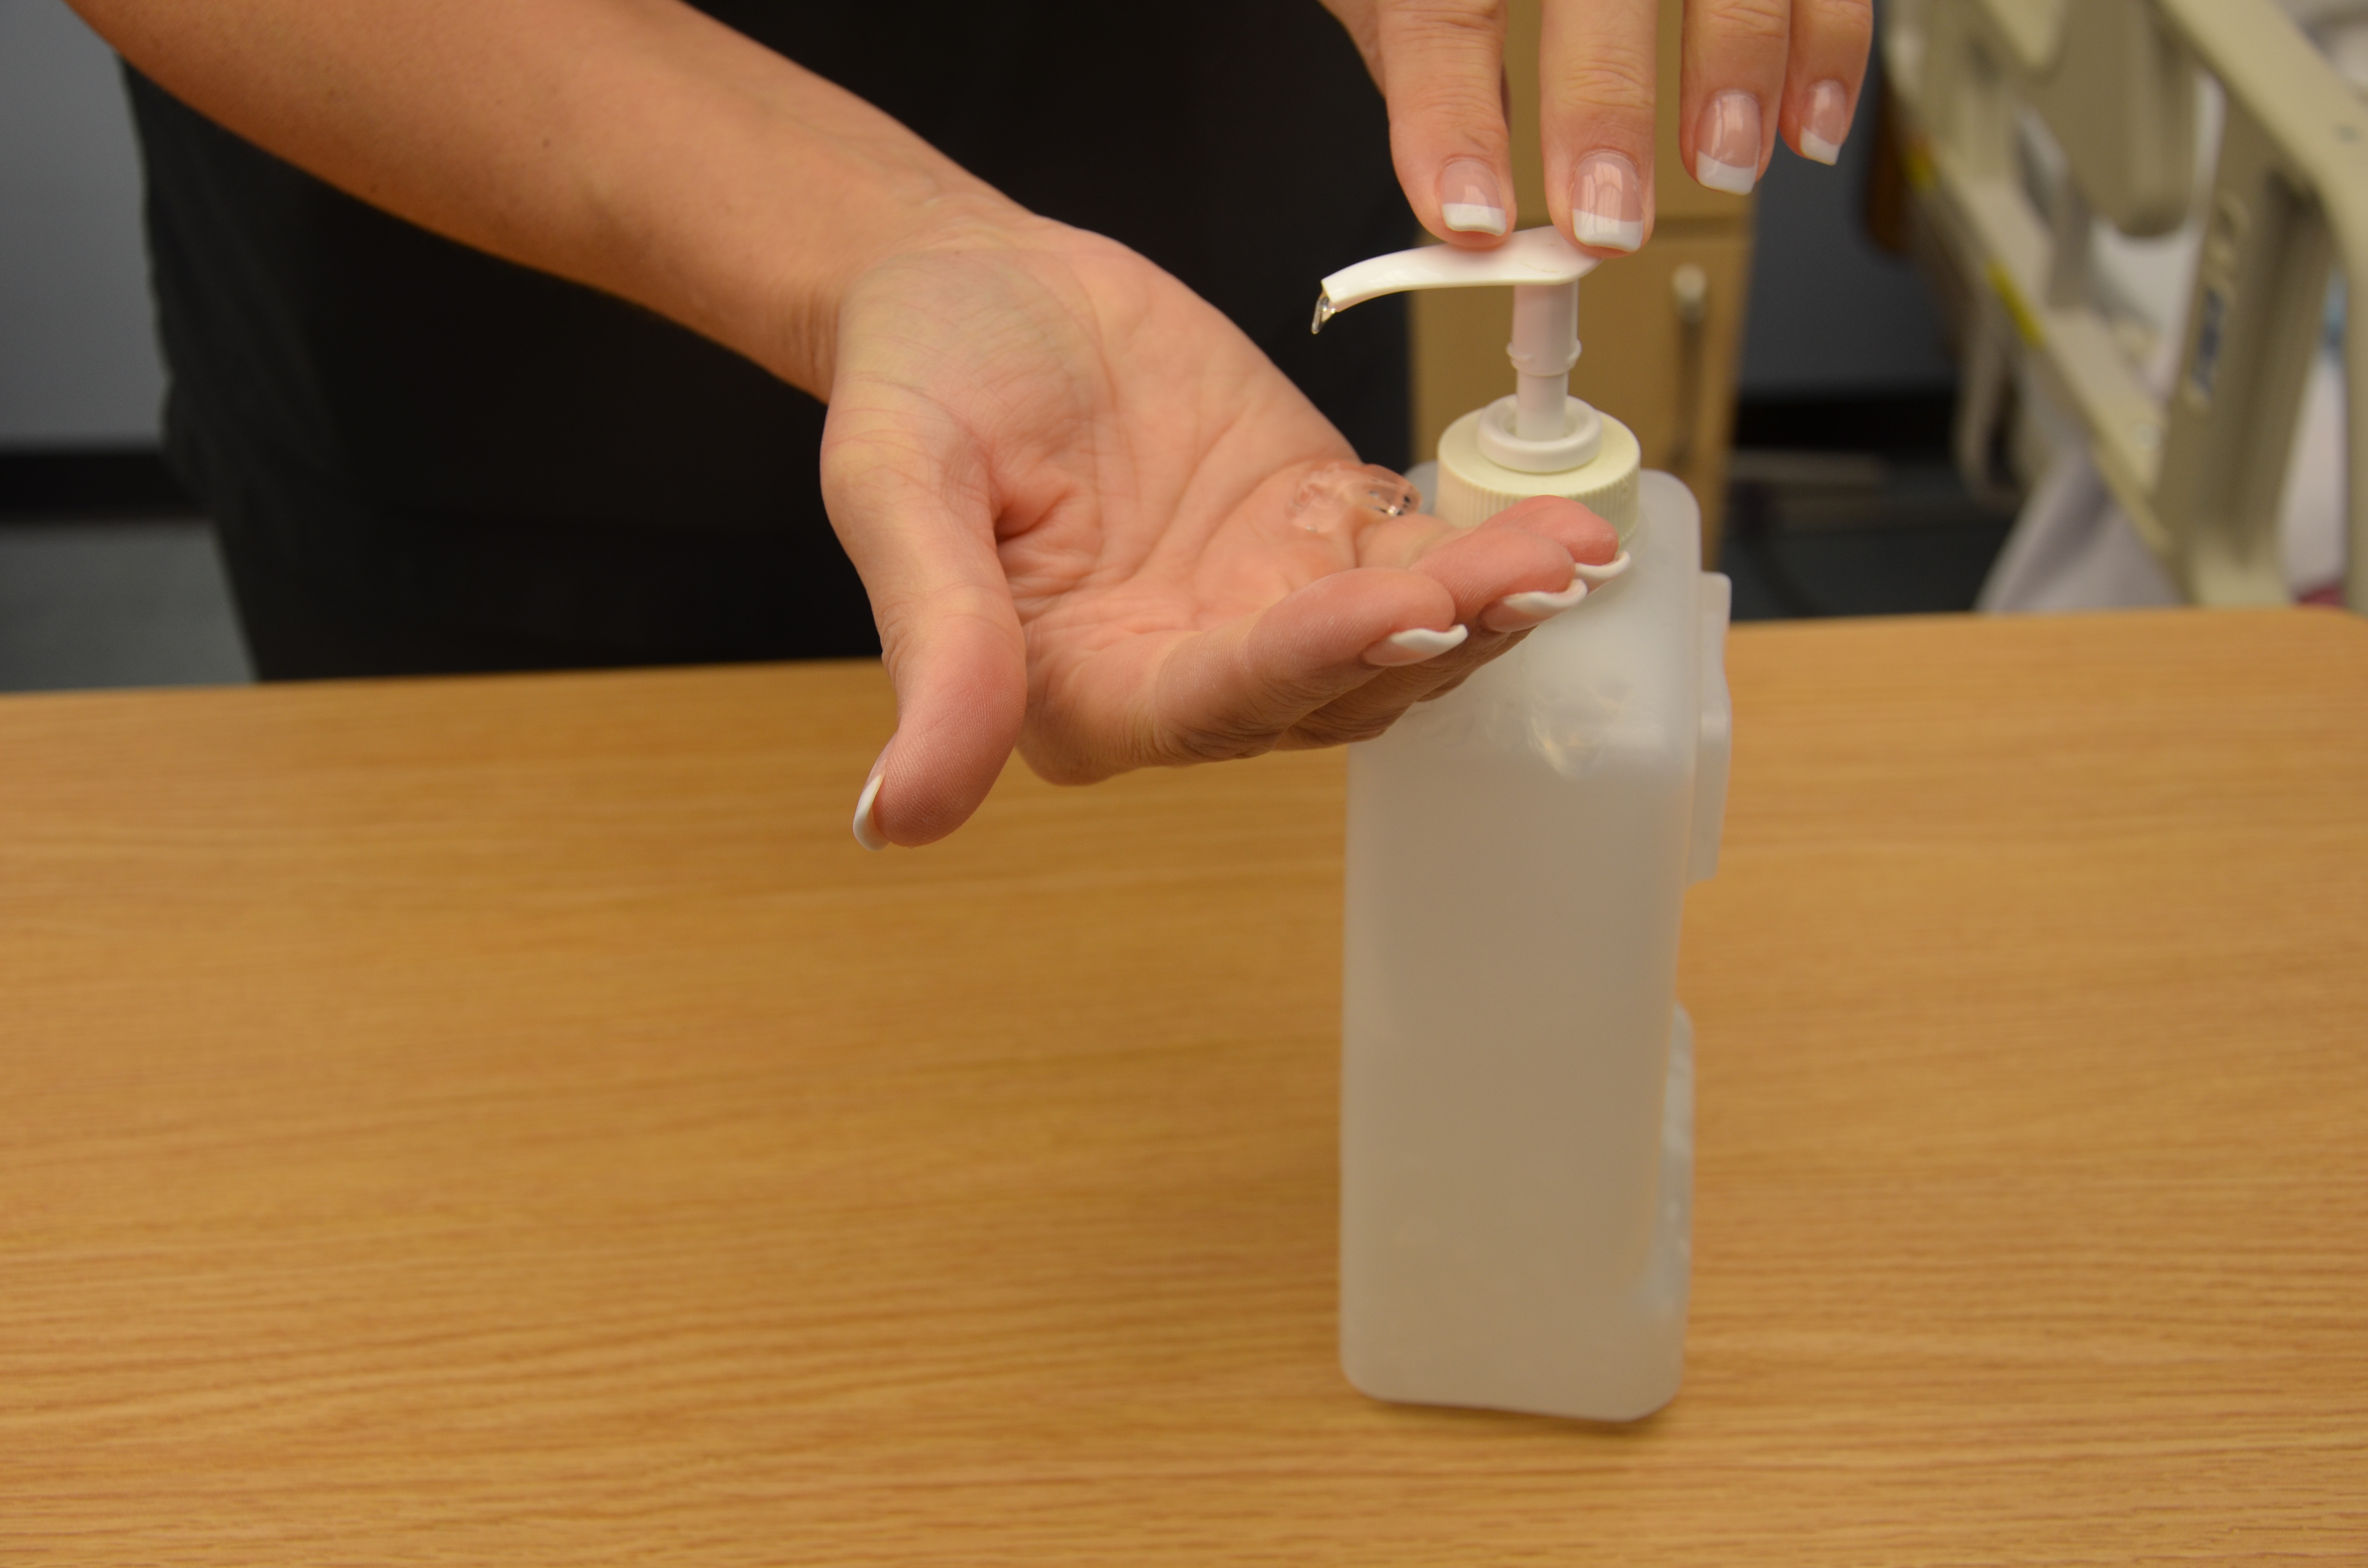
| Perform hand hygiene. | Always perform hand hygiene before administration and after removing gloves. For hand hygiene with ABHR, use 1 to 2 pumps of product; this volume requires a minimum of 15 seconds for hands to dry.
 |
||
| Prevent needle/syringe contamination. | Keep sterile parts of the needle and syringe sterile. Avoid letting the needle touch unsterile surfaces such as the outer edges of the ampule or vial, surface of the needle cap, or counter. Always keep the needle covered with a cap when not in use, and use the scoop-cap method to avoid needle-stick injuries. Avoid touching the length of the plunger. Keep the tip of the syringe sterile by covering with a cap or needle.
 |
||
| Prepare patient’s skin. | Wash the patient’s skin with soap and water if it is soiled with dirt, drainage, or fecal matter/urine. Follow agency policy for skin preparation. When using an alcohol swab, use a circular motion to rub the area for 15 seconds, and then let the area dry for 30 seconds. If cleaning a site, move from the centre of the site outward in a 5 cm (2 in) radius using friction. | ||
| Prevent contamination of solution. | Use single-dose vials/ampules whenever possible. Do not keep multi-dose vials in patient treatment area. Discard if sterility is compromised or questionable. Do not combine and administer medications from single-dose vials or ampules for later use. Ampules should not sit open and should be used immediately, then discarded appropriately. | ||
| Use new, sterile equipment with each injection. | Single use syringe and needle must be used with each patient. Always inspect packaging for intactness; inspect for dryness, rips, torn corners, and expiry date. If single use equipment is not available, use syringes and needles designed for steam sterilization. | ||
| Data source: CDC, 2015; Hutin et al., 2003; Perry et al., 2014; Provincial Infectious Disease Advisory Committee, 2014; Siegel et al., 2007. | |||
Safer Medication Administration
Medication errors have a substantial impact on health care in Canada (Butt, 2010). When preparing and administering medication, and assessing patients after receiving medication, always follow agency policy to ensure safe practice. The following table is from Chapter 6. Please review it for guidelines for safer medication administration.
Guidelines for Safer Medication Administration |
|||
Safety consideration:
|
|||
Principle |
Additional Information |
||
| Be vigilant when preparing medications. | Avoid distractions. Some agencies have a no-interruption zone (NIZ), where health care providers can prepare medications without interruptions. | ||
| Check for allergies. | Always ask patient about allergies, types of reactions, and severity of reactions. | ||
| Use two patient identifiers at all times. Always follow agency policy for patient identification. | Use at least two patient identifiers before administration AND compare against the medication administration record (MAR). Whenever possible, MARs and eMARs should be taken to the bedside. | ||
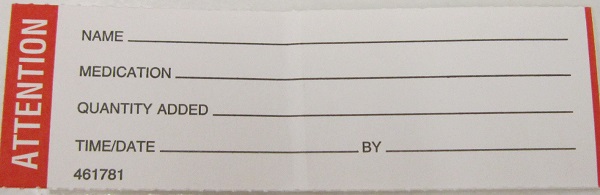
| Label all meds prepared away from the bedside. | Label should include 2 patient identifiers, drug, dose, time prepared, initials of the nurse who prepared it. Be confident that you know what you are administering.
 |
||
| Assessment comes before and after medication administration. | All medications require an assessment (review of lab values, pain, respiratory or cardiac assessment, etc.) prior to medication administration to ensure the patient is receiving the correct medication for the correct reason.
Assessment after medication administration helps to determine if the medication is having its intended effect and to determine possible adverse reactions |
||
| Be diligent in all medication calculations. | Errors in medication calculations have contributed to dosage errors, especially when adjusting or titrating dosages. If in doubt, ask a colleague for an independent double check. | ||
| Avoid reliance on memory; use checklists and memory aids. | Slips in memory are caused by lack of attention, fatigue, and distractions. Mistakes are often referred to as attentional behaviours, and they account for most errors in health care. If possible, follow a standard list of steps for every patient. | ||
| Communicate with your patient before, during, and after administration. | Provide information to patient about the medication before administering it. Answer questions regarding usage, dose, and special considerations. Give the patient the opportunity to ask questions. Include family members if appropriate. | ||
| Avoid workarounds. | A workaround is a process that bypasses a procedure, policy, or problem in a system. For example, nurses may “borrow” a medication from another patient while waiting for an order to be filled by the pharmacy. These workarounds fail to follow agency policies that ensure safe medication practices. | ||
| Ensure medication has not expired. | Medication may be inactive if expired. | ||
| Always clarify an order or procedure that is unclear. | Always ask for help whenever you are uncertain or unclear about an order. Consult with the pharmacist, charge nurse, or other health care providers and be sure to resolve all questions before proceeding with medication administration. | ||
| Use available technology to administer medications. | Technology has the potential to help decrease errors. Use technology that is available to you when administering medications, but be aware of technology-induced errors. | ||
| Report all near misses, errors, and adverse reactions. | Reporting allows for analysis and identification of potential errors, which can lead to improvements and sharing of information for safer patient care. | ||
| Be alert to error-prone situations and high-alert medications. | High-alert medications are those that are most likely to cause significant harm, even when used as intended. The most common high-alert medications are anticoagulants, narcotics and opiates, insulins, and sedatives. The types of harm most commonly associated with these medications include hypotension, respiratory depression, delirium, bleeding, hypoglycemia, bradycardia, and lethargy. High alert situations include: frequent dosing to the same patient (i.e., q4h insulin sliding scale; q1h morphine IV) , multiple meds (i.e., having to administer meds to multiple patients and each have multiple medications), high stress environments, noisy environments, and multiple distractions during medication preparation. | ||
| Independent double checks. | Two clinicians independently check each high-alert medication in relation to prescribing, dispensing, and administration (i.e., insulin, anticoagulants, IV direct medications).
Note: some agencies require an independent double check for every medication given to a neonate, all IV medications for pediatrics, and with all new medication orders |
||
| Open medications at the bedside | Doing so gives you time to think about the rights of safe medications within each patient context and allows the patient an opportunity to ask questions. | ||
| If a patient questions or expresses concern regarding a medication, stop and do not administer it. | If a patient questions a medication, stop and explore the patient’s concerns, review the physician’s order, and, if necessary, notify the practitioner in charge of the patient. | ||
| Data source: Agency for Healthcare Research and Quality, 2014; Canadian Patient Safety Institute, 2012; Debono et al., 2013; Institute for Healthcare Improvement, 2015; Institute for Safe Medication Practices, 2018; National Patient Safety Agency, 2009; National Priority Partnership, 2010; Prakash et al., 2014; Shah et al., 2016. | |||
Promoting Safety and Comfort of a Patient During an Injection
Injections can be given safely and effectively, and harm can be prevented if proper injection technique is used. Most complications related to injections are associated with intramuscular injections, but may occur with any route. Complications can occur when an incorrect site is used, or with an inappropriate depth or rate of injection (Malkin, 2008). To promote patient safety and comfort during an injection, review the guidelines in Table 7.2.
Table 7.2 Promoting Patient Safety and Comfort During an Injection |
|||
Principle |
Additional Information |
||
| Correct needle / syringe |
For injections, use a sharp, beveled needle. Correct needle length allows for correct delivery of medication into the correct site and can reduce complications such as abscesses, pain, and bruising. Needle selection should be based on the route ordered, the size of patient, the injection site, and the amount of medication injected. Women tend to have more adipose tissue around the buttocks and deltoid fat pad, which means many injections given do not reach the proper IM depths in women (Davidson & Rourke, 2013). Large bore needles have been found to reduce pain, swelling, and redness after an injection, as less pressure is required to depress the plunger. |
||
| Proper angle of insertion and removal (see Figure 7.1) |
Inserting the needle at the proper angle (depending on the type of injection) and entering the skin smoothly and quickly can reduce pain during injection. Hold the syringe steady once the needle is in the tissue to prevent tissue damage. Withdraw the needle at the same angle used for insertion. The angle for an IM injection is 90 degrees. Holding the syringe like a dart prevents the medication from being injected during insertion of needle. To prevent pain and discomfort caused by residue on the needle, prepare medication with blunt fill and blunt fill filters and switch to the correct needle for administration. |
||
| Patient position | The patient’s position may affect their perception of pain. Proper position will also facilitate proper landmarking of the site. For IM injections, for example, the ventrogluteal site has the greatest muscle thickness and is free of nerves and blood vessels, with a small layer of fat. | ||
| Relaxation technique and distraction methods | Position the patient’s limb in a relaxed, comfortable position to reduce muscle tension. For example, lying prone may help a patient relax prior to an IM injection. If giving a deltoid IM injection, have the patient relax the arm by placing the hand in the lap. If a patient is receiving an IM injection in the vastus lateralis or ventrogluteal site, encourage the patient to gently point toes outwards to relax the muscle. A skilled health care provider can help decrease the patient’s anxiety-heightened pain by diverting the patient’s attention away from the injection procedure. | ||
| Pre-medication, if required | To decrease pain upon insertion, a vapocoolant spray, topical anesthetic, or wrapped ice may be placed on the insertion site for a minute prior to injection. For IM injections, two studies found that applying pressure to the injection site for 10 seconds before the injection reduced pain (Ozturk et al., 2017). This data supports the gate theory of pain control. | ||
| Z-track method for IM injections | Some research shows that the Z-track technique results in reduced pain and complications, and fewer injection lesions. However, other research shows that Z-track injections result in more pain and bleeding at the injection site. (See Section 7.4 Intramuscular Injections for more on the Z-track method.) | ||
| Administration rate | Research has found that administrating medications at 10 seconds per ml is an effective rate for IM injections. Increasing the rate to 20 seconds per ml did not show any reduction in pain. Always review drug administration rate as per pharmacy or manufacturer’s recommendations. | ||
| Rotate injection sites | Rotate IM injection sites to prevent the development of indurations and abscesses. | ||
| Aspiration with IM injections | Review the latest research regarding the utility of aspirating IM injections. There is lack of strong evidence to support the technique of aspiration with IM injections. Refer to your agency policy regarding aspiration with IM injections | ||
| Data source: Ağac & Günes, 2011; Astle & Duggleby, 2019; Canadian Agency for Drugs and Technologies in Health, 2014; Cocoman & Murray, 2008; Davidson & Rourke, 2013; Greenway, 2014; Hunter, 2008; Malkin, 2008; Mitchell & Whitney, 2001; Nisbet, 2006; Ogston-Tuck, 2014a; Öztürk, Baykara, Karadag, & Eyikara, 2017; Perry et al., 2014; Rodgers & King, 2000; Sisson, 2015; Workman, 1999 | |||
Preventing Needle-Stick Injuries
Health care providers can be at risk for needle-stick injuries in any health care setting. The most common places for needle-stick injuries to occur are in the operating room and patient rooms. Tasks that place the health care provider at risk include recapping needles and mishandling IV lines. Table 7.3 provides guidelines to prevent needle-stick injuries.
Table 7.3 Recommendations for Prevention of Needle-Stick Injuries |
|||
Principle |
Additional Information |
||
| Avoid recapping needles. |
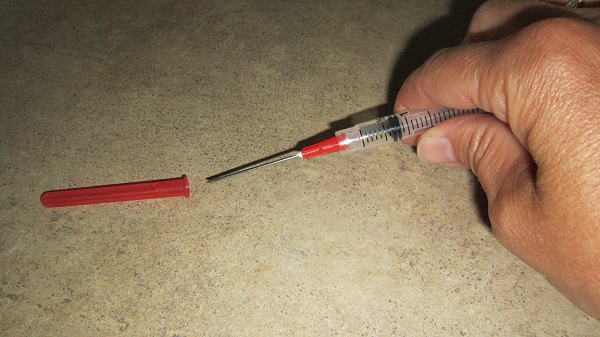 Recapping needles has led to the transmission of infection. If possible, always use devices with safety features (i.e., safety shield) and engage the needle’s safety system. If absolutely necessary, use the scoop method of recapping. |
||
| Dispose of the needle immediately after injection. | Immediately dispose of used needles in a sharps disposal container (puncture-proof and leak-proof) to avoid unsafe disposal of a sharp. | ||
| Reduce or eliminate all hazards related to needles. | Avoid using needles if possible. Use a needle only when performing an SC, ID, or IM injection (i.e., blunt fill and blunt fill filters). Use a needleless system and engineered safety devices for prevention of needle-stick injuries. | ||
| Plan disposal of sharps before injection. | Plan the safe handling and disposal of needles before beginning a procedure that requires a sharp needle. Bring sharps container close to the bedside prior to injection. Sharps containers should be at eye level and within arm’s reach. | ||
| Follow all standard policies related to prevention / treatment of injury. | Follow all agency policies regarding infection control, hand hygiene, standard and additional precautions, and blood and body fluid exposure management. | ||
| Report all injuries. | Report all needle-stick injuries and sharp-related injuries immediately. Data collected regarding the nature of injuries help guide needle-stick prevention strategies for new practices and devices. Review how to manage needle-stick injuries and follow agency policy regarding exposure to blood-borne pathogens. Policies help decrease the risk of contracting a blood-borne illness. | ||
| Participate in required training and education. | Attend training on injury-prevention strategies related to needles and safety devices as per agency policy. Participate in and evaluate the selection of safety devices, and report known needle-stick hazards to managers. | ||
| Data source: American Nurses Association, 2002; Centers for Disease Control, 2012; National Institute for Occupational Safety and Health, 1999; Perry et al., 2014; Pratt et al., 2007; Wilburn, 2004; Wilburn & Eijkemans, 2004 | |||
Preparing Medications from Ampules and Vials
Specific equipment, such as syringes and needles, is required to prepare and administer parenteral medications. The selection of the syringe and needle is based on the type and location of injection; amount, quality, and type of medication; and the body size of the patient. Some syringes come prefilled with a needle attached. Most times you will need to select your equipment from your agency’s stock. For safety, choose needless systems whenever possible and choose needles with safety shields to prevent injuries (Perry et al., 2014). Aseptic technique is paramount to the preparation and administration of these medications.
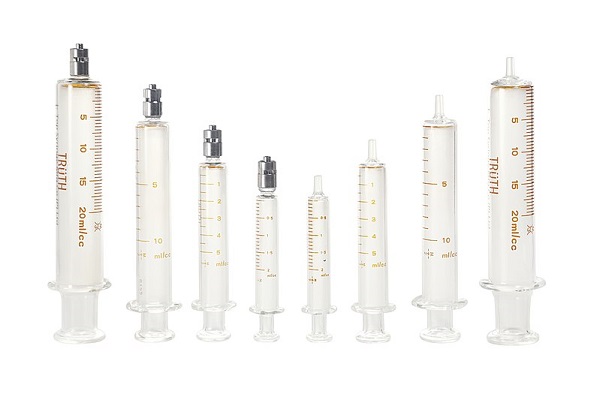
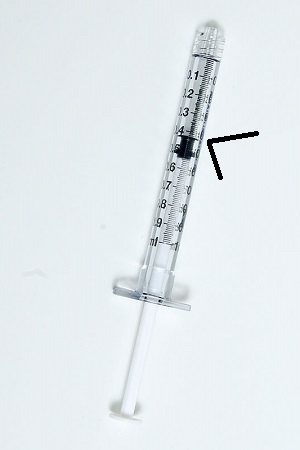
A syringe is a sterile, single-use device. Syringes come in various sizes from 0.5 ml to 60 ml (see Figure 7.5). Most syringes have a Luer lock (see Figure 7.6 ). Because syringes vary and the increments of measurement vary, it is important to know how to read the syringe correctly (Lynn, 2011). When preparing injections, the nurse should select a syringe size close to the volume to be injected. To determine the volume of medication in the syringe, read it from the top of the plunger (see Figure 7.7)
 |
 |
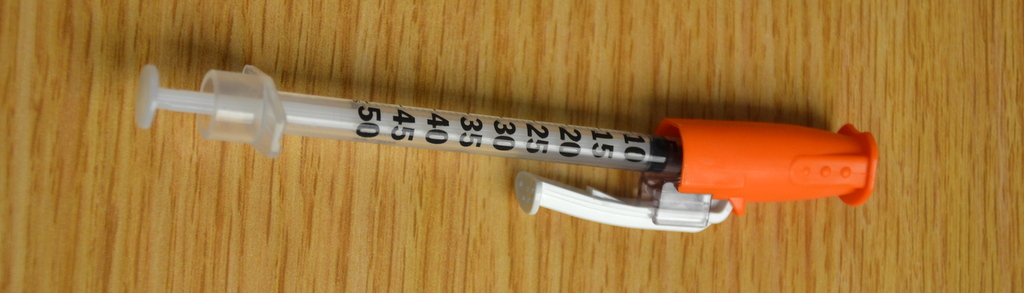
It is important to use the correct syringe and needle for each injection. Unless given by pen or pump, insulin should only be given using an insulin syringe (see Figure 7.8). Insulin is ordered in units.
Needles are made of stainless steel. They are sterile, disposable, and they come in various lengths and sizes. The needle is made up of the hub, shaft, and bevel (see Figure 7.2). The bevel is the tip of the needle that is slanted to create a slit into the skin. The shaft is the length of the needle. The hub fits onto the tip of the syringe (usually Luer locked). All three parts must remain sterile at all times. The length of the needle will vary from 1/8 in to 3 in, depending on the injection route. The gauge of a needle is the diameter of the needle. Gauges can vary from very small diameter (25 to 29 gauge) to large diameter (18 to 22 gauge). A needle will have its gauge and length marked on the outer packaging; choose the correct gauge and length for the injection ordered (Lynn, 2011). Blunt fill and blunt fill filter needles are used to prepare medications (Figure 7.8). They have a large gauge to make medication preparation easier. To reduce risk of needle stick injury, the nurse should use a needleless systems to prepare meds whenever possible (i.e., blunt fill and blunt fill filters) and choose needles with safety mechanisms attached.

 |
 |
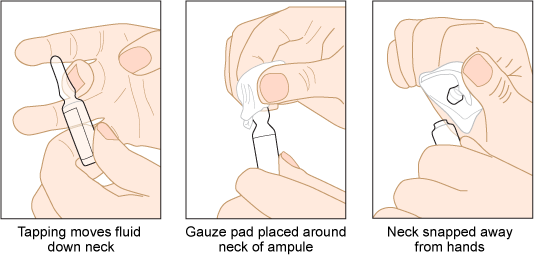
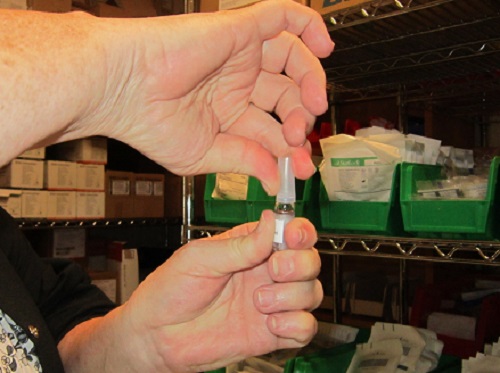
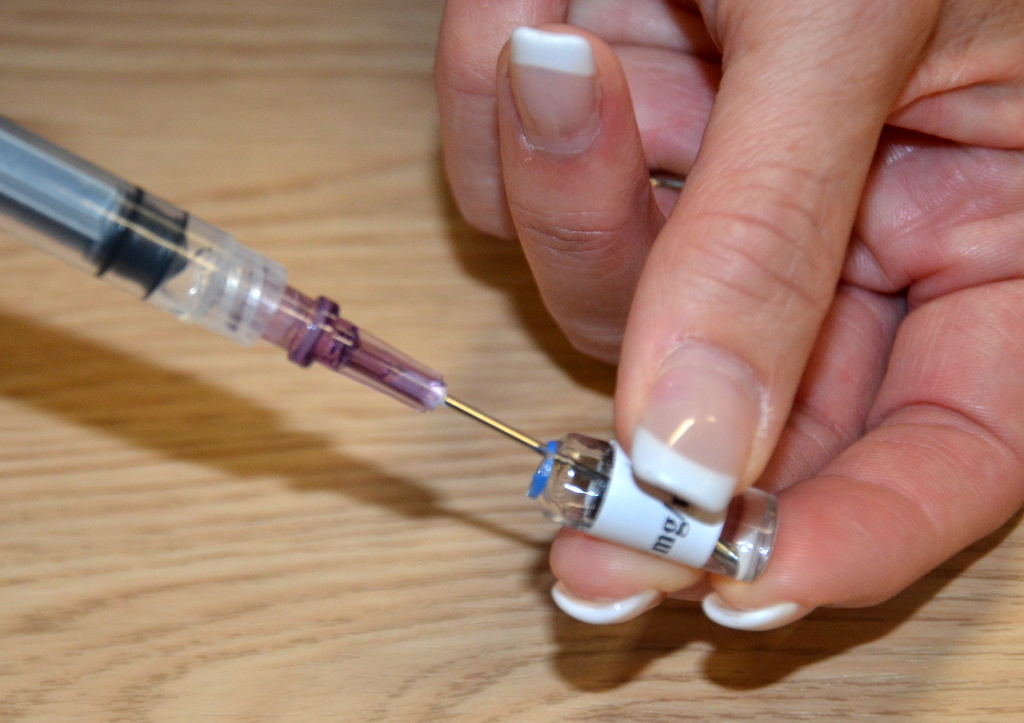
Parenteral medications are supplied in sterile vials, ampules, and prefilled syringes. Ampules are glass containers in 1 ml to 10 ml sizes that hold a single dose of medication in liquid form. They are made of glass and have a scored neck to indicate where to break the ampule. Because there is risk of being cut by glass when opening a glass ampule, the nurse should use an ampule breaker or wrap an alcohol swab package around the neck of the ampule for protection (See Figure 7.10, 7.11). A blunt fill needle with filter must be used when withdrawing medication to prevent glass particles from being drawn up into the syringe. Never use a filter needle to inject medication directly into a patient (Perry et al., 2018).
 |
 |
To better understand how to prepare medication from an ampule, watch the following video.
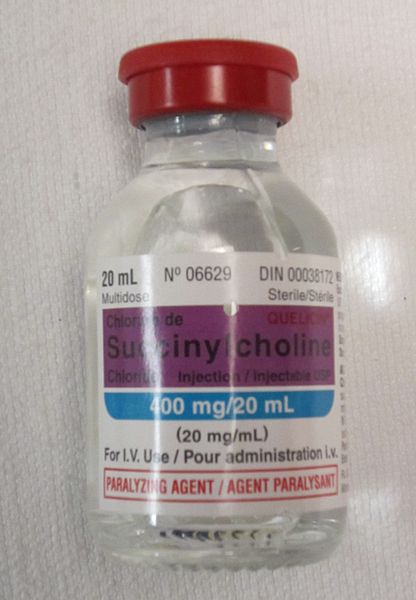
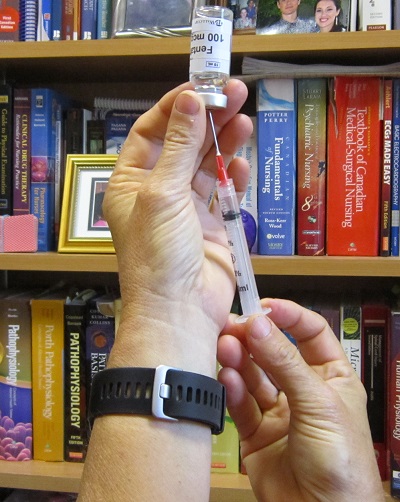
A vial is a single- or multi-dose plastic container with a rubber seal top, covered by a metal or plastic cap (see Figure 7.12). A single-use vial must be discarded after one use; a multi-dose vial must be labelled with the date it was opened. Check hospital policy to see how long an open vial may be used. The vial is a closed system, and air must be injected into the vial to permit the removal of the solution (Perry et al., 2018) (see Figure 7.13).
 |
 |
Reconstituting Medications
Some medications are supplied in powder form and require reconstitution before administration.
Critical Thinking Exercises
- Describe three strategies the nurse might do to reduce distractions while preparing medication.
- Identify three strategies the nurse should do to prevent infection associated with parenteral medication administration.
- Identify five principles of safe medication administration.
- Describe two strategies to prevent needle-stick injuries.
Attributions
Figure 7.1. Needle insertion angles for the 4 types of parenteral administration of medication: intramuscular, subcutaneous, intravenous and intradermal injection by BCIT is used under a CC BY 4.0 International license.
Figure 7.2. Disposable syringe and needle with parts labelled: plunger, barrel, needle adaptor, needle hub, needle bevel, needle shaft by BCIT is used under a CC BY 4.0 International license.
Figure 7.3. Medication label sample by author is licensed under a Creative Commons Attribution 4.0 International License.
Figure 7.4. Scoop method for recapping by author is licensed under a Creative Commons Attribution 4.0 International License.
Figure 7.5. Glass Syringe by Topsyringe is used under a CC BY 4.0 international license.
Figure 7.6. Syringe with leur lock by author is licensed under a Creative Commons Attribution 4.0 International License.
Figure 7.7. Reading the volume in a syringe by author is licensed under a Creative Commons Attribution 4.0 International License.
Figure 7.8. 1ml disposable syringe by Nadina Wiórkiewicz is used under a CC BY-SA 4.0 unported license.
Figure 7.9. Blunt fill and Blunt Fill Filter needles by author is licensed under a Creative Commons Attribution 4.0 International License.
Figure 7.10. Opening an ampule with alcohol swab by BCIT is used under a CC BY 4.0 International license.
Figure 7.11. Opening an ampule with ampule breaker by author is licensed under a Creative Commons Attribution 4.0 International License.
Figure 7.12. A vial of the paralytic agent suxamethonium chloride by James Heilman is used under a CC BY-SA 3.0 unported license.
Figure 7.13. Blunt fill needle to withdraw medication by author is licensed under a Creative Commons Attribution 4.0 International License.
